Keeping Up With Raya
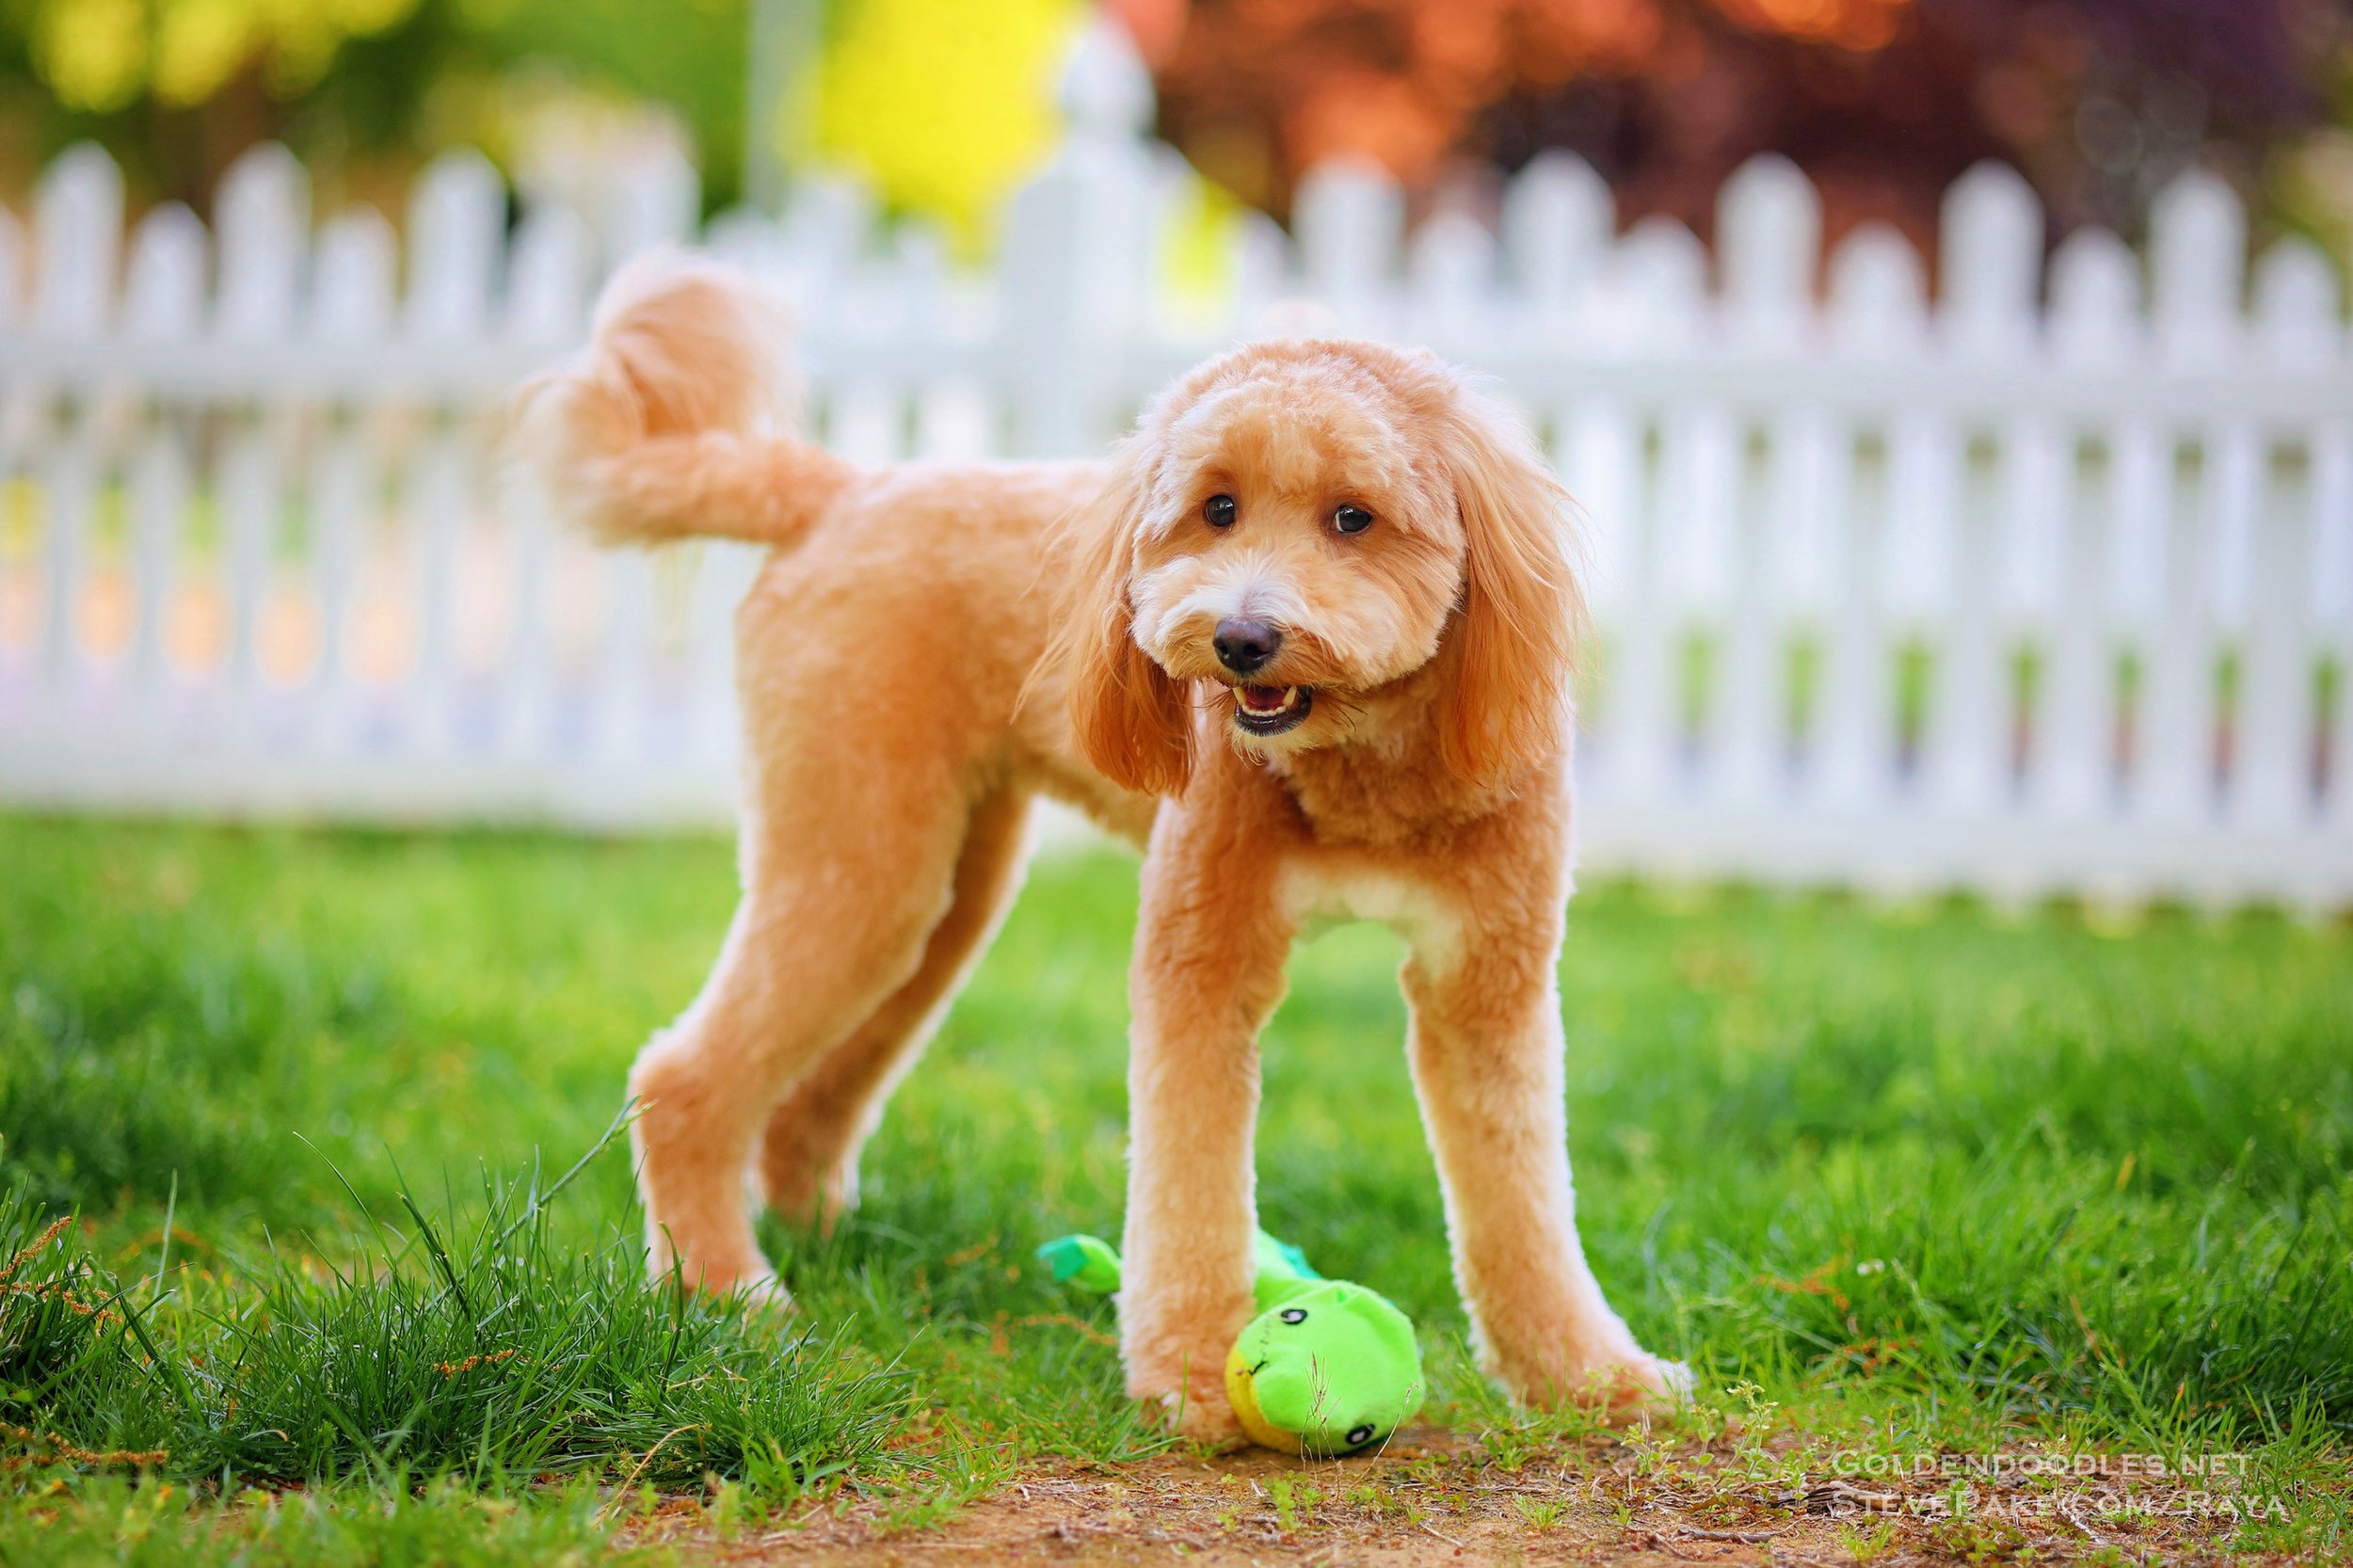
Our baby princess Raya is all grown, and currently expecting her first litter of puppies due June 19th. We’re so excited for her, and for the families who will take her puppies home!
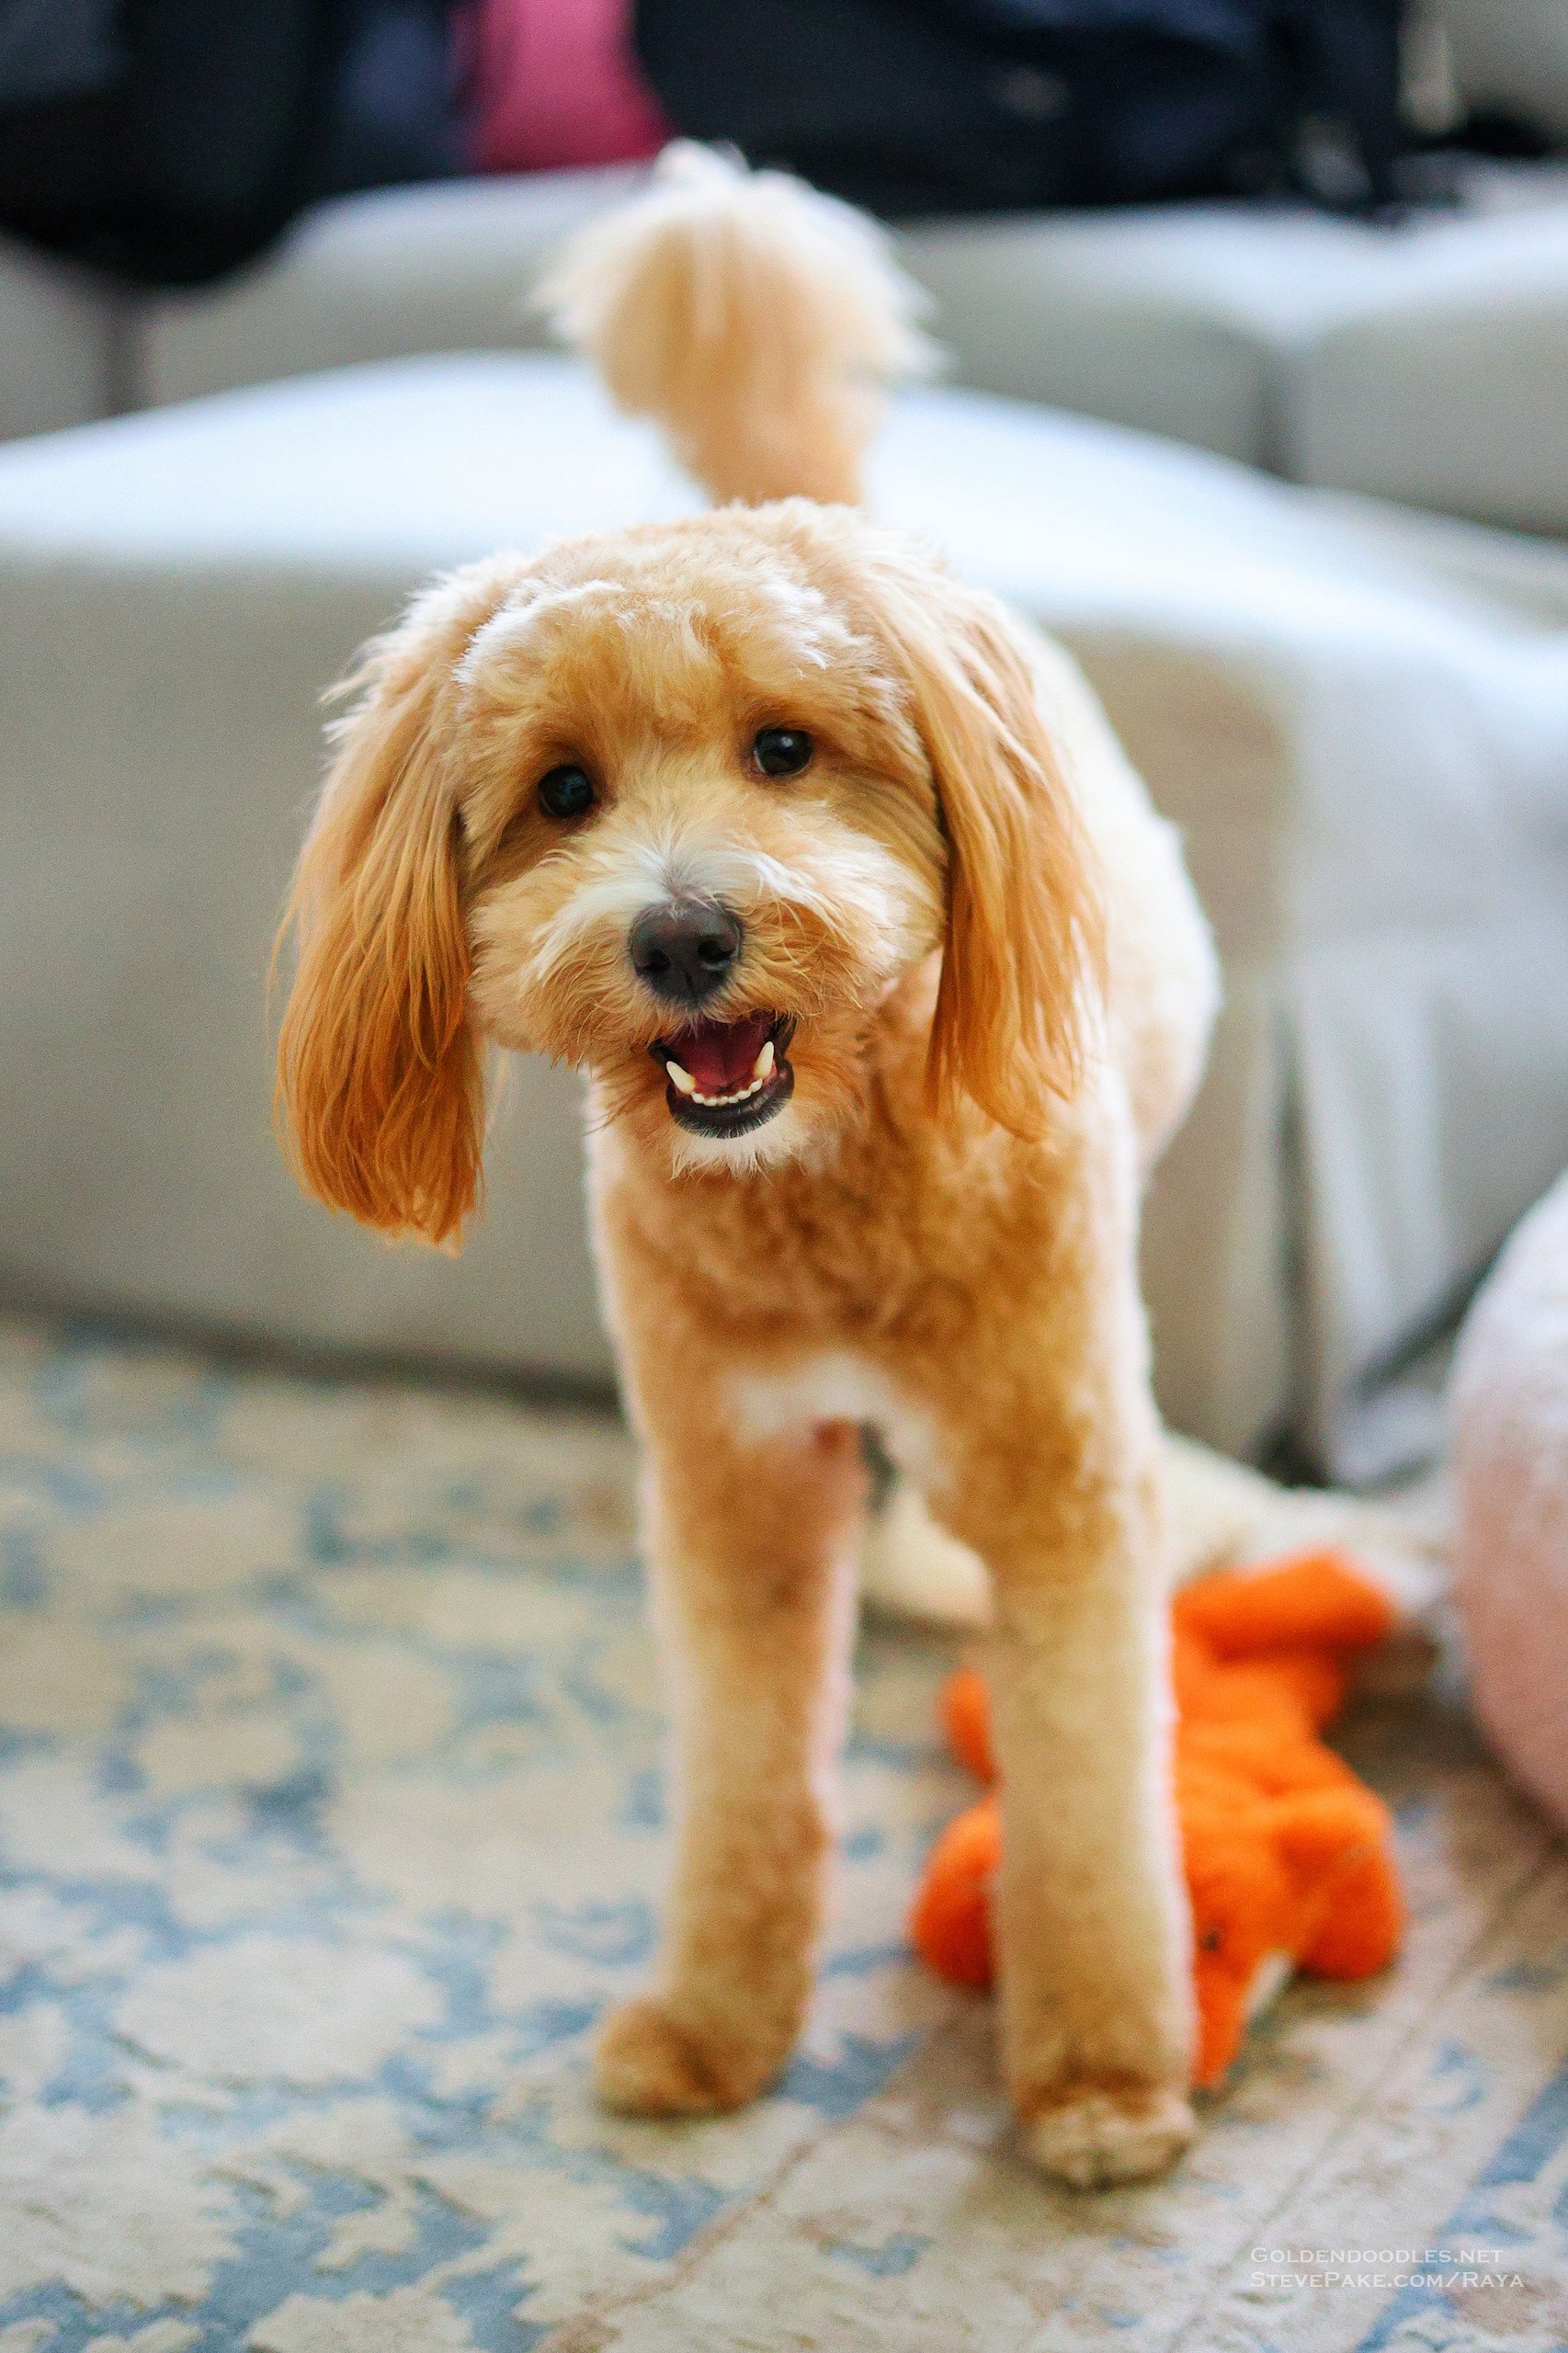
Well, it’s hard to believe, but we’ve already had our beloved Raya (“Ray of Sunshine”) for nearly a year and a half! Where has the time gone? It’s certainly been way too long since I’ve had time to get a doggy blog together about her, but that’s another story!
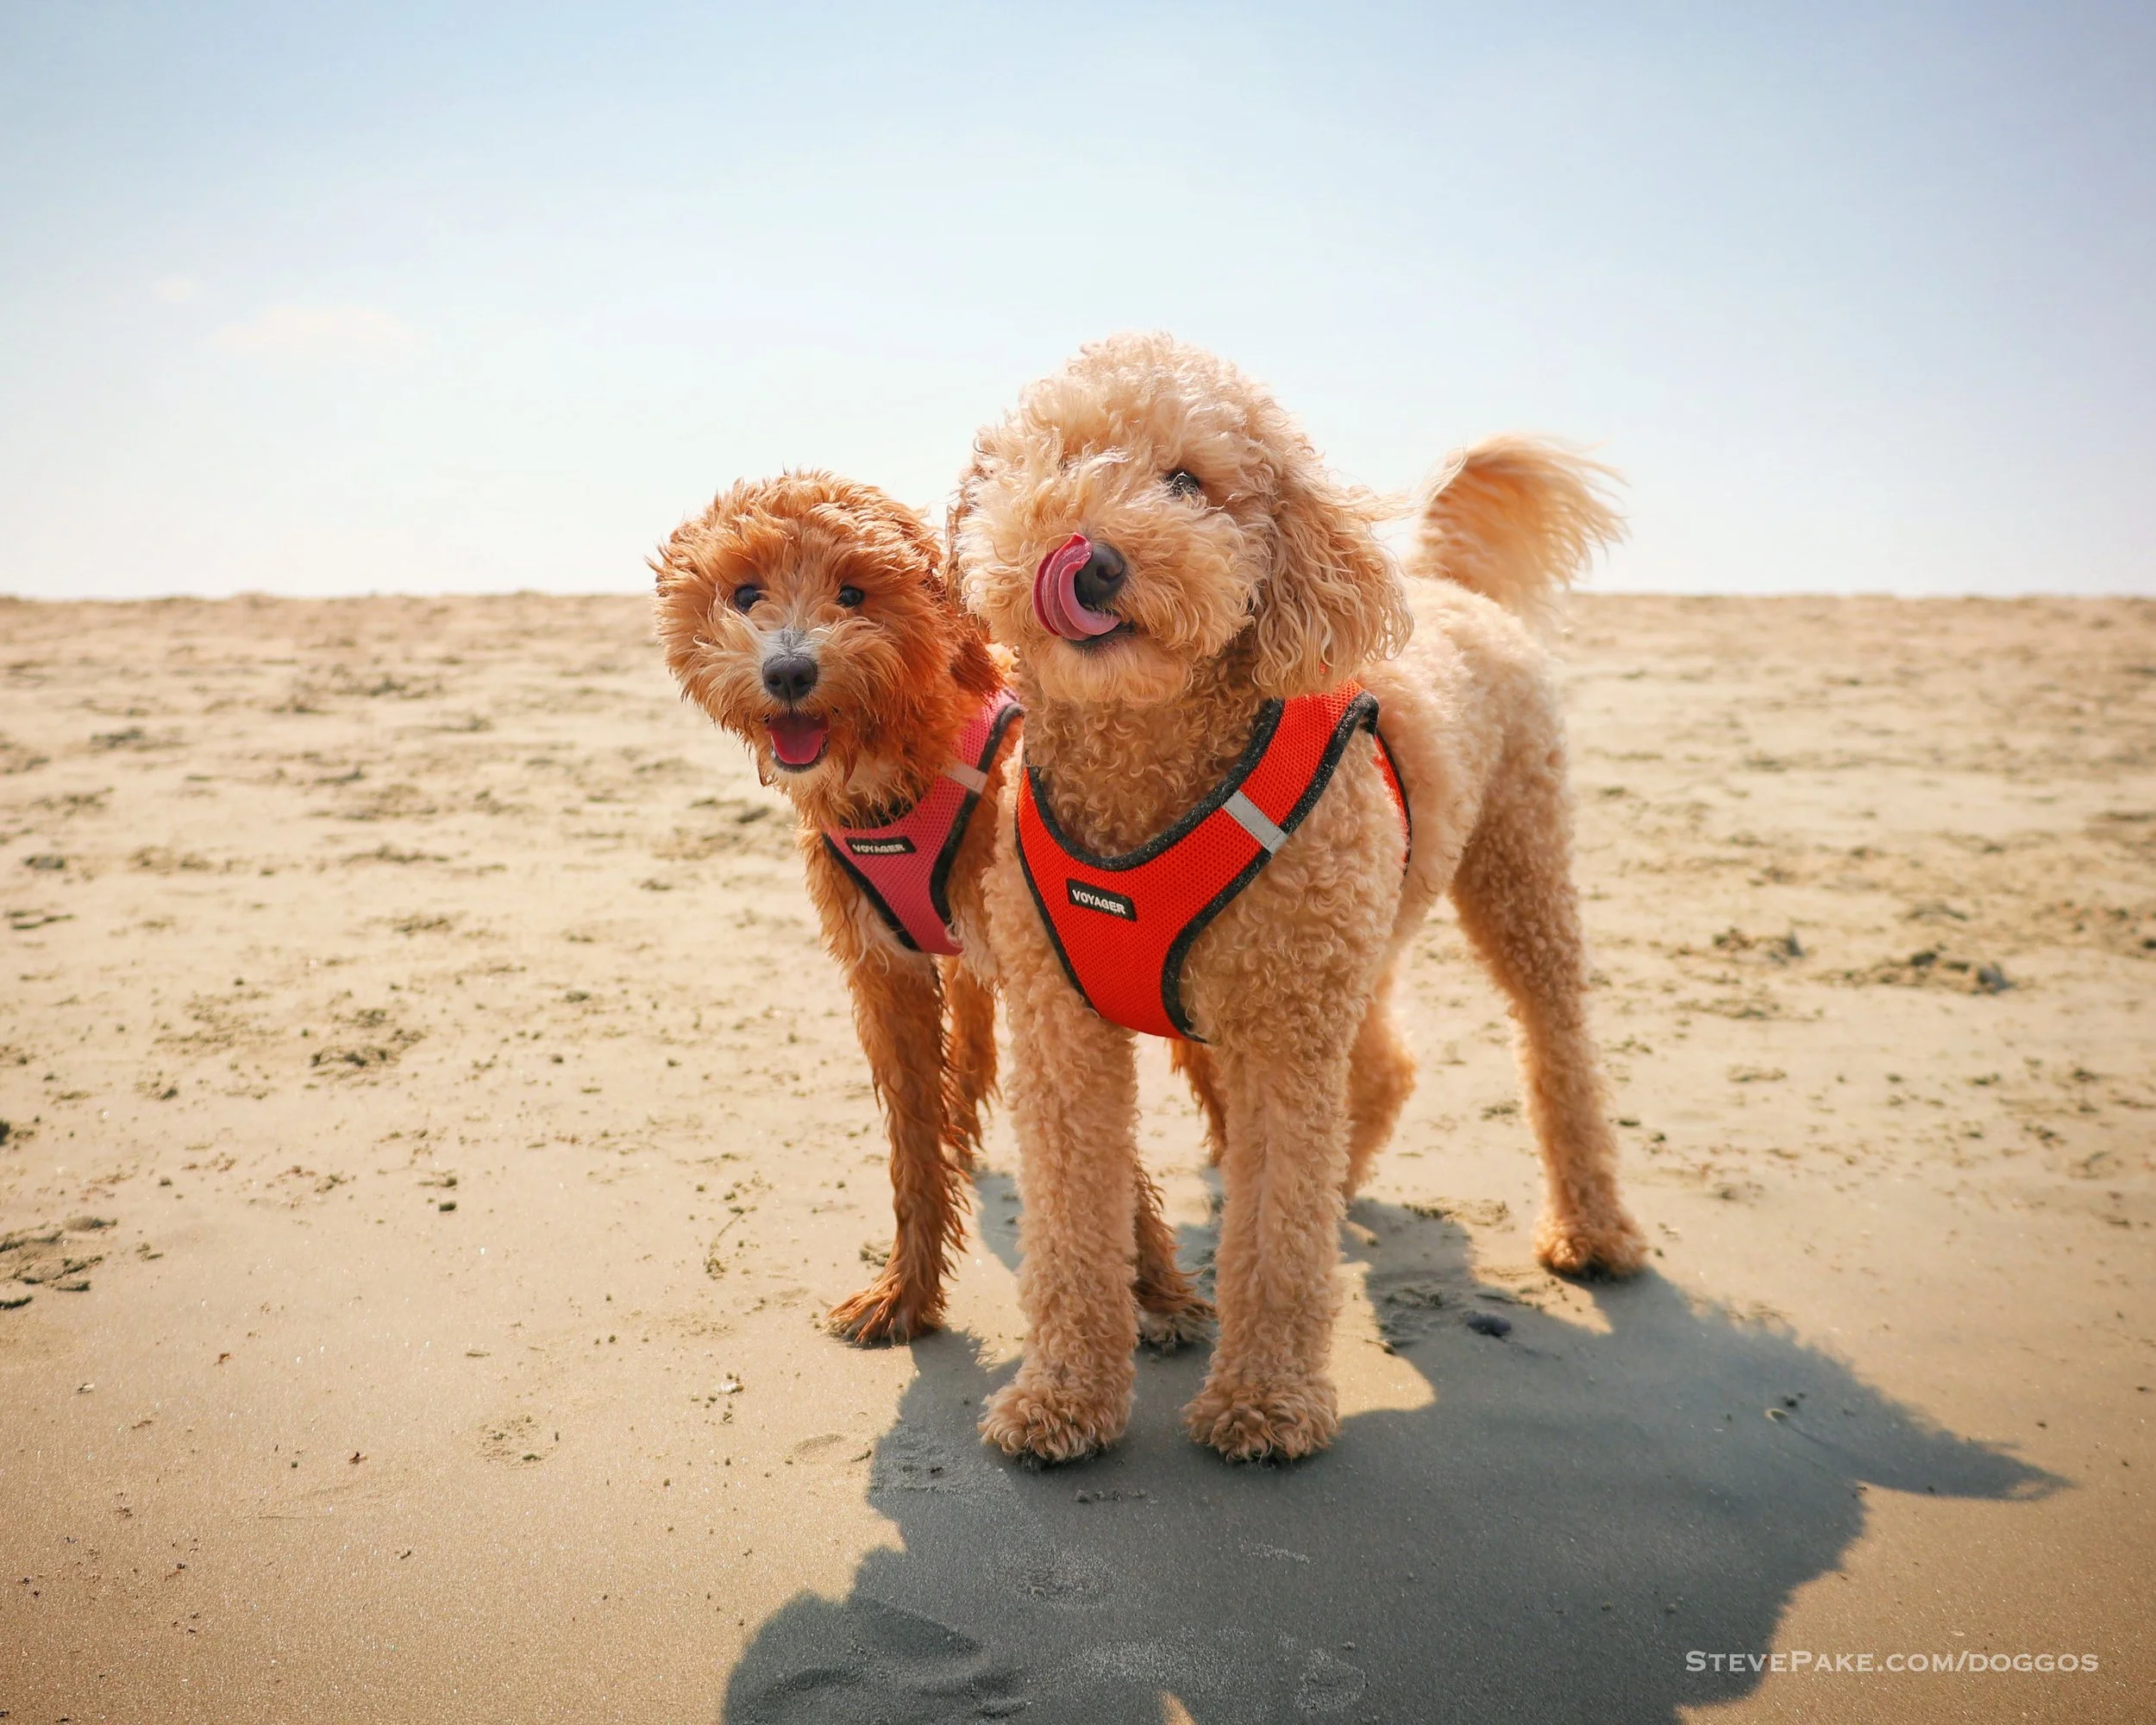
We celebrated both of our doodles October birthdays last year (Puffles on October 10th and Raya on October 22nd) with an off-season beach trip. Yes, we go to the beach more for the dogs now than for our two teenaged children! They both love the beach so much and zooming around, especially off-season when it’s cooler and there aren’t too many people around. We also celebrated our first “gotcha day” anniversary with Raya on January 4th this year. In another blink of the eye, Raya has already had her second heat cycle, and is now expecting her first litter of puppies to arrive on June 19th! We’re so excited for her and for future owners of her puppies! (Fox Creek Farm Goldendoodles breeds their guardian program girls on their 2nd, 3rd, 4th, and 5th heat cycles, skipping the first.)
Raya has earned a number of nicknames with us. There’s “Ray-Ray”, of course. Another is “Ray-roo” after a kangaroo, for how high she can jump when she’s really excited. I’m 6’3” tall and she can jump up to at least my chest or shoulder level, and can get face-to-face with other family members! Another is “Way-way” because of how little she is, like how a toddler might say her name. Her parents, Boodles and Jax, were 20 and 22 lbs, so we were expecting her to be a bit bigger. She’s topped out at a mere 15 pounds and is firmly in the petite range, and we love her just the way she is. She’ll forever be our little baby, even as she’s set to become a mommy for the first time. I love that I can still pick her up and hold her like she’s a puppy, even as a fully grown petite goldendoodle. :)
Raya is just beyond adorable. She’s so playful, loving, energetic, and silly. She has a great personality and is super smart, way too smart, and I’ll admit that she’s a daddy killer too. She’s cute and she knows it. Her overwhelming cuteness gets her a lot of attention which she loves, which is so tough to deny her because she’s so cute! It’s a vicious cycle that we all fall for. Not gonna lie, she owns me! She’s just so unbelievably cute and adorable in everything she does. She’s also a bit of a diva, and will let out cute little girly diva princess groans or sighs if she thinks you’re not paying enough attention to her. She was this way as soon as we got her, so don’t blame us! :) If I so much as put a hand on my wife, she’ll come over running and jump up on me while giving a little protest groan. “Hey, why you looking at her???” It’s so cute and funny, and both my wife and I laugh so hard all the time.
Raya had quite an exciting first year with us in 2023. We are big time road-trippers in case you didn’t know, so get around quite a bit. She got a first beach trip to Virginia Beach, VA in February, and then two trips to Rehoboth Beach, DE in June and October. She also got to come with us out to Ohio and Michigan, with stops at Sleeping Bear Dunes and then Mackinac Island. We ended the year with a trip to Savannah, GA and Hilton Head Island, SC, where Raya happened to run full speed into an 18-inch deep tidal pool after a seagull, in temperatures that were below 40F! She literally and figuratively froze and didn’t know what to do. Dad mode! I ran in after her in shoes and pants, promptly pulled her out within seconds, and wrapped her tightly in a towel and held her close until she dried and warmed up. She was just fine, but Raya has since been banned from being off leash at the beach! :)
If you’re considering a puppy from one of Raya’s litters, just know that you’re probably going to get some unbelievably cute, energetic, funny, loving, and silly little puppies just like Raya. They will love you so much, and provide you with endless smiles, love, laughter, and companionship that will brighten your homes in a more than manageable size. You’re also going to be exhausted! Just remember, all these little puppies know are their mommies and their litter mates for the first 8 weeks of their lives. And then they go to a new and unfamiliar home, and all they have is you. Raya is an absolute sweetie, but definitely needed a lot of time, love, attention, and engagement her first year, more so than Puffles did. She got everything she needed from us and more, which also explains doggy blogs and photo posts dropping off! We were too busy loving and playing with her, and having a blast while we were at it. Raya is a happy girl!
Raya’s first pregnancy has not yet been confirmed, but will be later in May. Based on what my wife and I have been observing so far though, there’s no way she isn’t pregnant with how she’s been eating and drinking up a storm! I’ve also been having really strange dreams a few nights in a row when I almost never have any, and my wife, Debbie, has been going on this crazy nesting instinct deep cleaning of the whole house rampage! Can doggy pregnancy hormones and pheromones affect their humans? We think so!
Fox Creek Farm Goldendoodles & Bernedoodles on Facebook

As Raya’s guardian family, we sure are going to miss her for a few weeks this summer, but couldn’t be more excited for the love, joy, and happiness that her puppies will surely bring to their new owners and homes. We cannot wait to see them in person when we pick her up 6 weeks after delivery, and to be reunited with our little princess. It’s going to be an exciting summer!
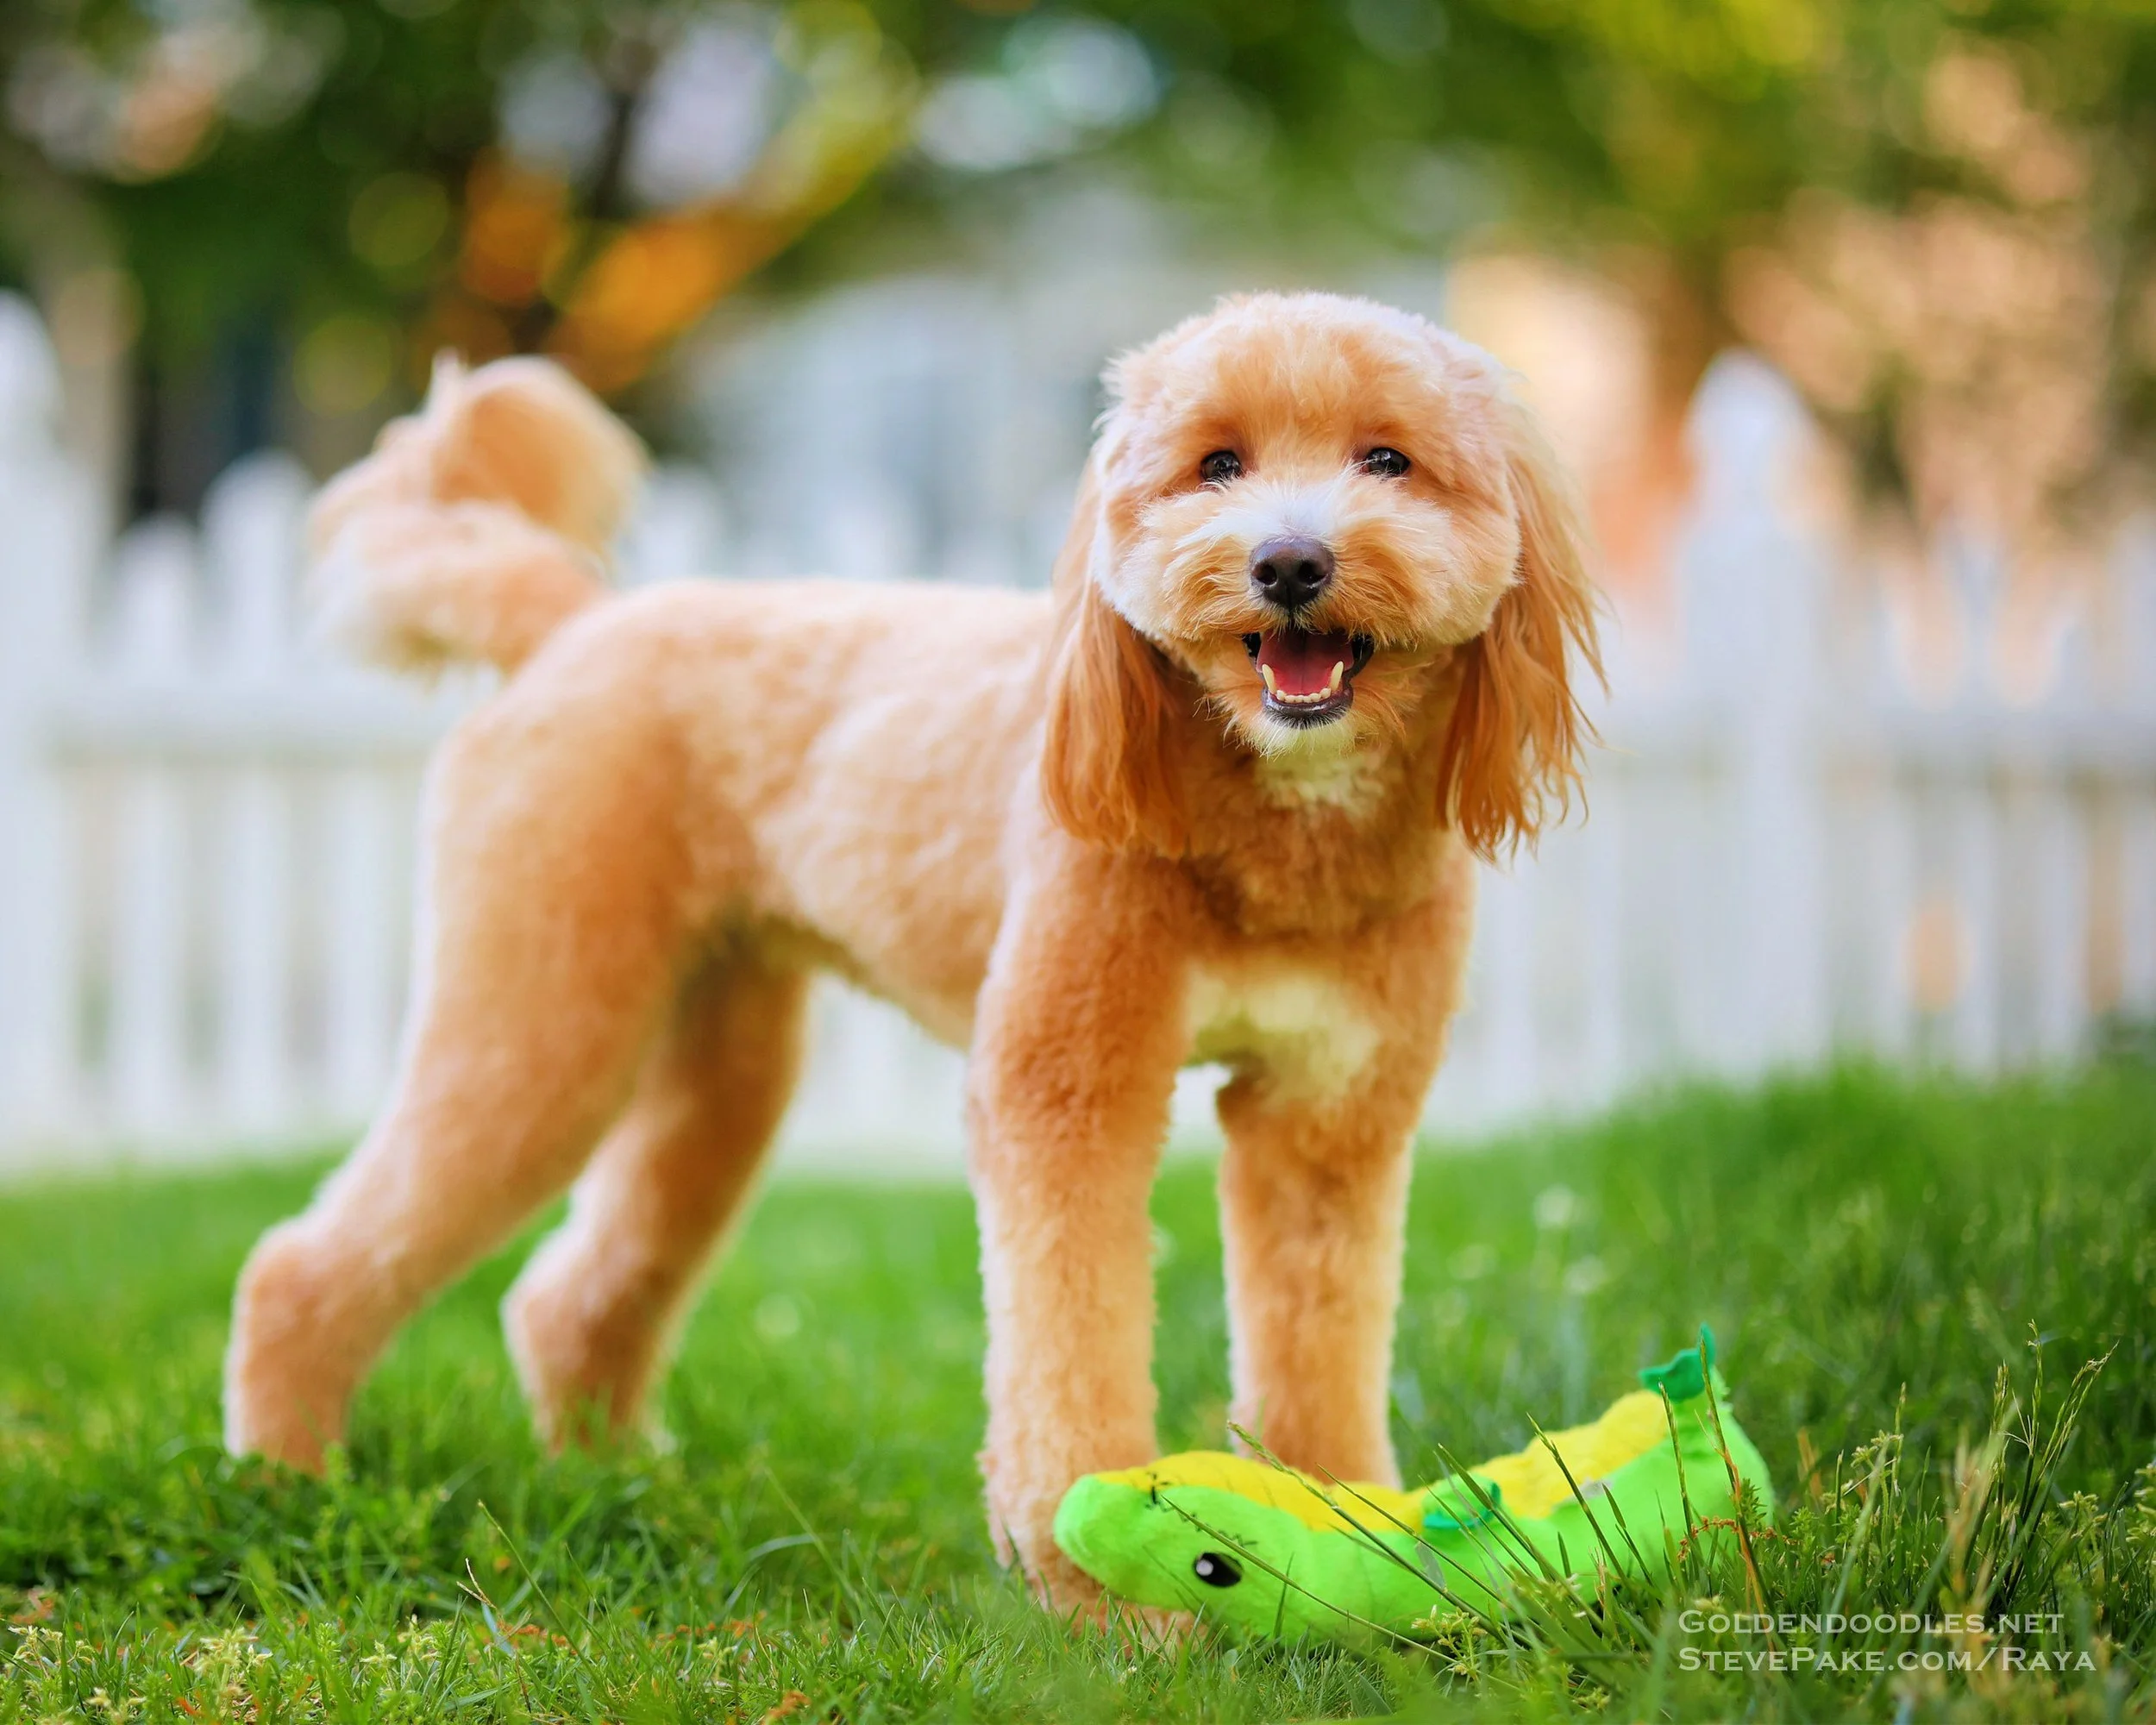
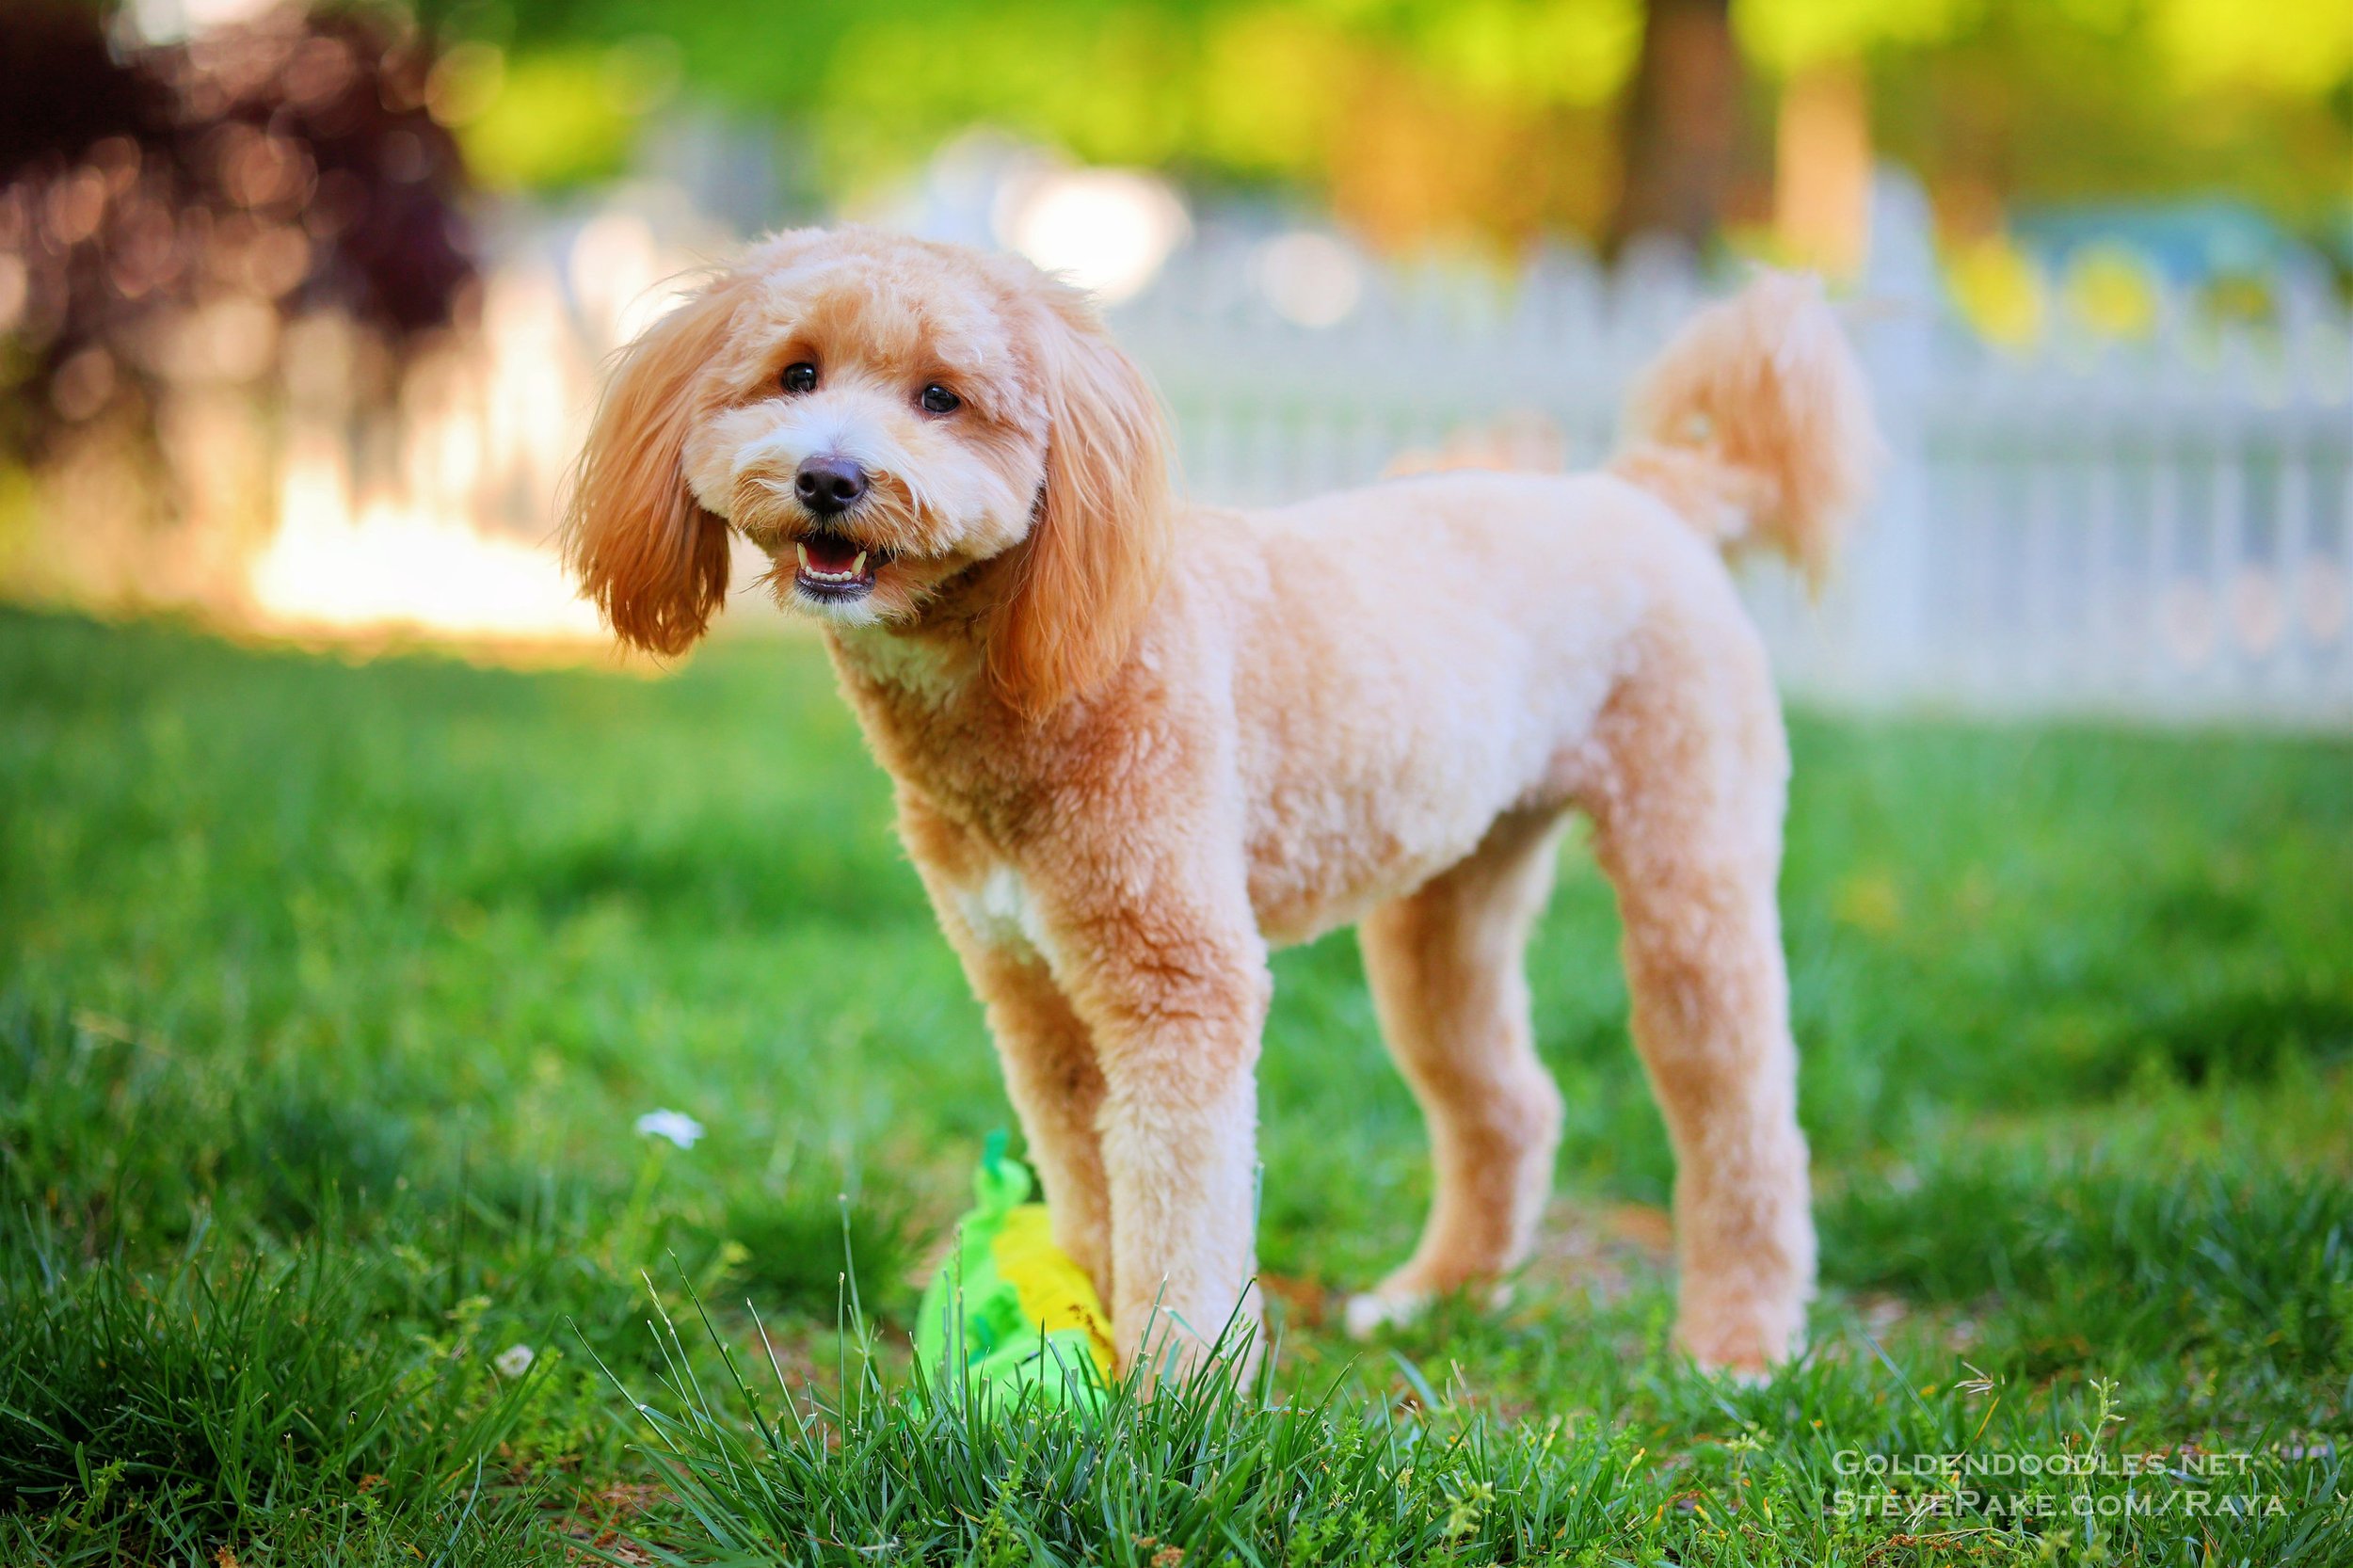
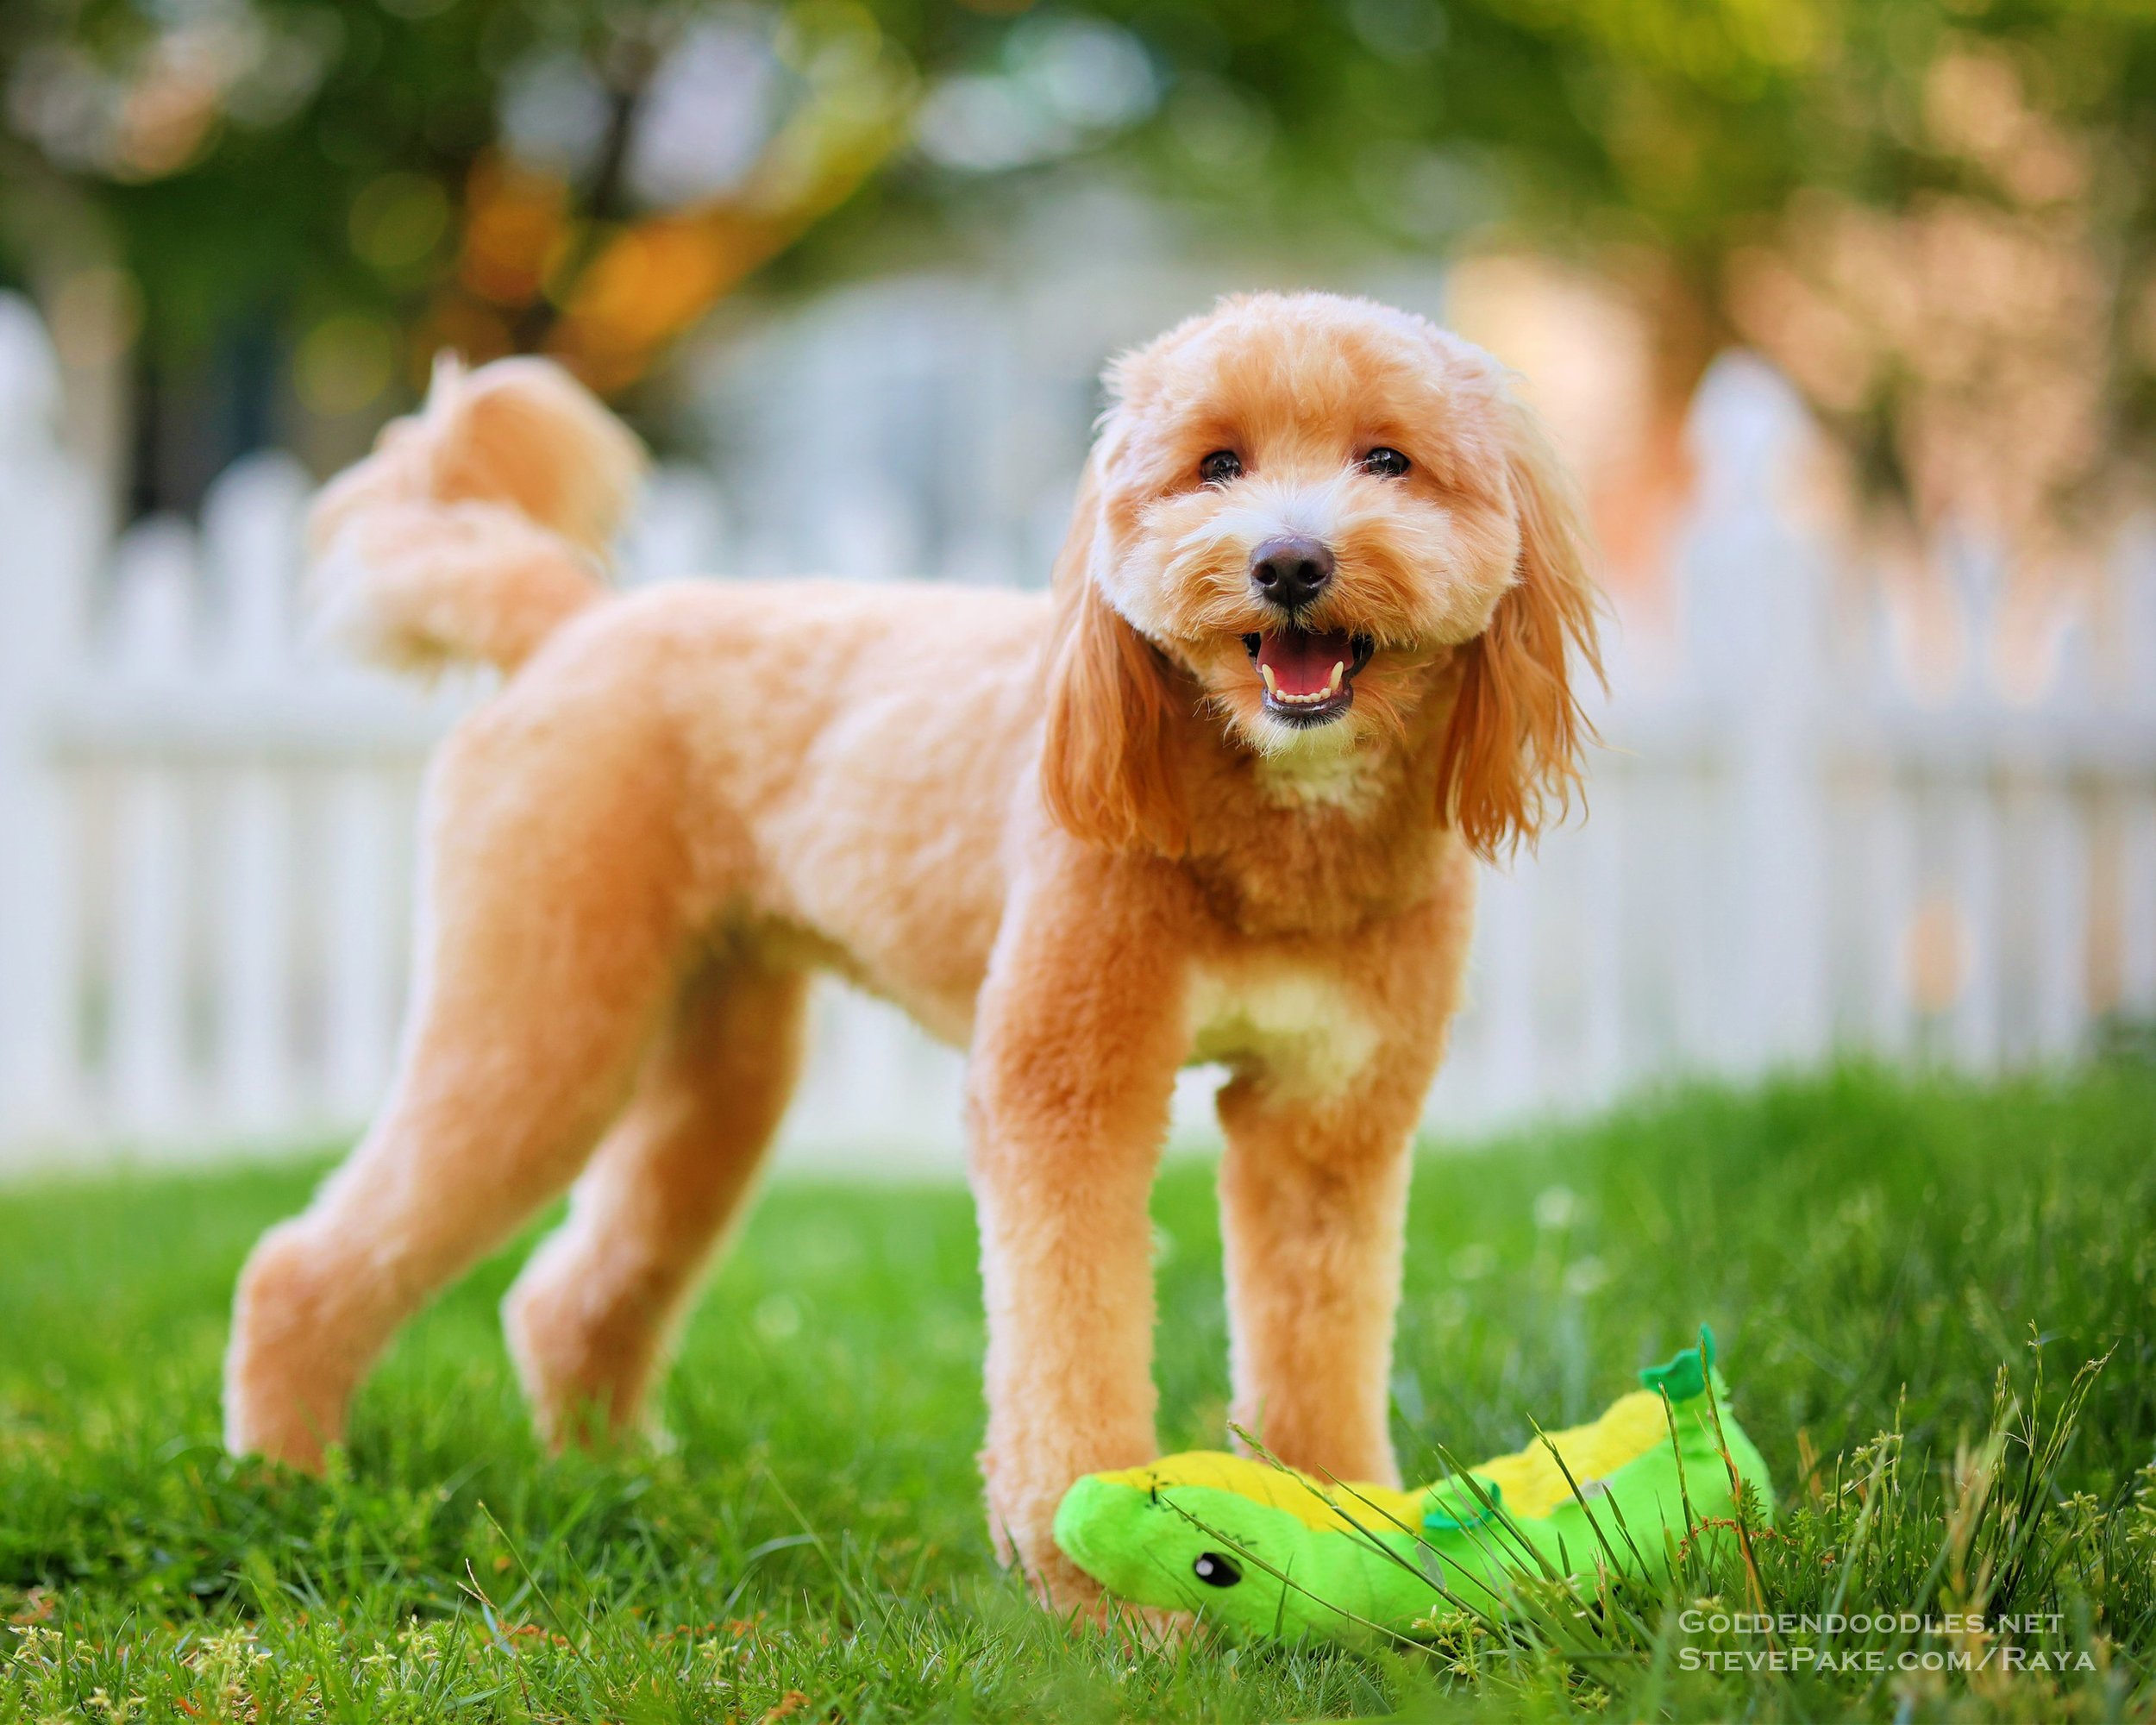
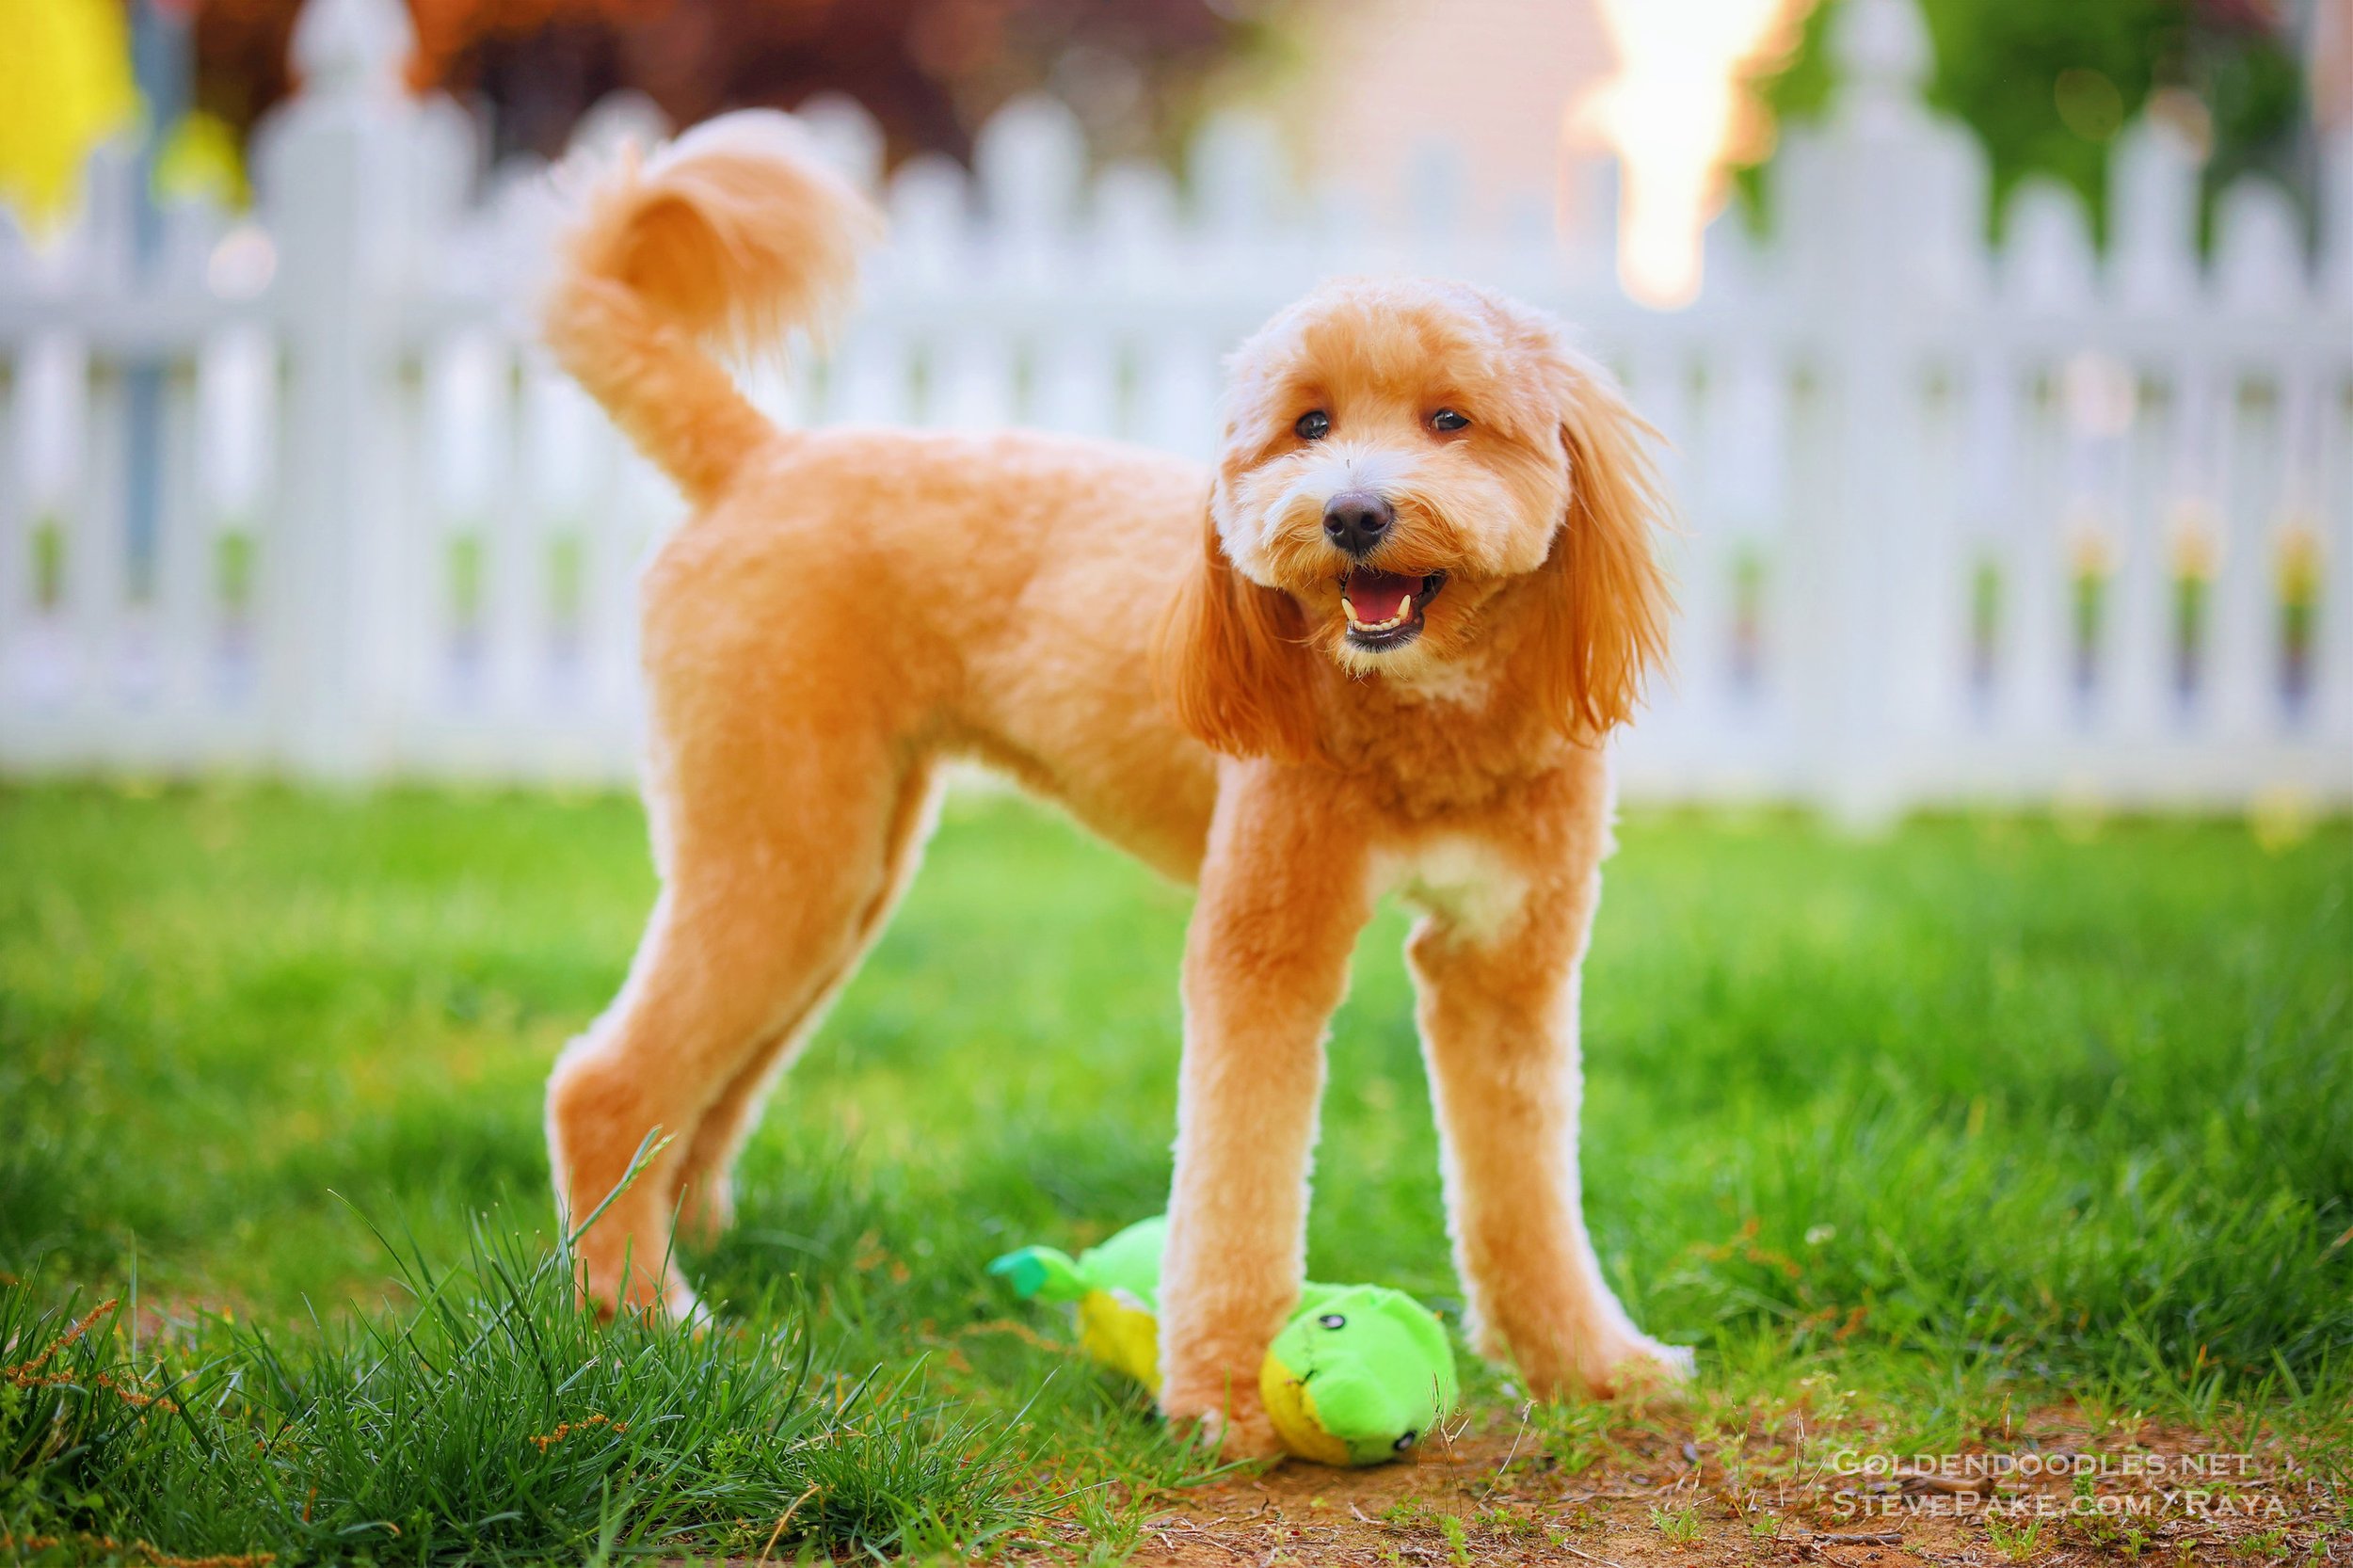
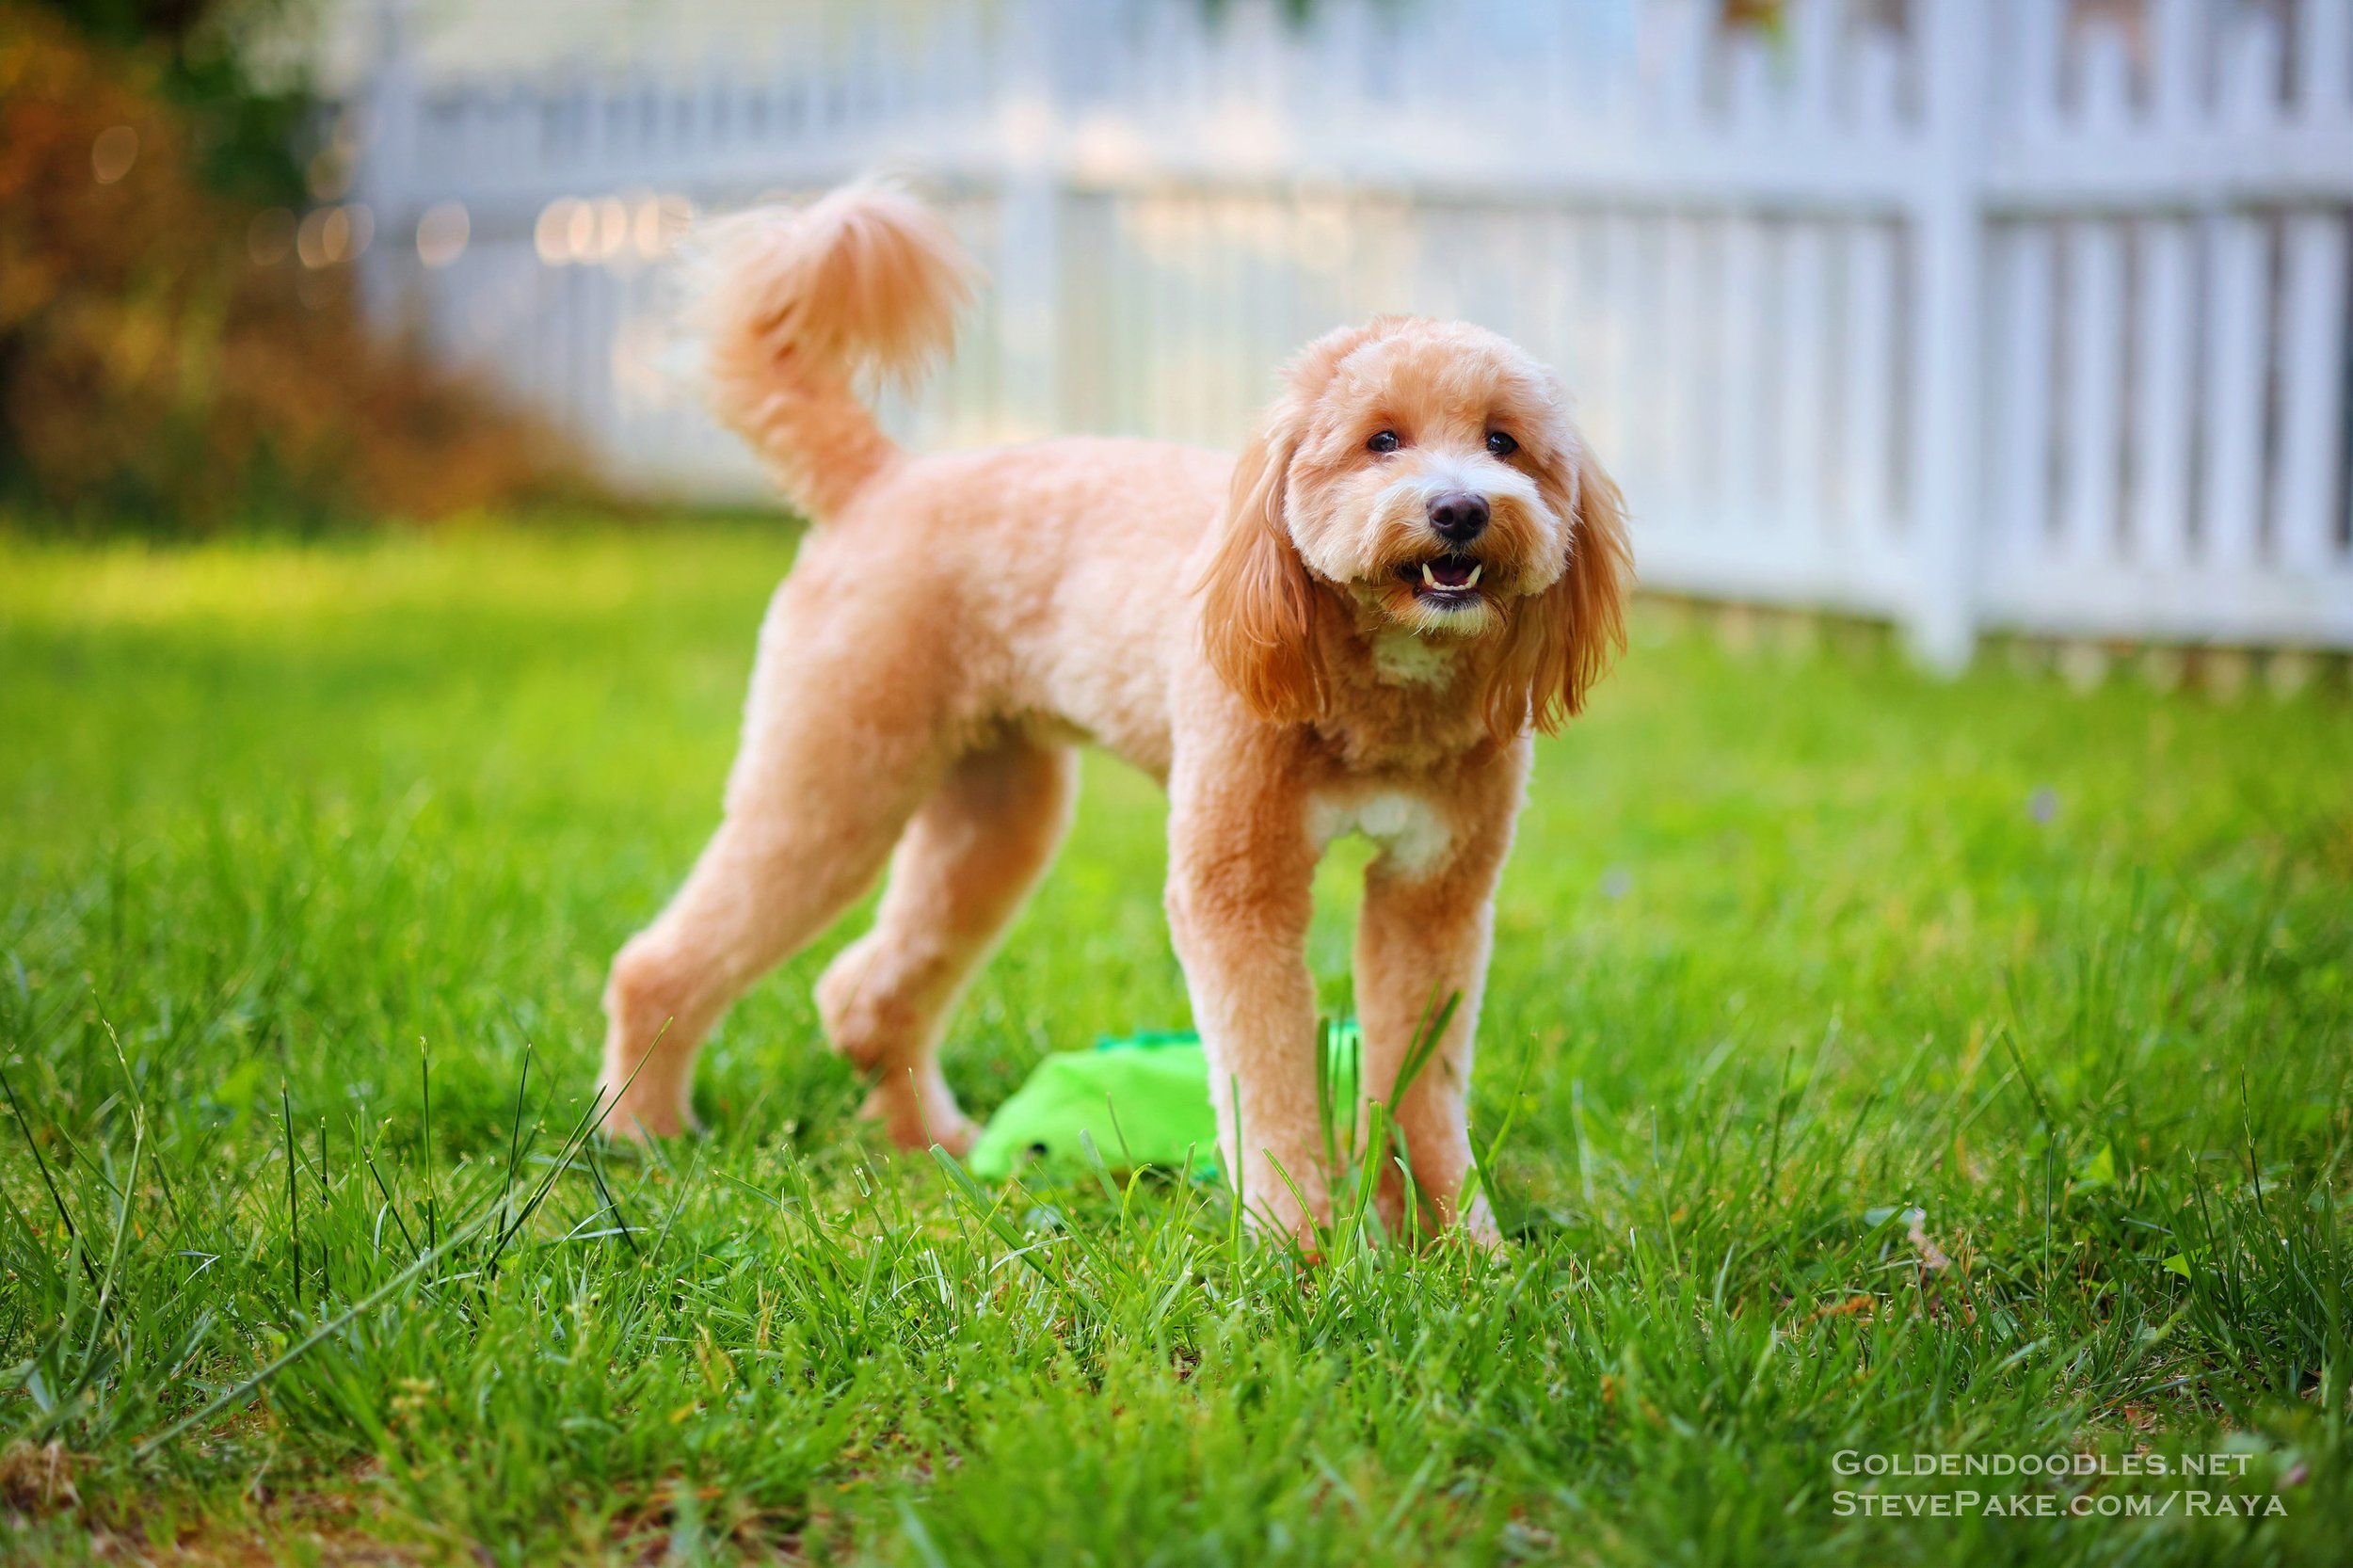
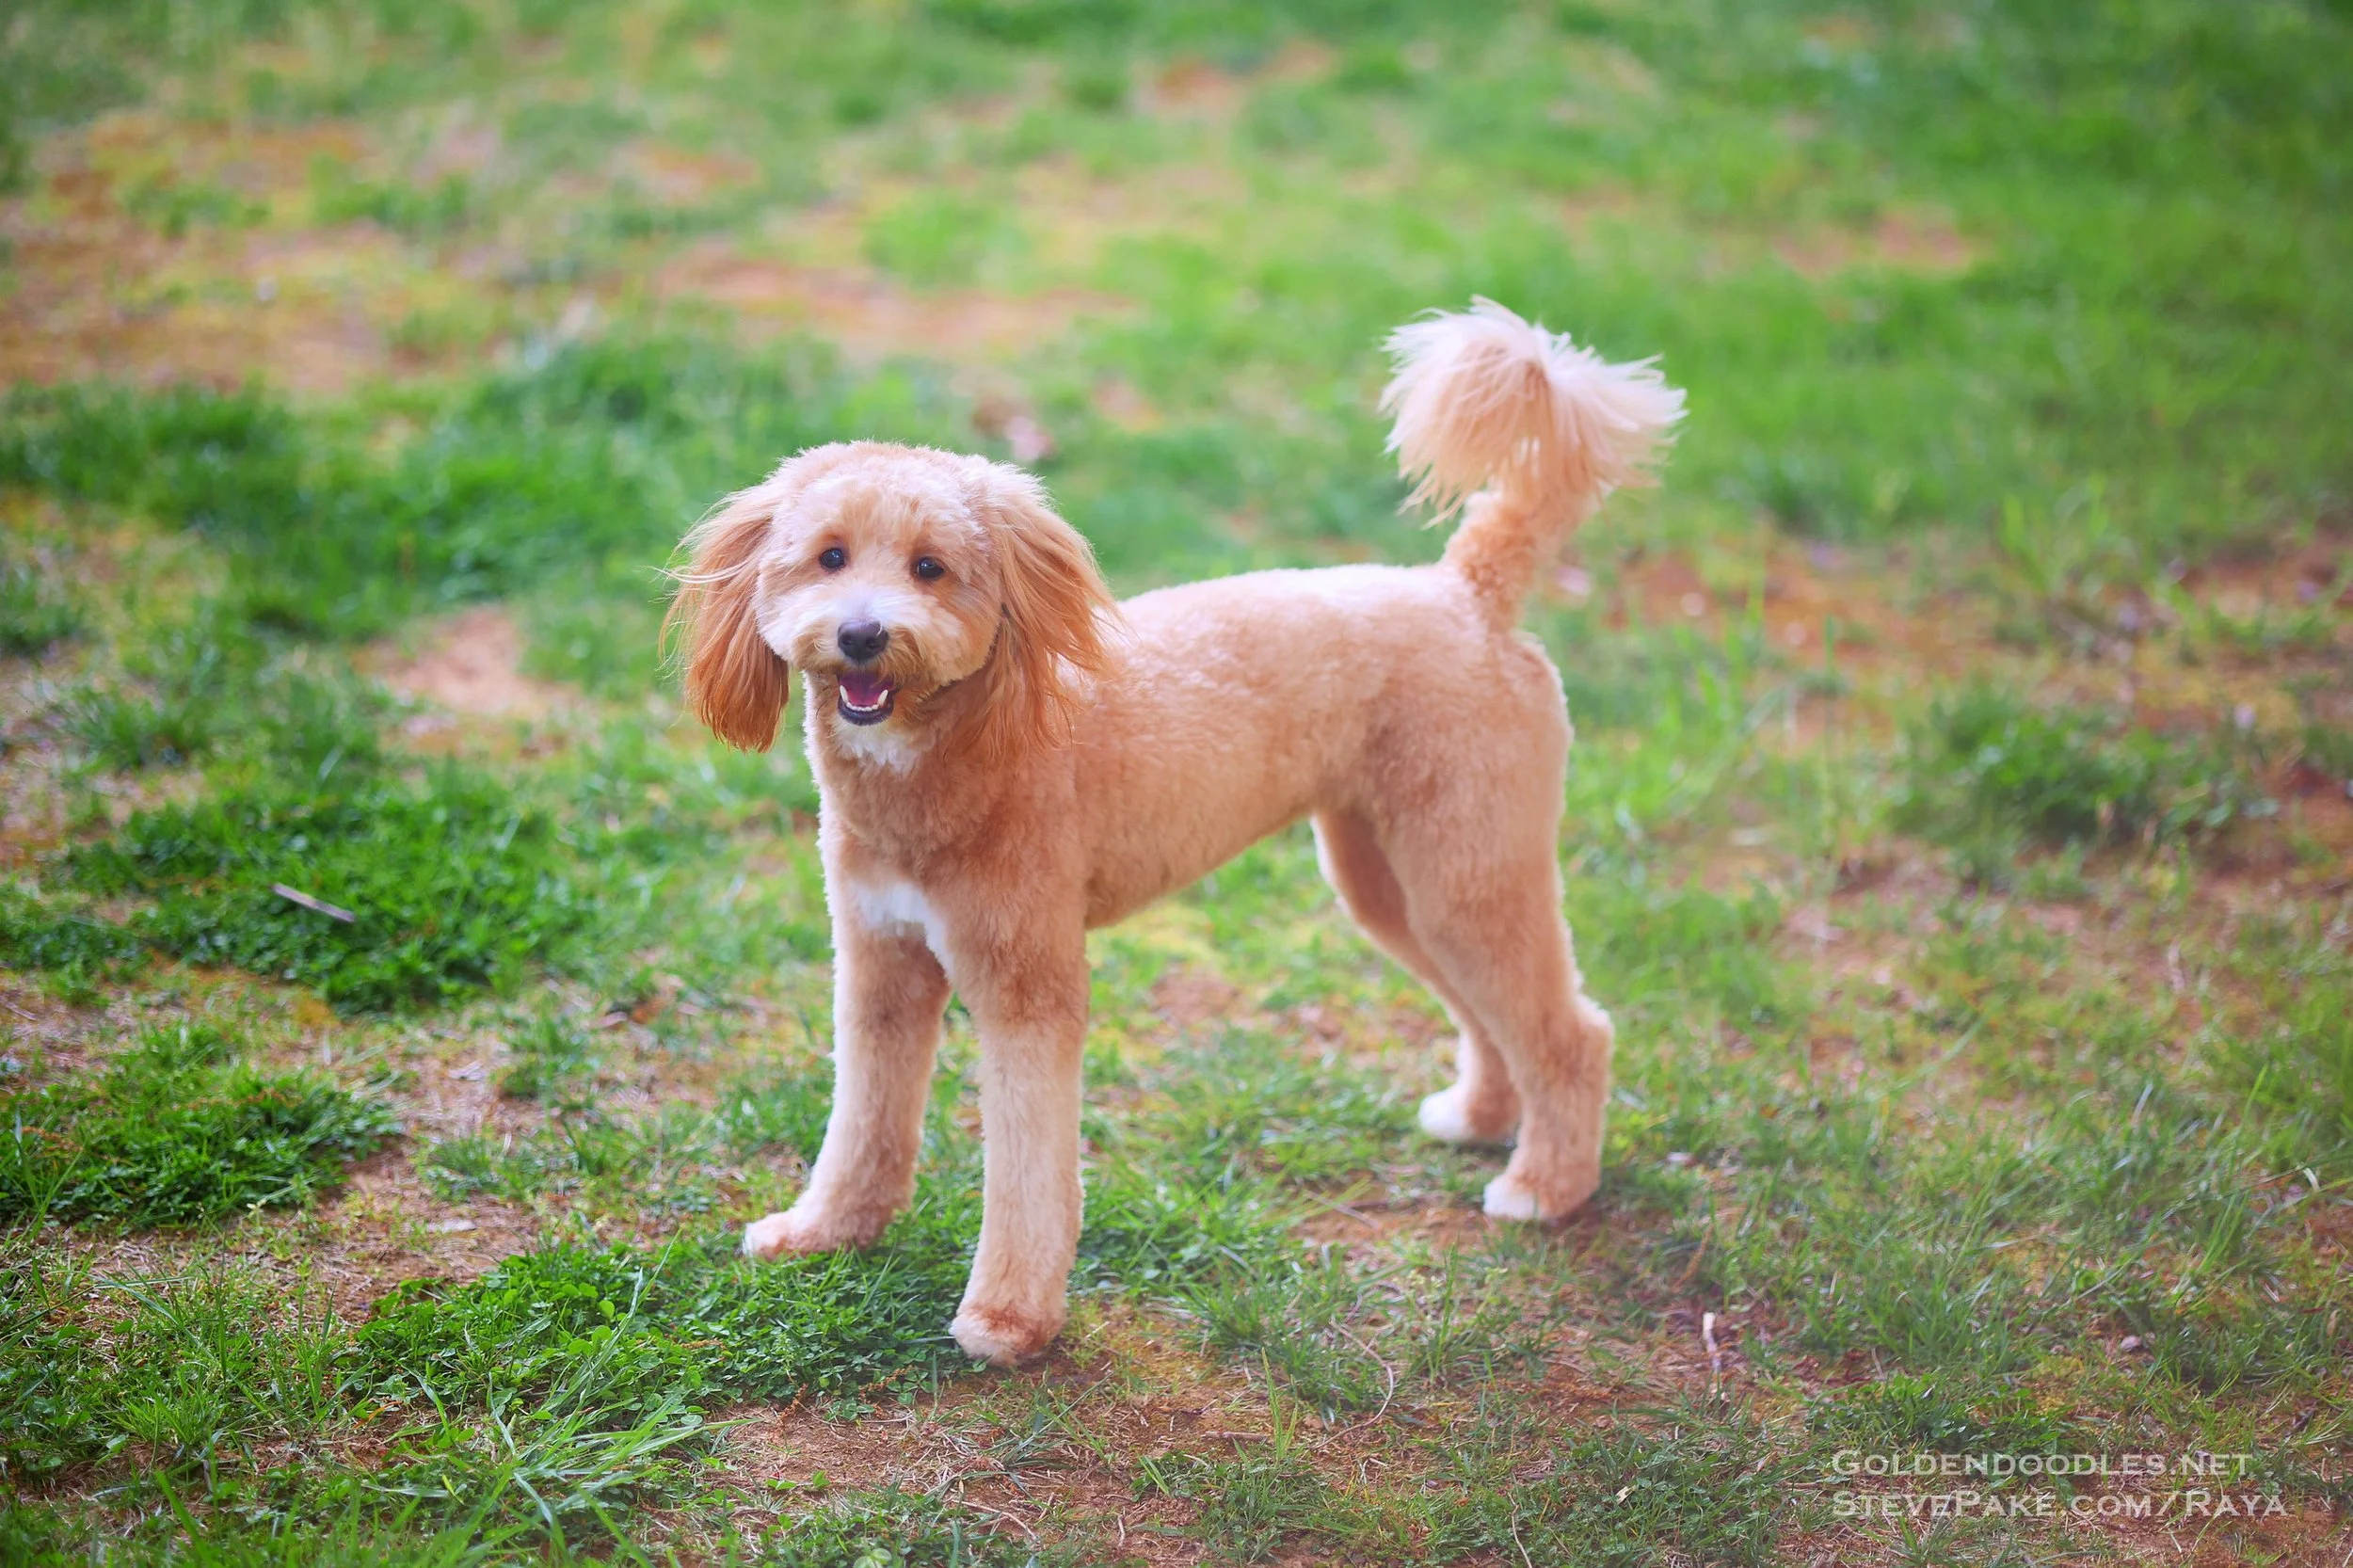
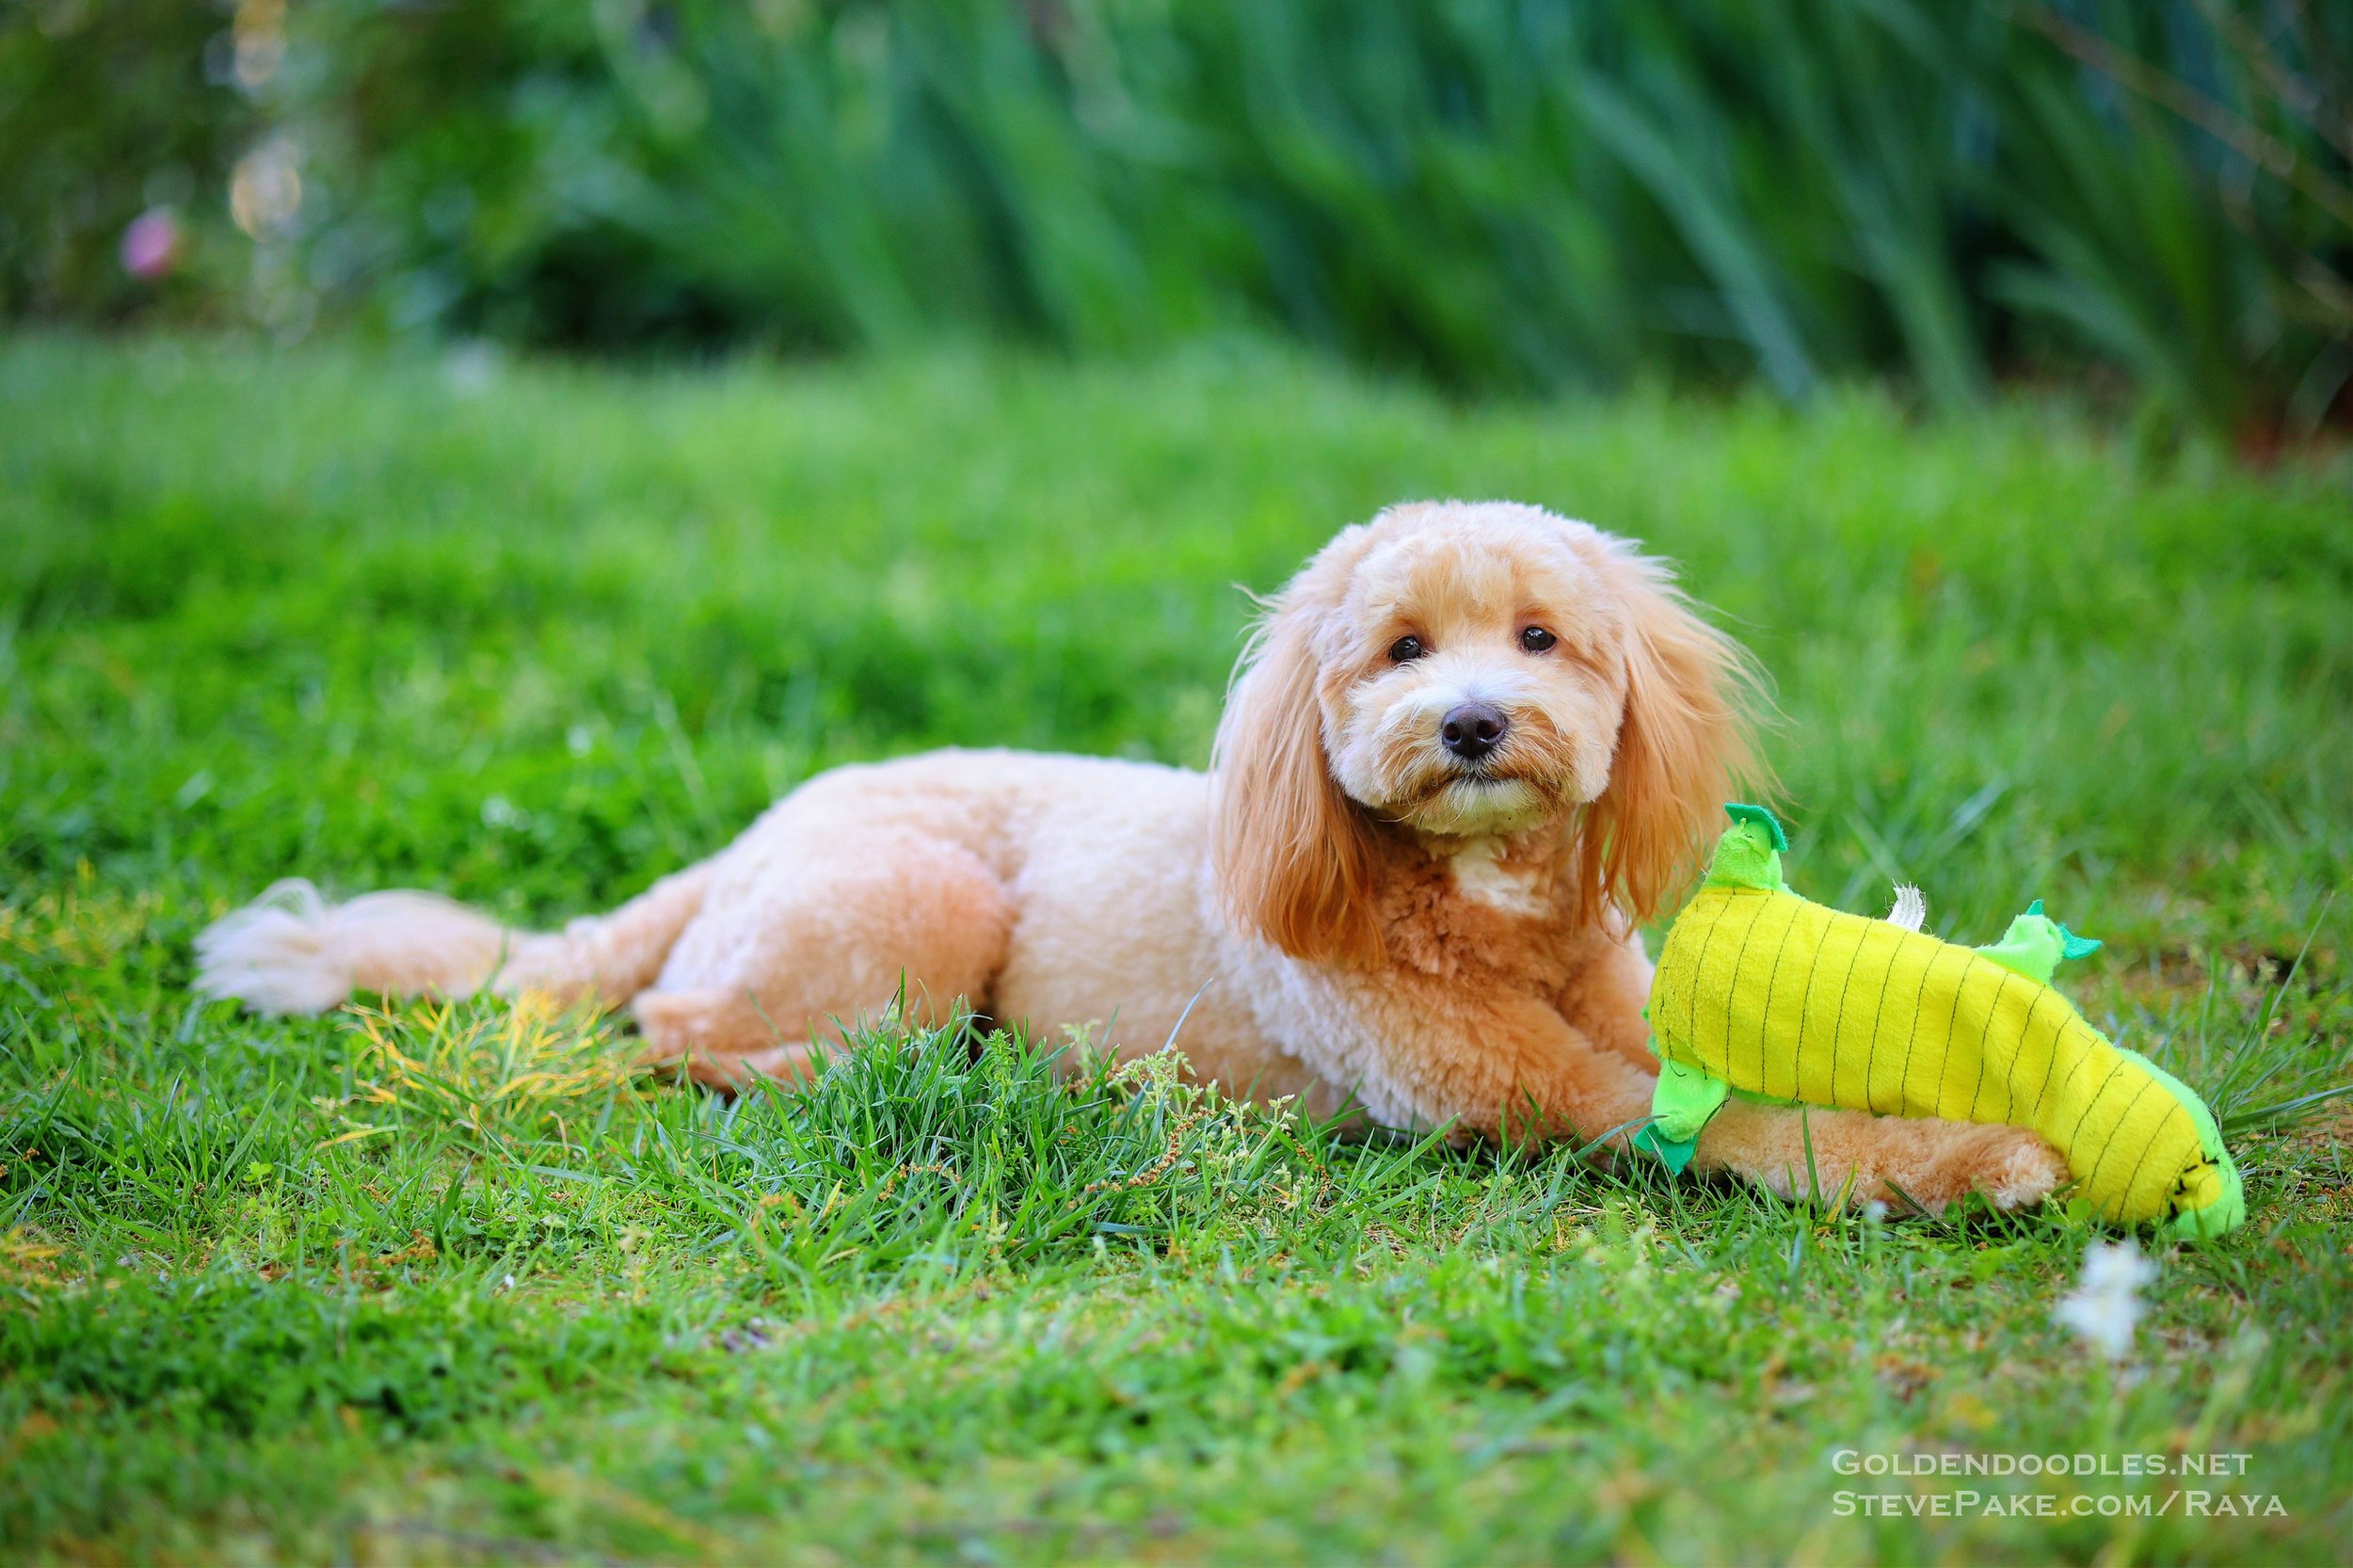
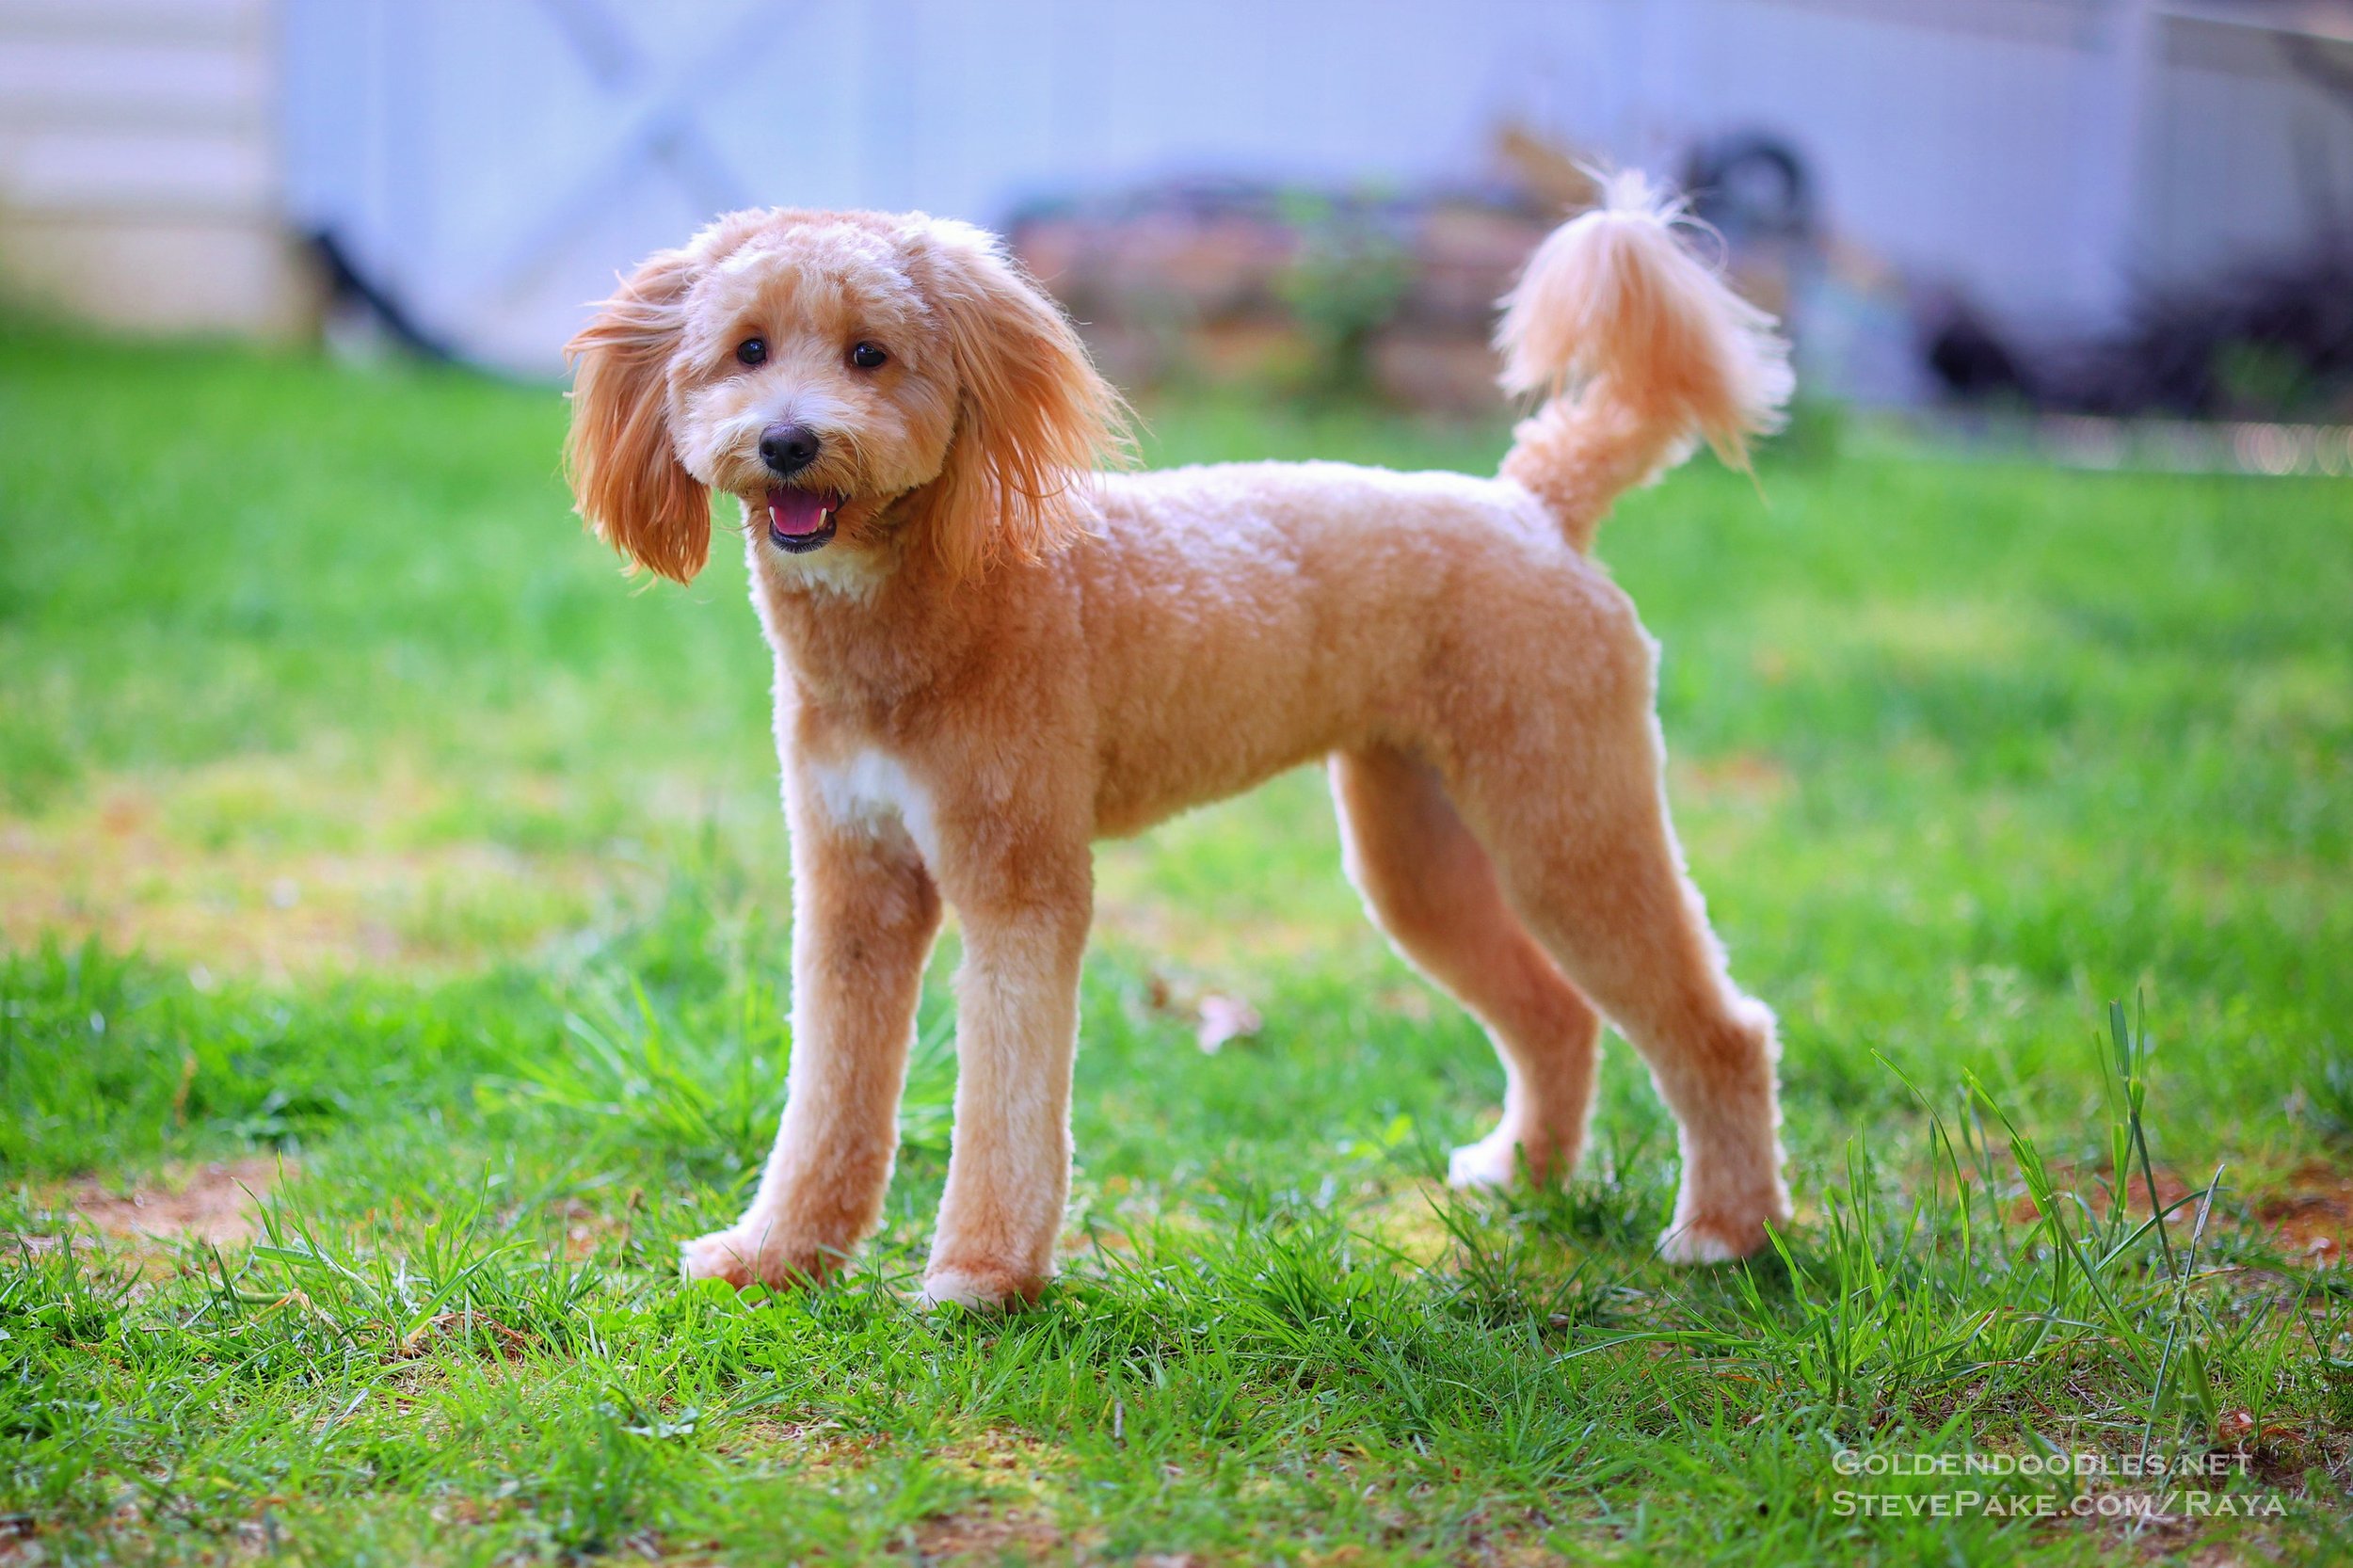
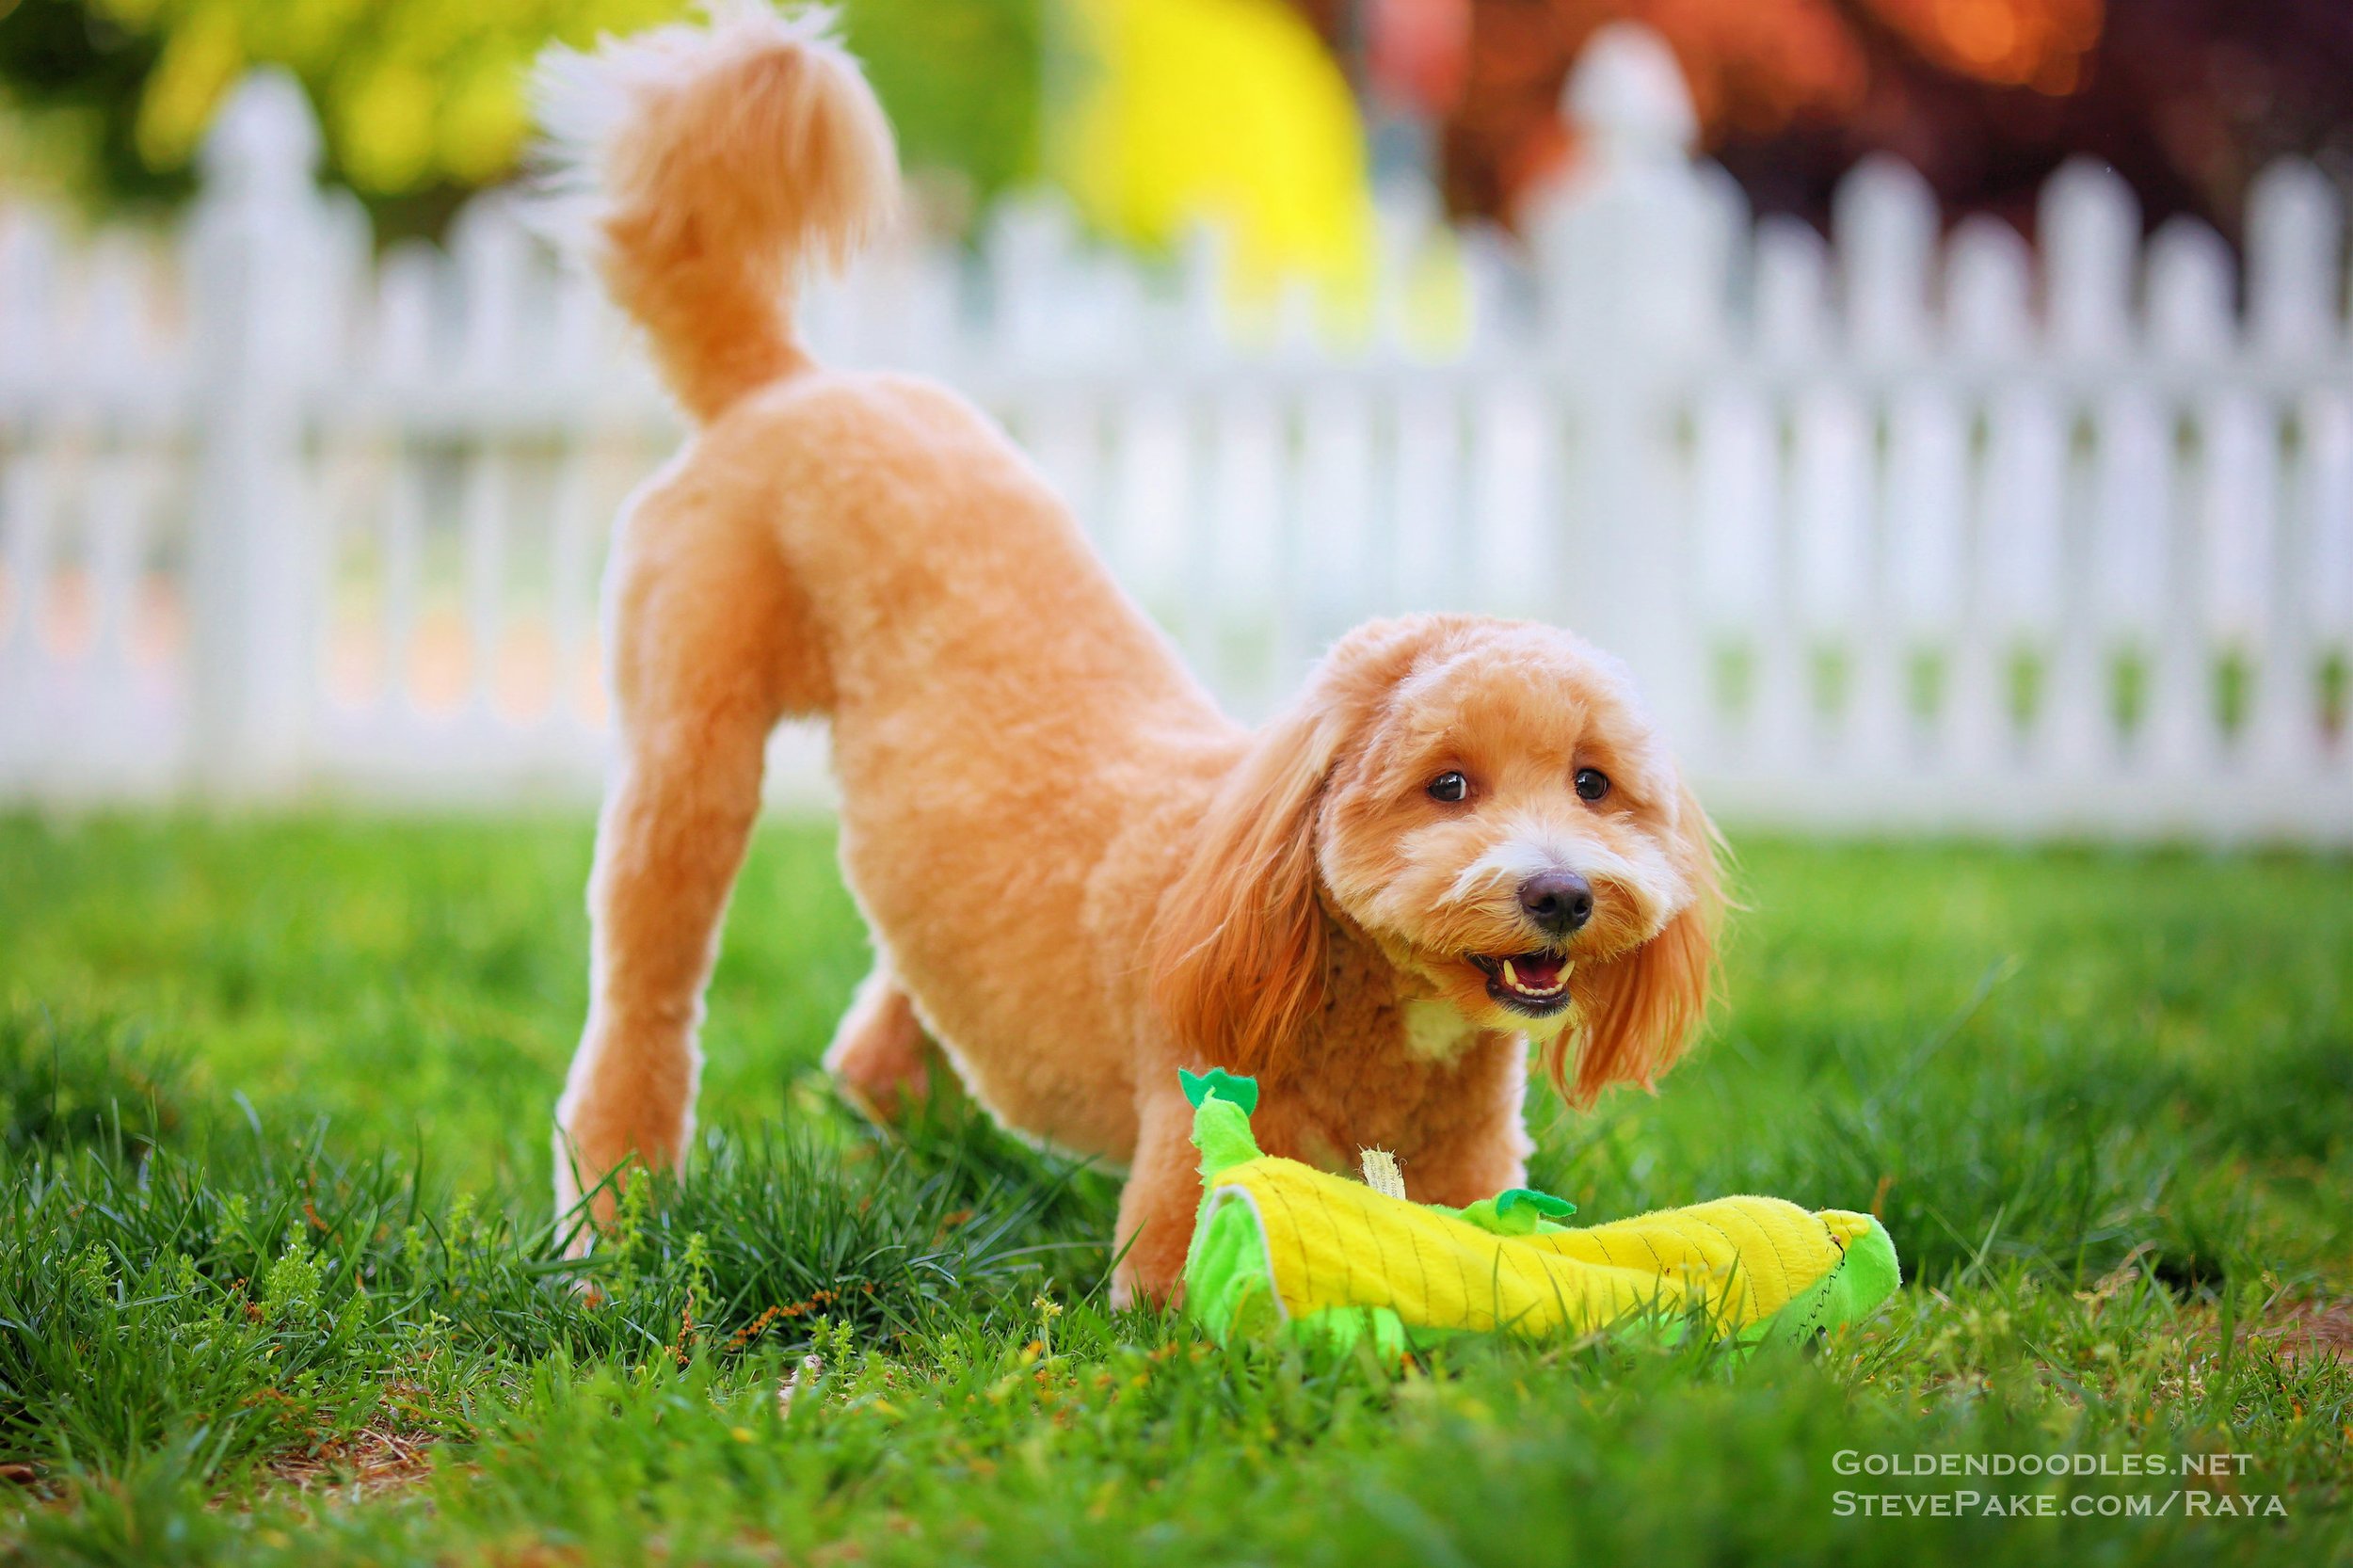
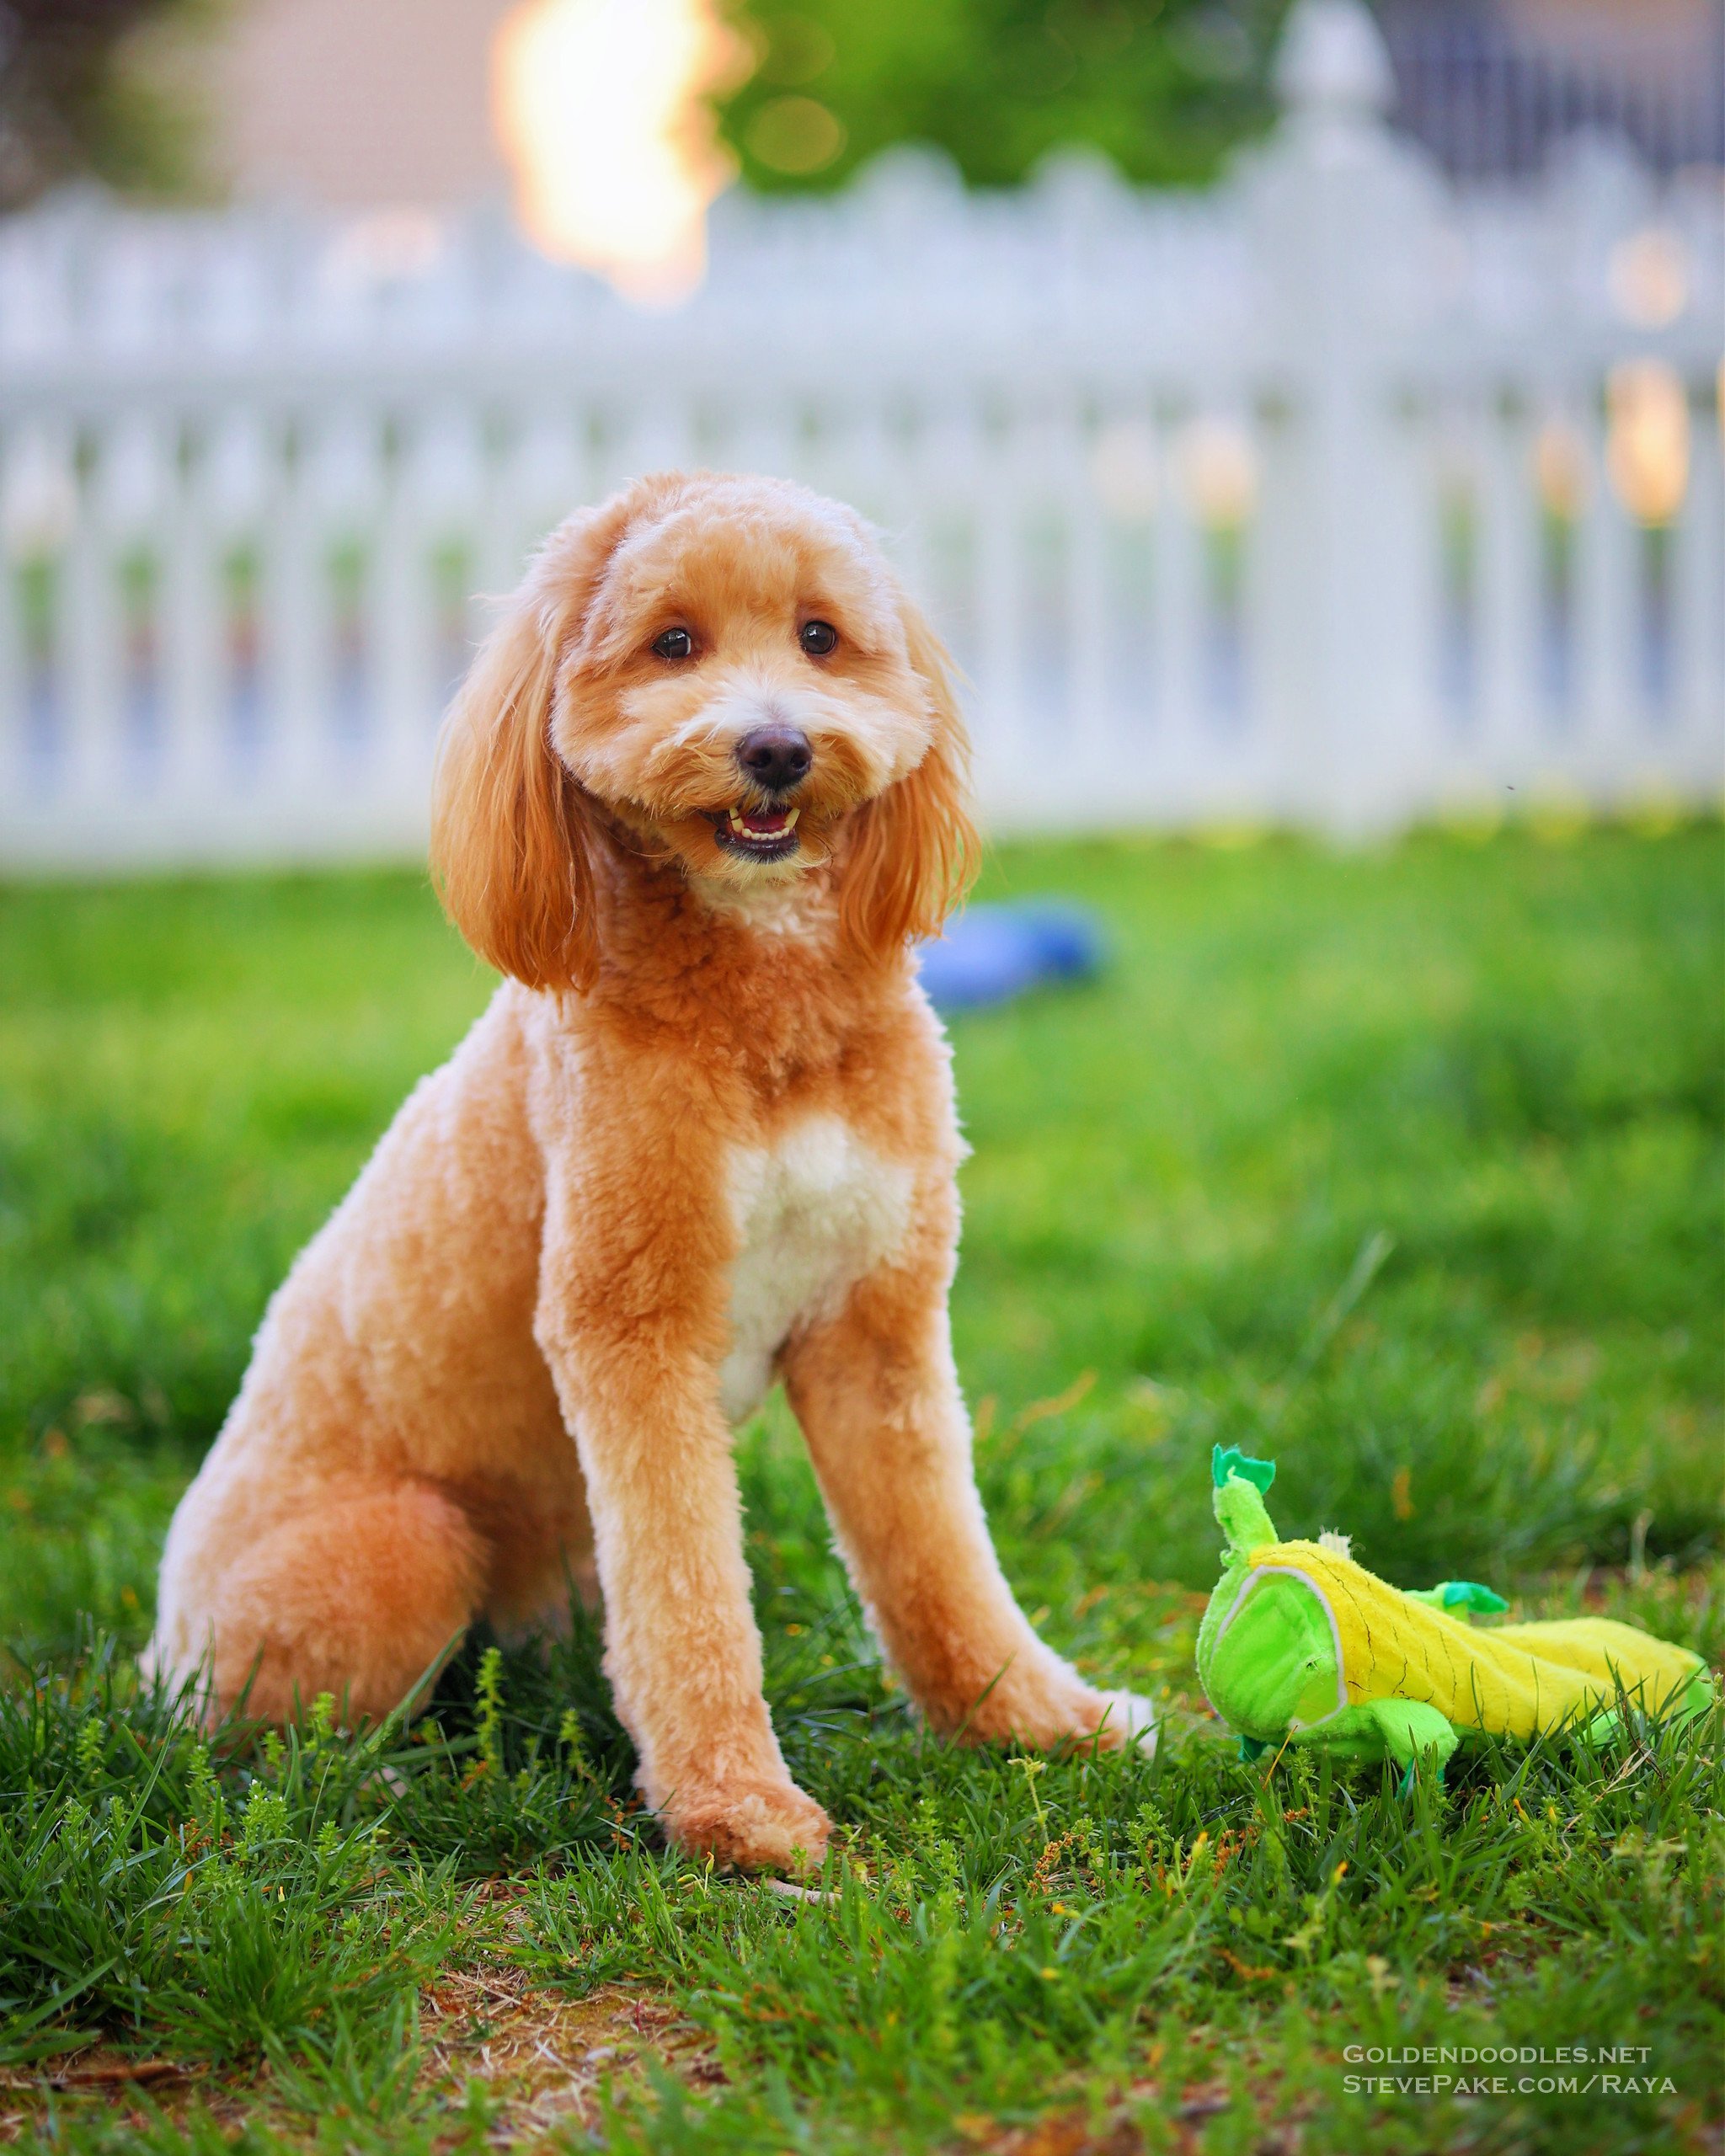
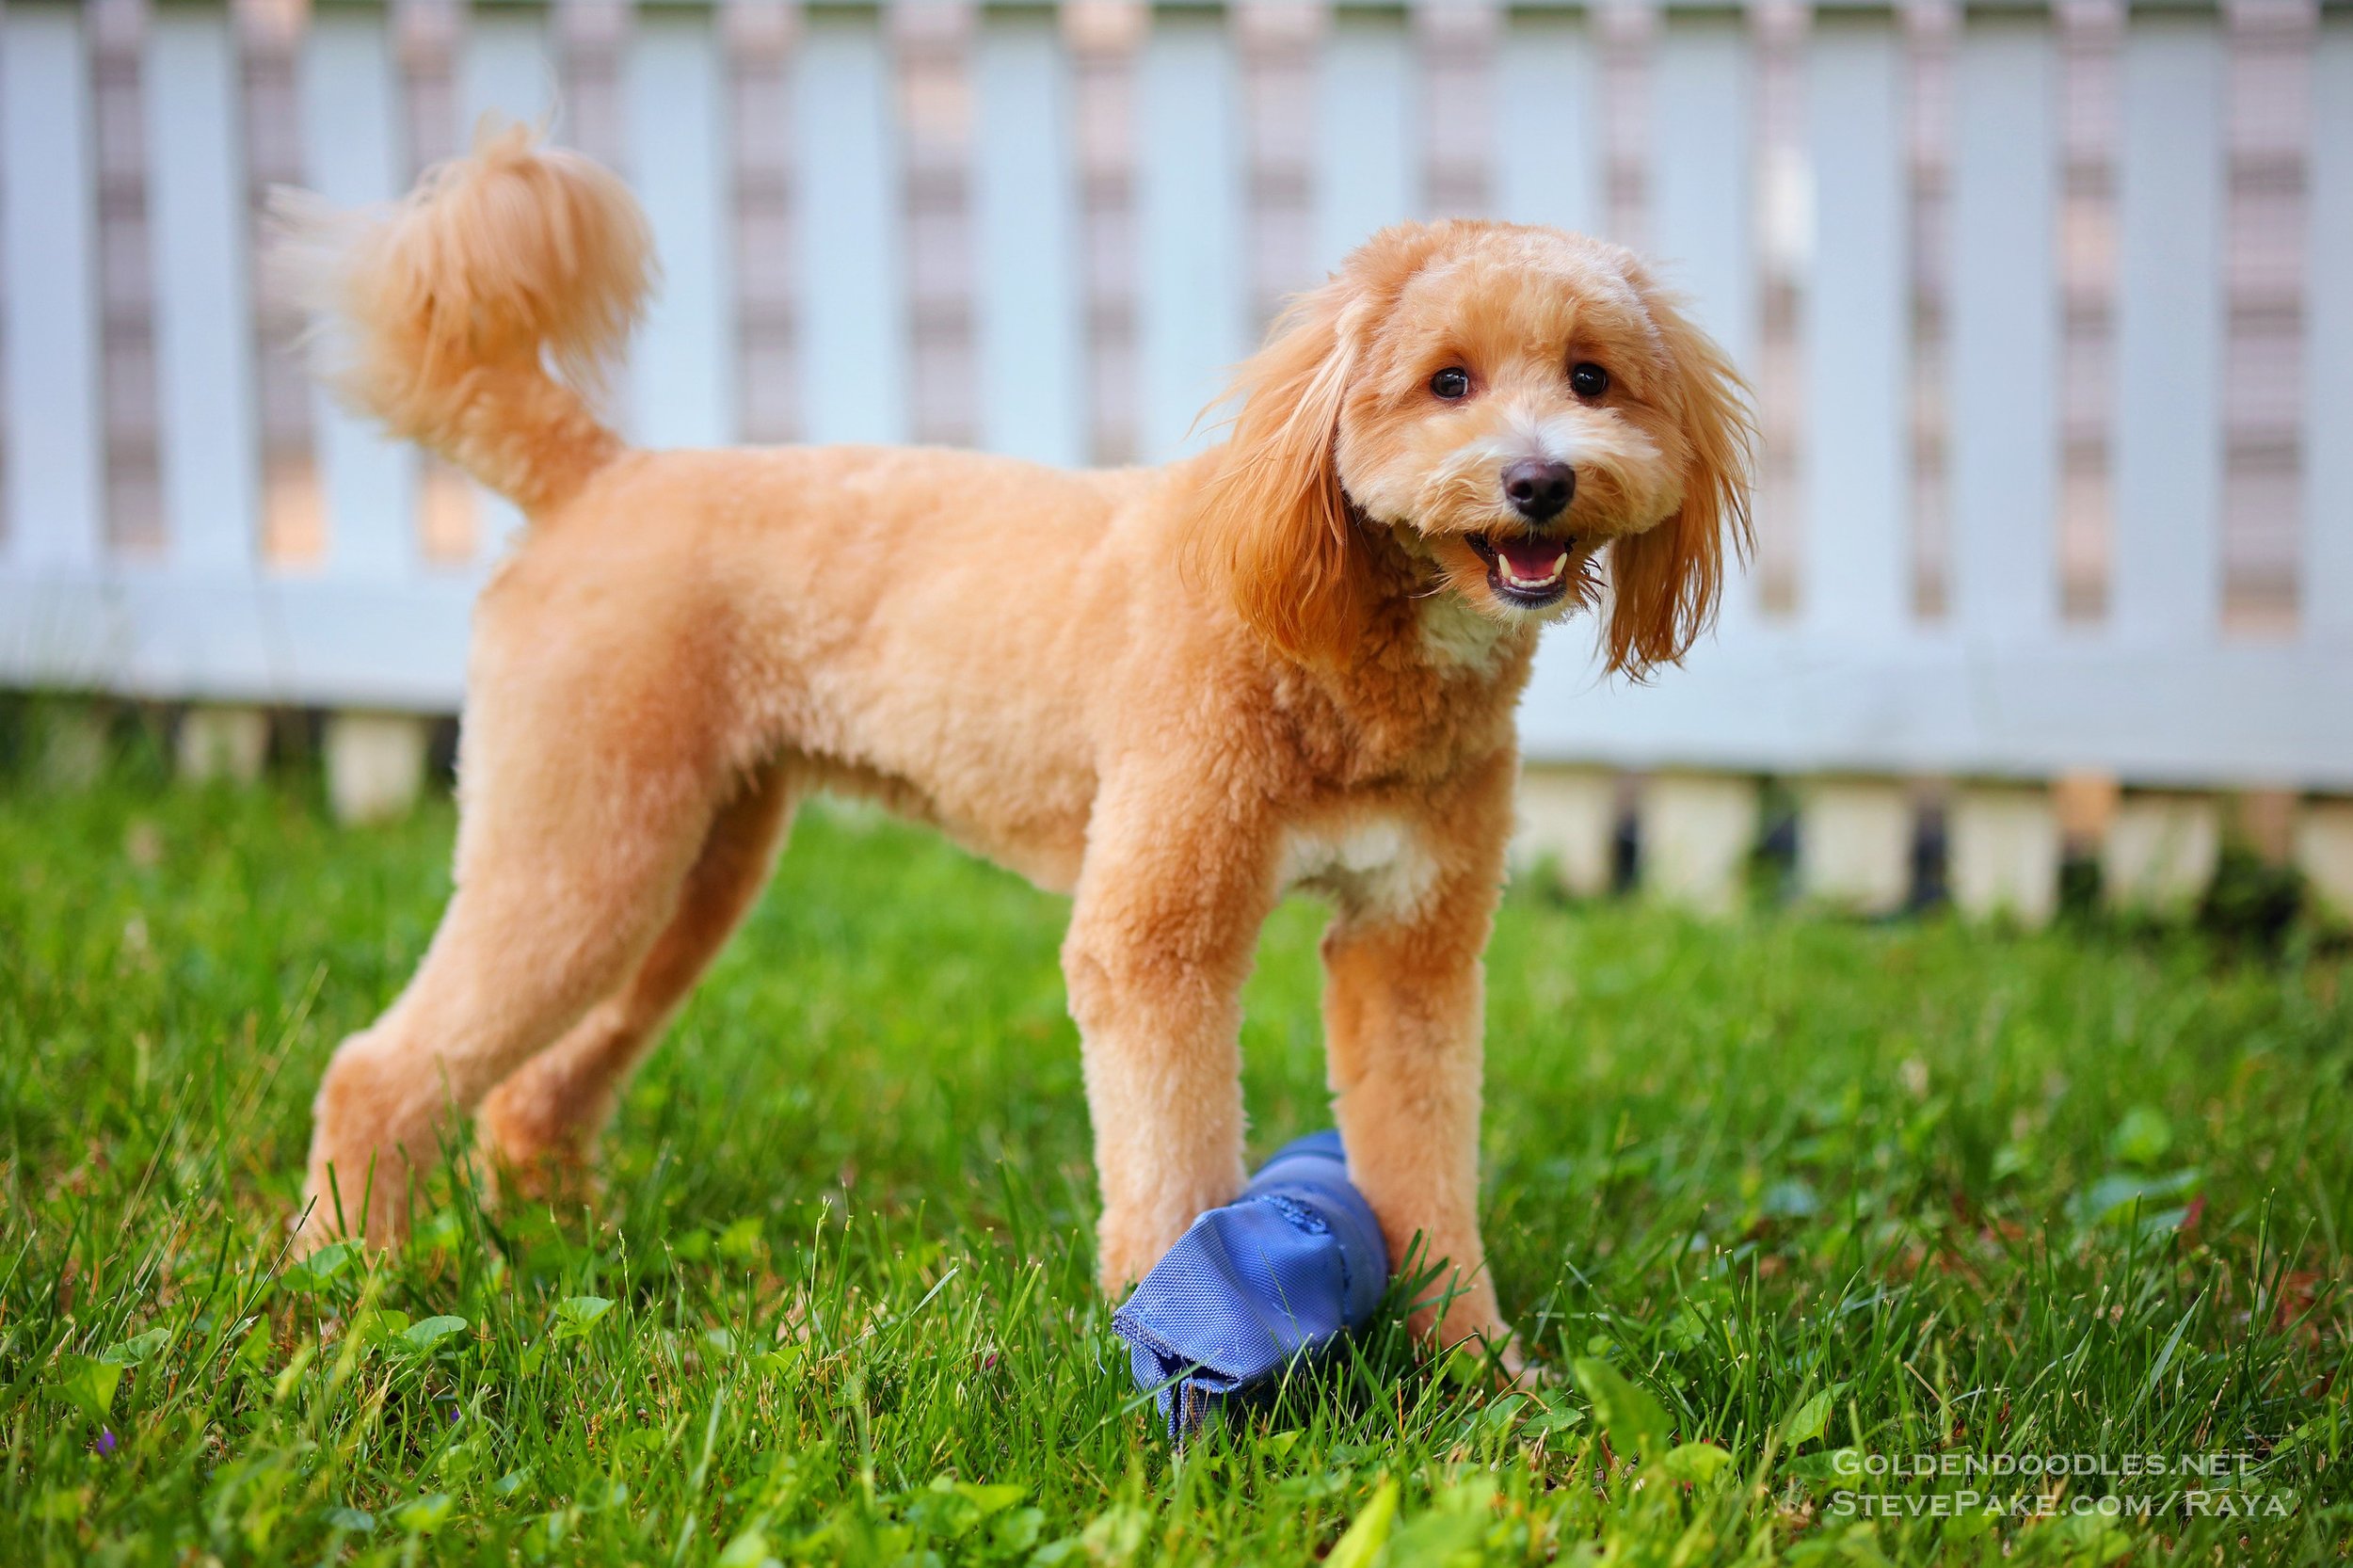
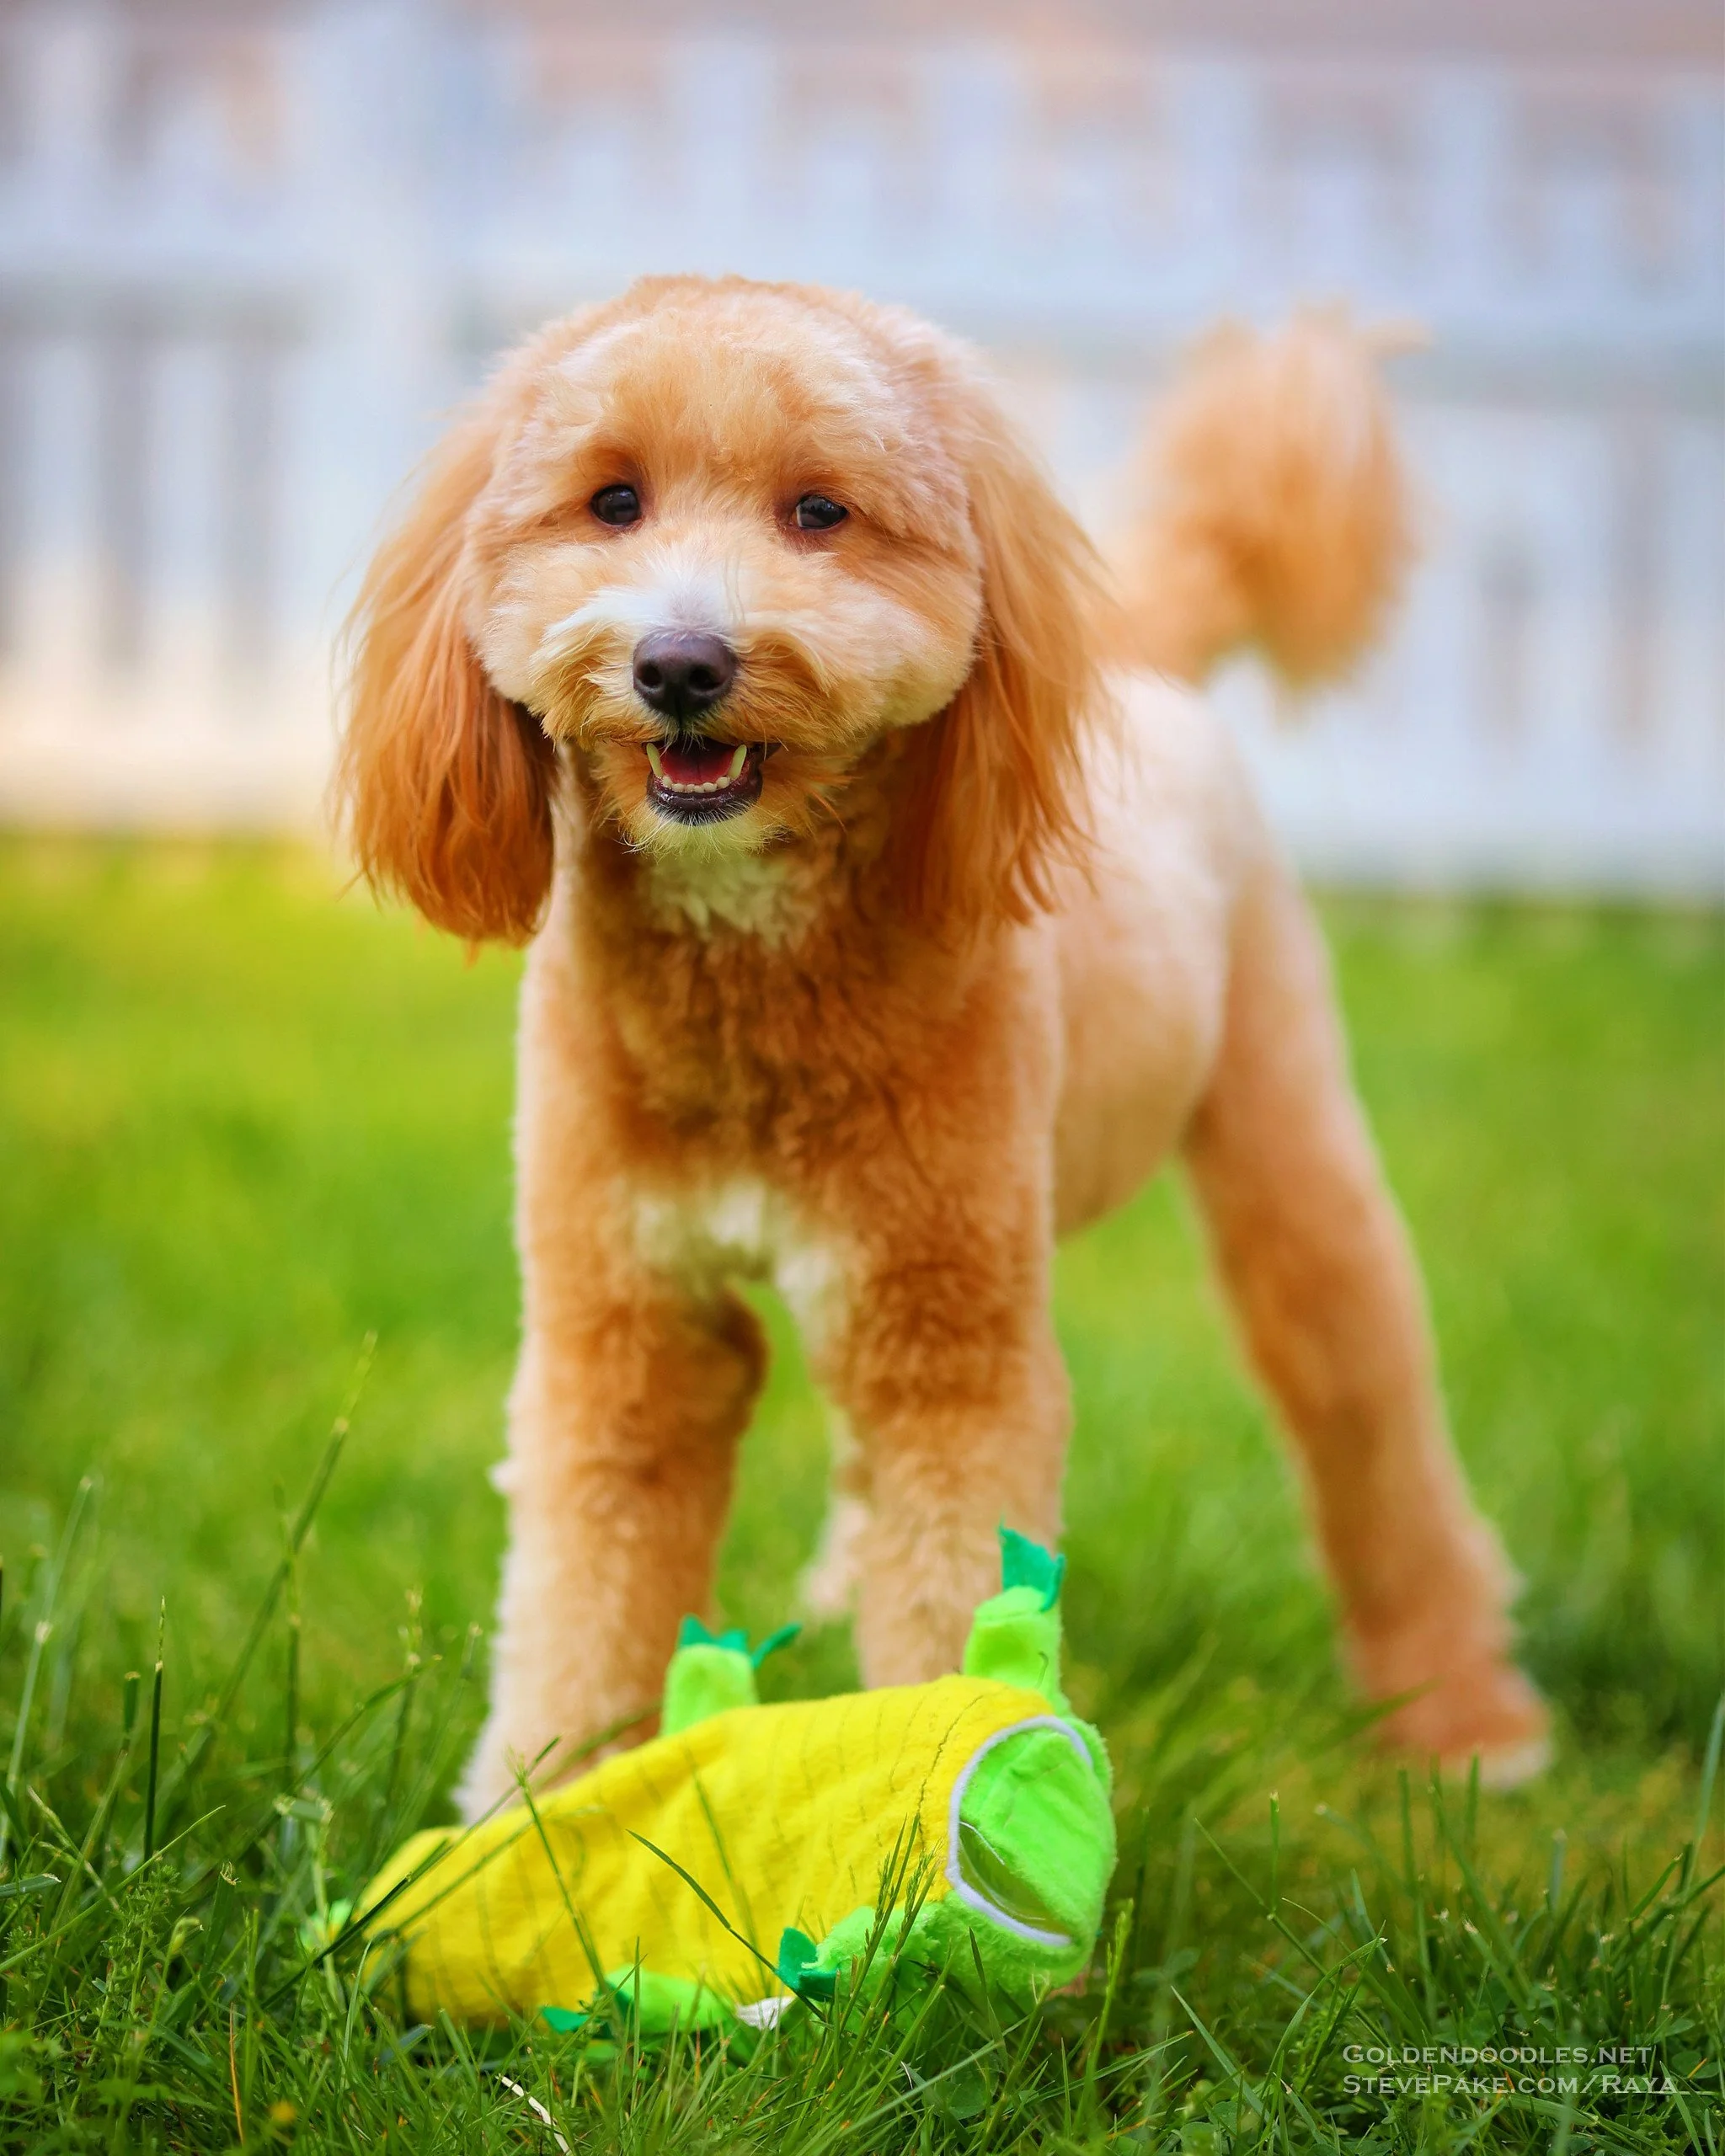
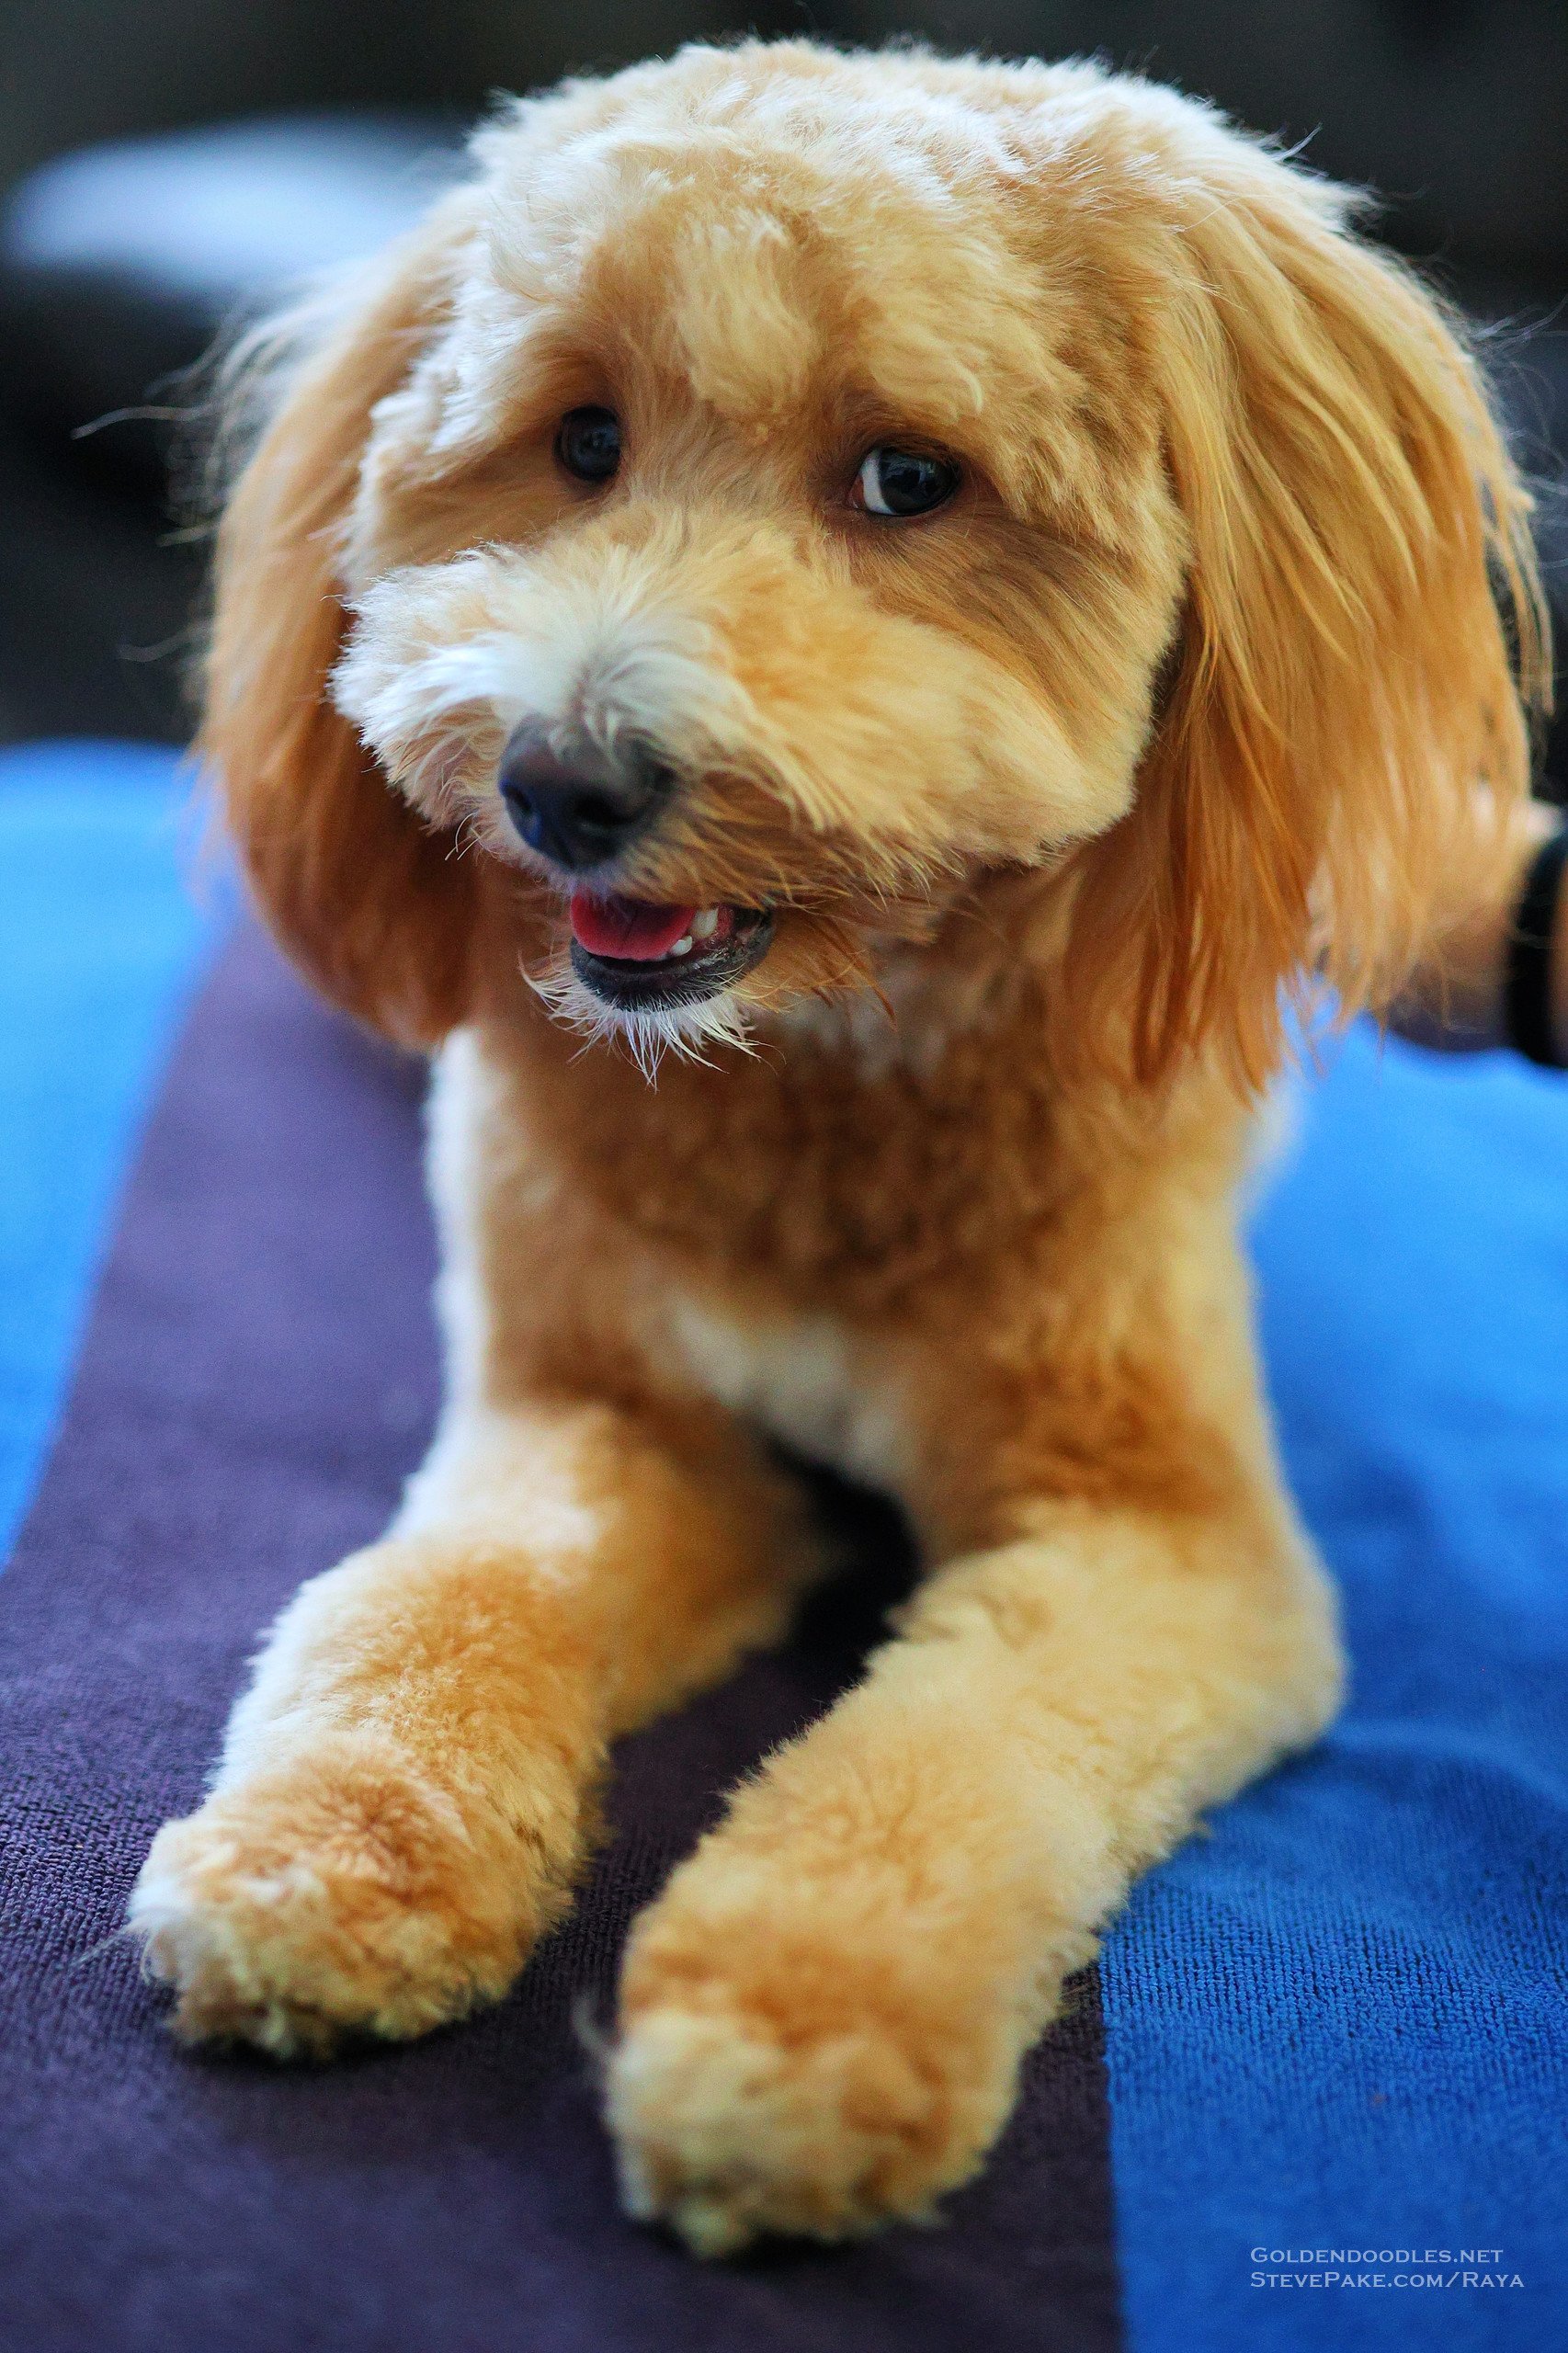
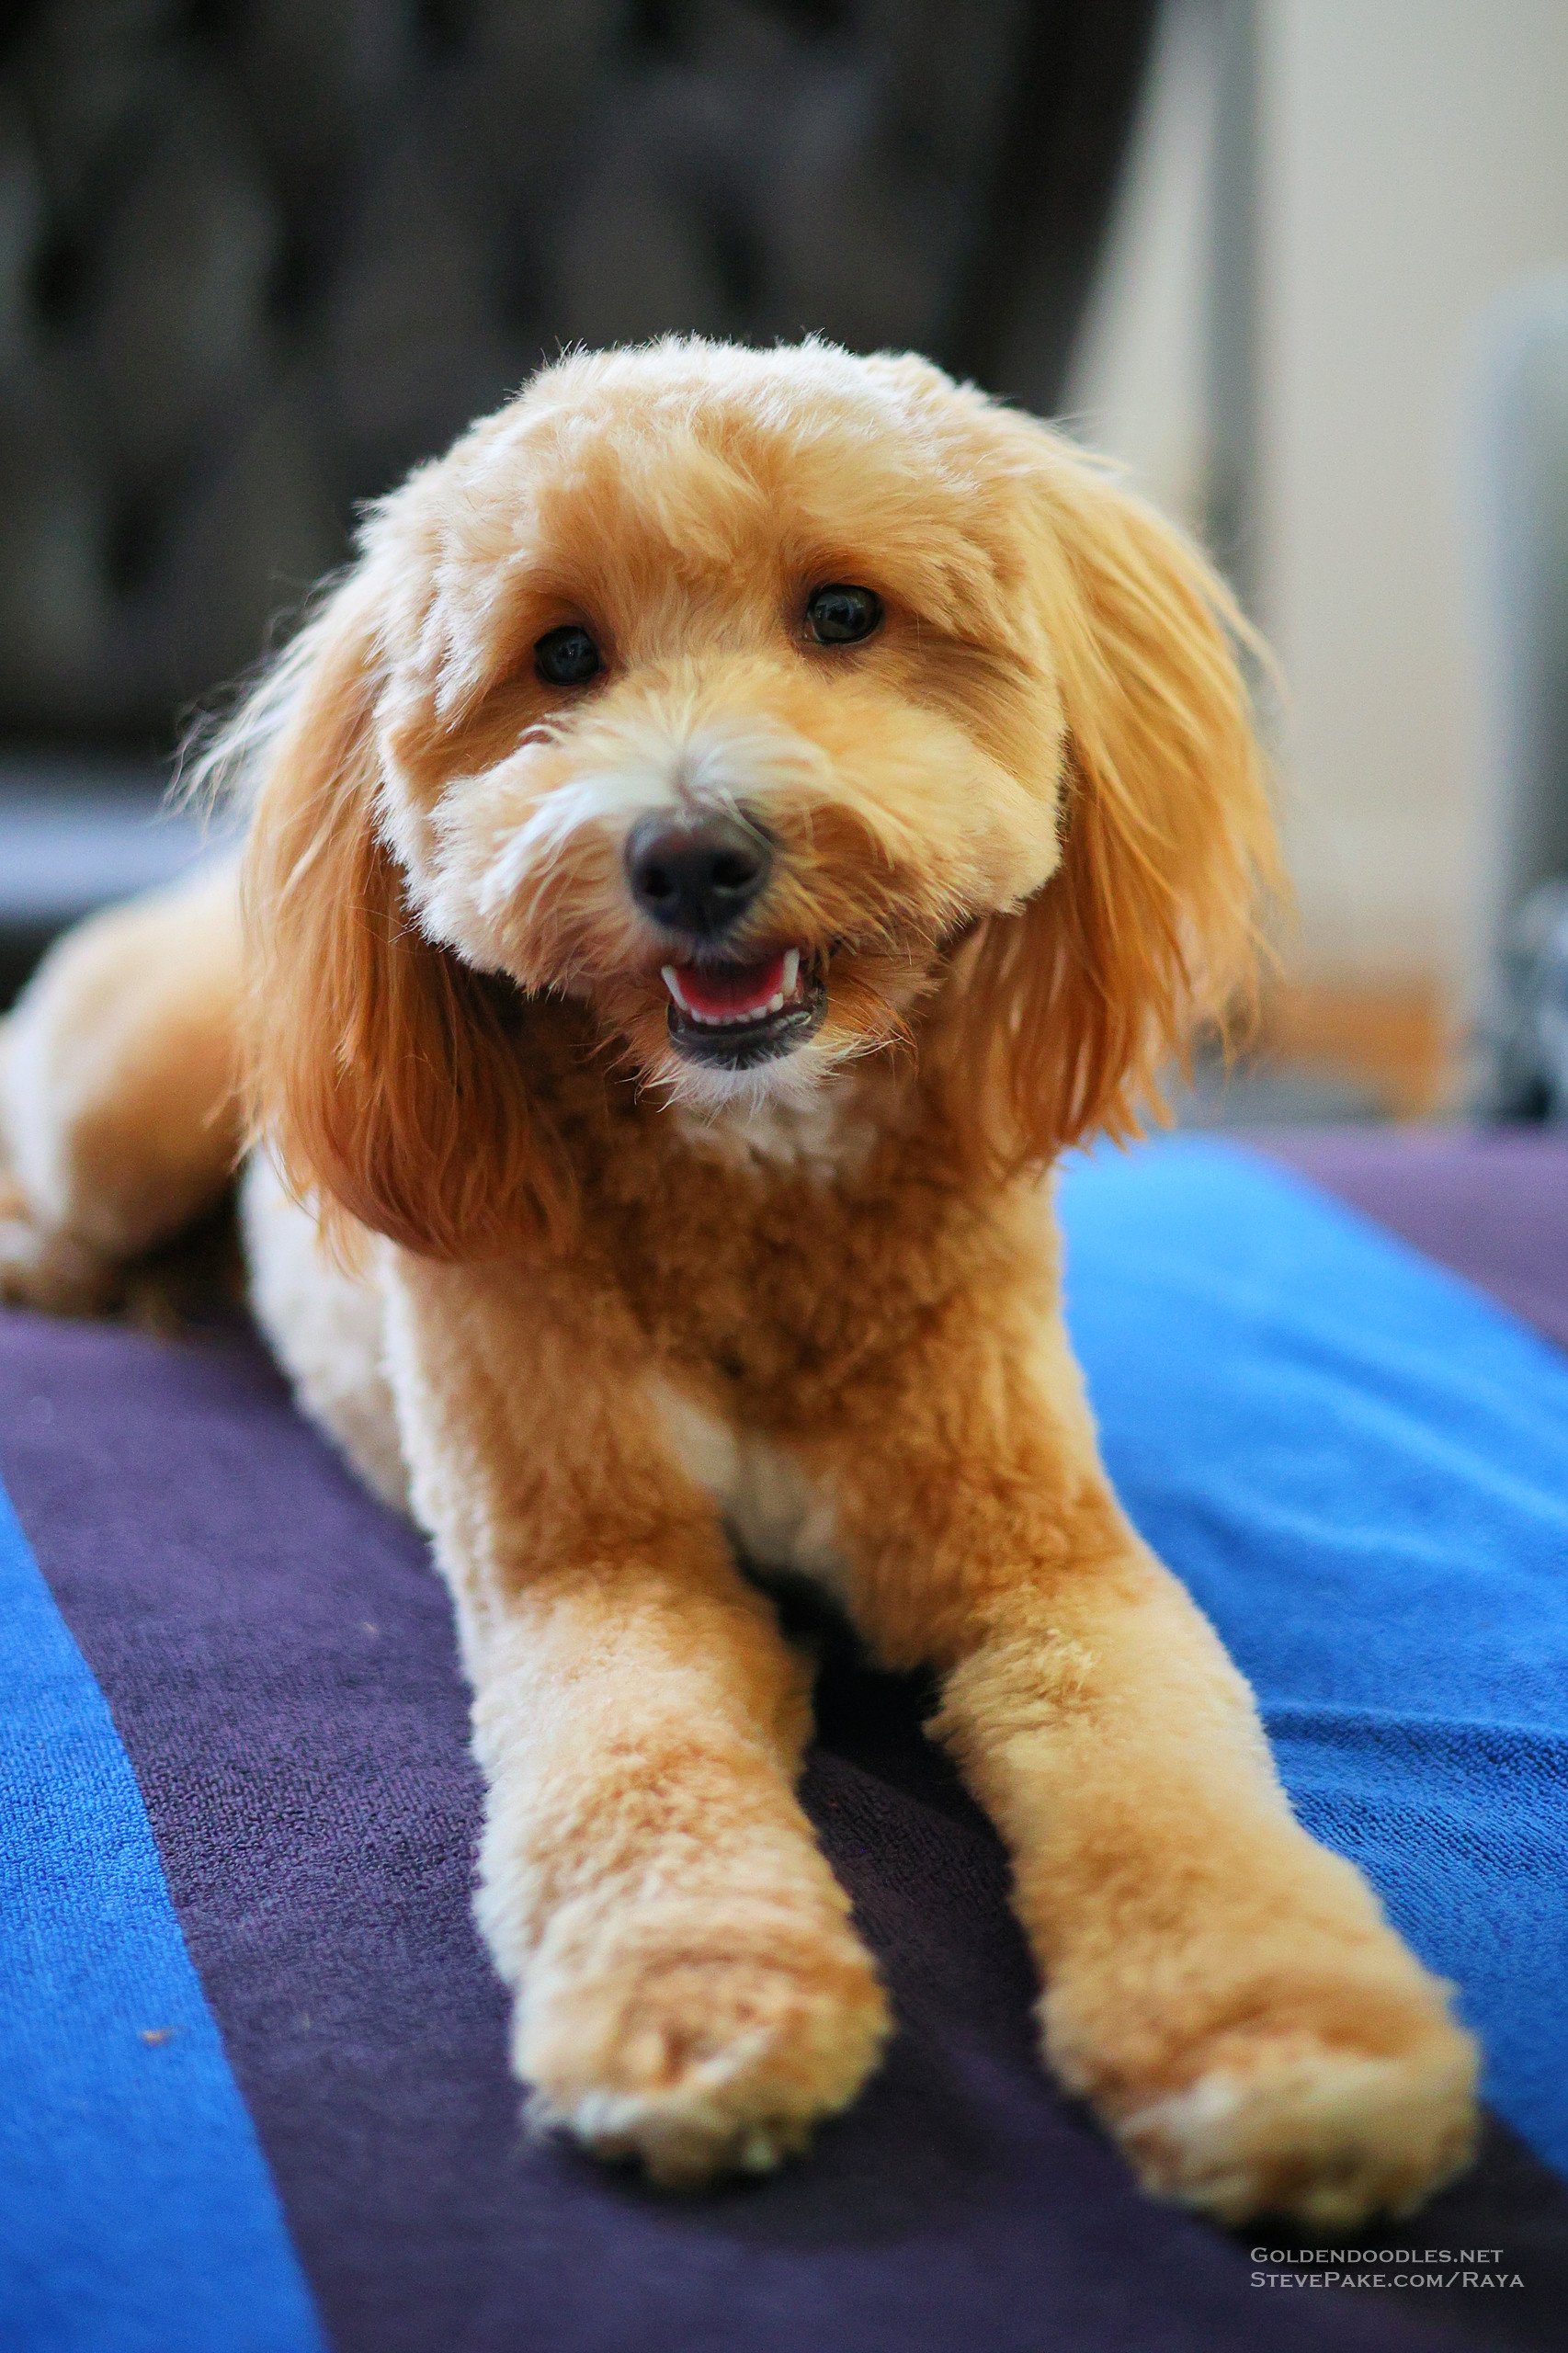
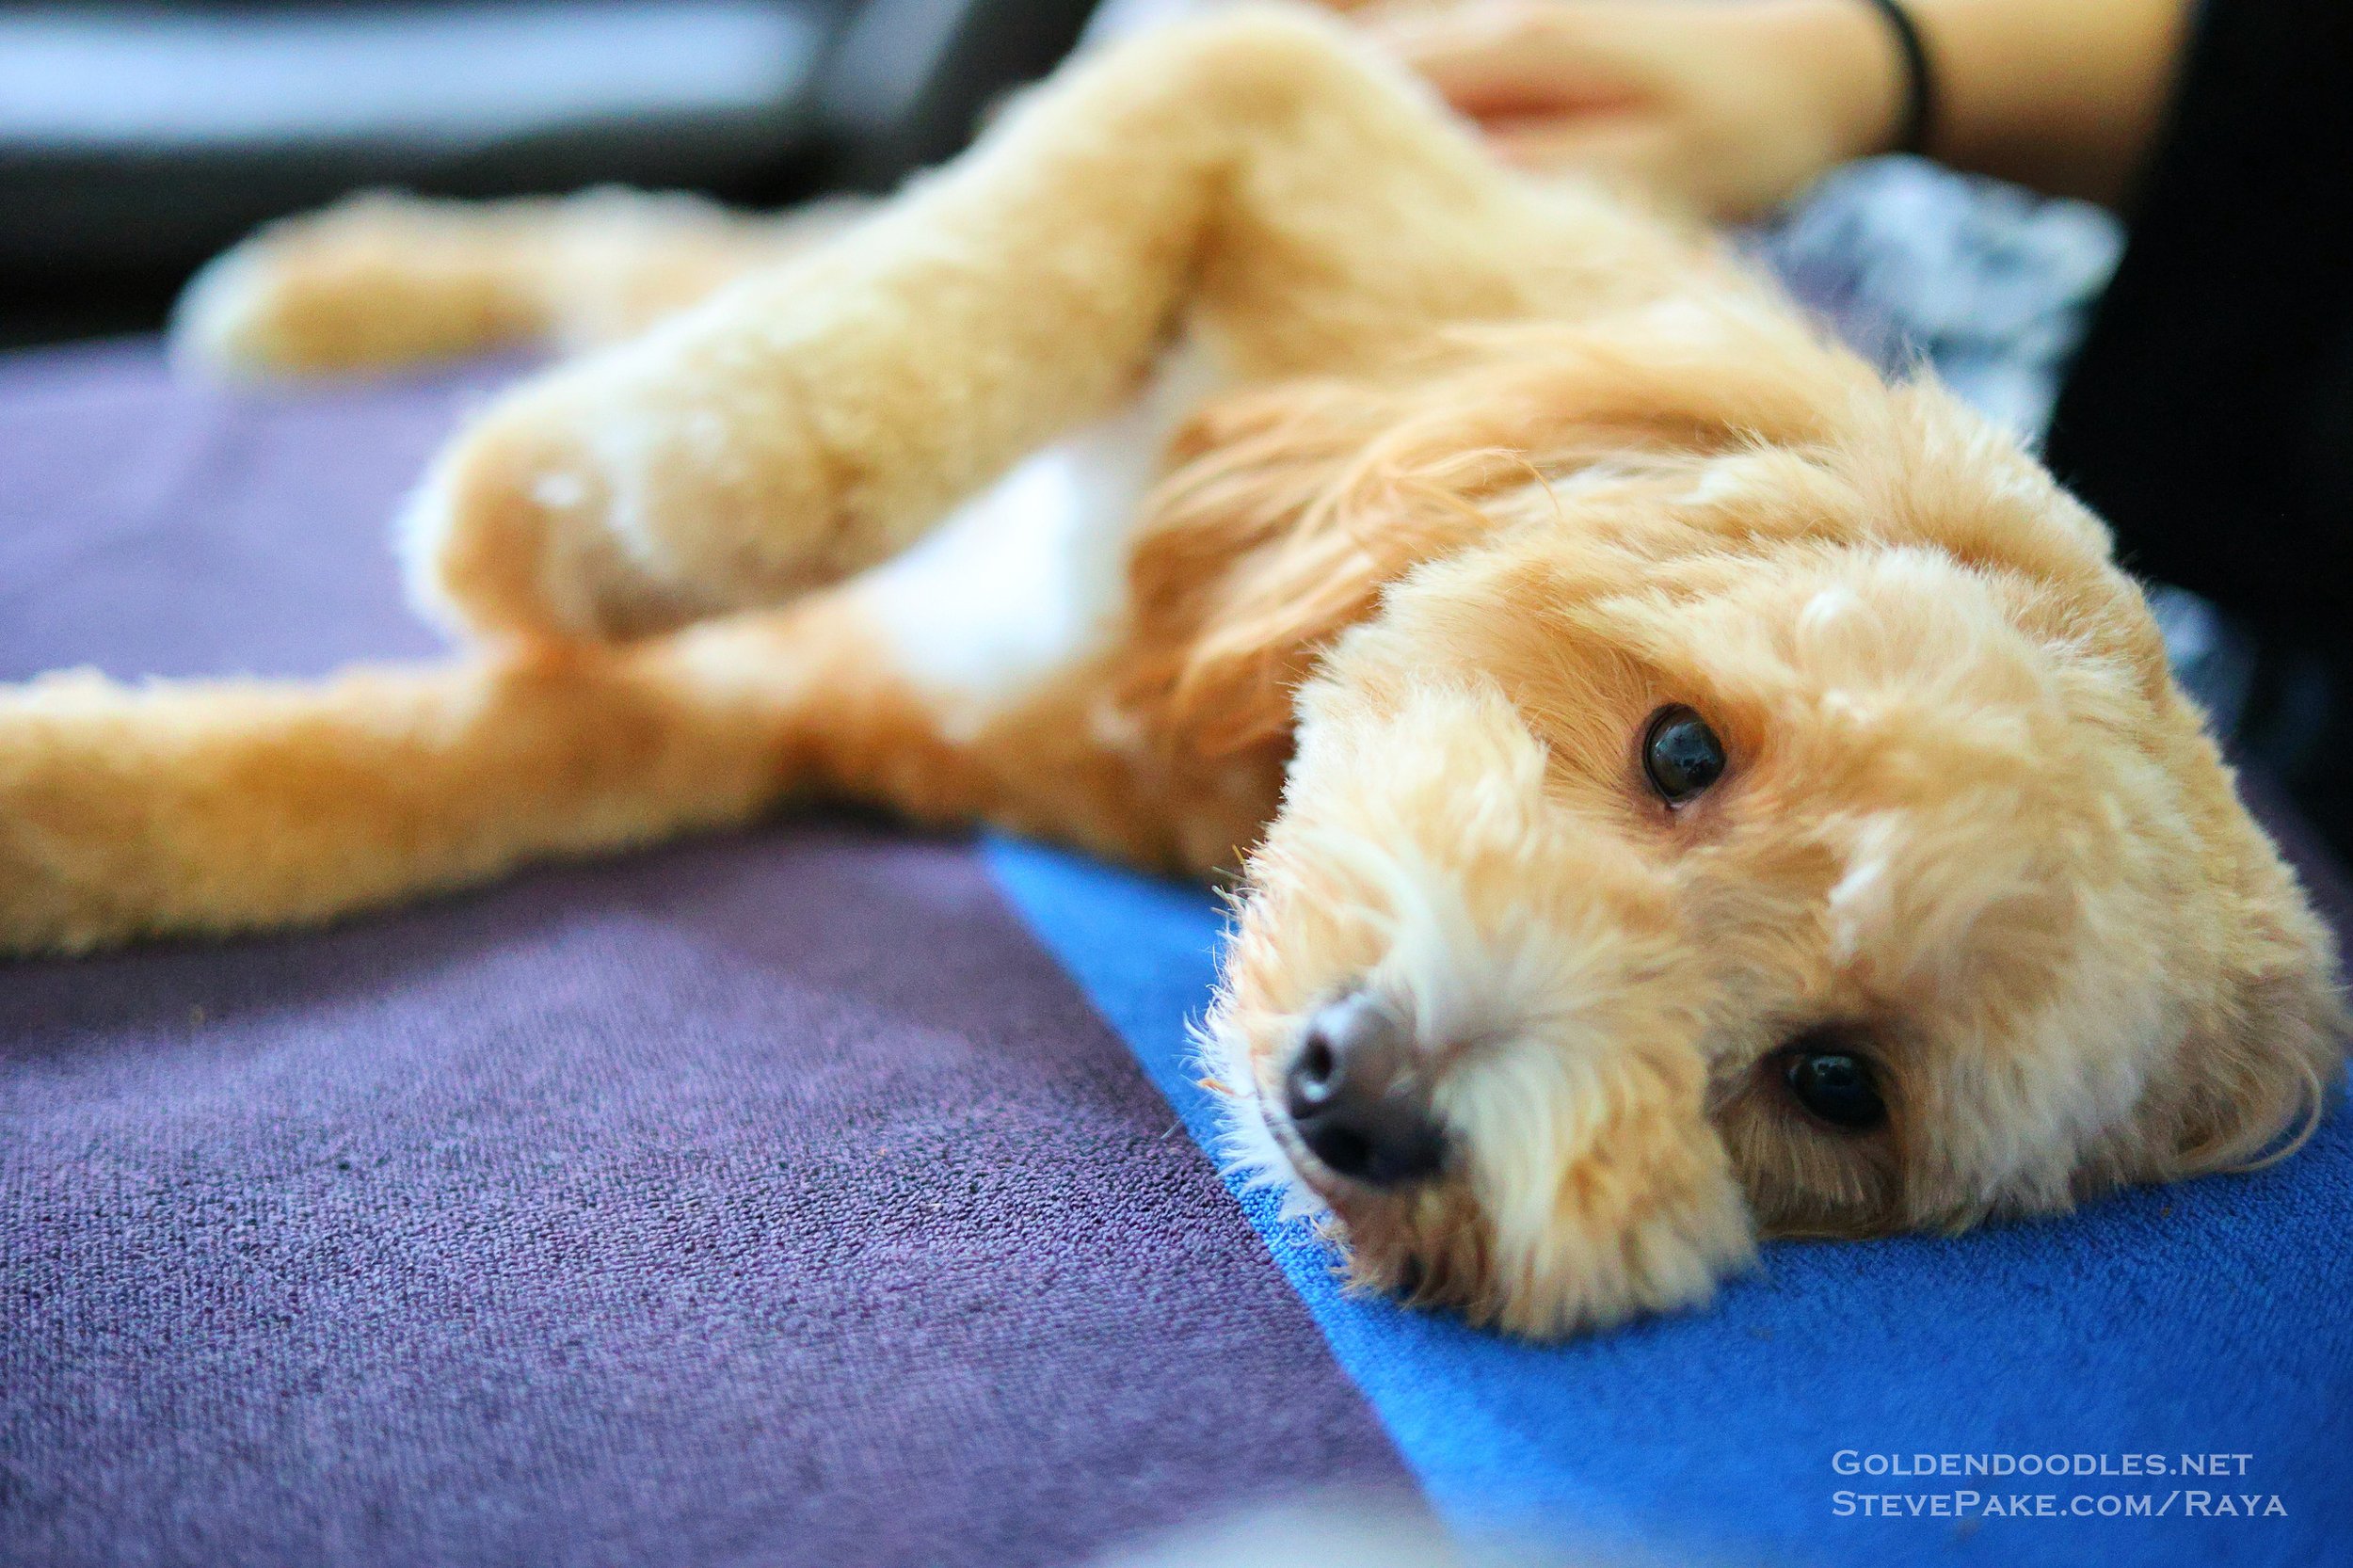
Raya’s 1st Maternity Photo Shoot
I took the outdoor photos with my Canon R6 and RF 85mm f/2 Macro lens, and then switched to the RF 50mm f/1.8 for the indoor photos. I used the articulating screen to place the camera down at ground level outside so that I could get nice angles of her without having to lay on the ground myself. I’m still using Photo Mechanic for sorting and rating, and recently have been using Radiant Photo for editing.
Normally Raya is a bit bashful after a grooming (omg I’m naked!), but she was happy to be back home from the farm and with her family after breeding, and happy to have all of her excess fur off as it was getting hot.


I hope you enjoyed this blog! Raya’s dedicated page is below, along with the main doodles page where I post photos of both her and Puffles together.

Our Second Honeymoon to Italy
As pressed for time as I tend to be on a day to day basis, I can’t not do a photography blog about our recent trip to Italy. By all means, check out the full photo albums, but here I just wanted to share the “wow” photos that I thought were the most interesting or beautiful.
As pressed for time as I tend to be on a day to day basis, I can’t not do a photography blog about our recent trip to Italy. By all means, check out the full photo albums, but here I just wanted to share the “wow” photos that I thought were the most interesting or beautiful. I’m not going to comment on settings and gear used for each photo, because honestly these are all vacation mode “f/8 and be there” type photos for the most part, that aren’t going to be beyond the realm of even the latest iPhones. Any DSLR within the past 10 years and any dual camera smartphone (iPhone 7 and up) are going to be more than good enough to get you tons of great photos, so long as you understand the basics and know how to use them, which I’ll cover at the bottom.
Firenze
We took a redeye from Washington-Dulles to Florence via Brussels, Belgium and Brussels airlines, and luckily were able to rest up enough that we were able to walk around and enjoy the city after we landed. Of course you have to swing by the Duomo in Florence, which is spectacular.
Cinque Terre
Cinque Terre is a UNESCO World Heritage site, and refers to a string of five ancient Meditteranean coastal cities along Italy’s western coast. We drove from Florence to our next hotel in La Spezia, and then took a local train that runs through Cinque Terre, since it’s not practical to access by car. Sadly, we drove right by Pisa and the famous leaning tower, but didn’t have time to stop, so we’ll have to do that on another trip someday. Cinque Terre was gorgeous and is definitely worth at least a full day stop.
Milano
I’ll be honest that we weren’t big on Milan. It’s too “modern”, when we strongly prefer the ancient towns and countrysides of Italy, but the shopping was great (for Debbie), and the Duomo was absolutely incredible. Be sure to check the bigger photo albums (Part 1) for many more interior photos, but like most things of this nature, you really just have to be there to experience it and take it all in, as even photos from a professional grade camera and lenses don’t do it justice. We went on a guided tour of the Milan Duomo, and can’t believe that it took 450 years to build. It’s incredible what they were able to build so long ago, but how do you put 450 years in perspective?
Lake Como
Lake Como is a place we’ll clearly have to visit again. It’s stunningly beautiful, but unfortunately we had bad weather the single full day we were there. That didn’t stop me from getting some great photos of the area the day we arrived, and then the morning we were leaving. Lake Como is a place that’s beautiful no matter the weather, and also incredibly quiet and peaceful, being far away from big cities. It was a great place to just unwind and relax, and enjoy the silence. We could easily spend a week here, enjoying all of the small towns and gardens, and might just do that on our next trip!
Verona
We made a quick pit stop in Verona while driving from Lake Como to Venice, and saw the Castelvecchio castle and bridge. I think the countrysides of Verona, ancient castles like this one, and possibly doing a winery tour is where it’s really at in this region.
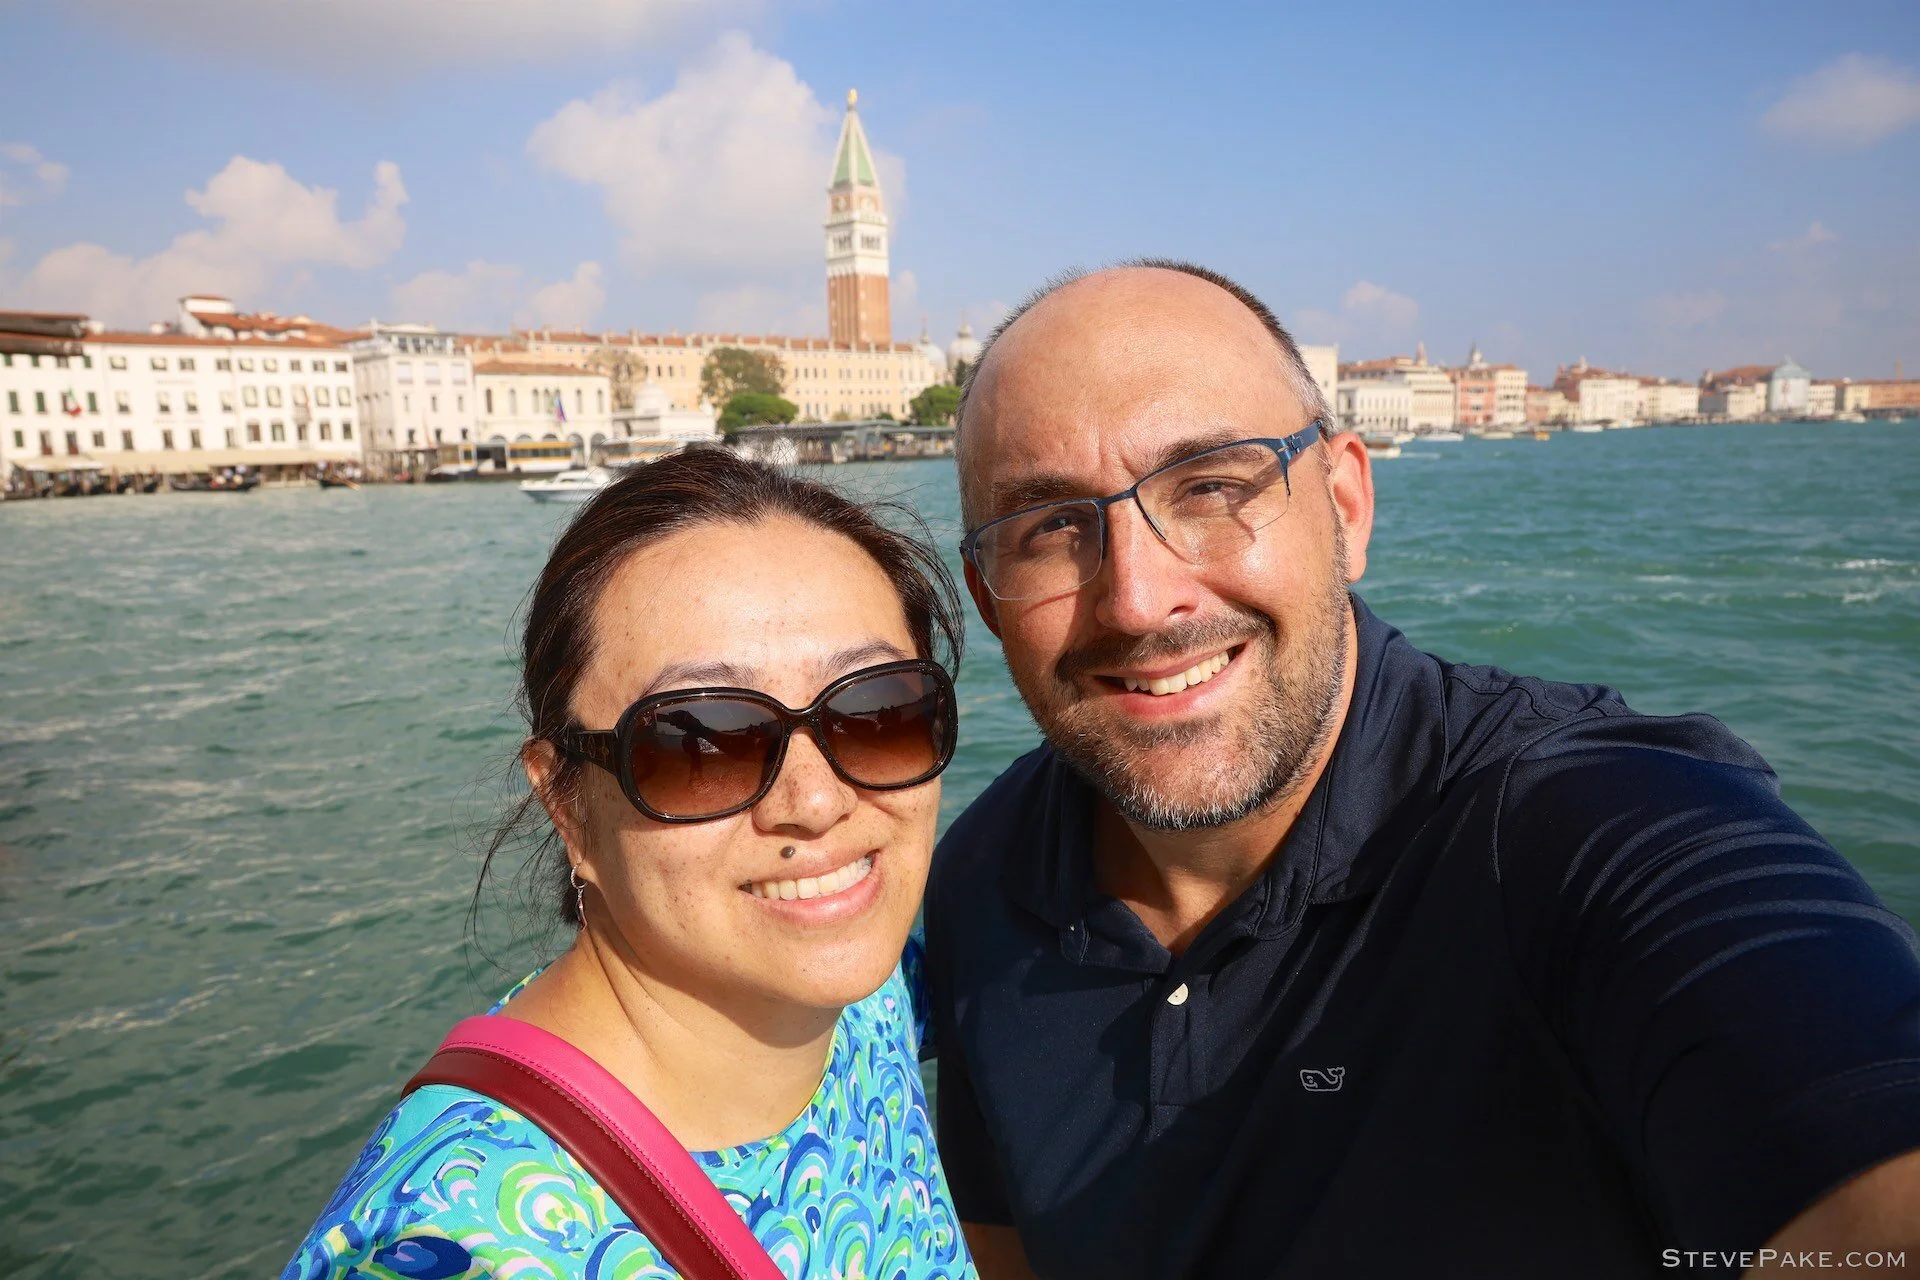
Venezia
Venice was truly stunning, and the city itself is another UNESCO World Heritage site. The art and architecture, its history, and the fact that this was all built on marshland a thousand years ago was all incredible to see and experience. As one of our tour guides pointed out, forget about seeing Venice as a “romantic” city. Venice was all about power, prestige, wealth, and greed in its day, and anything they wanted that they couldn’t get, they’d pillage from others. Venice was the first true international financial center in the world, emerging in the 9th century and peaking around the 14th. By the time new sea routes opened up around the Cape of Good Hope with the Americas, and then heading east to Asia, Venice was so wealthy that it took another three centuries for it to decline and to finally be conquered during the Napoleonic wars.
The city today is mainly just a living and breathing museum, and a big tourist trap that’s also massively in debt, but imagining all of this a thousand years ago was another mind-bender. Venice is definitely a must-see place in Italy.
Gear
Dude, it’s Italy. It’s gorgeous. You just show up and you’re going to get amazing photos just from being in such a beautiful place. I could have taken the vast majority of these photos with the cheapest DSLR camera and kit lens, and nobody would have been able to tell any difference. Any APS-C class or larger sensor DSLR or mirrorless camera from the past 10 years, and I’d say any dual-camera smartphone such as the iPhone 7 or newer, are all more than good enough. So long as you understand the basics of timing, lighting, and composition, you’re going to get great photos.
Related Blog: THE SECRETS TO GETTING GREAT PHOTOS
We’ve come a long ways in nearly 20 years of digital cameras and photography. Early digital sensors left a lot be desired compared to film, had limited resolution, and typically awful dynamic ranges and highlight renditions. I strongly preferred the look of film to even my Nikon D80, which came out in 2006, but anything made within the past 10 years is more than good enough. The reason I’d suggest a dual-camera smartphone such as an iPhone 7 or newer, if that’s you’re preferred photography tool, is because you’ll actually be able to take a normal or short telephoto shot at a reasonable resolution. With a single wide-angle camera, you end up having to crop heavily for a normal to short telephoto shot, which typically leaves you with very little resolution leftover, and a technically poor photo. Italy deserves better.
Gear really doesn’t matter these days, when most everything is so competent. Far more important than photography gear on such a trip is keeping what you’ve got powered up. Especially if using a phone that’s also sucking down navigation data as you walk around unfamiliar towns while also taking photos, a good 10,000 to 20,000 mAh class portable recharger is going to be essential. You might need to recharge your phone completely two or three times in a day if it’s doing it all! You also need a good bag to keep your belongings secured. All of your amazing photos are going to be for naught if a pick pocketer manages to make with your stuff! ThinkTank makes a lot of good stuff designed with this in mind. My Spectral 10 bag worked brilliantly. It’s been discontinued by ThinkTank, but is still available at retailers like B&H. (I make $0 on affiliate links, as this is purely a personal blog and website.)
That said, I brought my full-frame Canon EOS RP mirrorless camera, the Canon EF 17-40L ultra-wide, Canon EF 24-105L mid-zoom, and the new Canon native RF mount 35mm f/1.8 IS macro lens, along with a small Canon 220EX flash. This stuff is all total overkill for vacation photography like this, but it’s my format of choice and what I’ve got. I brought a mid-zoom rather than a telephoto, as 105mm was going to be more than long enough for most photos, and the point of this trip was to relax and have a nice time, rather than to be constantly jockeying lenses.
The biggest thing that I gain with a full-frame camera for vacation style photos is the natural vignetting (darkening of corners) that it gives the photos at medium to large apertures. I love this and feel that it gives photos a more natural and organic look, that I’d have to spend many hours recreating in post-processing otherwise. In comparison, more modern APS-C cameras and lenses are designed with more “optical perfection” in mind with less of this, but tend to deliver a flatter and more “clinical” rendering as a result that just puts me to sleep. I noticed this while going through a bunch of my older travel photos, that as good as my APS-C Canon 7D Mark II camera was and still is, I strongly preferred the “look” off of my older full-frame Canon 5D Mark II. This is why I’ve gone back to full-frame with the Canon EOS RP, as I just prefer its look better, among other things.
That’s it! I hope you enjoyed all of my Italy photos.
Check out my dedicated Italy page below, or click on the individual albums themselves at the bottom. The “Highlight” album covers our full October 2019 trip, but if you’re a foodie or want to see more, definitely check out the bigger albums that are split into two parts.


Thunder Over Dover Air Show 2019
We were so upset that we got rained out going to our hometown Andrews Air Show this year, that we drove all the way to Dover, DE for the Thunder Over Dover air show, and had a great time. We saw a lot of planes that we hadn’t seen nor even heard of before, and got to see some military demonstrations that we hadn’t ever seen either. Overall the Dover AFB Show was awesome. We look forward to going again next year!
Living in the D.C. area, we’ve greatly enjoyed the local Joint Base Andrews Air Show over the years. We’ve attended the past three previous shows in 2012, 2015, and 2017 until the inevitable finally occurred this year — we got rained out for 2019!
Related Photo Blogs:
JOINT BASE ANDREWS AIR SHOW 2015 | ANDREWS AIR SHOW 2017
The Saturday at Andrews in 2019 wasn’t great and they just barely got some of the aerial demonstrations up, but we had a schedule conflict that day and couldn’t go, and then Sunday when we could was rained out completely and the whole show was cancelled. This was truly awful for us avgeeks in the D.C. area, because we only get the Andrews air show every other year. So….. to Dover, DE we went about 2 hours away to get our air show fix this year! :)
This is the first time we’ve ever attended the Thunder Over Dover Air Show, and I think a lot of people in the D.C. area might have had the same idea as us, because we saw a lot of MD and VA plated vehicles parked in the parking lot. It was great to be able to drive right on base and park there, but we arrived a tad later than intended, and it ended up taking an hour and a half to get through the security checkpoint. Once inside though, it was a great show. The weather was couldn’t have been more perfect. It was nice out and not too hot, and the mix of clouds allowed the performers to run their high shows, made for great photography, and also helped to keep the temperatures down on the tarmac.
C-5M Super Galaxy
I’ll start with William’s favorite of the show, which was getting to see the C-5 Galaxy takeoff and land. Dover AFB serves as the home to the Air Mobility Command, so plenty of these aircraft are stationed here. This is the US Air Force’s largest transport aircraft, and one of the largest cargo aircraft in the world. To see such a huge aircraft takeoff and land in such short distances was impressive, although in reality they’ll gobble up every last bit of 10,000 foot runways carrying heavy loads to and from all parts of the world.
Photos best viewed on a desktop.
The C-5M “Super Galaxy” aircraft now in service all have upgraded GE CF6-80C2 engines that are derated to about 50,000 lbs of thrust each, because of structural limitations of the aircraft. The 43,000 lb thrust TF39 engines that originally powered the C-5 Galaxy were revolutionary in the 1960’s, and were the first high-powered high-bypass turbofan engine ever developed. Considering that the smokey and inefficient turbojet and earlier low-bypass turbofan engines that were powering many airliners at the time typically had a maximum thrust of under 20,000 lbs, and sometimes required water injection systems for takeoff, you can see how an engine cranking out over double the thrust was quite revolutionary indeed, and enabled such a huge aerial lift capability. The TF39 was developed into the civilian CF6 engine, which has found its way into many of the commercial airliners in service today, and which is now used on the C-5M Galaxy itself.
The much more modern GE CF6-80C2 that powers the C-5M Galaxy today. So modern, powerful, quiet, and efficient. In other words, booooooring! :)
The only thing that’s not so modern about the TF39 today is that it’s LOUD, and sounds like it’s ripping the sky to shreds. It’s quite a thing to hear! Pretty much all turbojet and turbofan back then were like this, leading to the far quieter jet engines we have today because of FAA noise regulations.
The modern CF6 engine is much more powerful and efficient, and so much quieter that you can’t even hear the aircraft in the pattern any more. It was a regular sound over Dover for years to hear TF39 powered Galaxies that sounded like they were tearing the sky in half. So the Galaxy is far more impressive than it ever was before, but doesn’t sound like it’s ripping the sky to shreds like it used to, so feels like a part of it is missing in a way! Lol!
No worries. There’s YouTube (headphone user warning!)
The Jet Waco
By far the most impressive aerial demonstration was the “Jet Waco”, which is a 1929 replica bi-plane, dual-powered by both a Pratt & Whitney R-985 radial piston engine delivering about 1500lbs of thrust, and then a GE J85 turbojet engine with about 3000 lbs of thrust!! The aircraft and everything it can do is such an assault on your senses and expectations. You see and hear a little bi-plane zipping around, and the next thing you know you hear the roaring of its turbojet engine being firewalled, and the aircraft accelerating into a straight vertical climb! It’s truly incredible to both see and hear, and really boggles the mind!
YouTube: Jack Links jet WACO "Screamin' Sasquatch" - Oshkosh 2017 - Thursday
MiG-17F
We’d also never seen a MiG-17 fly before either, which was another truly impressive flight demonstration. This was the first generation of fighter aircraft to have an afterburner, which always makes for a great air display! Despite what you might think with its swept wing design and its afterburning engine, the MiG-17 was not yet a supersonic aircraft, but merely transsonic, as the “all flying tail” needed for supersonic flight wasn’t implemented until the fully supersonic MiG-19. So the MiG-17 could approach Mach 1, but couldn’t exceed it because the aerodynamics to allow this hadn’t yet been fully sorted. But the afterburning engine definitely allowed it to accelerate and climb much more quickly, which is what made it a menace to its adversaries.
The MiG-17 proved to be effective against Vietnam era U.S. fighters such as the F-105 Thunderchief, and the F-4 Phantom II, and it’s easy to see why. American fighters may have been Mach -2 class and faster, but dogfights never happen at those speeds. The MiG-17 was far more maneuverable at the subsonic speeds where they do, and was able to down more than a few U.S. aircraft and pilots.
The MiG-17 delivered some great high speed passes, along with tight turns and steep climbs, which was amazing to see of an aircraft that’s around 60 years old!
We got to meet Loco!
Another great highlight of the Dover Air Show was actually getting to meet and shake hands with “Loco”. Maybe we just always missed them, but I never recall the demo pilots walking by the flight line to say hello to people at the Andrews Air Shows. I recognized Major Paul “Loco” Lopez immediately when he came by as the F-22 Raptor Demonstration Team pilot, and made sure to get a photo of him with William.
YouTube: U.S. Air Force: Maj Paul Lopez II, F-22 Pilot
There’s a truly amazing avgeek community on Instagram, and these guys are all on there. Follow Loco at @f22demoteam on Instagram.
By the time “Loco” was in the air with the Raptor, William had tired out after walking and standing around all day and wanted to head back to our car, so we made the long trek back down the runway where our car was parked. I got a nice takeoff roll shot of Loco and the Raptor, but was far away from show center, but still managed to get some nice photos. At one point Loco banked the Raptor into a hard left turn over all of the parked cars, probably in full military power, and set off a zillion car alarms! Lol!
Heritage Flight
As you might have guessed, I’m a bit of an avgeek. Although not a pilot myself, as an engineer I have a very deep appreciation for the engineering that goes into aircraft both old and new, love reading all about them, and having a little flight sim fun when I have time, which is not often these days. So of course I love the Heritage Flight, featuring the North American P-51 Mustang with its glorious Rolls-Royce Merlin V-12 engine, and the Lockheed F-22 Raptor. The most elite of both old and new. It actually takes a lot of training to be able to fly such dissimilar aircraft in close formation like this. Everything is an art in aviation, which is another thing I love about it all.
Without further adieu, here’s a few snaps of the Thunder Over Dover Heritage Flight.
We Loved Thunder Over Dover!
All in all, Thunder Over Dover was a great show, and I think we’ll definitely be back next year, especially since our closer to home Andrews Air Show is only every other year and the next won’t be until 2021. That’s much too long for us!
Here’s some additional random cool photos.
The cockpit of the F-15E Strike Eagle
F-15 Strike Eagle on the tarmac
The business end of the Eagle’s Pratt & Whitney F100 engines.
The C-17A Globemaster III, another of which performed an aerial display.
“Panchito” the B-25 Mitchell.
MQ-9 Reaper drone
William’s favorite, the A-10C Warthog, for all of the “freedom” it can deliver!
This hawg has seen some action.
GAU-8: “BRRRRRRRRT!”
The F-16 Viper, the aircraft that most resembles William. Small, lightweight, super fast and agile, but very little fuel tank!
The B-52H Stratofortress!
Speaking of old school engines, the B-52 still languishes today with ancient 1950’s technology Pratt & Whitney JT3D turbofan engines. There’s been several failed attempts to upgrade the B-52’s engines to something a bit more modern, but haven’t worked out due to flawed studies or schemes.
Another C-5M Super Galaxy with cargo doors open.
An A-10 Warthog on a takeoff roll.
We got a flyby of two Hawgs, but no demo. There is actually an A-10 Demonstration Team and a certified pilot, but we haven’t managed to see it yet.
“Panchito” on taxi.
Black Daggers Parachute Team
Matt Younkin Beech 18 Aerobatics was very impressive!
Brent Handy and Todd Farrell 2-ship Pitts Aerobatics was amazing too!
C-17A demonstration lining up for takeoff.
The C-17 demonstrating a tactical departure, climbing as quickly as possible to escape small-arms fire.
The C-17 did a figure-8 around the field, demonstrated a missed approach and go-around, and then came in for a landing.
As the F-22 and P-51 Heritage Flight was winding down, we beat the rush out and got on the road, and made it down to Rehoboth Beach, DE 45 mintues away just in time to grab the next to last table at our all time favorite, Henlopen City Oyster House, followed by a little outlet shopping.
Photography Gear Chat
Okay, so no photography blog would be complete without at least a little gear chat, so here we go.
I brought my full-frame Canon EOS RP mirrorless camera, just because. I’d never shot it at an airshow before, so had no idea how well it would do and wanted to try. For lenses, the obvious, I brought my Canon 100-400mm L II lens for the telephoto zoom (my wrist was finally feeling up for it), and then the Canon 17-40mm f/4L ultra-wide lens. I also brought my Fuji X100F as a secondary camera, which came in handy!
Fuji X100F, Canon 17-40L ultra-wide, and the Canon 100-400mm L II lens attached to the tiny EOS RP!
If you’re shooting the popular Canon 100-400mm lenses in either variant, full-frame is definitely the correct choice for air shows. The reason is because the 1.6x multiplication factor of crop frame cameras, like my excellent Canon 7D Mark II, makes the 160mm equivalent view too long at the widest end of the lens. 160-640mm equivalent on a crop frame sounds awesome, except 640mm is total overkill much of the time, and you’ll commonly need wider than 160mm. 100-400mm works more naturally, and you can always crop from 400mm if something was a bit further away.
I’ll give the EOS RP a mixed review for air shows.
It got the job done, but…. The biggest issue I had with the RP wasn’t insufficient reach with the 100-400L II or inaccurate autofocus, but rather the very slight delay in bringing the electronic viewfinder picture back up as you’re bursting photos as aircraft are zipping by. It definitely made smooth tracking of aircraft difficult, which is especially important when tracking propeller driven aircraft, and using a slower shutter speed to get enough prop blur. Tracking is much easier with a DSLR and its ground glass viewfinder, because as soon as the shutter re-opens you have an instant real-time look at whatever you’re tracking right through the lens, without any electronics getting in the way.
So between a DSLR and a mirrorless camera, I’d definitely prefer a DSLR for tracking aircraft at an airshow, or my dog zipping around where I’ve had the same issues. But for an airshow with the 100-400L lens where you already have plenty of reach, I’d prefer full-frame over a crop-body where I won’t have issues with 160mm equivalent at the widest on a crop frame camera being an issue when aircraft are closer. As long as you have 20-30MP resolution or more on a full-frame, you can always crop as needed to recover the “reach” that you don’t have with a full-frame vs. a 1.6x crop frame, but you can’t back up or go wider when you’re too close.
Thus, the best camera for airshows is one that I don’t have - the Canon 5D Mark IV full-frame DSLR. Between my full-frame RP mirrorless and my crop-frame 7D Mark II DSLR, it’s a tough call, but I guess I prefer the RP very slightly. The RP’s 5 fps frame rate was more than enough, and I actually took a manageable number of photos this year — only around 1700! Yeah, you can turn it down, but with the 7D Mark II it’s all too tempting to machine gun away at the full 10 fps frame rate, and I’ve ended up with over 3000 photos to go through, which I don’t have time to do!
One pro-tip on the RP for air shows. Don’t bother with the 1.6x crop mode in camera for the long shots. Just shoot at full-frame and 400mm or whatever your longest is, and crop in post when needed. What will happen is that you’ll switch to 1.6x crop mode for a longer photo, but in the blink of an eye aircraft will be coming right back before you have a chance to switch back to full-frame, and you’ll end up at 120mm in 1.6x crop mode and getting only a 10MP photo, whereas if you were in full-frame mode you could have shot at around 200mm and gotten the full 26MP on the RP. So I wouldn’t bother with the crop mode on the RP for things like this.
One thing I wondered about the EOS RP is how the tiny little battery would do driving the much bigger AF motors in the 100-400L II lens, and it did fine. I shot for most of the day and went through one full battery, and then only about one-third of another, so no worries. My 7D Mark II chews through much larger batteries much faster at airshows, but clearly that’s more because of machine-gunning at 10 fps and having double the number of pixels to process, the crazy autofocus system in that camera, and less because of the power demands of the lens. At the 2017 Andrews Air Show, I had gone through two full EN-EL6 batteries and was onto my third, but had also shot double the number of photos because of the ridiculous frame rate of the camera. Another pro-tip. 10 fps is total overkill for air shows. You can turn it down to 5-7 fps and you’ll be just fine and won’t miss anything, unless you’re trying to get that absolutely perfect “crossing” shot, in which case yes, keep it cranked up all the way. Otherwise anything around 5-7 fps is more than enough for us mere mortals.
And that’s a wrap! I hope you enjoyed the blog. We hope to go again next year.
Be sure to check out the full albums below.
StevePake.com
Why You Should Shoot Fast Prime Lenses at the Beach
When it comes to crowded summer beaches with zillions of people, there’s nothing better than fast prime lenses to help keep your photos focused on your subjects, and not on other beachgoers! Beach photography with my Canon EOS RP and Canon 35mm f/1.4L and 135mm f/2L lenses.
The dynamic duo back in their natural element, the Canon 35mm f/1.4L and 135mm f/2L lenses on a proper full-frame camera, the Canon EOS RP.
Now that I’m back to shooting full-frame with the Canon EOS RP mirrorless camera, I’m overjoyed that all of my lenses make sense again, and especially my Canon 35mm f/1.4L and 135mm f/2L fast primes. I adored these lenses on my old full-frame Canon 5D Mark II, but as digital rot set in on those bodies, I longed for something newer and with a zipper frame rate and autofocus. I found that the successor 5D Mark III was just too much money for a professional non-professional enthusiast level photographer, and that the new full-frame Canon 6D (Mk I at the time) seemed like more of a side-grade or even a step down in various respects versus my 5D2, so I went with the crop frame APS-C 7D Mark II instead (and don’t ask me about Canon’s model naming convention). The 7D2 was and still is a brilliant camera, and probably one of the most well-rounded cameras I’ve ever owned with its much more modern tech, crazy fast autofocus system, and blazing fast 10 fps frame rate. I loved everything about it and still have it, except that it’s just not a full-frame camera. My high-end lenses didn’t work as they should, and it just doesn’t deliver the “look” that a full-frame camera does.
Canon EOS RP with 35mm f/1.4L at f/1.4, 1/4000s, ISO 50 at 2PM at the beach. Check out the natural vignetting. I love it and it gives a much more “organic” look than the totally flat rendering that you’d get with a crop-frame camera.
I can and do walk around all day with a wide-normal prime lens like the 35mm f/1.4L, which is why the Fuji X100F with its built-in 23mm f/2 lens and a 34.5mm equivalent focal length is such a great fit for me. But that 35mm lens on a crop-frame camera suddenly becomes a 56mm equivalent, which just feels awkward to me. The 135mm f/2L is a brilliant medium telephoto lens on a full-frame camera, but becomes too long most of the time at 216mm equivalent on an APS-C. In addition to the crop frame equivalent focal lengths ending up being awkward, given that you’re only utilizing the center of the image circles of these lenses on a crop frame camera, you lose all of the glorious vignetting that really adds character and another dimension to your photos that you get when shooting with them on a full-frame camera. As brilliant of a camera as I’ve found my 7D Mark II to be, it’s always had a very flat and dull image rendering that I found lacking, and it’s entirely due to the format.
Some people will think I’m crazy or old-fashioned, but I love all of the vignetting and distortions of the “older” lenses that were originally designed back in the film era when shot on full-frame cameras, and feel that modern lenses are over-corrected. A lot of people disagree with that blog, but I don’t, almost wanted to scream from my rooftop when I first read it because I thought I was the only one, so I really don’t care what other people might think or how many times its been “debunked” on the Internets. I’ve always found it crazy that people spend thousands of dollars on the latest over-corrected lenses, just to add things like vignetting and various distortions back in in post-processing! How crazy is that? My “old” full-frame lenses do that all by themselves, and if you don’t like it just stop down a bit. There’s definitely some niche areas of photography where the latest and greatest super corrected modern lenses can help you and might make more sense, but for the most part I think it’s just splitting hairs or pixel peeping, and I’m quite happy with my old film era designed lenses.
Enough Gear Talk, The Beach!
Related: TURKS AND CAICOS WITH MY NEW CANON EOS RP
Anyways, this is about the beach. I’ve already been to the beach with the Canon EOS RP, but that was to Turks and Caicos with my 17-40mm f/4L ultra-wide and 70-200mm f/4L telephoto zoom lenses, and places where there weren’t going to be a million people. Rehoboth Beach, Delaware in the summer after schools have just gotten out is a very different place, and the thing that’s always irked me about trying to get good photos of my kids at the beach is just how many people always end up being in the background of my photos. Without fail, whenever I manage to get a really awesome shot of my kids, either there’s some hot girl in a bikini in the background and I get slapped on the shoulder by my wife and accused of actually trying to take a photo of the girl (it’s happened!), or something closer to the exact opposite of that. Either way, crowded beach photography can be a total pain in the ***!
135L at f/2.5, 1/2500s, and ISO 50
You’re never going to be able to frame your subject at a crowded beach such that there’s nothing distracting in the background, and cropping isn’t always an option either. The solution is to just shoot a fast prime lens, keep your kids in focus, and then yank whatever else is out there as far out of focus as possible. You can do this with a 70-200mm f/2.8 zoom also, but those are massive hulking lenses that are a pain to lug around. Something like the Canon 135mm f/2L lens is a fraction of the size and weight, so much more fun to shoot with, and you get a stop of additional speed and subject isolating ability with it.
Yes, you can shoot fast primes at the beach, and no you don’t necessarily need an ND filter. With my old Canon 5D Mark II, this was a piece of cake. You could drop it down into its special ISO 50 mode, and then with a top shutter speed of 1/8000s you could practically shoot at f/1.4 in broad daylight at the beach. That was always a little overkill, and shooting at f/1.4 while keeping a dynamic and moving subject in focus at all was virtually impossible, so f/2 to f/3.2 or so tends to be the sweet spot. The Canon EOS RP has a top shutter speed of 1/4000s, so not quite as good as the top cameras, but it still has a trick ISO 50 mode so I had no trouble shooting at large apertures at all. One of my old Nikon cameras used to have a base ISO of 200, and a top shutter speed of only 1/4000s. That’s where you’ll struggle and really need an ND filter in bright conditions if you’re trying to shoot at large apertures, but as long as your camera can do at least a 1/4000s shutter speed with a base ISO of 100, you should be good most of the time to shoot in the f/2 range.
I’ll just let the results speak for themselves, and say that even in restaurants I find something like the 35mm f/1.4L to be amazing with its ability to yank other tables and parties in the background so far out of focus that you don’t even know that they’re there.
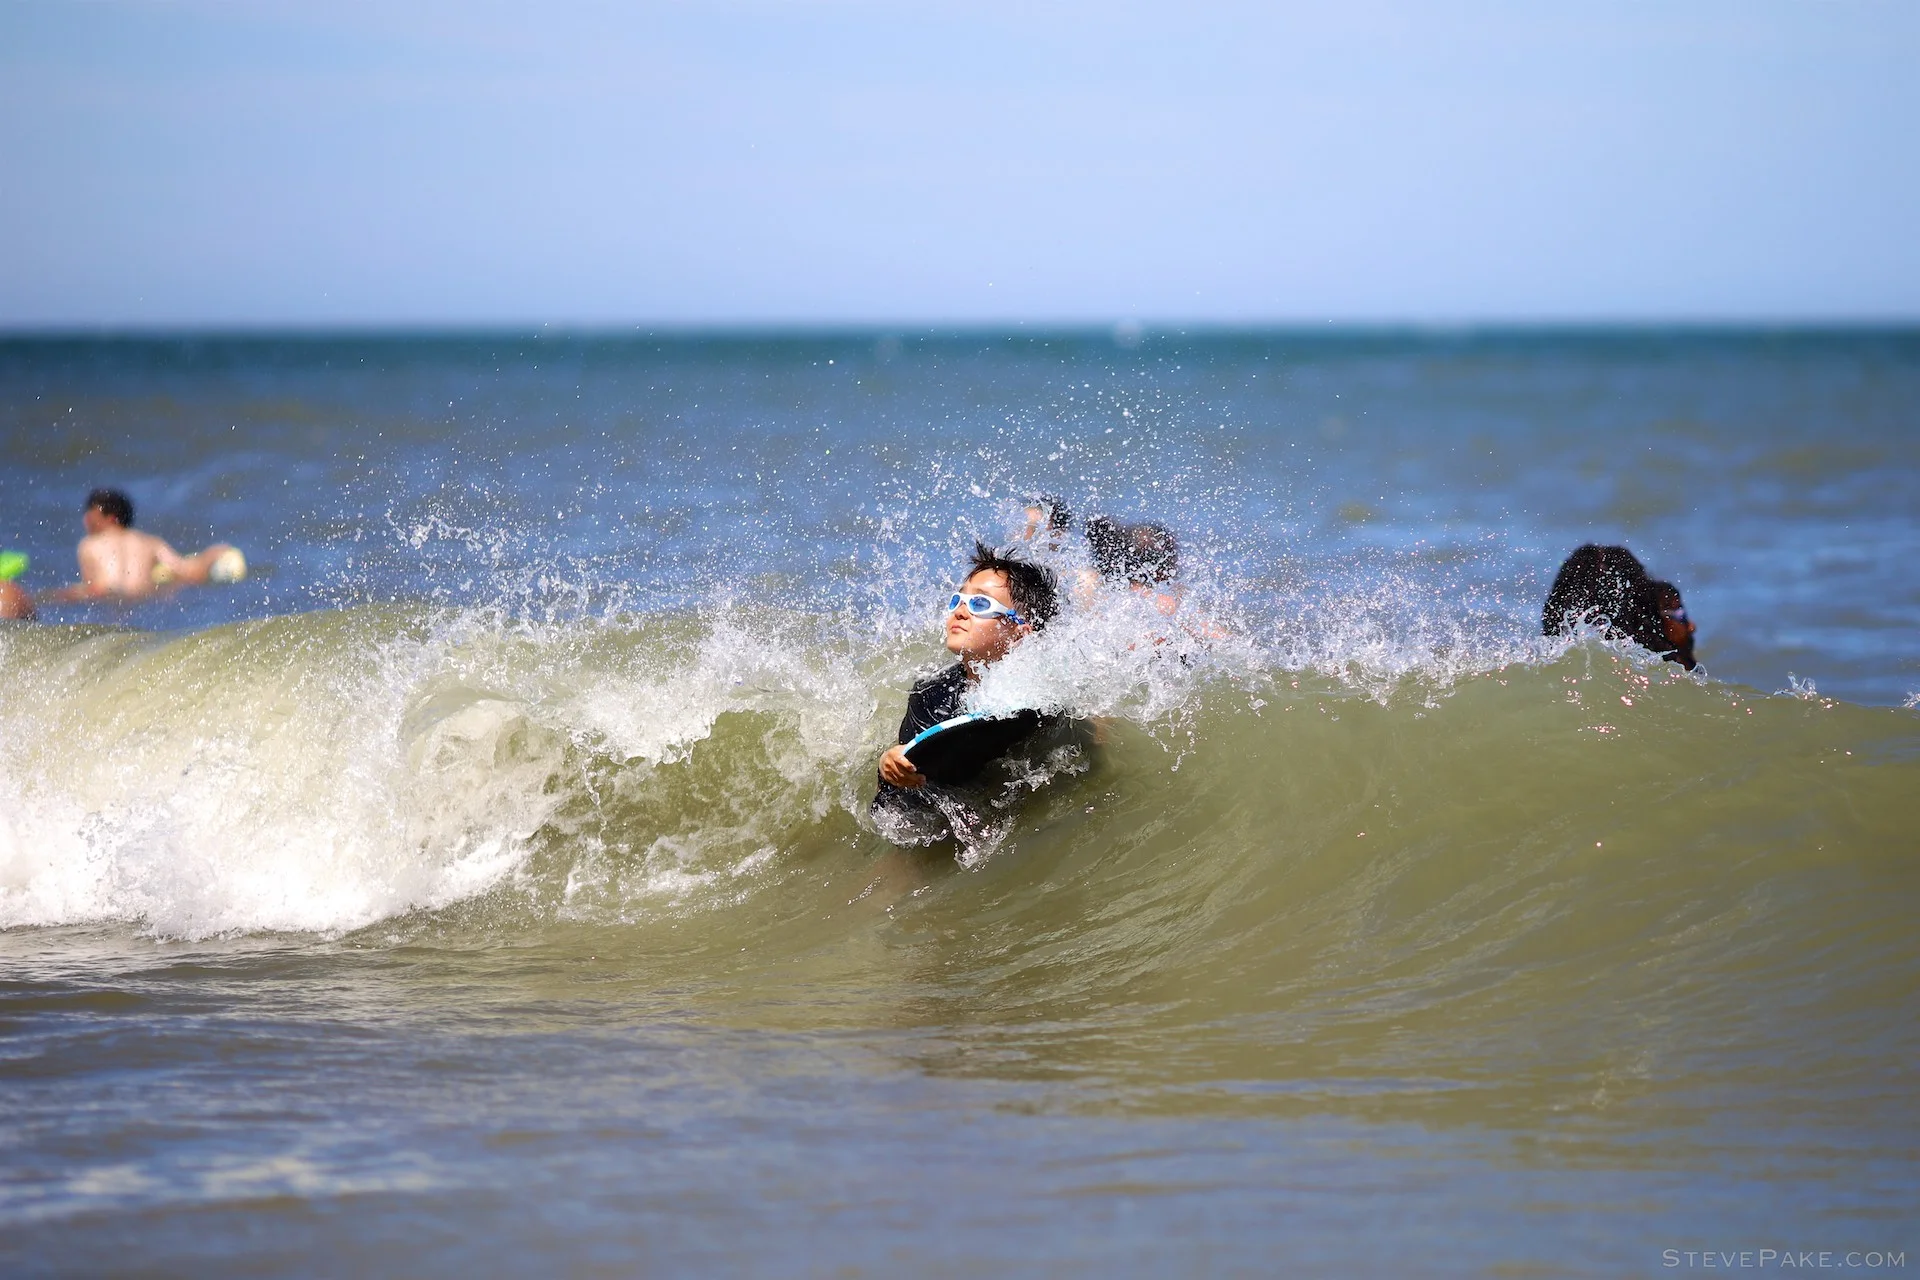
William Hits The Waves
This series of photos were all taken with the Canon 135mm f/2L lens, which is one of Canon’s classics and very best, and at least to my eyes these photos all have one thing in common. They’re not distracting at all and keep your eyes focused on the subject, despite having potentially distracting elements in the background. The other beach goers in the background are far enough out of focus that your eyes aren’t drawn towards them, and the natural vignetting of the lens shot at or near full aperture further helps to center your eyes on the proper subject.
135L at f/2, 1/2500s, ISO 50. If my camera only had a base ISO of 100, the needed shutter speed for this photo would have been 1/5000s, above the top shutter speed, so I’d have had to stop down to about f/2.2. Big deal. For the most part I was okay without the special ISO 50 mode, but it was handy to have for situations like this and not have to dork around with ND filters.
135L at f/2, 1/2000s, ISO 50.
135L at f/2, 1/2000s, ISO 50.
135L at f/2, 1/2000s, ISO 50
135L at f/2.8, 1/2000s, ISO 50
135L at f/2.8, 1/2000s, ISO 50, cropped. You can always shoot at 135mm and crop a bit if needed, but if you’re already at 216mm equivalent on a crop-frame with this lens, it’s often already too long and you can’t make it wider! The 85mm f/1.8 is a better option for crop-frame cameras.
The depth of field is so thin with an f/2 medium telephoto lens that just your subject ends up being the only thing in focus, and everything else just melts away. It’s glorious! And this little 135mm f/2L lens is a joy to take anywhere, and isn’t a hulking beast like the 70-200mm f/2.8 lenses which are a stop slower. I used to own a Nikon 70-200mm f/2.8 VR lens when I shot Nikon. It was a glorious lens, except it was so big and heavy that I never wanted to take it anywhere! The 135mm f/2L is so small and light in comparison.
35L at f/2.8, 1/2000s, ISO 100.
35L selfie at f/3.5, 1/2000s, ISO 100.
The Rehoboth Beach Father’s Day 5K
The auto eyeball grabbing autofocus system in the EOS RP is good enough that I can hand my wife or kids the camera with one of these lenses on it, and it’ll generally be smart enough to grab focus on the proper subject. I had her take a few of us with the 35L lens, and then swapped the camera over to the 135L so that she could get race photos of us coming in to the finish line.
35L at f/1.6
35L at f/3.2
The 135mm f/2L prime is super handy for my wife! I don’t know why she does this, but she’s just so used to her iPhones after all these years, that she no longer understands zoom lenses. As many times as I’ve told her to ZOOM IN with any of my zoom lenses, she’ll burst a hundred photos of one of us at the wide end of a lens while we’re still a mile away and just a tiny spec in the viewfinder, leading to totally useless photos. With the 135mm f/2L prime, she’s PRE-ZOOMED and cannot “zoom out”, and was finally able get some nice race photos of us! :)
The Hulk coming into the finish! I ran the 5K in a 30:24 which is pretty freaking good for this hulking 6’3” 270lb giant who still suffers from post-cancer chronic fatigue issues!
William is 10 and ran a 28:05. He’ll be going out for track in middle school, which is why I’m holding onto my Canon 7D Mark II and Canon 100-400L II lens. :)
Banner tow plane at 135mm and f/2. What you’re seeing here is the natural vignetting of the lens.
Sand castles at 135mm and f/2.
ROWR!!!! Here’s the one hot babe I can photograph at the beach and not get in trouble for! 135mm f/2L at 1/3200s, ISO 50, and f/2. Yes, there’s people in the background here on both sides who may or may not have been distracting in some way, but there’s so far out of focus that you almost don’t even realize they’re there, which is why you want to shoot these lenses at the beach.
Dinner Time
Our fav! Henlopen City Oyster House in Rehoboth Beach is so good that we’ve come here during the off season just to eat here. Yes, it’s that good. See the full album for food photos.
Father’s Day. Slight boo-boo. There wasn’t quite enough depth of field here with the 35L at f/2 to keep Katie in focus. Oops! You definitely need more shot discipline when shooting full-frame, but it’s worth it. f/2.8 probably would have done the trick.
The 35L at f/2.
35L at f/2
35L at f/2
35L at f/2
Evening Stroll on the Boardwalk
Moonrise with the 135L at f/4, 1/160s, and ISO 250.
35L at f/1.6 - the other guy in the background is already falling well out of focus.
Morning Catch on the Beach
135L at f/2.5, 1/2500s, ISO 100.
135L at f/2, 1/2000s, ISO 100.
35L at f/2, 1/2500s, ISO 50
35L at f/3.2, 1/2500s, ISO 50, +1.33EV and then pushed in post. I was trying to see how well the Canon EOS RP would do with a contre jour type backlit photo, and the answer is not nearly as well as my Fuji X100F, although I probably could have exposed it better.
Fess up to the f*ck up. 35L selfie and even at f/4 William is way too far out of focus. LOL. You can definitely get away with sloppy technique much better on APS-C. Full-frame is much less forgiving.
35L at f/8
35L at f/8
35L at 1/4000s and f/2
135L at f/2, and the people in the foreground are melted out of focus. Some people might dislike it or find it distracting, but I took an identical shot at f/8 and much preferred this one.
135L at f/2.2, 1/3200s and ISO 100.
Fess up to the f*ck up. This is the ONE photo I took with my 17-40mm f/4L ultra-wide, the family selfie before leaving, and of course I messed it up. Somehow the lens got bumped from autofocus to manual focus mode, and didn’t focus properly. Oh well.
Versus the Fuji X100F
Related blog: IS THAT A LEICA? TRIAL BY FIRE WITH THE FUJI X100F AT REHOBOTH BEACH, DE
I’ve previously brought just my Fuji X100F to Rehoboth Beach, and I know it’s a totally apples to orange comparison, but I still like both cameras for various things. The Fuji has killer flash capabilities with its virtually unlimited flash sync speed, you can do some pretty neat tricks with the built-in 3-stop ND filter which is switchable at the push of a button. It’s also the best food camera I’ve ever had with its close focus ability and ease of fitting on a crammed dinner table. It also looks cool in nice restaurants. That said, I still prefer Canon colors a lot more in comparison to the Fuji’s “fun house” like color palette. And of course, the fixed wide-normal lens on the Fuji isn’t going to get cool photos of my kids riding the waves.
The Fuji X100 line is a master of its own universe and fills a nice niche for photogs with the know-how when they just want to relax and shoot more casually, but it won’t ever replace a full camera system. It’s a great compliment to an existing system, or as photo blogger Ken Rockwell has described, the pro’s fun camera. I’ve thought of selling my Fuji X100F to help fund some more Canon RF mount lenses, but it serves its purpose well and I’ll continue to use and enjoy it.
The Basics Are All You Need
Related: THE SECRETS TO GETTING GREAT PHOTOS
As I wrote in the above blog, The Secrets To Getting Great Photos, you don’t need to have dropped tons of money on super high end lenses to get great photos, but you do need the right tools for the job. I have and shoot the best because photography is a great hobby for me and something that I love to do, but you can get very much the same photos with lenses like Canon’s 50mm f/1.8 and 85mm f/1.8 lenses. The 50mm f/1.8 prime lens* for $125 will serve as a nice short telephoto lens on an APS-C crop-frame camera, and the 85mm f/1.8 for just $349* on rebate at B&H is a steal, and will provide the same medium telephoto view on a crop frame camera like my 7D Mark II or a Rebel as the 135mm f/2L does on a full frame. It doesn’t quite have the “magic” of the 135L on a full-frame camera, but believe me when I say it’ll deliver a helluva lot better results than most crappy zoom lenses. The Canon 40mm f/2.8 “pancake” lens is a handy little lens also, but since I was already bringing the 35mm f/1.4L on this trip, it was redundant and stayed at home.
* Note that my website is entirely personal and non-commercial, and paid for out of my own pocket. I make nada dollars selling anything and don’t have affiliate links anywhere. This is purely free and personal photography advice from “that dad” at the beach, so take it for what it’s worth, but you can’t go wrong with lenses like these. They’re absolute gems, and way better than the zillions of boring slow f/5.6 zooms out there which often cost MORE money!
Related: PETE & MARNIE - OCTOBER 2015
I did a sort of post-wedding engagement shoot of my friends Pete and Marnie, which I guess is the last pro-style photo shoot I’ve done, and I used my two Canon 5D Mark II cameras with these same 35L and 135L prime lenses. Their rendering is amazing and timeless, and anybody who says otherwise is nuts!
Anyways, I hope you enjoyed this blog and some of our beach photos. You can check out the full albums below. I split the beach photos and our 5K race photos into two different albums. We’ll be going to Virginia Beach later in the summer where I’ll again bring these two lenses, but add my Canon 100-400mm L II lens to the bag, as there’s a lot more distance shooting opportunities at that beach with the long sand bar.
Drop me a line if you want to talk about photography at all via the contact button below.
We made our annual trip to Rehoboth Beach, DE for Father's Day. The weather was perfect and we all had a great time after schools had just gotten out. William and I also ran the Father’s Day 5K race (see other album), and then celebrated by stuffing our faces with all of the delicious food at Rehoboth Beach, and of course had some fun at Funland! All in all a great trip, and a great start to the summer! :)
William and I ran the Seashore Striders Rehoboth Beach Father’s Day 5K for the second year in a row, and this is our third timed race together. William (10) did great and set a new personal best of 28:05, and I ran a very solid 30:27. We were both really happy with our results, and then proceeded to stuff our faces with all of the delicious food at Rehoboth Beach. We’re going to keep training through the summer for some fall faces to stay on top of our game. :)
Enjoy!
Steve

Memorial Day 2019 at Shenandoah National Park
We went to Shenandoah National Park over Memorial Day weekend this year. Unlike in the past where we’d enter at Thornton Gap and just stick around the central district, this time we entered at the north end of the park in Front Royal, and made our way almost all the way down to the south end of the park at Mile 80. Our kids are all a bit older now at 10 and 12, so they’re capable of a lot more than they were even a few years ago, and our dog has proven to be quite the hiker as well, so our trip to SNP was a lot of new adventures for us in an old place.
We went to Shenandoah National Park over Memorial Day weekend this year. Unlike in the past where we’d enter at Thornton Gap and just stick around the central district, this time we entered at the north end of the park in Front Royal, and made our way almost all the way down to the south end of the park at Mile 80. Our kids are all a bit older now at 10 and 12, so they’re capable of a lot more than they were even a few years ago, and our dog has proven to be quite the hiker as well, so our trip to SNP was a lot of new adventures for us in an old place.
My photography lineup for the trip was my new Canon EOS RP full-frame mirrorless camera. I was going to keep it simple and just bring the Canon 35mm f/1.4L prime lens, but it just felt wrong for some reason, so i went ahead and stuffed my bag with the 17-40mm f/4L ultra-wide and 70-200mm f/4L telephoto zoom lenses as well, along with my newly acquired used Canon 320EX flash.
I have to say, I really liked hiking with the 35mm f/1.4L lens. I think what I’d really want is the EF 24mm f/1.4L II which I could pickup cheaply used, but I’m in a bit of a wait and see mode right now with the new Canon RF mount, seeing what new native RF mount lenses they end up releasing for it, and their prices. While hiking in the wood, you run out of light pretty quickly, and can also have distracting backgrounds, so I really loved the ability of the 35L lens to get some nice mid-hike photos.
Hiking Portraits with the Canon 35mm f/1.4L
The best part of these photos besides the thin depth of field is that you still end up at a very low ISO. A slow lens and especially an f/5.6 would have needed ISO 1600 to 3200 or more for many of these.
The last two photos of William and Katie were at 1/500s and ISO 3200 and 1000 respectively. I’m not sure you’d want to go slower than 1/500s while grabbing mid-hike candid portraits, so the extra optical horsepower of the fast glass really pays off when you’re deep in the woods.
A Great Change of Scenery
Shenandoah National Park was beautiful, as always. There’s never a bad time to go.
I’m a big fan of actually using a flash when needed, but I hate big flashes unless I absolutely must. They’re heavy and take up a ton of space that could otherwise be used for a lens, and just annoying and clunky to use, so I’ve always been a fan of the mini flashes.
I used to have a Canon 270EX, which had a handy head that would flip up for bounce flash and also had two zoom settings, but with only 2-AA batteries it took way too long to recycle at full power, and overall just didn’t have enough power and sold it. I picked up a used Canon 220EX flash which takes 4-AA batteries and definitely recycled more quickly at full power, but fixed 28mm angle and no bounce flash. it definitely worked better than the 270EX, but I found it lacking for larger groups of people where you need some fill flash during daylight. So yet another flash! I recently picked up a Canon 320EX used from KEH.com, and I’m pretty pleased with this one. It has 4-AA batteries again and a handy LED light if you’re doing video or want steady illumination for the all important food photos, but it also has a manually zooming head with 28 and 50mm settings, and now it finally has proper fill power for people that might be further away. I didn’t use the flash all that much on this trip, but I was pretty pleased with it. It did as good of a job here as my big Canon 580EX would have done at only half the size and weight, and that’s what you want when you’re out hiking - just enough to get the job done without any extra weight.

Nice even illumination on faces despite the mixed lighting thanks to the Canon 320EX flash!
We always love the change of scenery up in the mountains. Sorry for the lack of more annotations on WHERE exactly each photos was taken at and settings. No time and really just wanted to get a nice photo blog up, but if you’re really curious, hit my CONTACT link and I’m happy to chat photography or what to see and do in Shenandoah National Park with anybody. :)
Overall, we had a great trip, and the weather was perfect for us with only a few very brief rain showers that we didn’t get caught in. The Canon RP is an awesome camera, although i’m definitely looking forward to getting some native RF mount lenses to drop a bit of size and weight. I’ve always loved the look of full-frame photography more, but not the size and weight of all of the gear. The mirrorless camera body itself is significantly smaller than something like a 5D or 6D full-frame body so helps a ton by itself, so once more full-frame mirrorless lenses are available, it will really start to mature as a new camera system. Can’t wait to blow more money!
You can see the full photo album at the link below.
Living in the D.C. area, we love making the hour or two drive out to Shenandoah National Park in Virginia. Now that our kids are a little older and can do a little more, we’ve started venturing out, and started at the North end in Front Royal, and went all the way down to Mile 80 in the South end of the park, taking in much more of Skyline drive, and doing a bunch of hikes that we’d never done before. It was a great way to spend Memorial Day weekend.

HyperFest 2019
William and I made our way all the way down to Virginia International Raceway (VIR) in Alton, VA, a 4 hour drive from the DC area, for HyperFest 2019 and a boys only weekend. It was a blast to see all sorts of cool cars blasting around, and getting to camp out at the track.
William and I made our way all the way down to Virginia International Raceway (VIR) in Alton, VA, a 4 hour drive from the DC area, for HyperFest 2019 and a boys only weekend. It was a blast to see all sorts of cool cars blasting around, and getting to camp out at the track.
Along with the tons and tons of Bimmers, there were lots of Corvettes, Ford Mustangs, and Chevy Camaros, and miscellaneous other cars. We saw a few Dodge Vipers, a MkIV Toyota Supra drift car (which broke), and some Nissan Silvia (aka 240SX) drift cars, most of which were converted to V8’s. There were also a number of Hondas and Acuras, a ton of Mazda Miatas and some RX-8’s with their screaming rotary engines, and a few Porsches racing around. Strangely missing, I saw absolutely zero Nissan Skyline R35 GT-R’s on the racetrack, which seems pretty bizarre considering there are a lot of these cars around now, and that Nissan is the course sponsor. The only Nissan Skyline I saw was an old R32 which I don’t think was a GT-R, with an instructor on board. We managed to spot the Honda Manufacturing Odyssey race van, so there were more (bleeping) minivans on the track than there were GT-R’s. What a travesty! :)
Not that I’m biased or anything but, my personal favorites were the BMW Spec E46 and Spec E30 cars, which had started out their lives as regular production spec BMW 3-series models, but now converted by their owners into race spec machines. Seeing these old Bimmers tearing around the track with their Straight-6 engines screaming was a sight and sound to behold. The drift cars were also pretty amazing to see and hear (and smell!) as well, so of course I had a ton of fun taking pictures of all of them.
A Spec E46 car blasting away from the South Paddock, and probably one of my favorite captures of the whole weekend.
Spec E30
If any Spec E46 or E30 guys happen to see this, drop me a line because I have tons of photos of y’all.
Gear
I brought my new Canon EOS RP with the 17-40mm f/4L ultra-wide lens, and then my 70-200mm f/4L non-IS lens, but I knew two things in advance. I wasn’t sure if either the autofocus or the frame rate would be up to the task of capturing race cars at varying angles, and I was also quite sure that just 200mm on a full-frame body was probably not going to be long enough. I had the option of bringing my Canon 100-400mm L II lens, but it’s a tank of a lens and this was supposed to be a fun weekend with my son, and it was also forecast to be in the mid-90 degree range, so didn’t want to commit to carrying too much when I’d also have a backpack full of drinks and possibly carrying chairs around the race track! The big 400mm lens also wouldn’t have done anything about any autofocus or frame rate deficiency on the RP, so rather than bring another big heavy lens, I brought my Canon 7D Mark II instead. It has has unquestionably good autofocus and a blazing fast 10 fps frame rate that ought to capture anything, and also weighs half of what that 100-400L II does. And since the 7D2 is a crop frame camera (1.6x), the 200mm becomes 320mm equivalent, so there’s the extra reach I needed.
I could have just brought the Canon 7D Mark II, but wanted to play with the new RP also!
Having a second camera body also solved another potential issue in the form of power. Although I had pretty good battery life in Turks and Caicos, shooting sports and action rather than landscapes is a totally different thing, and I wasn’t sure the two tiny little LP-E17 batteries were going to make it through the weekend without recharging. I didn’t feel like bringing my big external power station and A/C inverter, and it’d also be a colossal waste of energy to use the AC outlet in my truck, which requires that the engine be running just for a tiny little battery. The best option here for field recharging the new Canon EOS RP is a portable USB battery recharger that most everybody has these days, but there’s a catch. Unlike my Fuji X100F that will recharge off of standard USB charger, the EOS RP needs a PD spec charger, which I don’t have yet. So to make a long story short, bringing my Canon 7D Mark II along let me kill three birds with one stone in that two fully charged Canon LP-E6N batteries would be more than enough for the weekend. In hindsight, I could have just brought the 7D Mark II, but the point was to try out the new toy and put it through its paces. :)
Photographing Race Cars
The trick with photographing moving objects is to make them actually look like they’re moving. You can go out and shoot shutter priority (Tv or S mode) at 1/1000s and you’ll definitely get nice, sharp photos that are free of any hand shake or motion blur. The problem is, then your speeding race car actually looks frozen on the track and like it’s not moving at all. Not good. Photographing propeller driven aircraft is similarly challenging in that if you use a fast shutter speed, you’ll freeze the propeller, and make it look like the engine has stalled and the plane is going to fall out of the sky. Of course, there’s a catch.
The longer (slower) the shutter speed you try to use, the more shots you’re going to lose that are just too blurry to be usable at all. To keep a speeding race car sharp while dragging the shutter at a slow speed, requires you to track the object that you’re tracking in thew viewfinder as precisely as possible, so that the subject remains nice and sharp and blur free, while everything in the background blurs away as you pan with the subject.
1/80s
We got to the track, and I saw these beautiful looking and sounding BMW SPEC E46 and E30 cars blasting out of turns 5a and 6, whipped out my camera and fired. The panning blur at just 1/80s was great and looked fantastic, but then ask me what my keeper rate was. Not good, and most of the photos were lost completely to excessive blurring.
1/125s
1/125s gave me a noticeably better keeper rate while still having nice looking panning blur in the background, so I stuck with that.
1/125s at Turns 5a/6
1/125s at Turns 5a/6
1/160s between Turns 4 and 5.
This blue E46 M3 was gorgeous. 1/160s between Turns 4 and 5.
1/125s, Front Straight
1/125s, Front Straight
We camped out on top of the hill here, but managed to make our way to the other side of the track to take a look from various vantage points.
The Rally course was fun to check out too. William can still get motion sick pretty easily, so we didn’t give it a try. With the rally cars you’re already getting a big sense of motion from all of the dirt they’re flinging around, so this was at 1/500s.
Drift Cars
Here’s where I really struggled with the EOS RP. The autofocus was fine, but the camera kept wanting to display the image review in the electronic viewfinder between when the cars were at the top of the hill, and then in full opposite lock sliding right past us a few seconds later. Trying to show the image review would cause me to lose track of where the cars were through the viewfinder, and there’s a noticeable lag that’s less than a second but long enough to be a distraction, between when the camera gets back into live view mode again through the EVF. This is something that I just wasn’t used to or prepared for from being used to shooting a DSLR with a straight optical viewfinder. Oops. I can easily disable the image review in my “C2” bank for Sports/Action, but didn’t want to mess with it while busy shooting. 200mm also wasn’t long enough to get to the top of the patriot course, and the frame rate is only 4 fps with autofocus and exposure running and not 5, so it’s honestly a pretty pokey camera if you’re used to more. And that’s why I brought the 7D Mark II. :)
I love all of the stuff that newer technology lets you do, but there was nothing like going back to a ground glass optical viewfinder on my DSLR when shooting these high-performance drift machines, with an absolute no nonsense real-time view.
I shot at about 1/1000s for a nice sharp view of the cars far away and up the hill, and then spun the control wheel down to around 1/200s or less as they slide past us in full opposite lock with tires blazing to get some nice panning blur in the background. Yes, that’s some sort of drone with a GoPro mounted to it tracking the Corvette!
They had a 500hp BMW E70 X5M with a fully rigged out camera car to record the drift cars, which was pretty neat to see as well. It has to be fast enough to keep up!
Full Course Drift
At the end of the day, they had a full course drift for the drift cars. William and I were setup near Roller Coaster (Turn 15) for the power wheels downhill competition. Check the full album for those.
HyperFest 2019 in Review
Overall, HyperFest was a blast, and VIR is a truly incredible track. There’s not too many tracks where you can have multiple configurations running at the same time, which is how they had the track spec cars running on the full course, and then the drift spec cars on what’s called the Patriot course, so there’s always a lot going on and a lot to see.
William and I both loved it and we had a fun time camping out, but it was definitely way too hot at 94 degrees! We’d love to go again next year, but not if it’s that hot, and it’d be fun to bring some friends along to help make the long drive a bit more entertaining. Even the cars and the drivers were definitely suffering as the day wore on due to the heat. We kept ourselves well hydrated, but still had to hop into our living room - I mean Suburban - with the A/C running twice for 30-45 minutes each time, just to cool down a bit and avoid heat stroking. After getting up at 5am to leave from Maryland and after walking around in the heat all day, we were too tired to watch the burnout competition, even though it was just 100 yards or so away from our tent. Also, ear plugs are definitely required if you want to get some sleep. This isn’t like Cub Scouts campouts - there’s not really a such thing as quiet hours. Some people had pretty noisy generators running all night, and of course some people nearby had other music playing all night “to help them sleep”, which of course kept us both up, so ear plugs are a must.
Photography Wrap-up
Photography wise, sports and action just aren’t the Canon EOS RP’s forte, but I was well aware of this when buying it. There’s a huge difference between 10 fps and just 4 when shooting sports and action like this, so clearly the 7D Mark II did the much better job, and has the autofocus and frame rate to keep up. I still love the look of full-frame more, but for photos like these it didn’t really matter. I’ve disabled the image review on my RP’s “C2” bank that I have setup for sports and action now, so that will help a bit keeping the viewfinder engaged on the subject, and not switching between that and image review mode where there’s some lag, and then you can lose track of your subject. If we go again next year, I’ll probably just bring the 7D Mark II.
Transportation
The Suburban was, of course, a fantastic road trip machine. It was super comfortable the whole way there and back, and with the optional 3.42 gears that I insisted on getting, it never needed to downshift out of top gear even once though the southern VA foothills. It managed a pretty incredible 23 mpg overall, which included the 1-2 hours of time spent idling with the A/C running, a few full throttle passes around morons, and two minor traffic jams. I wasn’t just impressed, I was blown away, because this was nearly as good as my old Toyota RAV4 V6, which would never seem to do anything better than 23-25 mpg overall on road trips despite being half the size. Minus sitting with the A/C running and WOT passes, it probably would have done 24 mpg. Our old BMW X5 turbodiesel could do 26-27 mpg pretty consistently, but again it’s much smaller, and diesel fuel can tend to get pretty pricey also. A vehicle the size of your living room getting 23 mpg is really freaking good, and after just over 500 miles it still had enough fuel leftover to go another hundred, for a legit 600 mile cruising range. I’m sure some of your minivans will do better per mile if not outright cruising range, but you know how I feel about minivans, so piss off. :)
Two final things to checkout:
Don’t miss my photo album below.
HyperFest 2019 Full Photo Album
Also, this dude with a sweet GT350R put up some cool YouTube videos that are worth checking out. I actually just got a GoPro Hero 7 Black, but have barely even taken it out of the box yet, haven’t even powered it on and have absolutely no clue how to use it, so didn’t bother. My brain doesn’t speak video very well at all, I’ve always been more of a stills guy, but if we go again next year I’ll bring that for sure, along with a decent mic to capture the amazing sounds these machines make as well.
Hope you enjoyed the blog!
StevePake.com

Turks and Caicos with my new Canon EOS RP
A photo tour of our trip to Turks and Caicos in the British West indies with my new full-frame Canon EOS RP camera. Enjoy!
It’s not often that I ever get around to actually writing a photography blog, but when I do it’s probably because we either went somewhere or did something amazing, or I got some new photog gear to write about. In this case it’s both, Turks and Caicos island with the new full-frame Canon EOS RP, dubbed the “World’s Best Mirrorless Camera” by independent (and infamous) photo blogger Ken Rockwell.
Turks and Caicos 2019
My workhorse camera over the past few years has been the “crop-frame” APS-C Canon 7D Mark II, along with a Fuji X100F for more casual photography, but I’ve been longing to get back to full-frame photography for quite some time. Crop-frame cameras are great, but they’re just not the same as full-frame. I won’t bore anyone in this blog with gear rationale, going from full-frame to APS-C and back, or from DSLR to mirrorless and blah blah blah, because then I’d never get to the actual photos or our Turks and Caicos vacation. So for now, simply enjoy some fantastic photos of a stunningly beautiful place along with some “pro-tips”, and I’ll get to the system building and transitioning stuff another day!
Getting Back to Island Time
Debbie and I in St Lucia in 2012, shot with my Canon 5D Mark II, 24-105L IS lens at 35mm, 1/50s, f/4.5, ISO 1600, natural light.
The last time we’d been to the islands was just Debbie and I to St Lucia in 2012. This was our first real getaway together after my cancer diagnosis and fight in 2011, and it was exactly what we needed, and another stunningly beautiful place. It’d been far too long, so we were all really looking forward to this as a larger group. Between hectic work and travel schedules and being pretty burned out, we uncharacteristically had zero advanced day-to-day itinerary planned as far as where to go and what to do. That’s pretty unusual for us, so I brought a bit more photo gear than usual and planned to just trim down as needed based on whatever we planned to do on a given day.
This right here was all I really needed. Luckily I’m already pretty much set for lenses, as I used to shoot full-frame with the Canon 5D Mark II from 2010 to 2015, until I switched over to the crop-frame 7D Mark II. My Canon 17-40mm f/4L ultra-wide zoom and Canon 70-200mm f/4L (non-IS) telephoto zoom covered 90% of the photos on this trip, with the little Canon 40mm f/2.8 pancake lens able to cover the rest, along with a compact Canon 220EX flash as needed. All this fits perfectly in my ThinkTank Retrospective 5 bag, doesn’t stick out like a sore thumb, and isn’t so heavy that you’ll tire of carrying everything. I’ve always liked high-performance yet lightweight photography setups not just because heavy gear isn’t any fun to carry, but because for years after my cancer fight I suffered from chronic fatigue issues, and physically couldn’t carry that much without it wearing me out! This setup right here was no problem at all to carry, and delivered extremely pleasing results!
The new full-frame Canon EOS RP with the EF to RF adapter, Canon grip, and then the Canon 17-40mm f/4L, 70-200mm f/4L non-IS, 40mm f/2.8 pancake lens, and then an old used Canon 220EX flash, all of which fit nicely into a ThinkTank Retrospective 5 bag.
Turks and Caicos actually consists of 8 main islands, but because of numerous family members being prone to motion sickness, we elected to stay only on Providenciales (Provo), and didn’t do any half or full day excursions via either boat or air to the other islands. Maybe another time, but there’s plenty to do in Provo!
Long Bay Beach
After some initial recovery and dinner the first night with a friend who happened to be in Turks and Caicos at the same time, our first order of business was to hit the beach, obviously! We slept in the first full day, but for some reason Debbie was thinking that it was “too hot” to go out on the beach after lunch when we finally came to and needed to wait. Nonsense! It was only in the low-80’s, and there was a nice breeze which made it feel just about perfect.
Canon EOS RP with the 17-40L, Aperture Priority, 20mm and f/5.6. See the natural vignetting? I love that! It adds another dimension to your photos that’s totally lacking without post-processing on crop frame cameras, and this is half the reason I wanted to get back into full frame photography again. Just stop down to f/8, or turn on the in-camera vignetting correction, and it goes away.
Long Bay Beach was spectacular! We’d never been to a beach where the water was crystal clear like this and seemingly went on for miles off shore. We saw people easily a mile offshore standing in this same water, and this is actually one of the premier kite sailing places in the world with tons of open space and water just 2-3 feet deep. It was spectacular. St Lucia further to the south and east in the Caribbean was stunningly beautiful in its own ways, but if there’s one thing not to like about St Lucia it was that it just doesn’t have nice beaches like these as a volcanic island.
Canon EOS RP and 17-40L, Aperture Priority, 19mm and f/8, Landscape Picture Style +2 saturation, Vignetting Correction OFF.
Canon EOS RP and 70-200mm f/4L, Shutter Priority, 1/500s, 200mm and f/4.5, "Auto” Picture Style and +1 or +2 saturation.
Canon EOS RP and 70-200mm f/4L, Aperture Priority, 78mm and f/8, 1/400s. This is another reason I wanted to get back to full-frame, because 70mm ends up being too long most of the time on a crop frame, whereas the 70-200 range is “just right” on a full-frame.
Canon EOS RP and 70-200mm f/4L, Shutter Priority, 1/1000s, 149mm and f/5.6. Long Bay Beach in Turks and Caicos is one of the premier kite surfing places in the world due to the length of the beach, and miles of water that’s only 2-3 feet deep. I would have loved to try, but I have hernia issues both from being a big and tall dude, and from cancer surgeries. My body doesn’t need to take a rough fall, so I’ll just watch and take photos!
Canon EOS RP and 70-200mm f/4L, Aperture Priority, 81mm and f/8. This beach goes on for miles, and the 2-3 feet water goes offshore for miles. Amazing.
Selfie, Canon EOS RP and 17-40L, Shutter Priority, 28mm, f/5.6, 1/500s, and Full Auto AF, no flash.
Sunset Dining at magnolia restaurant and wine bar
For dinner after our first full day on Turks and Caicos, we went to the Magnolia restaurant for dinner since it had a nice sunset view off of their deck. The food was excellent, but check the full photo album for those. The view was great, especially right at sunset.
Canon EOS RP and 17-40L, Aperture Priority, 22mm, 1/60s, f/11, and Canon 220EX flash ON.
Canon EOS RP and 70-200mm f/4L, Aperture Priority, 200mm and f/8, 1/250s, Auto ISO 125. My 70-200mm lens isn’t stabilized, so I have to keep the shutter speed up as the light fades. The Auto ISO takes care of this for you.
Canon EOS RP and 70-200mm f/4L, Aperture Priority, 70mm and f/22, 1/80s, Auto ISO 200. You don’t really get much of a sunstar effect by going to a tiny aperture with the 70-200mm lens, but you can get a little bit of it.
Canon EOS RP and 35mm f/1.4L, Aperture Priority at f/2.8. I was taking some dinner portraits with the 35L (in the album) and took this landscape photo with it also. The 40mm f/2.8 pancake would have done about as well. Going to full aperture on the lens definitely helped yank other dinner parties out of focus better, but I could have left the lens home and just used the 40mm. I’m planning to get the Canon RF mount 35mm f/1.8 macro lens, which will serve my travel purposes better than both, since it can focus more closely for the all important food photos, and its also stabilized. :)
Sunrise at Long Bay Beach
I couldn’t be out on the islands with a brand new camera and not get up early for some sunrise photos, so I got up at 5:45am twice and wasn’t disappointed. Long Bay Beach was just a 5 minute drive from our AirBnB and on the proper side of the island, so very easy to get to.
6:04am: Canon EOS RP and 17-40L, Aperture Priority, 19mm, f/5.6, 1/60s, and ISO 3200. No big deal that my old 17-40L isn’t stabilized or that I didn’t break out my tripod, because ISO 3200 still looks great. You can hardly even tell you’re not at base ISO, the colors still look great, and there’s plenty of dynamic range.
6:28am: Canon EOS RP and 17-40L, Aperture Priority, 20mm, f/4, hand cranked ISO to 400 to get 1/1250s. The winds were at 20-25 knots, so I wanted to keep the shutter speed fast to help freeze the palm trees.
6:34am: Canon EOS RP and 70-200mm f/4L, Aperture Priority, 70mm and f/4, 1/800s, ISO 100.
6:41am: Canon EOS RP and 17-40L, Aperture Priority, 22mm, f/4, and 1/1250s, ISO 100, again to freeze the palm tree branches, otherwise they would have been a blurry mess from the wind.
It would have been fun to have my Canon 100-400L II lens for both the sunrise and sunset photos, but it’s absolutely no fun to lug that beastly lens around on vacation when you’re just trying to relax and unwind. In comparison, the 70-200mm f/4L is a faction of the size and weight, and absolutely painless to carry around, so that’s what I went with. If I want tighter crops on any of the telephoto shots, 26MP on the sensor is plenty to work with in the vast majority of cases, so I didn’t miss my 400mm for this.
Grace Bay at Seven Star Resort
Since we rented an AirBnB type place for all six of us, which was way cheaper than a trio of hotel rooms, we didn’t have access to any amenities at any of the resort areas, but you can get day passes at area resorts when space is available that give you access to everything a regular resort guess would have except a room. These tend to be pricey, but at $100 per adult and $50 per child, the Seven Star Resort day pass in Grace Bay was pretty reasonable by Turks and Caicos standards.
Canon EOS RP and 17-40L, Aperture Priority, 19mm and f/4, 1/1600s, ISO 100. I intentionally shot this wide-open at f/4 to get the vignetting, but probably overdid it a bit. Another photo I took at f/8 looked too flat and boring, so about f/5.6 probably would have been ideal.
Canon EOS RP and 70-200mm f/4L, Aperture Priority, 84mm and f/8, 1/400s, ISO 100.
Canon EOS RP and 17-40L, Aperture Priority, 40mm and f/8, 1/500s, ISO 100.
Canon EOS RP and 17-40L, Aperture Priority, 21mm, f/11, 1/640s, and ISO 400. The idea here with these beach foam photos is to get low, wide, and close. Since you want the foam from the waves to be in focus, but also hopefully what’s on the horizon, you need to be shooting at a small aperture for maximum depth of field, f/11 or f/16. But since the wave is moving, you also need to be shooting with a faster shutter speed, 1/500s or faster. That means cranking up the ISO a bit off of base even in broad daylight, in this case ISO 400.
Canon EOS RP and 17-40L, Aperture Priority, 22mm, f/16, 1/80s, and ISO 100, Canon 220EX flash on. I stopped down to f/16 here because it was super bright out, and didn’t want to risk an overexposed photo with the limited 1/180s flash sync speed of this camera. Looks like f/11 still would have been okay. Notice how the shadows on our faces aren’t so bad? That’s because of the fill flash! :)
Canon EOS RP and 17-40L, Aperture Priority, 38mm and f/11, 1/500s, ISO 400. This was actually an action shot because of the 20-25 mph winds, so needed to use a fast shutter speed and bump the ISO a bit.
Canon EOS RP and 17-40L, Aperture Priority, 20mm, f/8, 1/400s, and ISO 100.
Chalk Sound
I saw Chalk Sound from out the window of our Southwest flight on the way in to Providenciales and didn’t even know what it was, but thought it looked fantastic. It’s a large lagoon that’s mostly less than 5 feet deep that has this beautiful turquoise color to it, so a drive through Chalk Sound Drive was definitely in order. Let’s just say that land development in Turks and Caicos isn’t always coordinated. Private luxury homes and a lack of official look out points make it difficult to see, but it’s worth it for sure. I know I’ve seen the view in the first two photos below in some magazine before.
Canon EOS RP and 17-40L at 33mm and f/8, 1/320s, ISO 100.
Canon EOS RP and 70-200mm f/4L at 200mm and f/8, 1/320s, ISO 100.
Canon EOS RP and 17-40L at 21mm, f/13, 1/160s, ISO 100.
Canon EOS RP and 70-200mm f/4L at 70mm and f/8, 1/320s, ISO 100. I love that the 70-200mm lenses are just wide enough on a full frame camera to get nice short telephoto landscapes like these. 70mm is way too long on a crop frame camera, which makes this lens more difficult to use.
Canon EOS RP at 17-40L at 29mm and f/8, 1/640s, ISO 100.
Sunset at Leeward Beach
After taking in Chalk Sound and a failed attempt to find out how to get to Taylor Bay Beach, we had lunch and then took naps, and went over to Leeward Beach, which has a nice view towards the west to take in the sunset.
Canon EOS RP and 17-40L at 25mm and f/8, 1/250s, ISO 100.
Canon EOS RP and 17-40L at 40mm, f/14, 1/180s, Canon 220EX flash on, Lightened with Nik Color Efex Pro 4. This was a tricky photo to pull off, and I should have been in full manual exposure mode, and should have had the flash set manually to go full power each time. Chalk it up to being a newbie with the camera though, I didn’t know how or where to set it. This would have been easier with my full-sized 580EX flash, which you can set to full power manually right on the flash itself rather than fiddling around in menus. Either way, I really love how this photo turned out!
Canon EOS RP and 17-40L at 28mm, f/11, 1/125s, and ISO 100, Canon 220EX flash on.
Canon EOS RP and 70-200mm f/4L at 81mm, f/8, 1/3200s and ISO 100.
Canon EOS RP and 17-40L at 24mm, f/8, 1/400s, and ISO 100.
Canon EOS RP and 70-200mm f/4L at 200mm and f/6.3, 1/320s, ISO 200, cropped to about 350mm equivalent or so. Even with only a 200mm lens, there’s still more than enough resolution to crop pretty heavily if needed and get a nice sized print.
Taylor Bay Beach
Taylor Bay beach is pristine, and when you finally find your way to it you almost feel like you’re on some deserted island beach in the south Pacific somewhere. It just feels special, which is probably why the locals try so hard to keep the general public and commoners like us out of it. While all beaches are public in Turks and Caicos, the wealthy homeowners in this area have blocked off all of the land access, have signs threatening to tow cars away, and have blocked paths down to the beach. Google satellite view helped us find our way down, and once we were there it was spectacular.
Canon EOS RP and 17-40L at 26mm, f/11, 1/160s, Canon 220EX flash on.
Canon EOS RP and 17-40L at 24mm, f/16, 1/160s, ISO 100, and Canon 220EX flash on, lightened in the center a bit more with Nik Color Efex Pro 4. This is where cameras with faster flash sync speeds come in very handy, like my Fuji X100F (or old Nikon D40), as being able to use a faster shutter speed allows you to proportionally capture more of the flash lighting and less of the ambient light, which makes your flash more powerful. Only 1/180s flash sync speed isn’t the best, but most cameras these days aren’t much different. My 220EX flash just barely got the job done.
Canon EOS RP and 17-40L at 21mm and f/8, 1/400s, ISO 100.
Canon EOS RP and 70-200mm f/4L at 200mm and f/8, 1/500s, ISO 100. These people don’t want us on “their” beach, but it’s not technically their beach anyways! :)
Canon EOS RP and 70-200mm f/4L at 70mm and f/8, 1/500s, ISO 100. Again, here’s where a full-frame camera can make full use of the 70mm wide end of the 70-200mm lenses. This would have been way too long on a crop frame camera.
Canon EOS RP and 17-40L at 27mm, f/11, 1/180s, and ISO 100, Canon 220EX flash on, and some additional fill lighting added in Nik Color Efex 4 Pro. Why not just skip the flash and just do the fill lighting all in post? Because the closer you get it straight out of the camera, the better and more natural it will look in the end, and with less noise.
Canon EOS RP and 17-40L at 24mm and f/5.6, 1/500s, and ISO 100. Again, I love the vignetting with full-frame. Way too many times I’ve taken a photo like this on crop frame and it just looks flat and boring, and then I have to waste time adding some sort of vignette in back in post, that never seems to look quite as good or as natural as you can get right from the camera with a full-frame camera! This looks perfect to me. Had to use a slightly quicker shutter speed to freeze the motion of the palm tree branches in the wind.
Canon EOS RP and 70-200mm f/4L at 140mm and f/8, 1/500s, ISO 100.
Canon EOS RP and 17-40L at 23mm and f/11, 1/640s, and ISO 200. This is another low, wide, close and fast beach foam style photo.
Canon EOS RP and 17-40L at 19mm and f/8, 1/640s, ISO 100. This is one of several massive piles of limestone that the locals probably piled in to stop people from getting down to Taylor Beach. Granted, there’s no “parking area” down there and not safe except for off-road vehicles, but the locals clearly don’t want tourists and other people on “their” beach. Tough. If you see these, you’re on the right track for Taylor Bay Beach. Hot tip. Use Google Maps Satellite view and it’s very easy to find these unmarked paths to get down to the beach. :)
Dinner at Coco Bistro
For our last night in Turks and Caicos, Debbie and I went on a “date night” to Coco Bistro while her sister watched our kids for us (they really don’t need much watching anymore). I don’t think anybody goes to Turks and Caicos for the food, but there’s actually some pretty good places to eat on Provo, even if prices are pretty high. This was one advantage of renting an AirBnB place, because it had a full kitchen that let us do some cooking and our own meal prep, so we really only ate out once per day.
Canon EOS RP and 17-40L at 19mm, 1/60s, f/4, and ISO 10,000. As this is a brand new full-frame camera, high ISO photos look great of course! The color and range still looks great at ISO 10,000.
40mm f/2.8 pancake lens at f/2.8
40mm f/2.8 pancake lens at f/2.8
Canon EOS RP with 40mm f/2.8 pancake lens at f/8, 1/160s, ISO 2000. Unlike the 24mm pancake lens that I was used to on crop frame, the 40mm variant for full-frame doesn’t focus nearly closely enough for good detailed food photos. It will focus on a full plate, but not on individual pieces. Pro tip: switch the camera into 1.6x crop mode, and it’s about as good. Sure, you only have 10MP vs 26MP, but are you really going to print food photos three feet wide? If not, then this is still more than good enough. I’ll probably buy the native RF mount 35mm f/1.8 macro lens anyways.
Canon EOS RP with 40mm f/2.8 pancake lens at f/8, 1/160s, ISO 2500.
Canon EOS RP with 40mm f/2.8 pancake lens at f/8, 1/100s, ISO 12,800, iPhone flashlight lighting. Another pro tip. Using continuous lighting from your phone in flashlight mode is usually enough light to get nice food photos in dark restaurants. Some flashes can’t dial down enough at close range like this, and it’s also less disturbing to other dinner guests.
Canon EOS RP with 17-40L at 24mm and f/4, 1/60s, ISO 1000, Canon 220EX flash.
And that’s a wrap! Be sure to check out the FULL ALBUM below.
We finally made it to the islands again for the first time since St Lucia in 2012. It’s been way too long. Turks and Caicos was truly spectacular, the weather was perfect, local food was wonderful, and each beach we went to was even more beautiful than the last. What a fantastic place! Don’t miss the blog.
capsule Review of the Canon EOS RP
I love it! It’s a brilliant camera, and I love shooting full frame again. The ranges of all of my full-frame lenses make perfect sense again and I get to experience them in all of their glory. I love the look of a full-frame camera with the older generation of lenses developed in the film era.
My full travel kit for Turks and Caicos with the addition of the 24-105L IS and 35L lenses, all packed into my larger ThinkTank Spectral 10 bag.
When I first got the RP with the free introductory Canon promo EG-E1 grip I couldn’t believe how tiny it was, but after shooting with it for a month now I can’t believe what a massive brick my 7D Mark II feels like! The tiny LP-E17 battery and battery life in general was a big concern for me, but I managed all day battery life while out and about by keeping the rear LCD turned around and closed, and just using the EVF, which is actually better battery life than my 7D Mark II with the bigger LP-E6N.
I love being able to get the exposure and color exactly the way I want it in the EVF, and being able to review accurately and instantly even in bright conditions, something that’s nearly impossible with a DSLR. I don’t have much if any time to sit and post-process images, so being able to get things exactly right much more consistently right in the EVF as I’m shooting is a huge plus.
I’m definitely missing the joystick controller for driving AF points, which I’m used to from both my previous 5D Mark II and 7D Mark II cameras for the past 10 years. I’m having trouble developing the muscle memory for the RP method of using the top and rear control wheels to drive the AF sensors, but I’ll get it with time. The autofocus definitely isn’t good enough to keep up with our dog and other fast action type situations, so I’ll probably be holding onto my 7D Mark II for situations that require better autofocus performance and faster frame rates.
I’ll write more in the future about the RP and slowly rebuilding my Canon system around it, but for now I’m just happy to have a full-frame camera again. The Canon EOS RP is fantastic!
StevePake.com

July 4th Fireworks 2018
Last year we were too exhausted from moving to enjoy any fireworks, but this year we had a great time! The city fireworks where we live our right in the park in our neighborhood, so we can just walk about a mile for a really nice show.
Last year we were too exhausted from moving to enjoy any fireworks, but this year we had a great time! The city fireworks where we live our right in the park in our neighborhood, so we can just walk about a mile for a really nice show.
I used my Canon 7D Mark II on a tripod with a remote shutter release, and the Tokina 12-28mm ultra-wide lens. You have to do everything manual style. I let the autofocus system focus at infinity on a distant water tower before it got too dark, and then switched the lens to manual focus mode and didn't touch it. If the autofocus system tries to work when it's dark out and fireworks are going off, you'll never get anything. You also have to set manual exposure. I set the camera for 4 second exposures at f/8, and ISO 200 earlier on when there was still some light in the sky, and then ISO 400 as it got a bit darker. A remote shutter release is needed because if you're trying to press the shutter release on the camera itself, you'll introduce vibrations into the camera and tripod setup and will end up with blurry photos when using a 4 second exposure. I left the camera positioned horizontally, and then just cropped to vertical in post-processing. Voila! Not much to it. :)
Click Or Tap the Image Below for the Full Photo Album


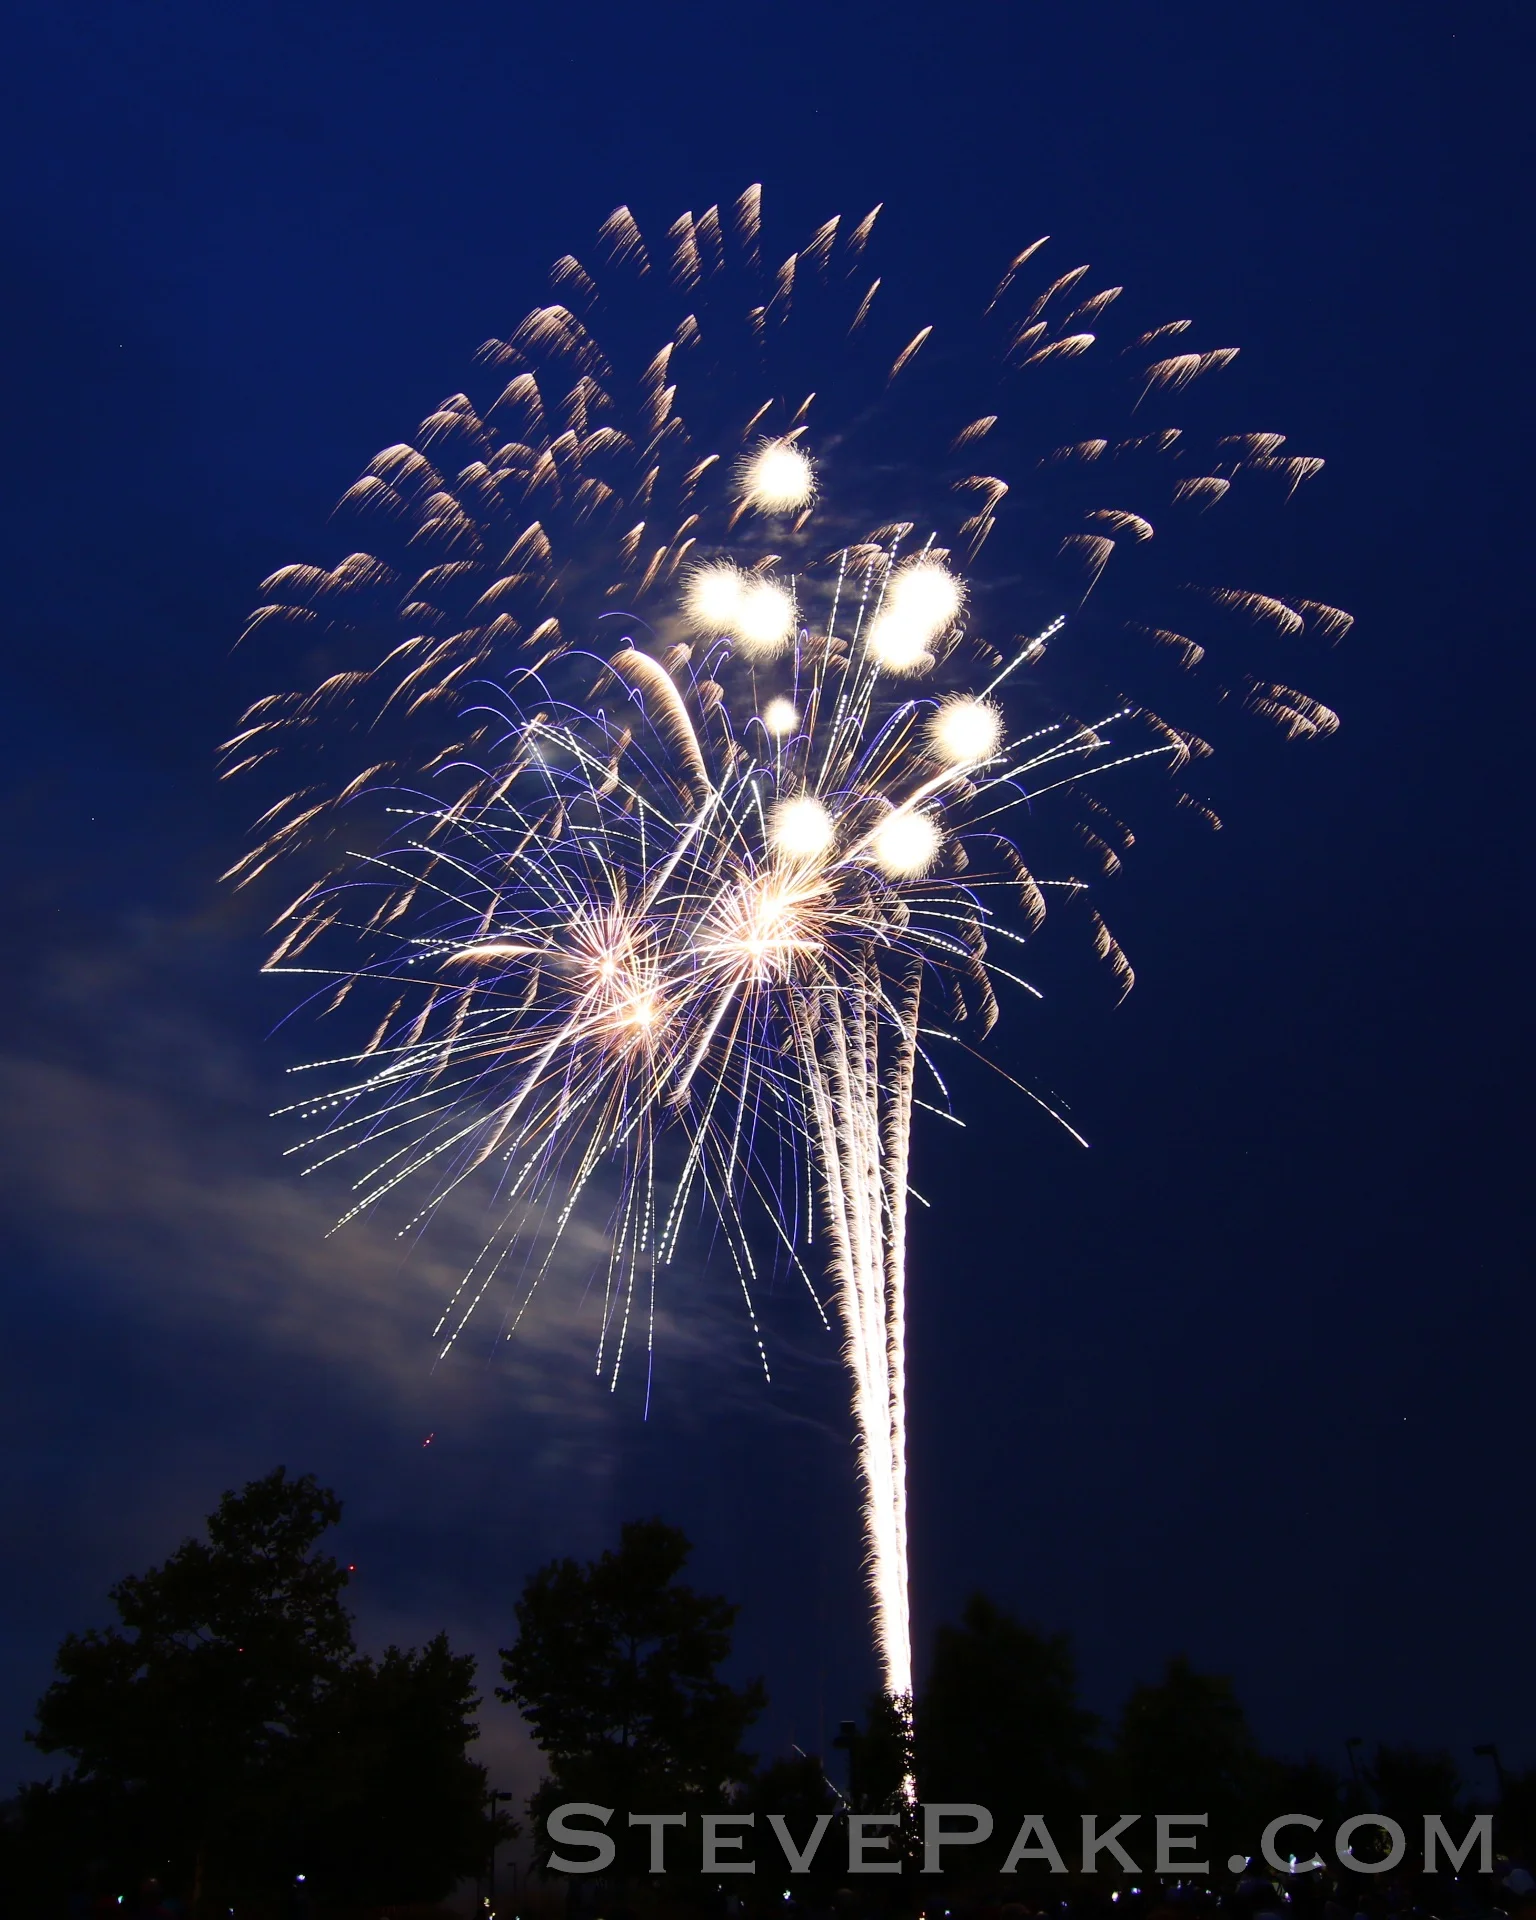
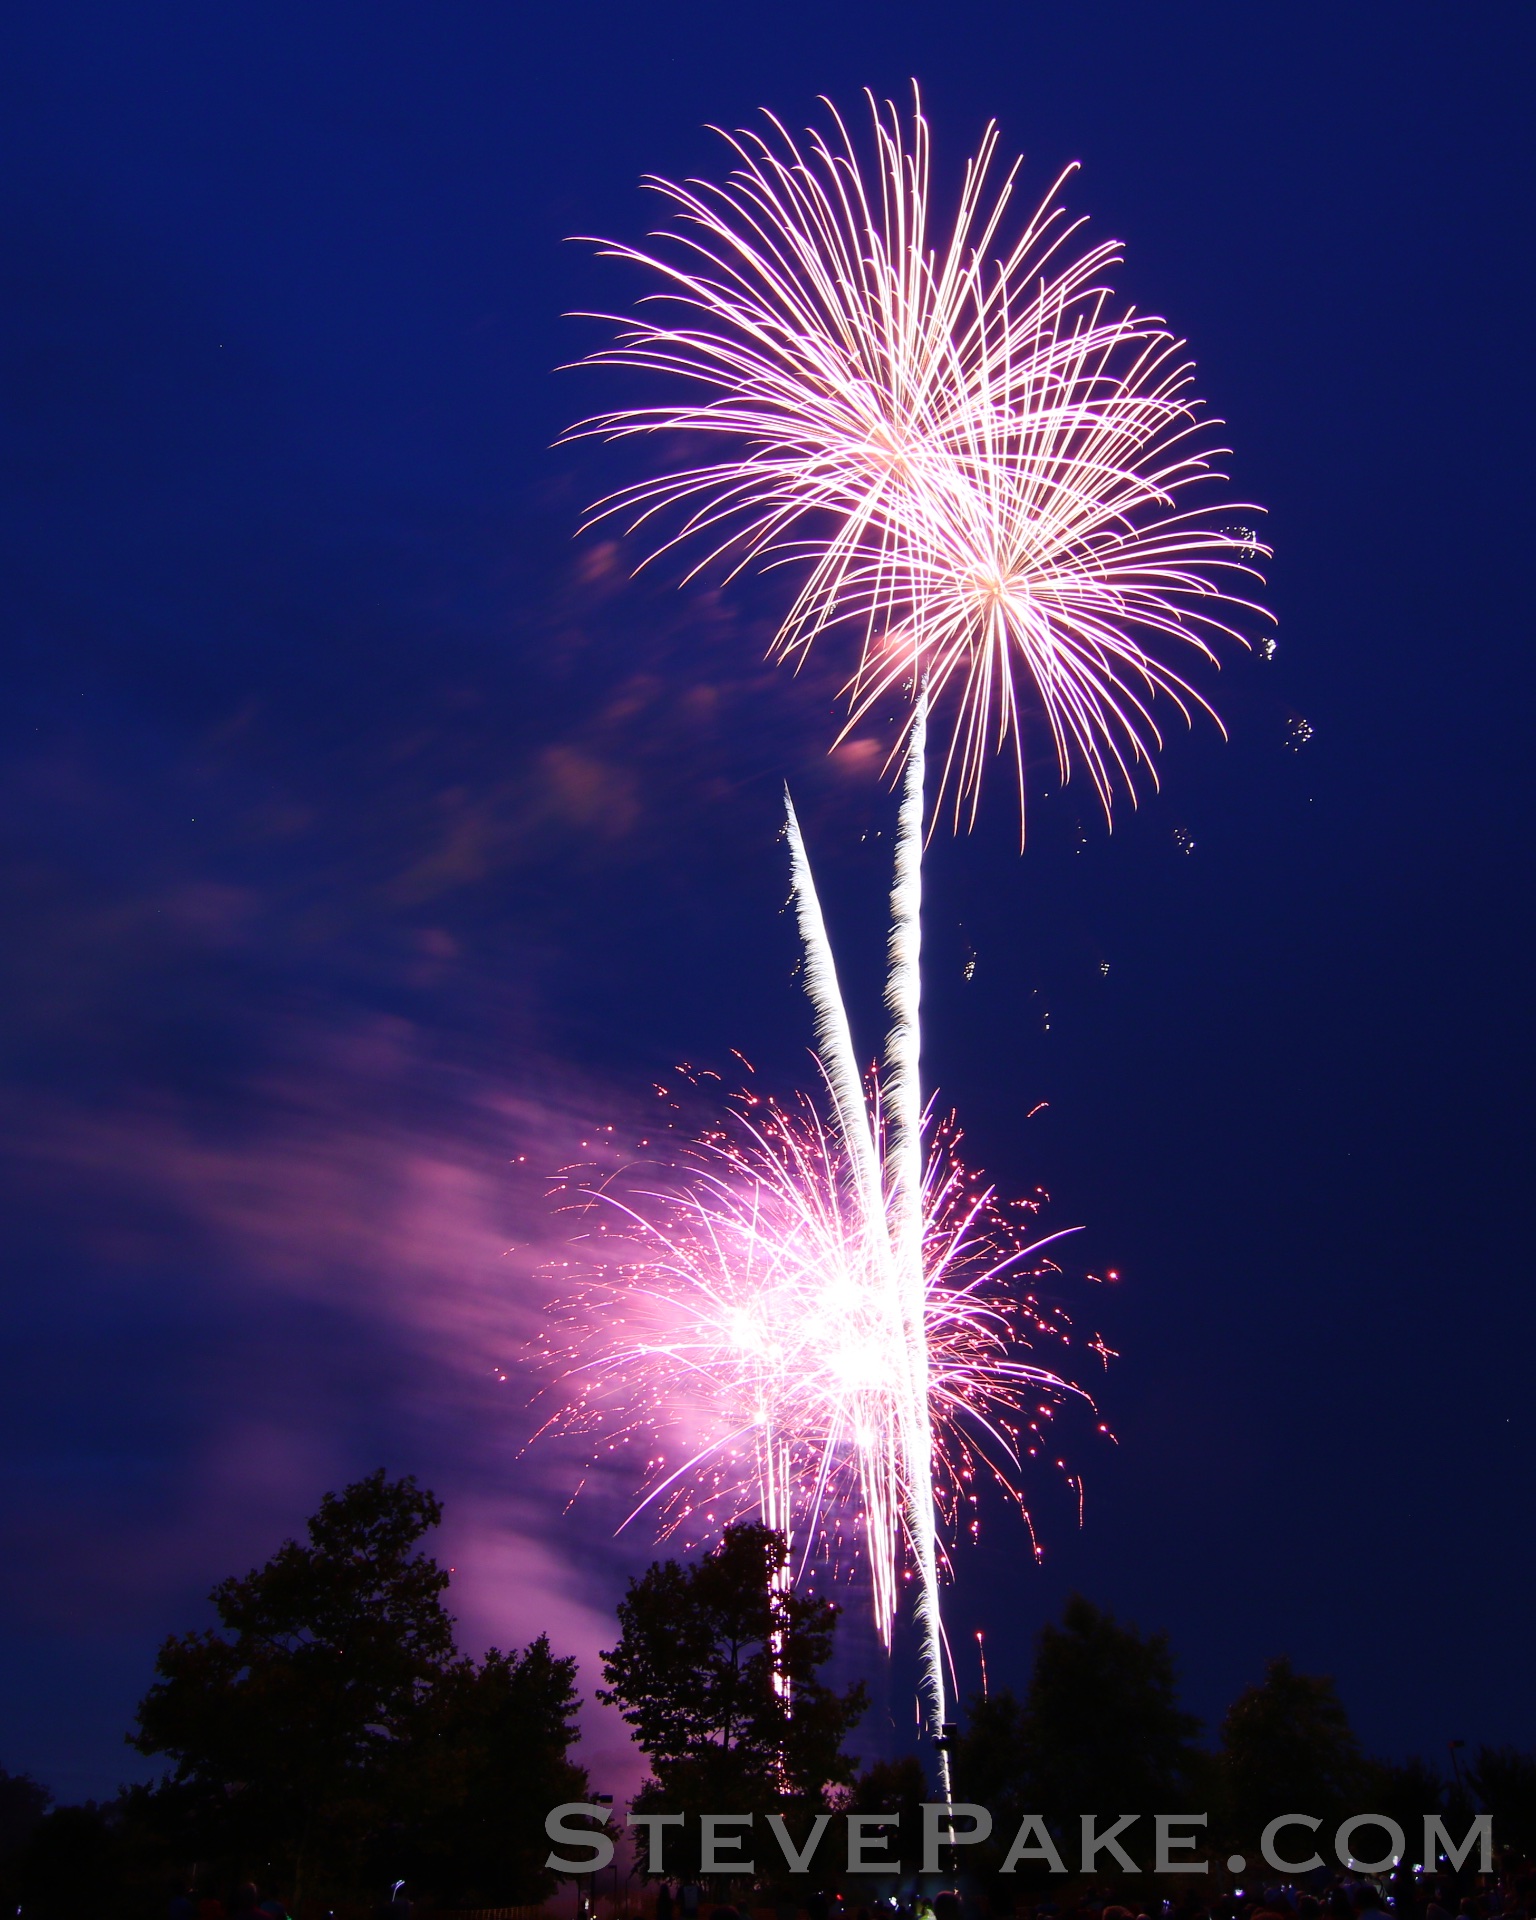


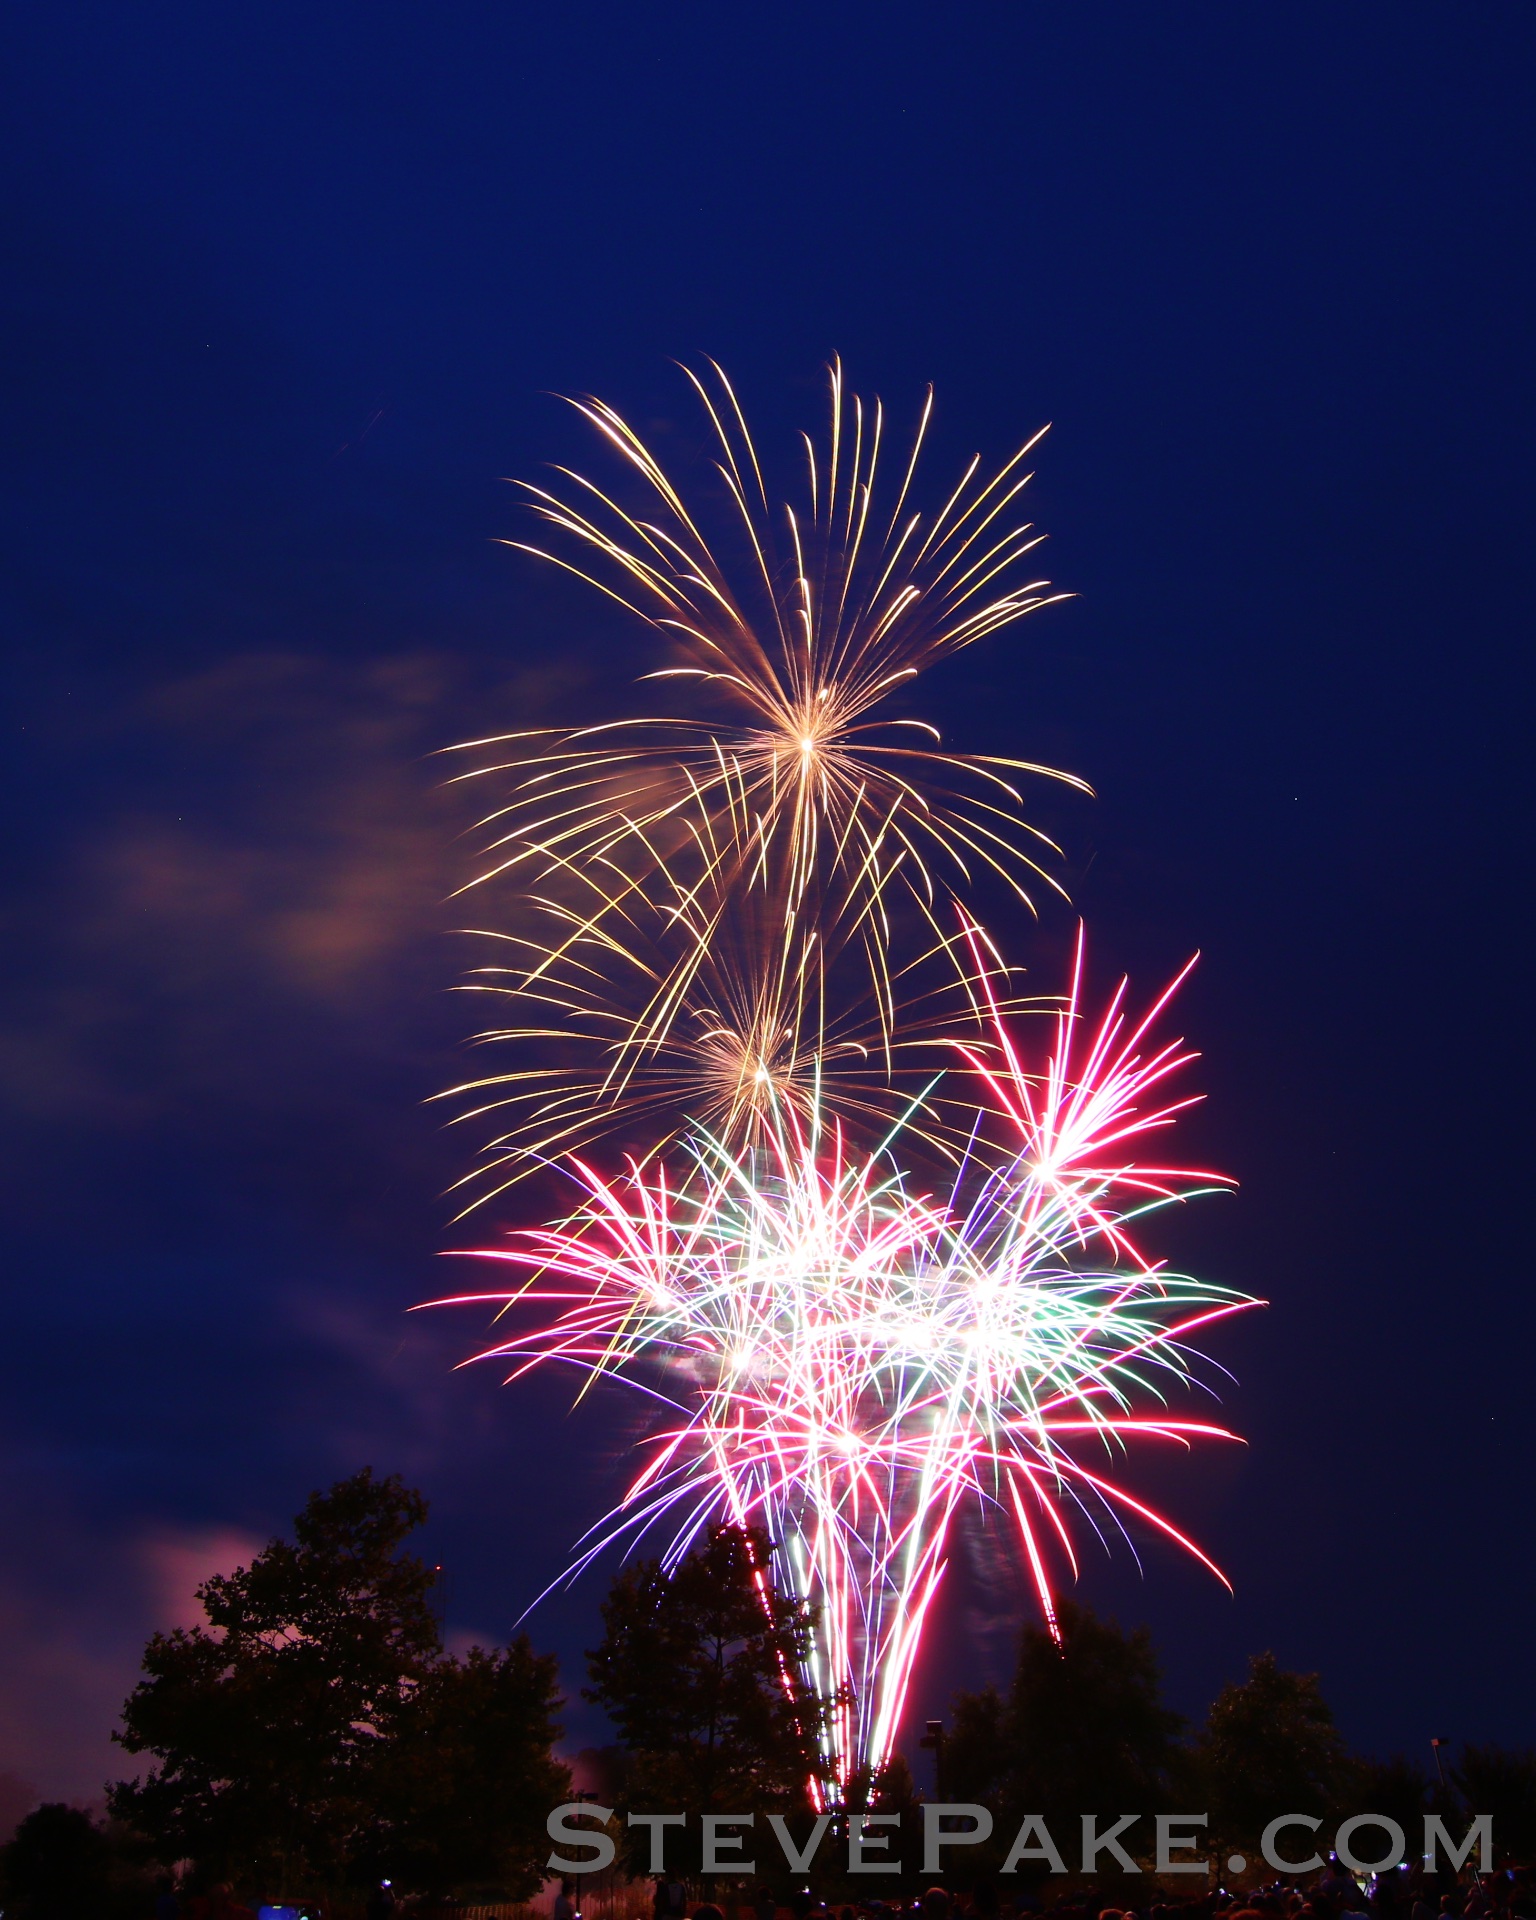


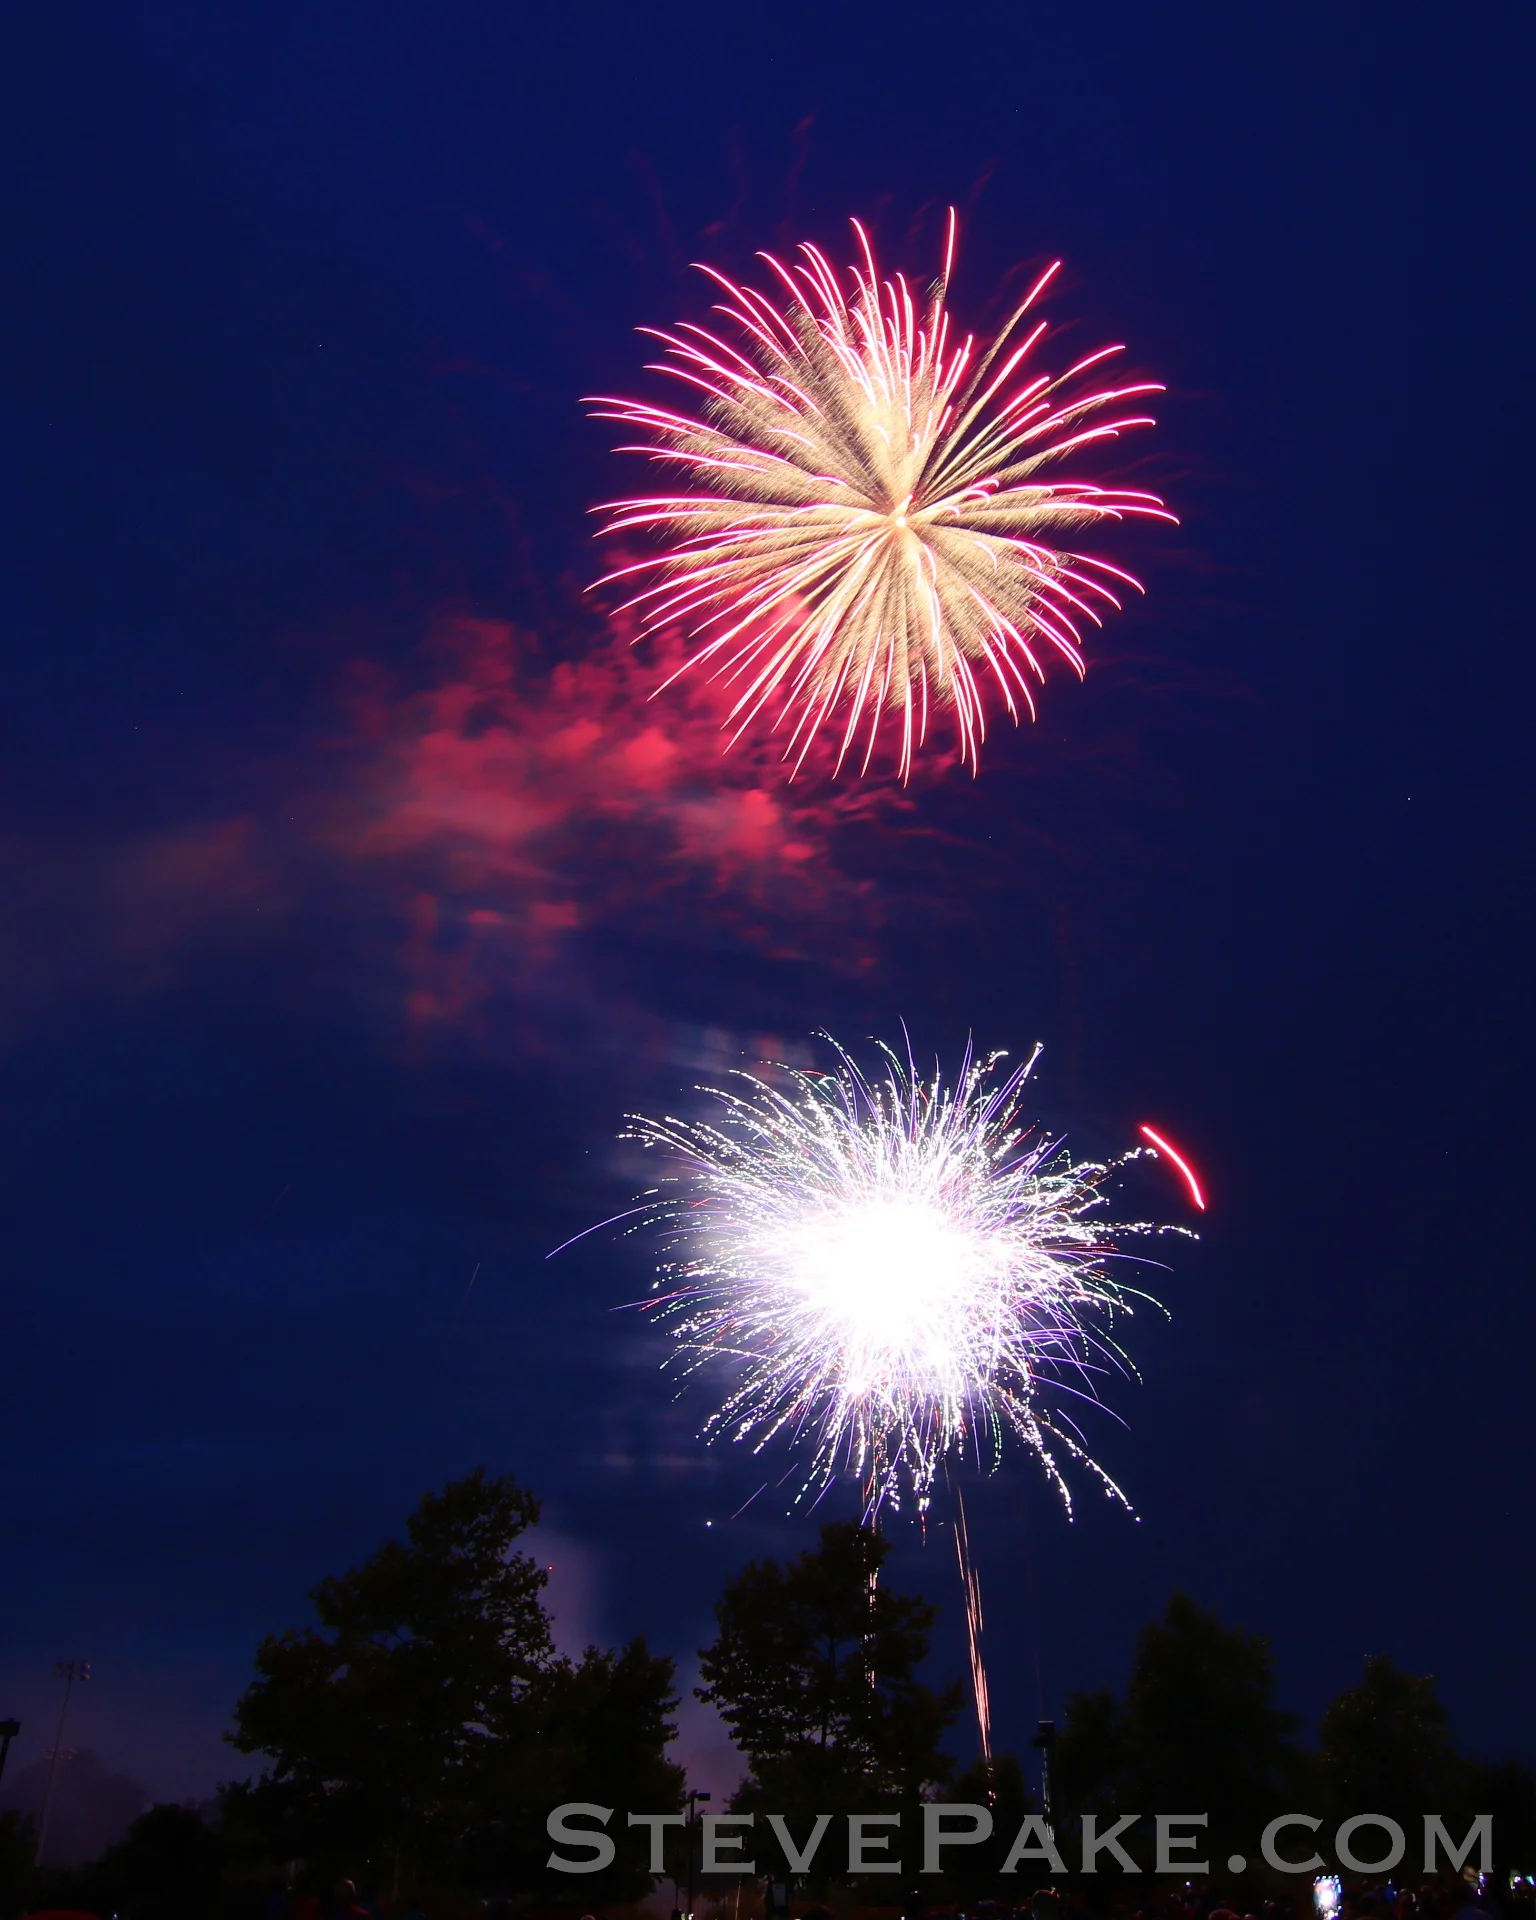


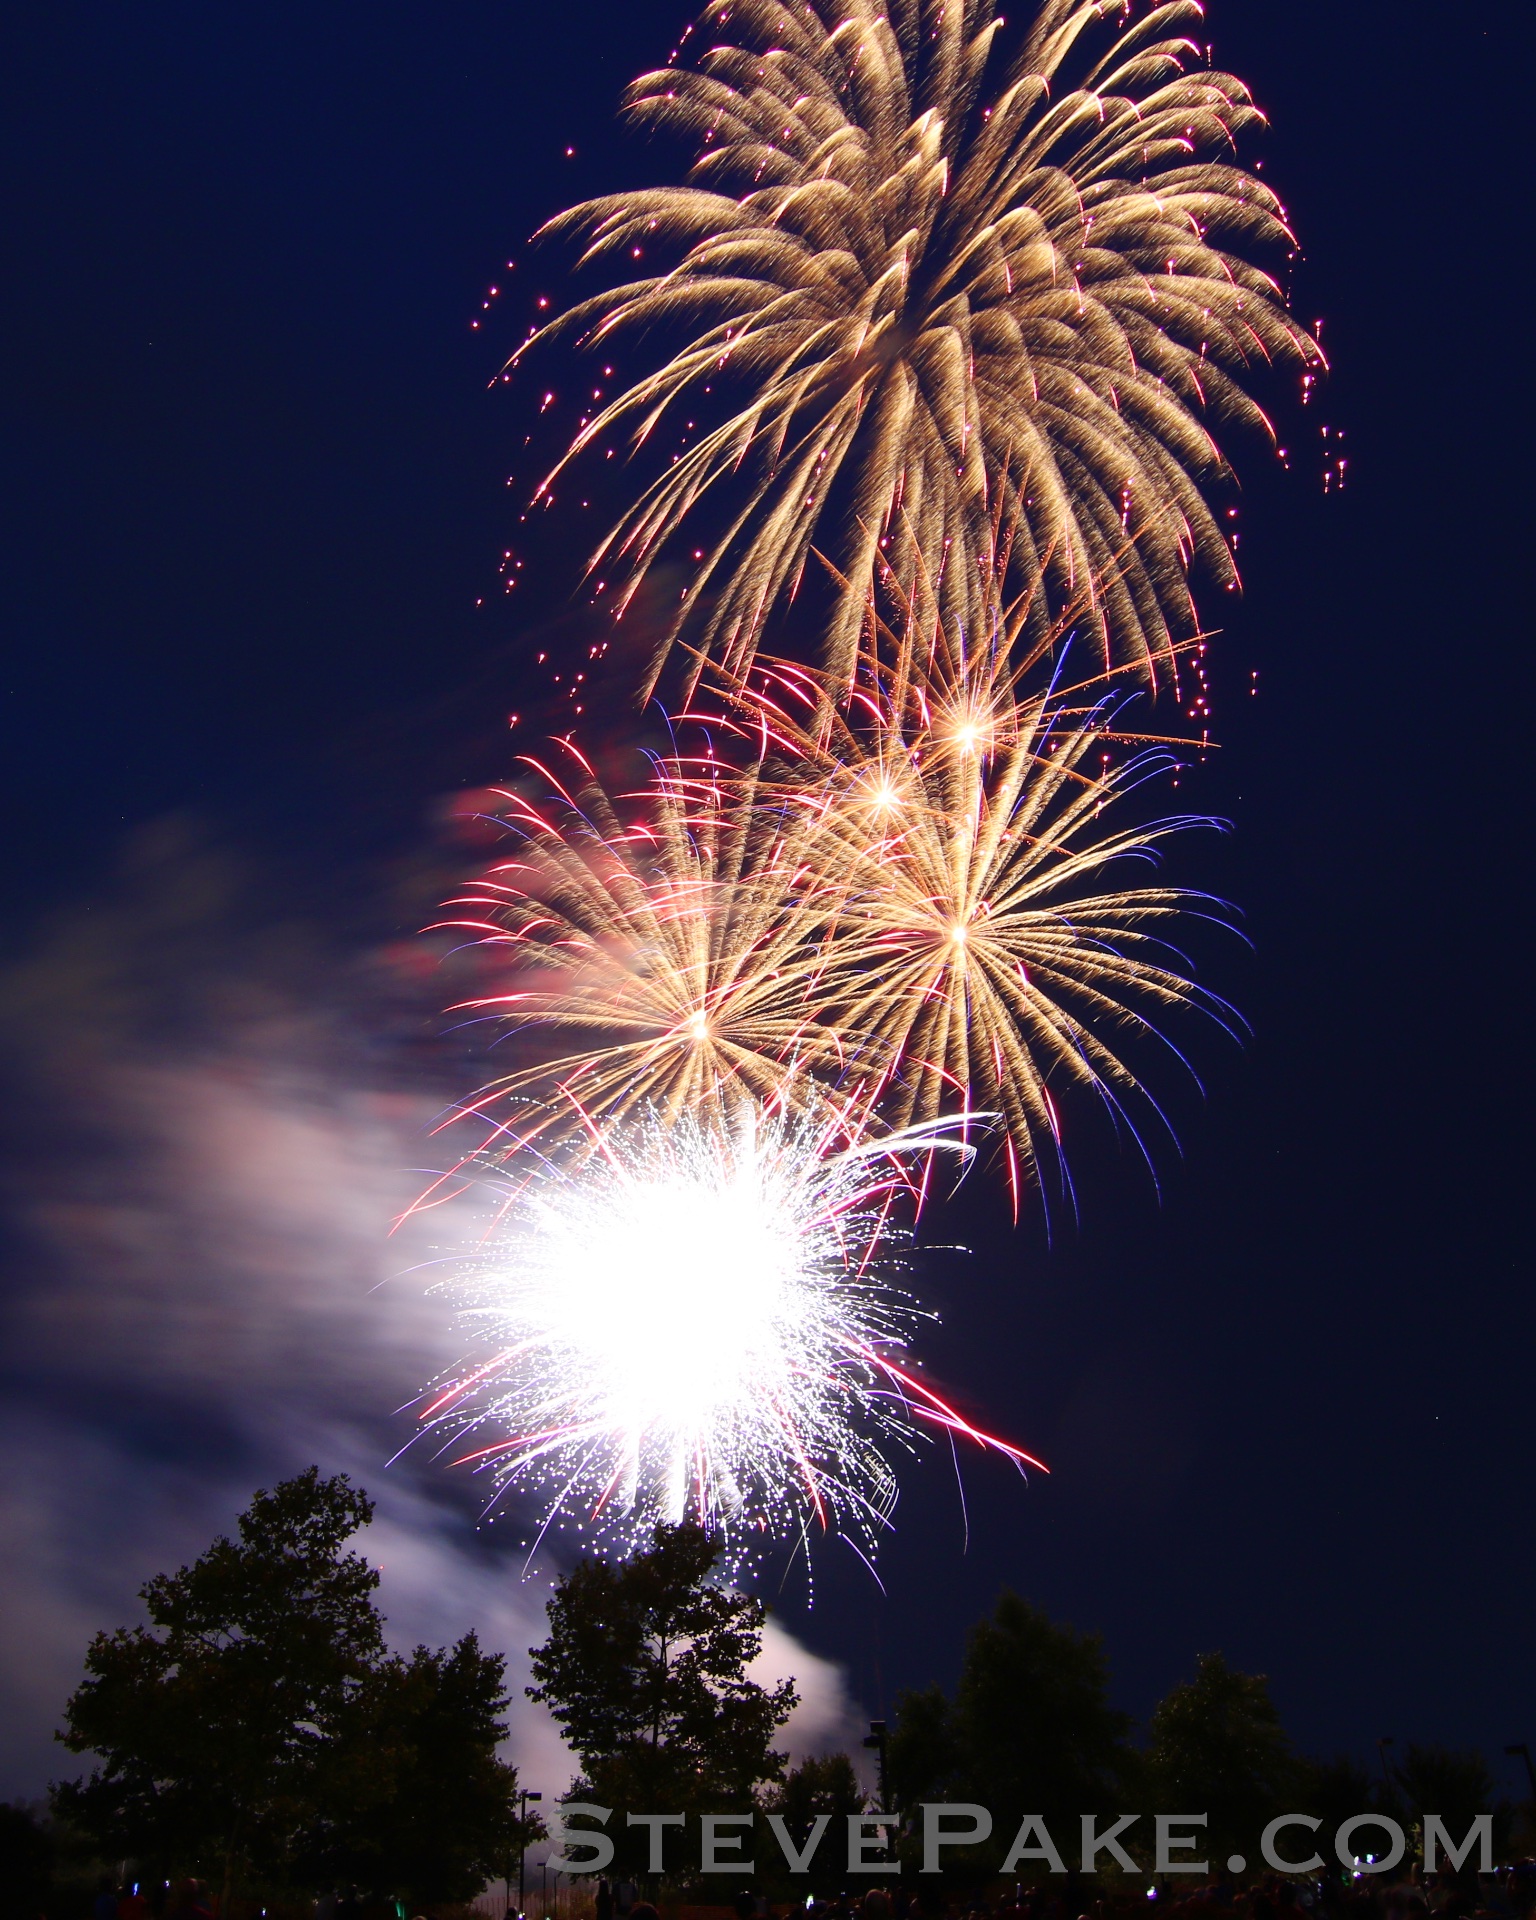


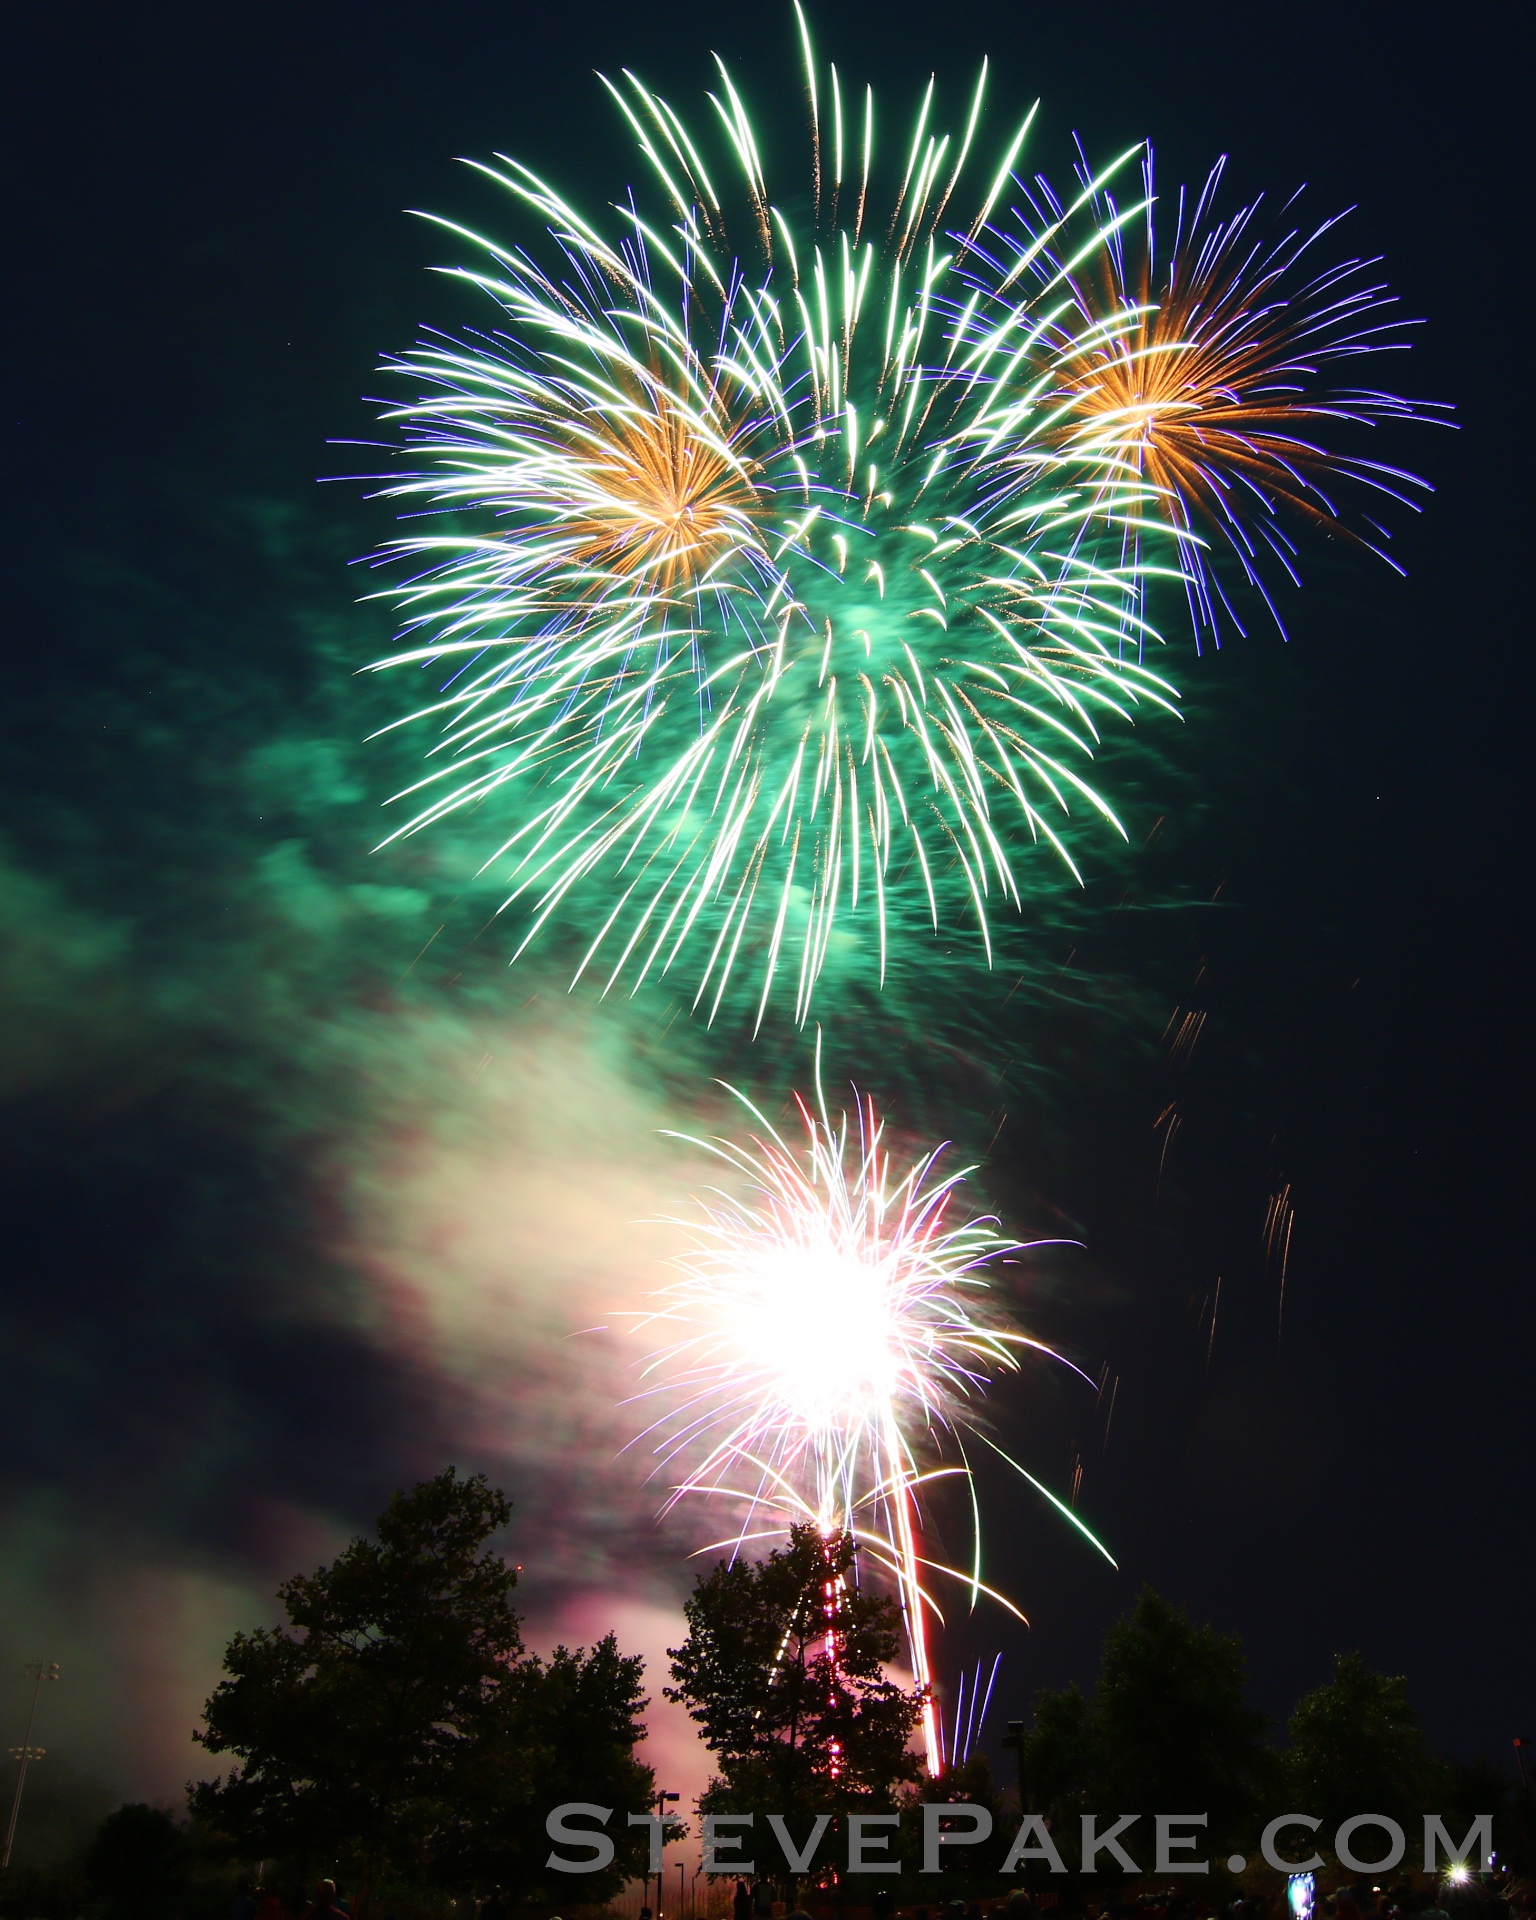


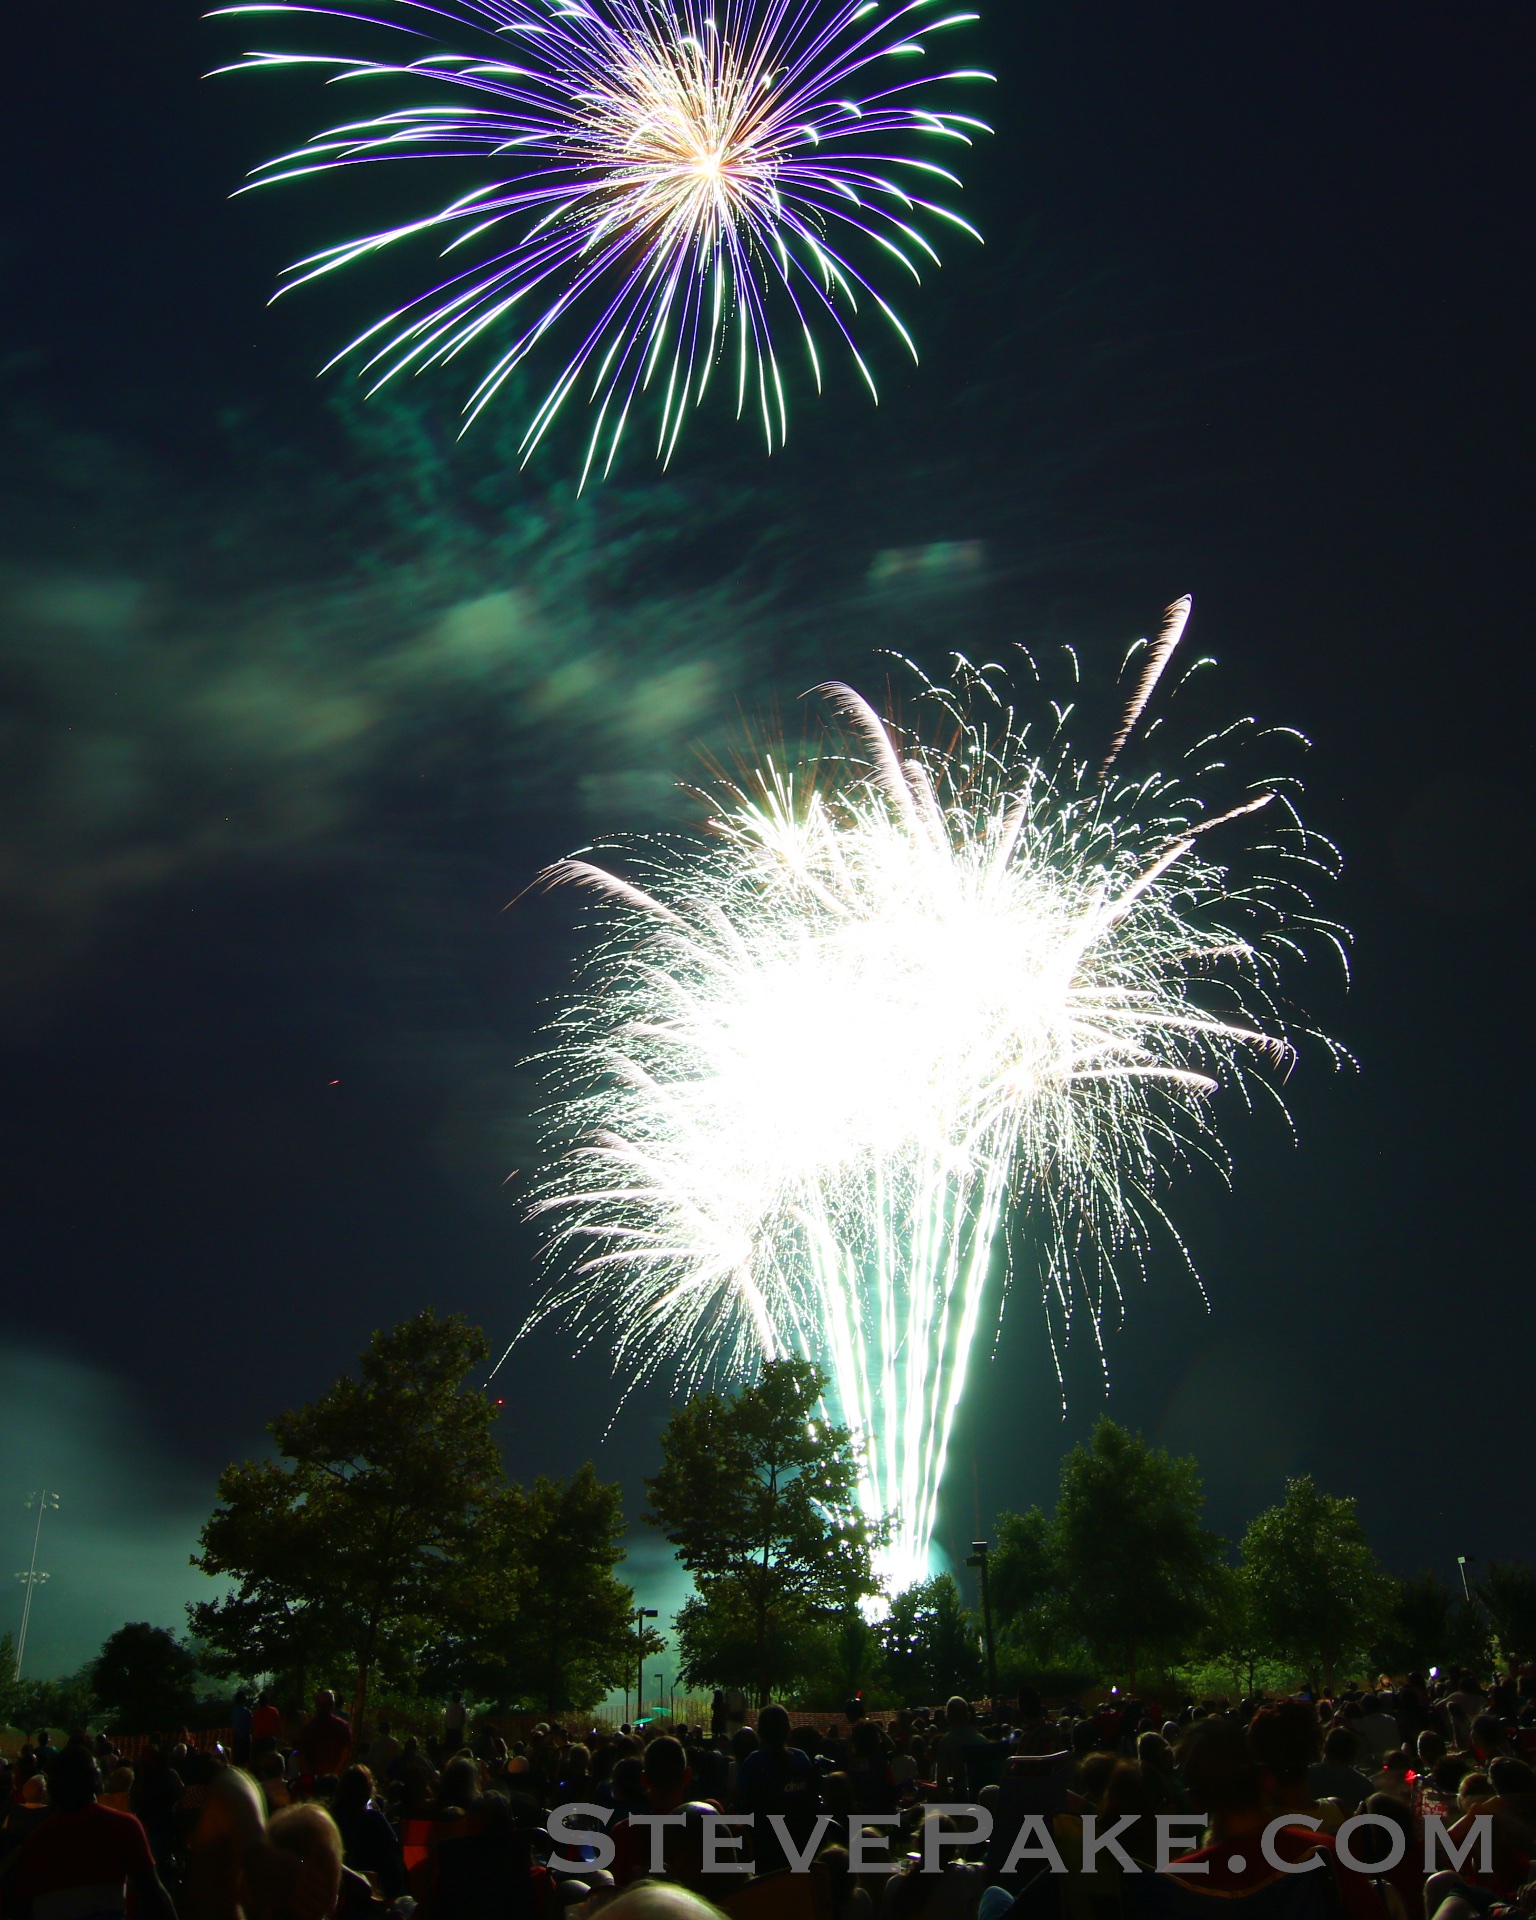


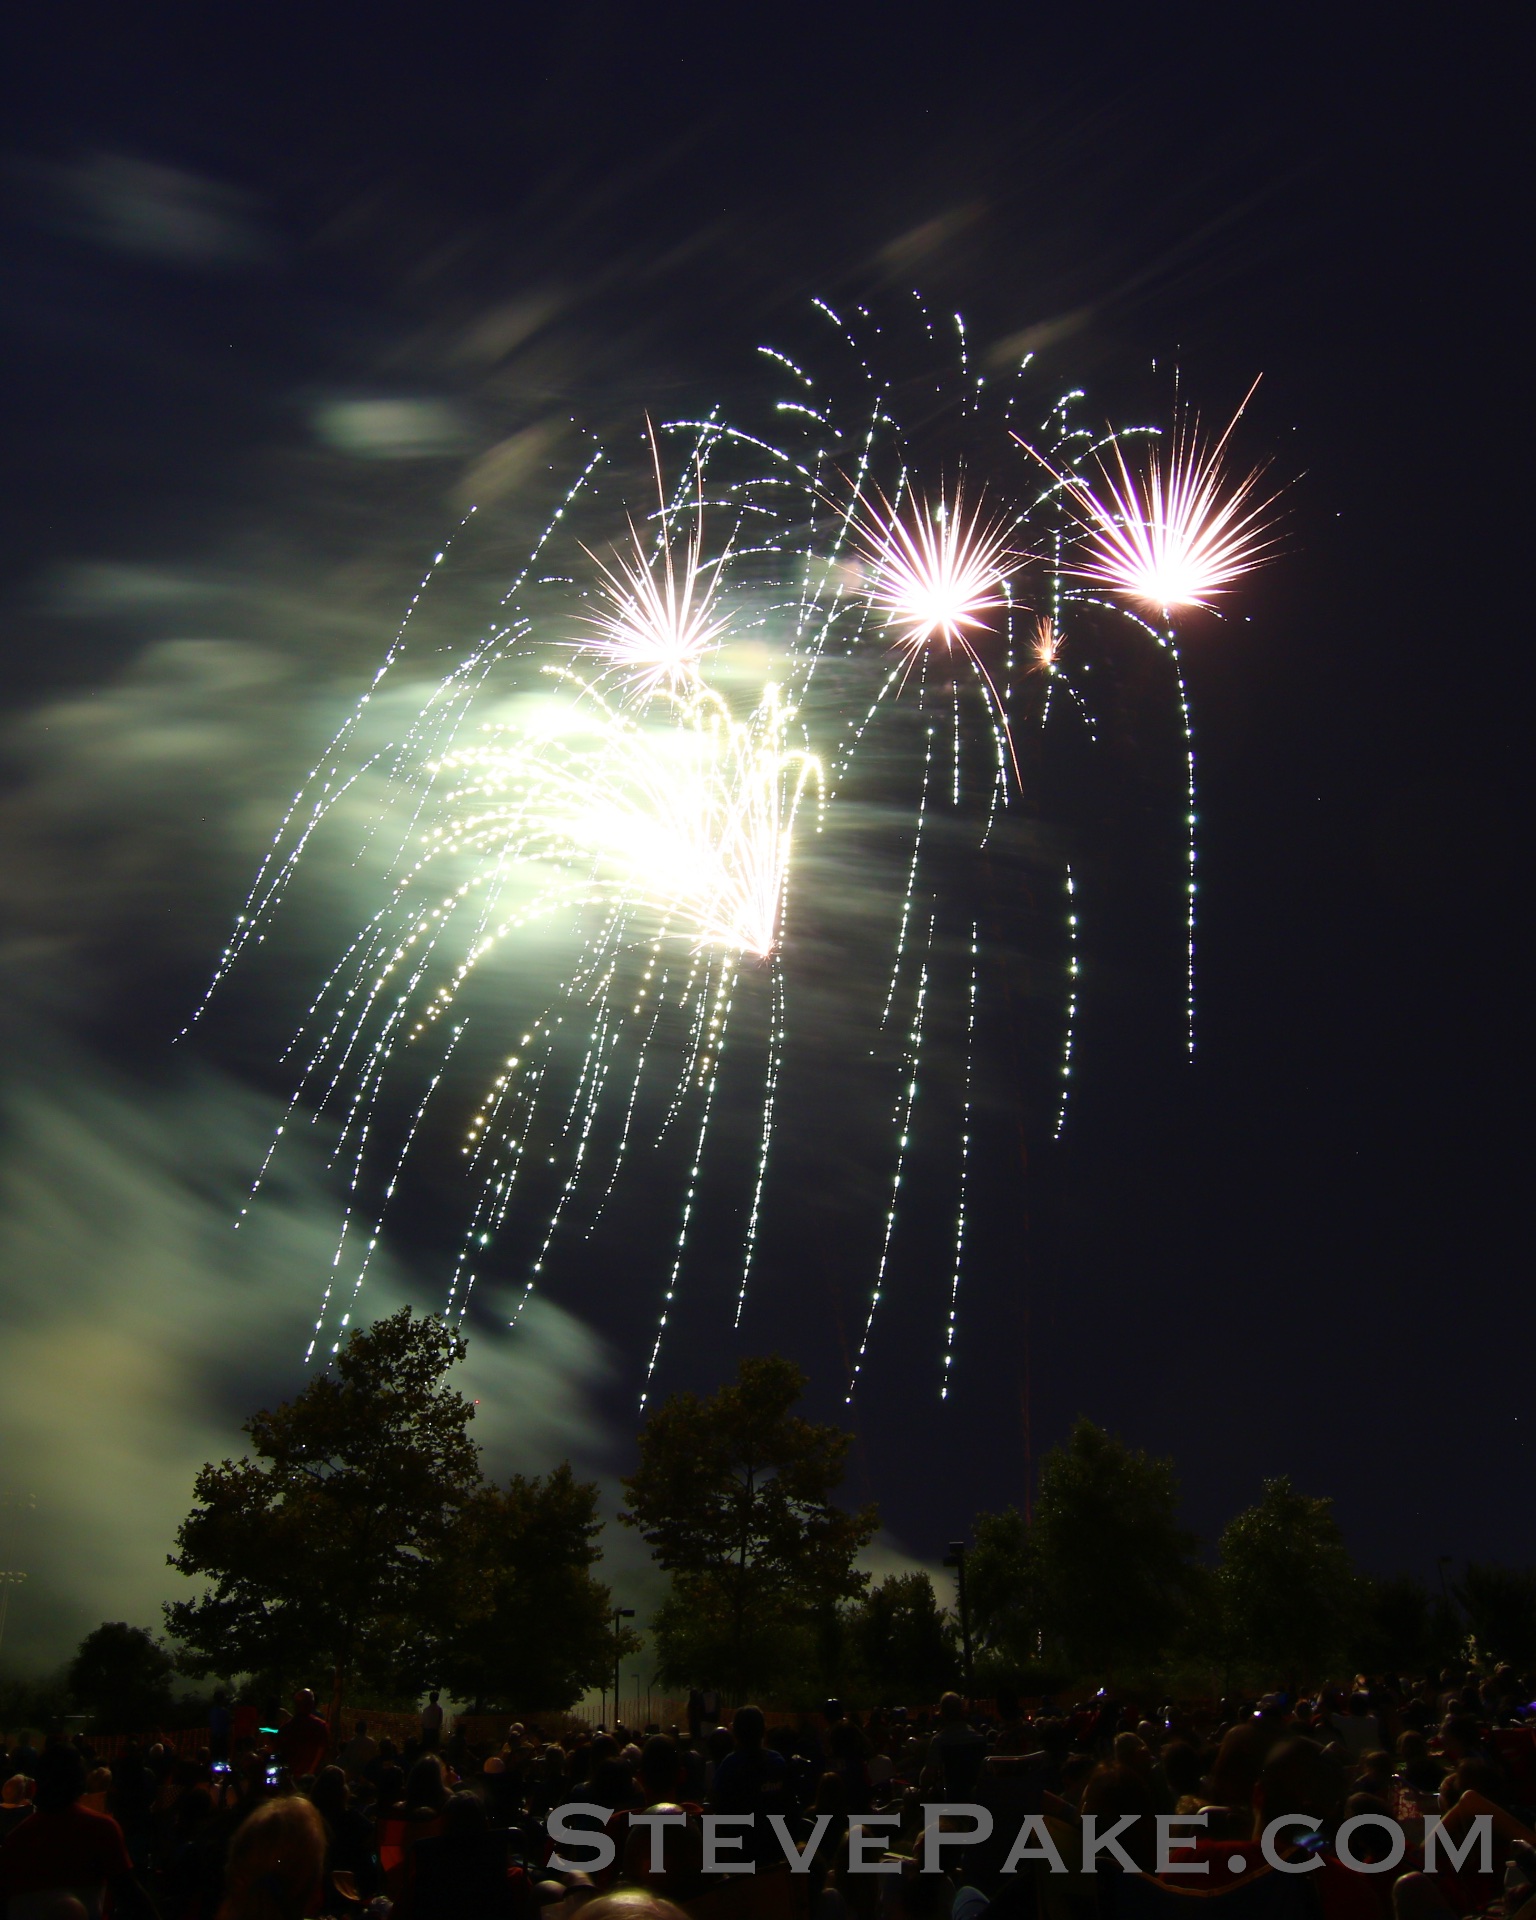
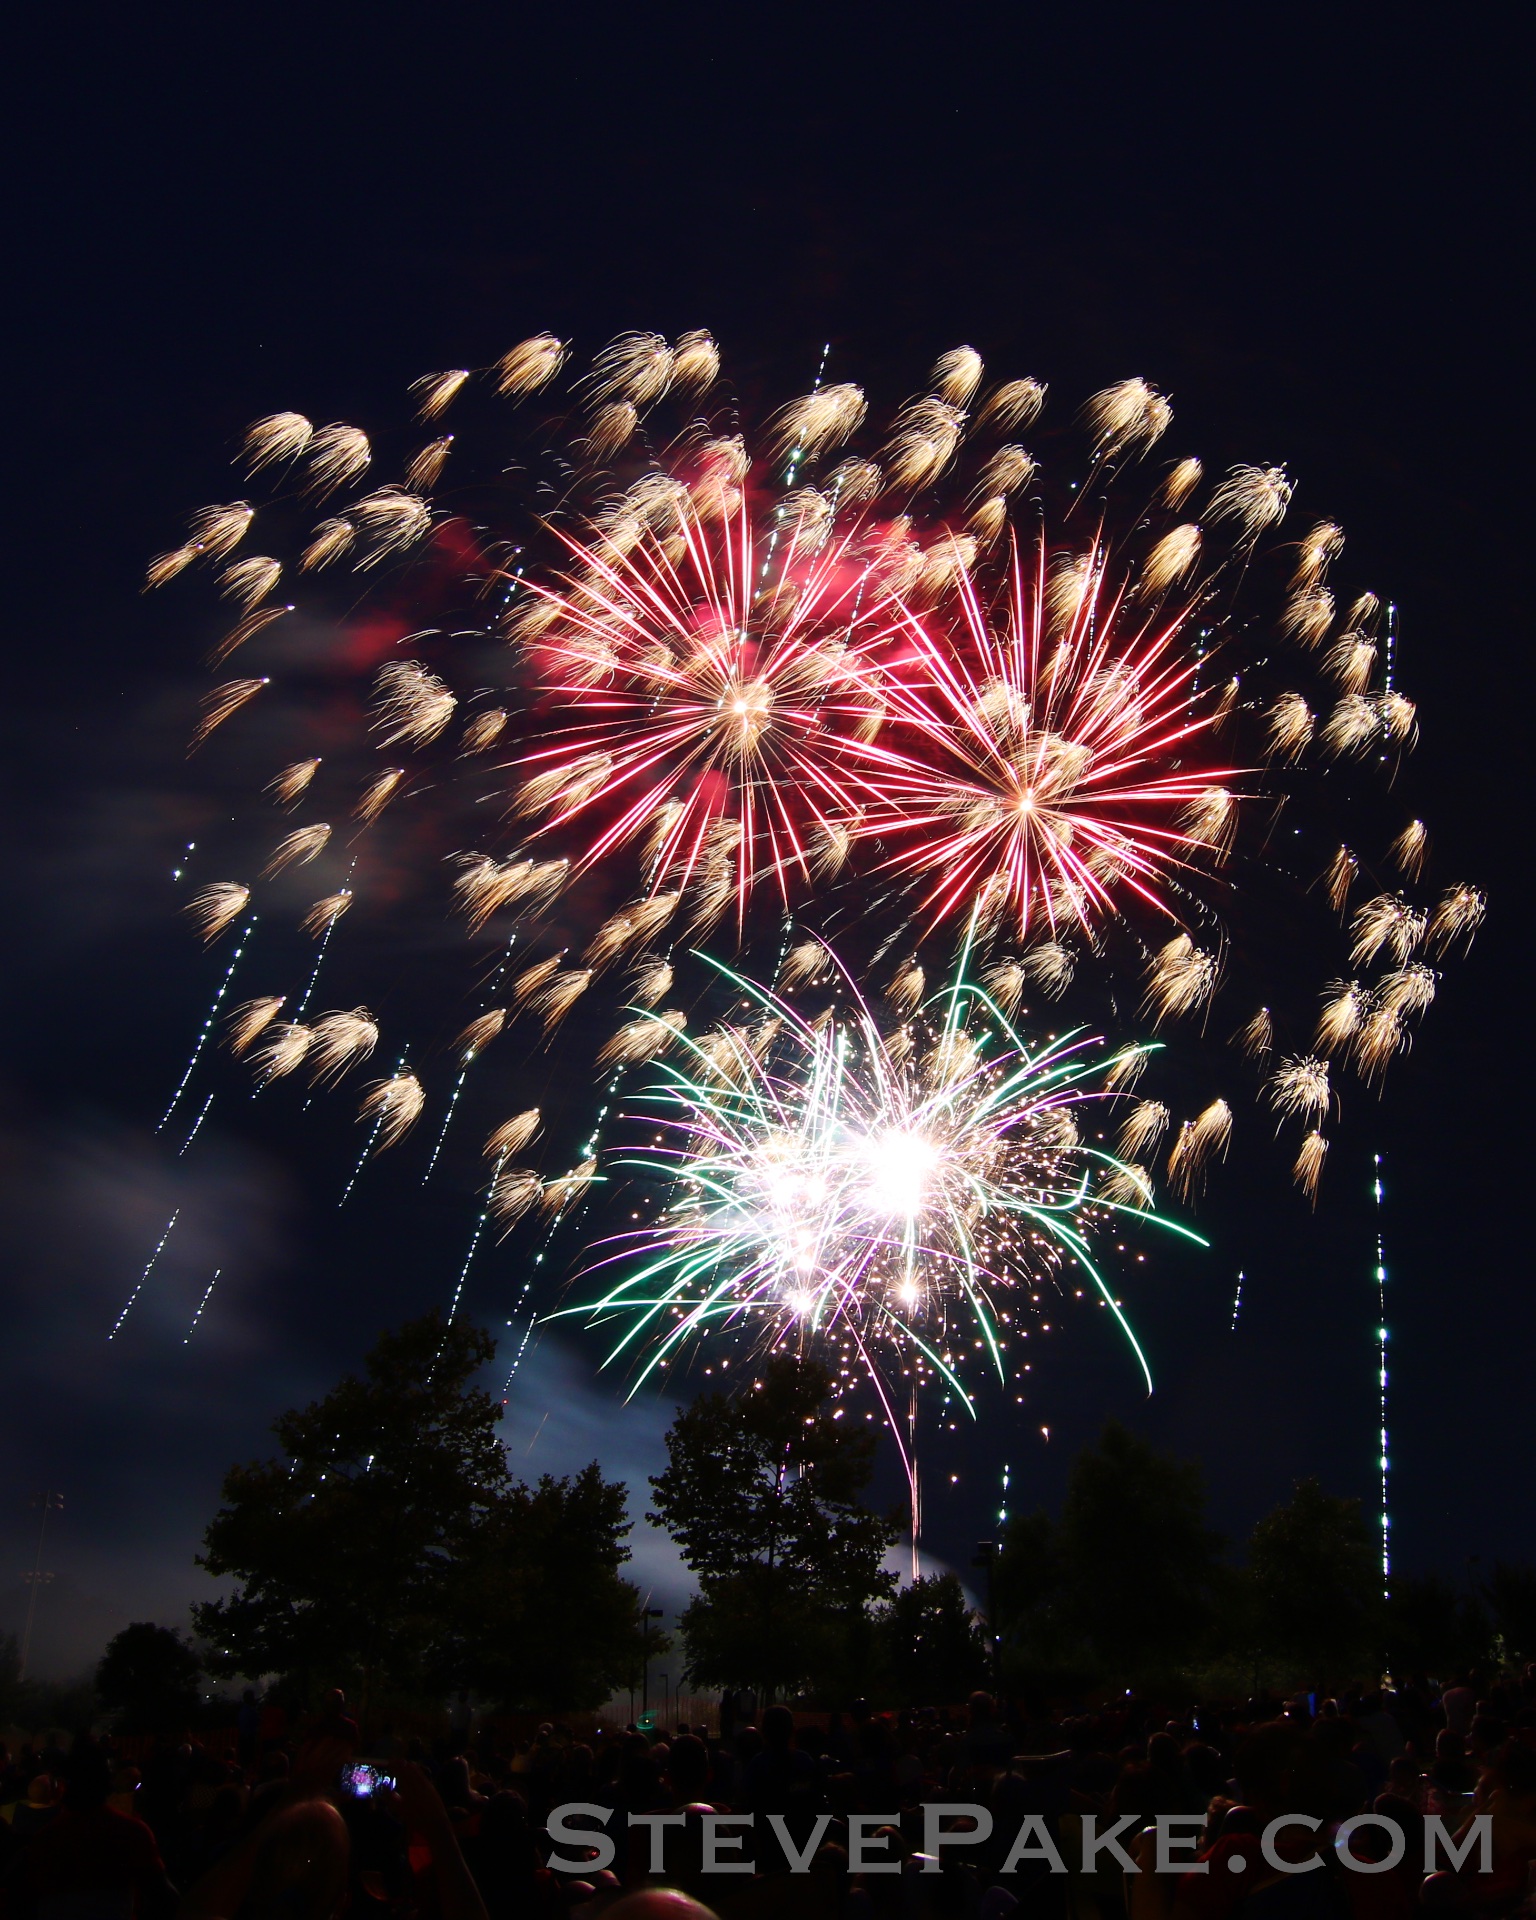


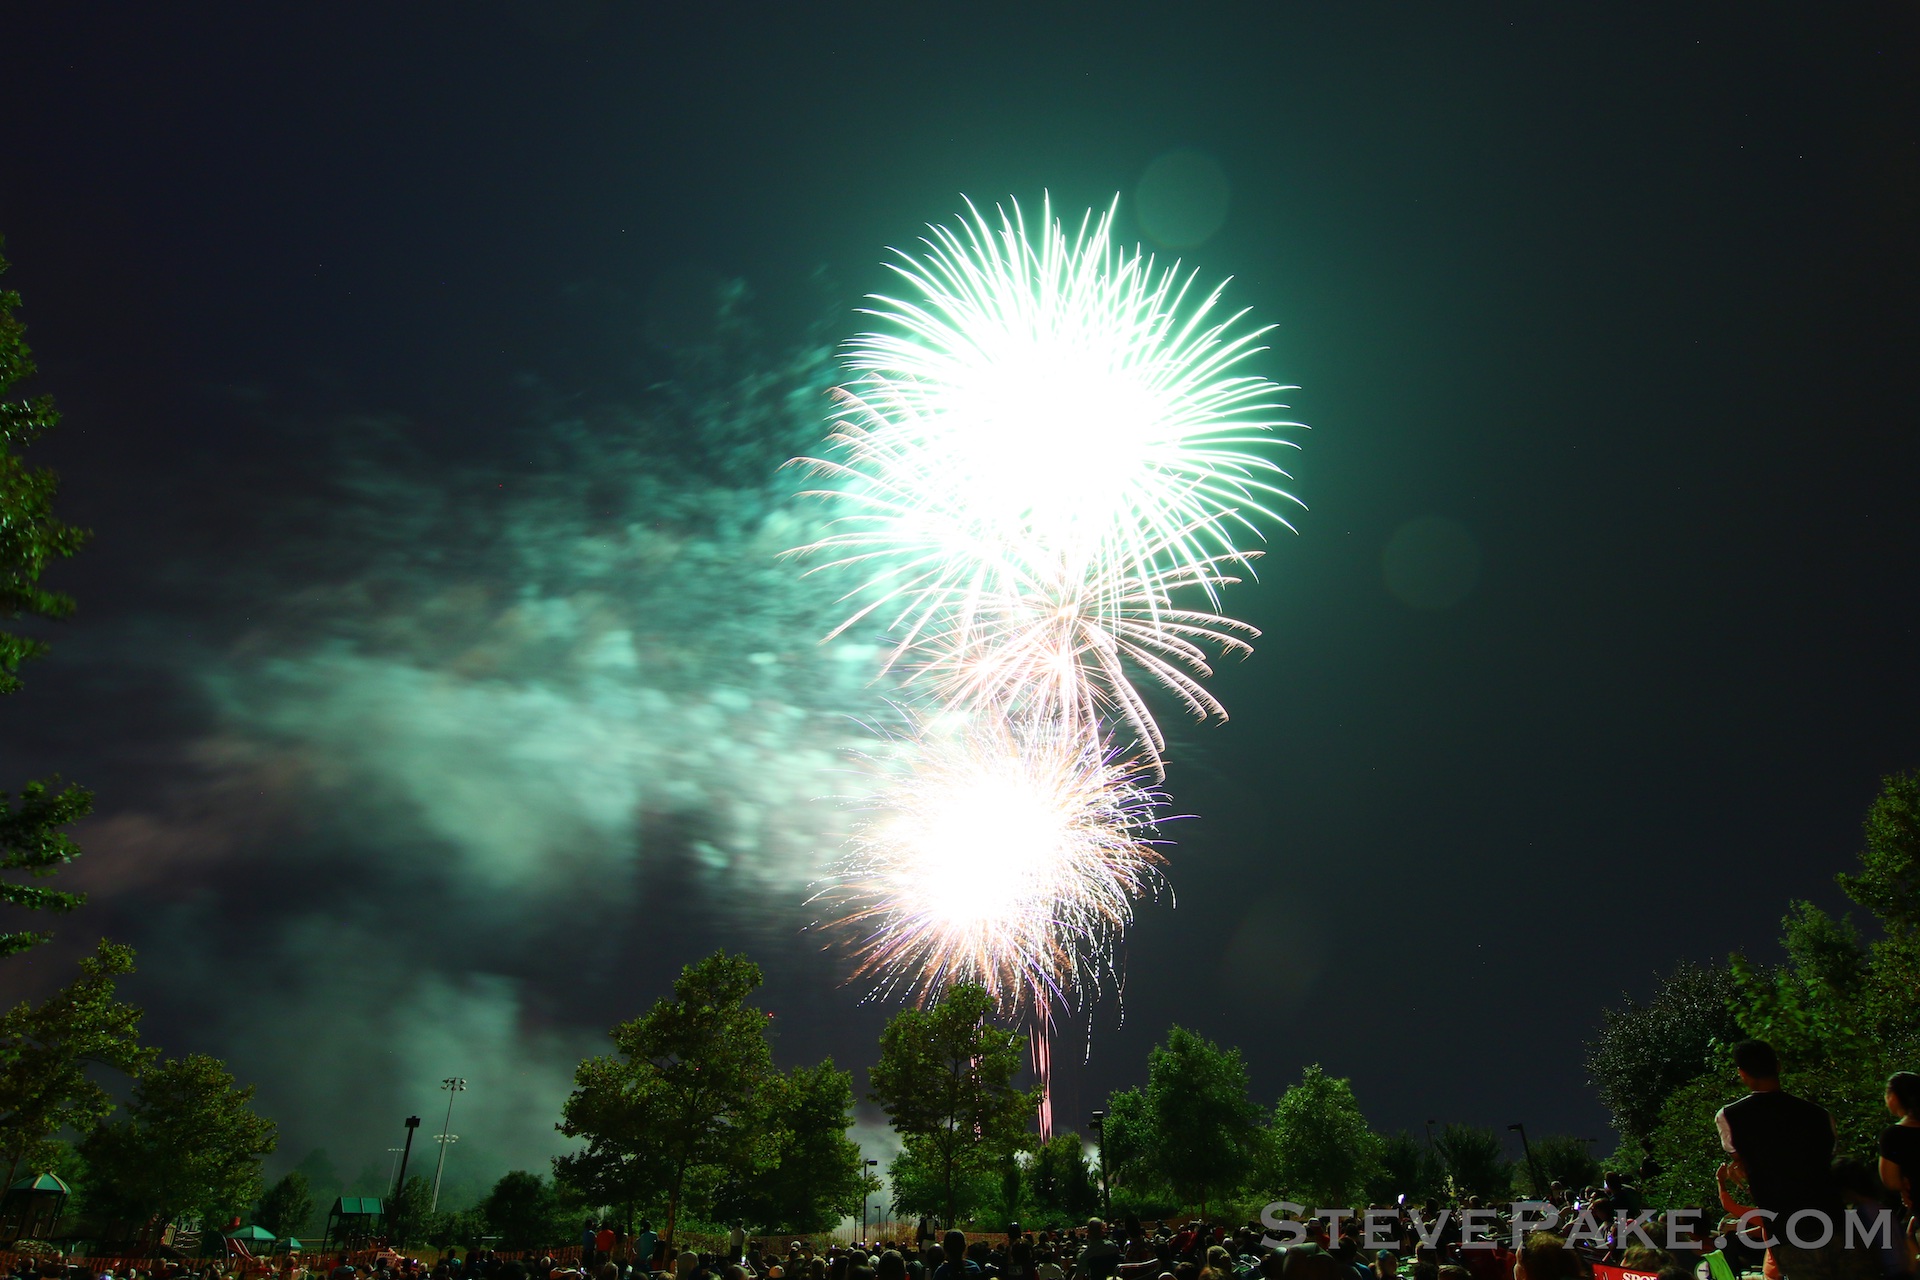
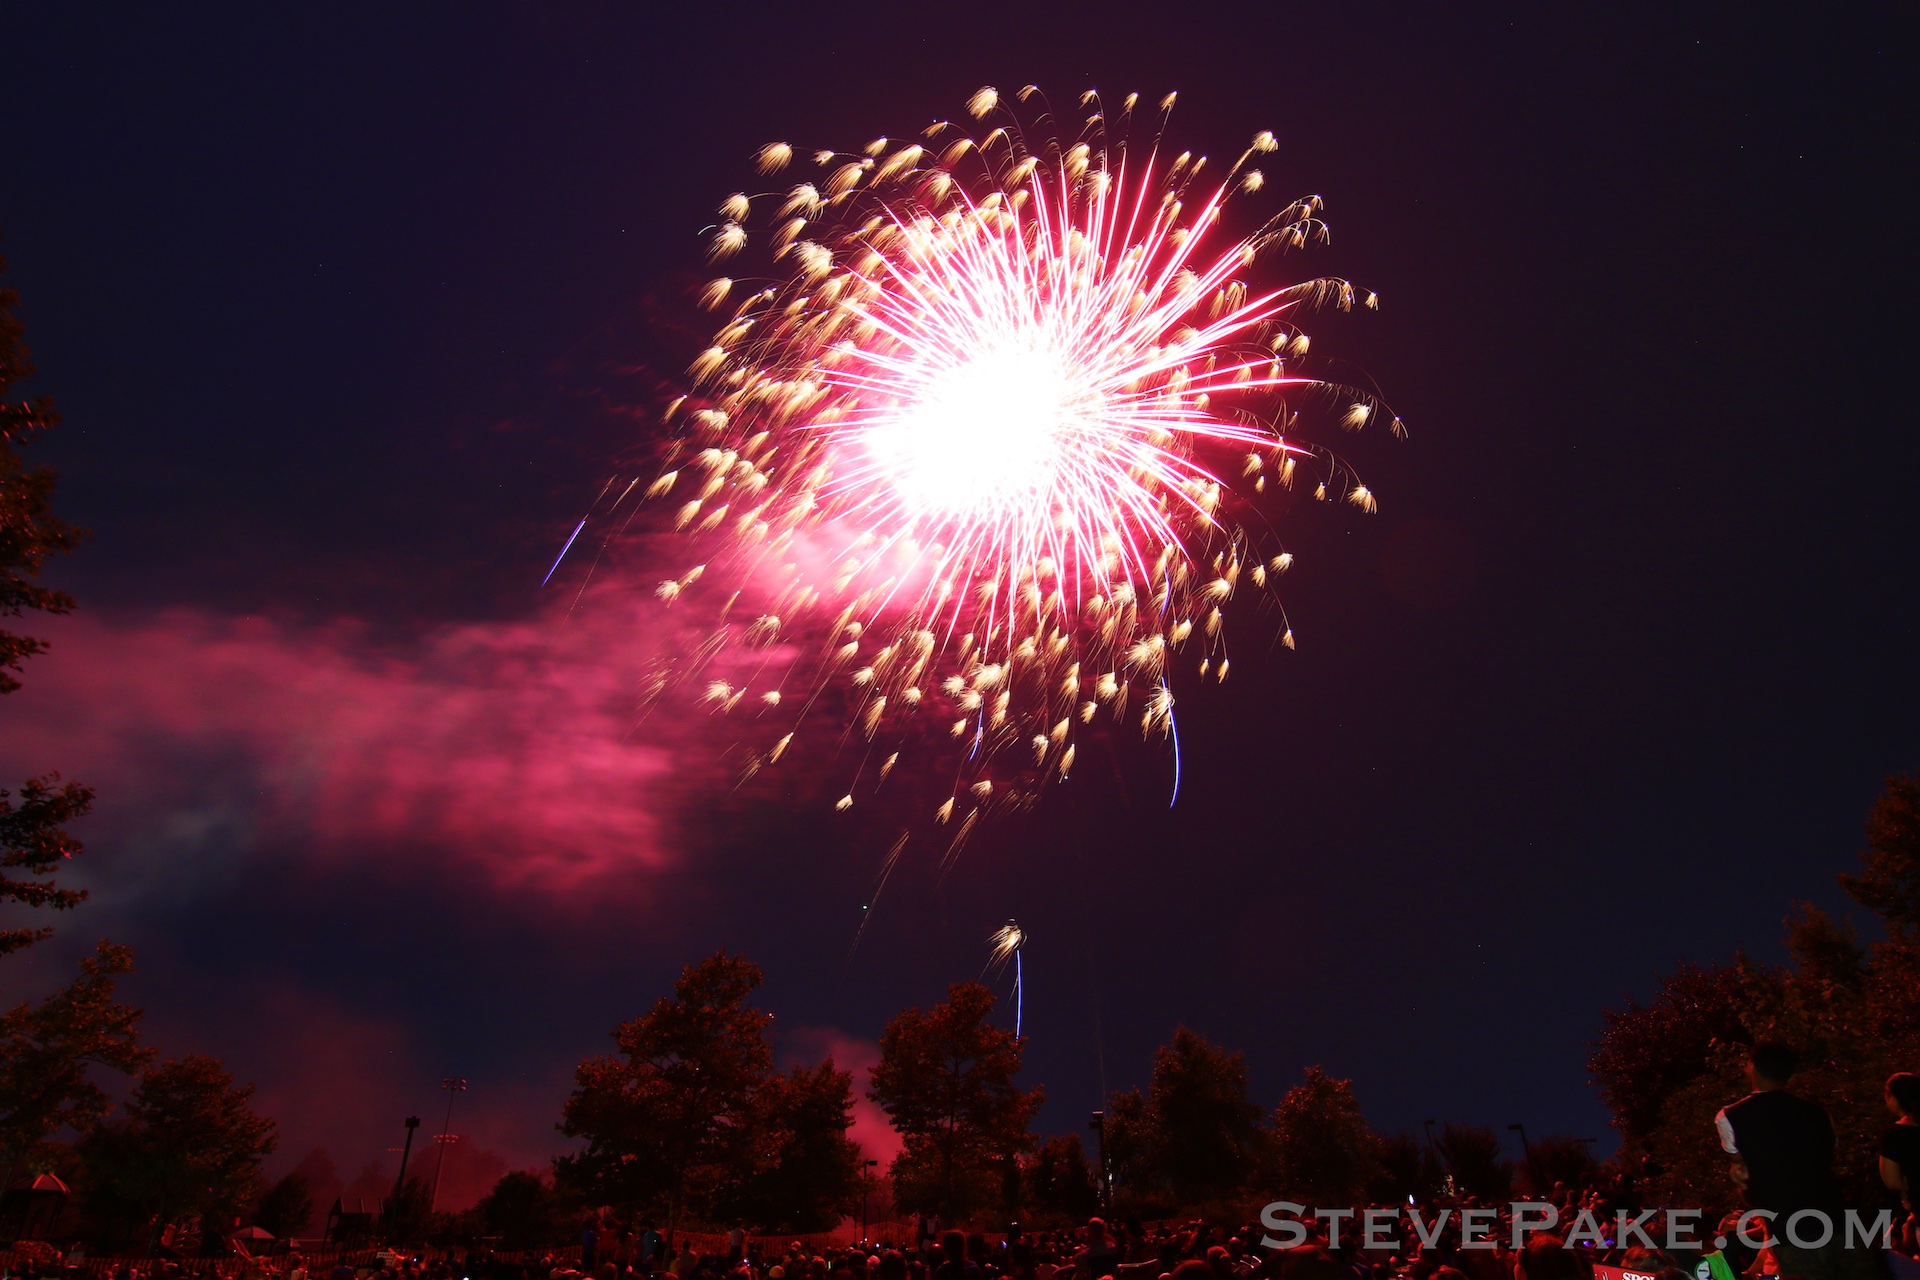

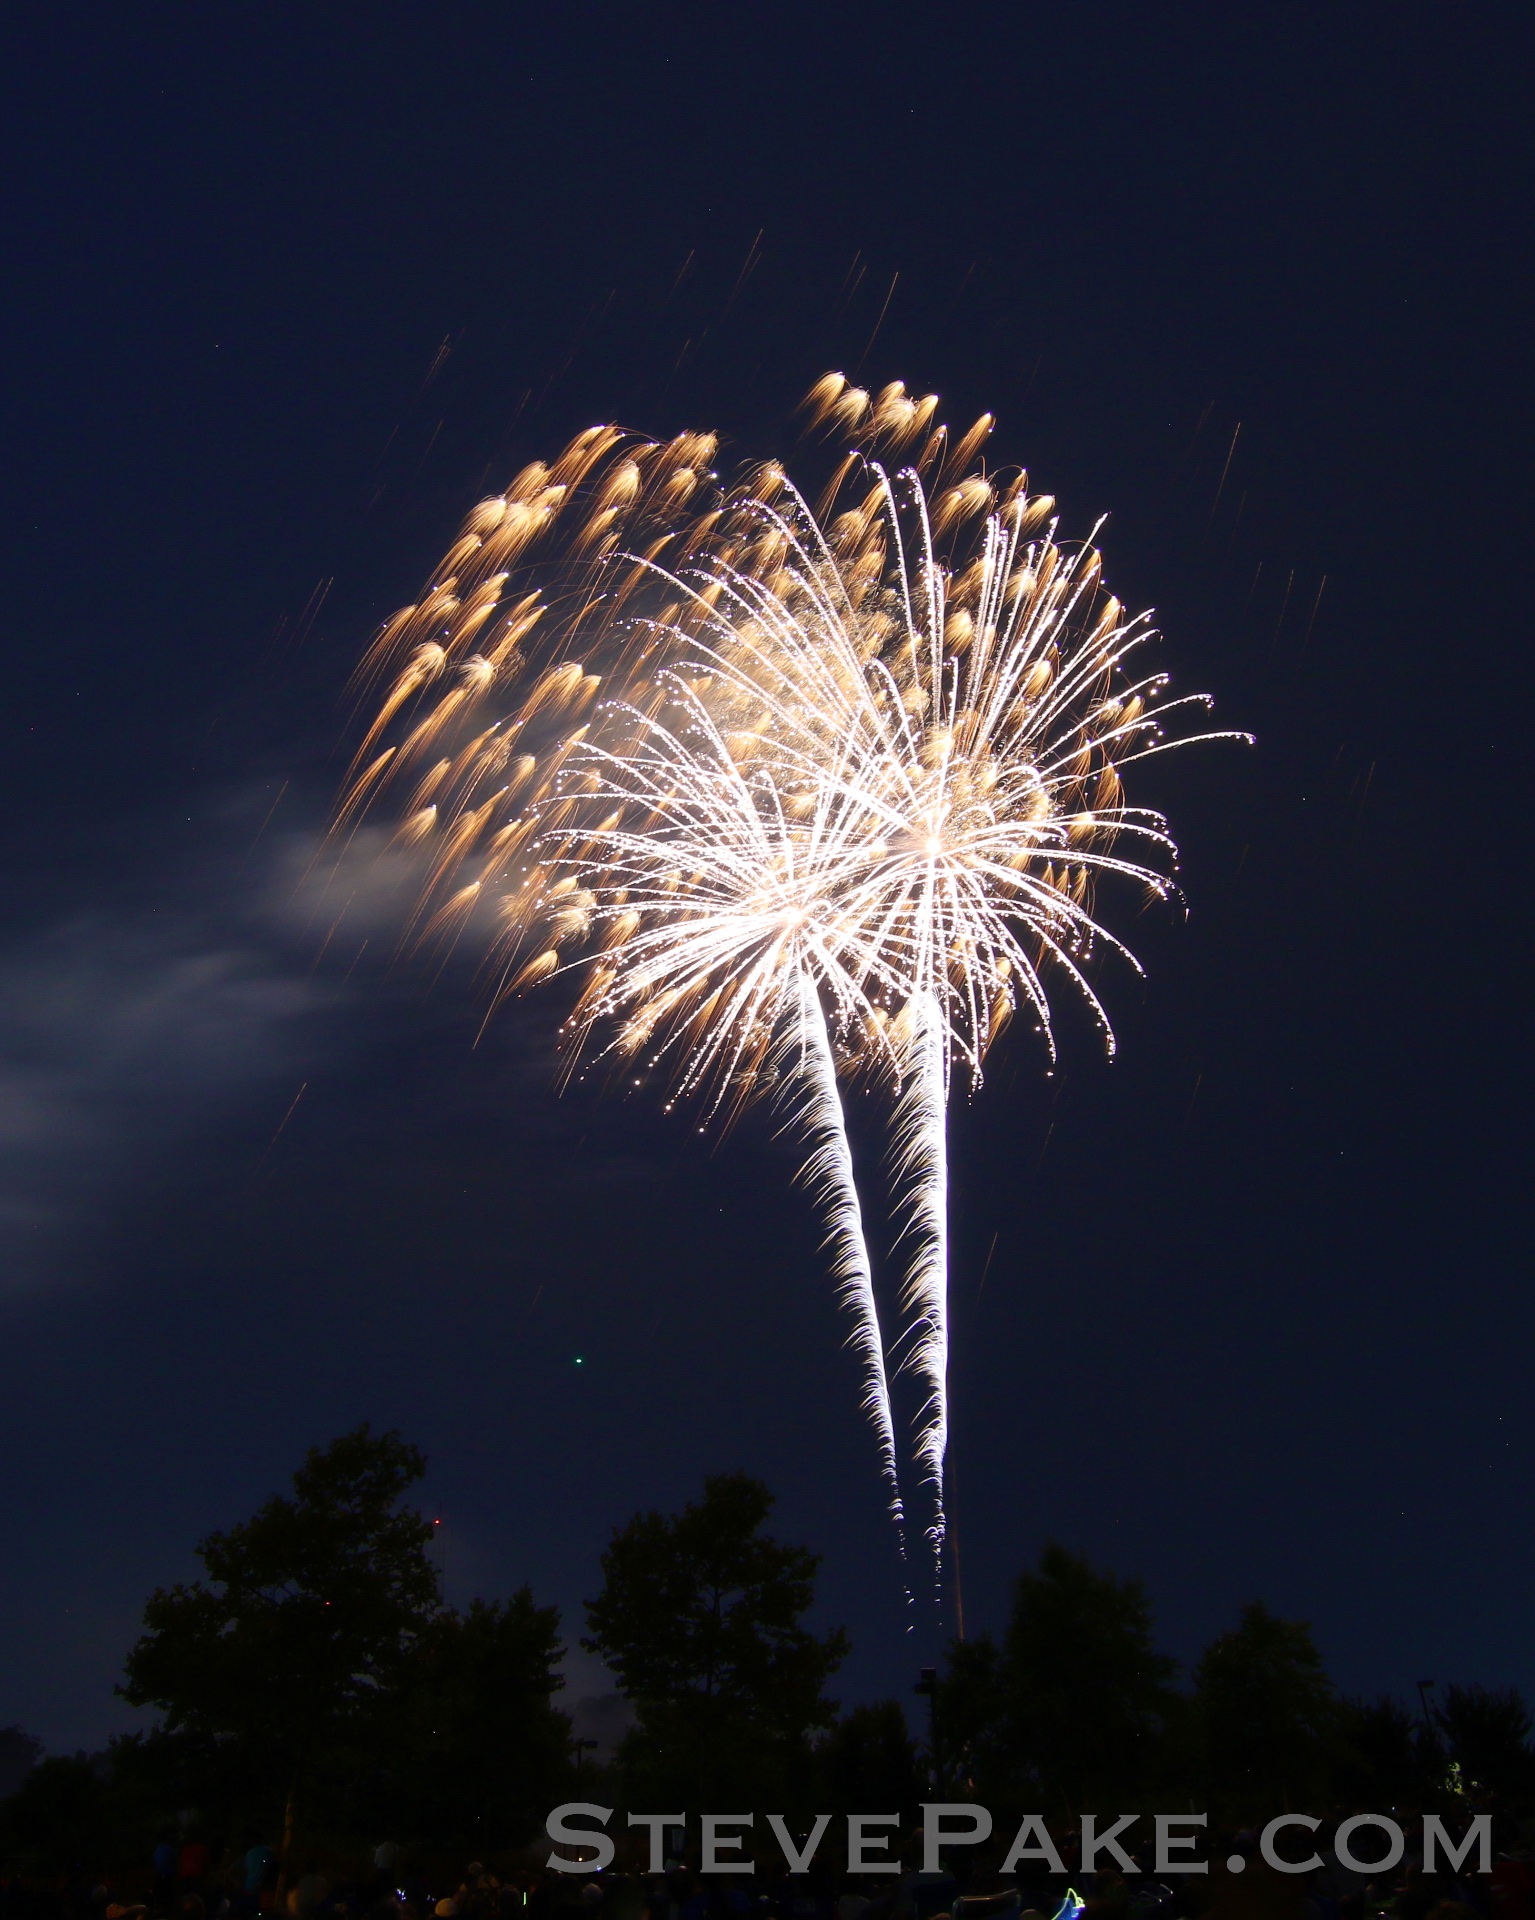
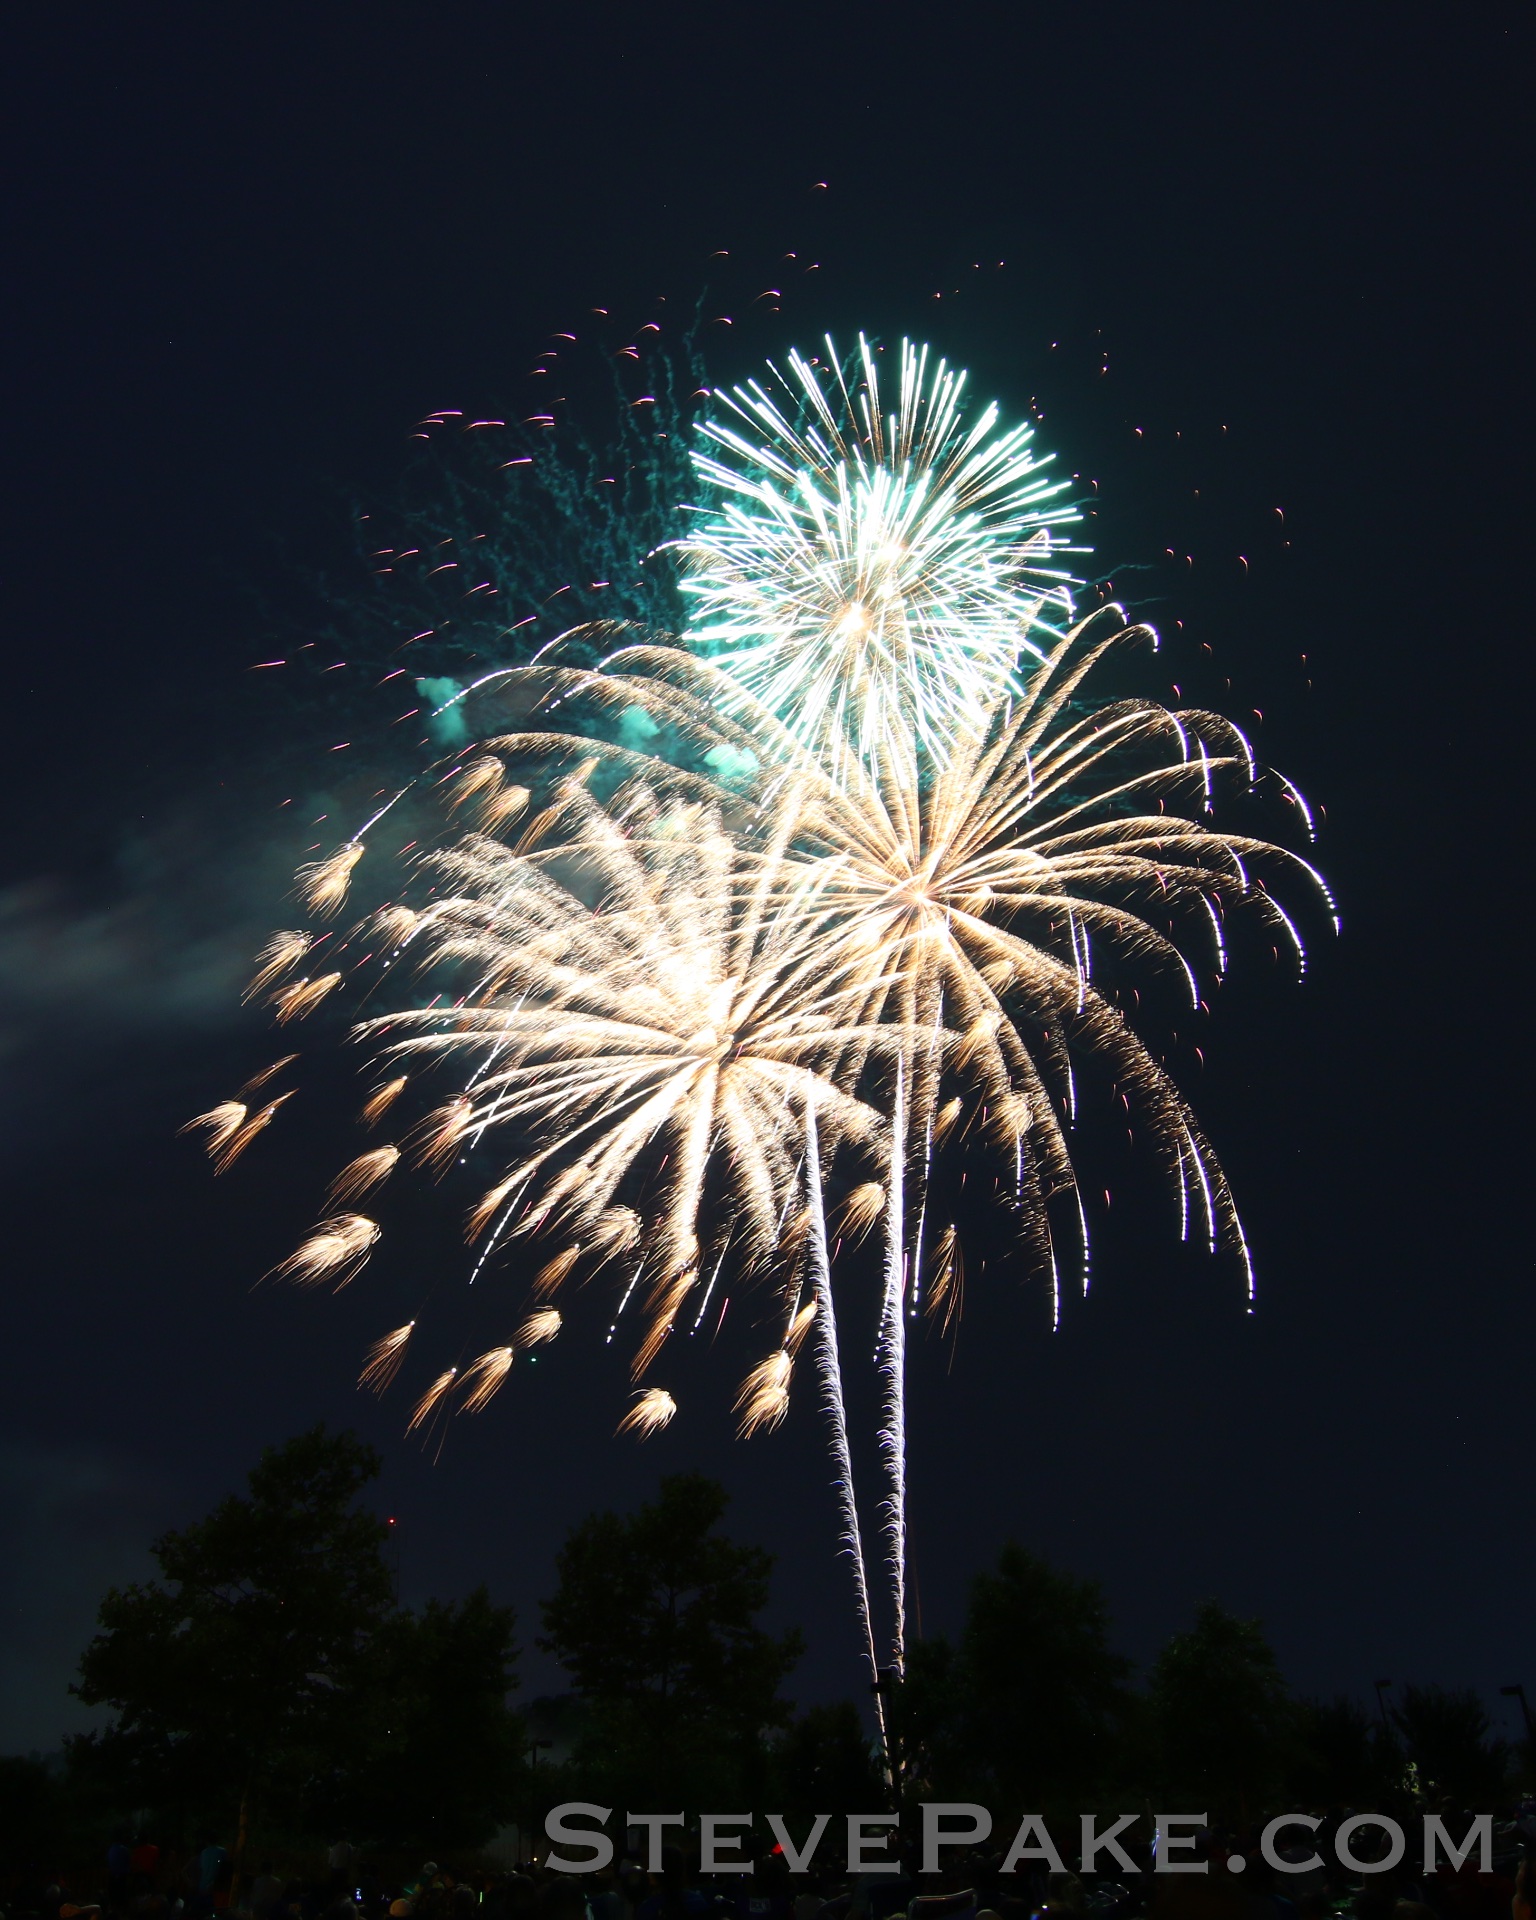

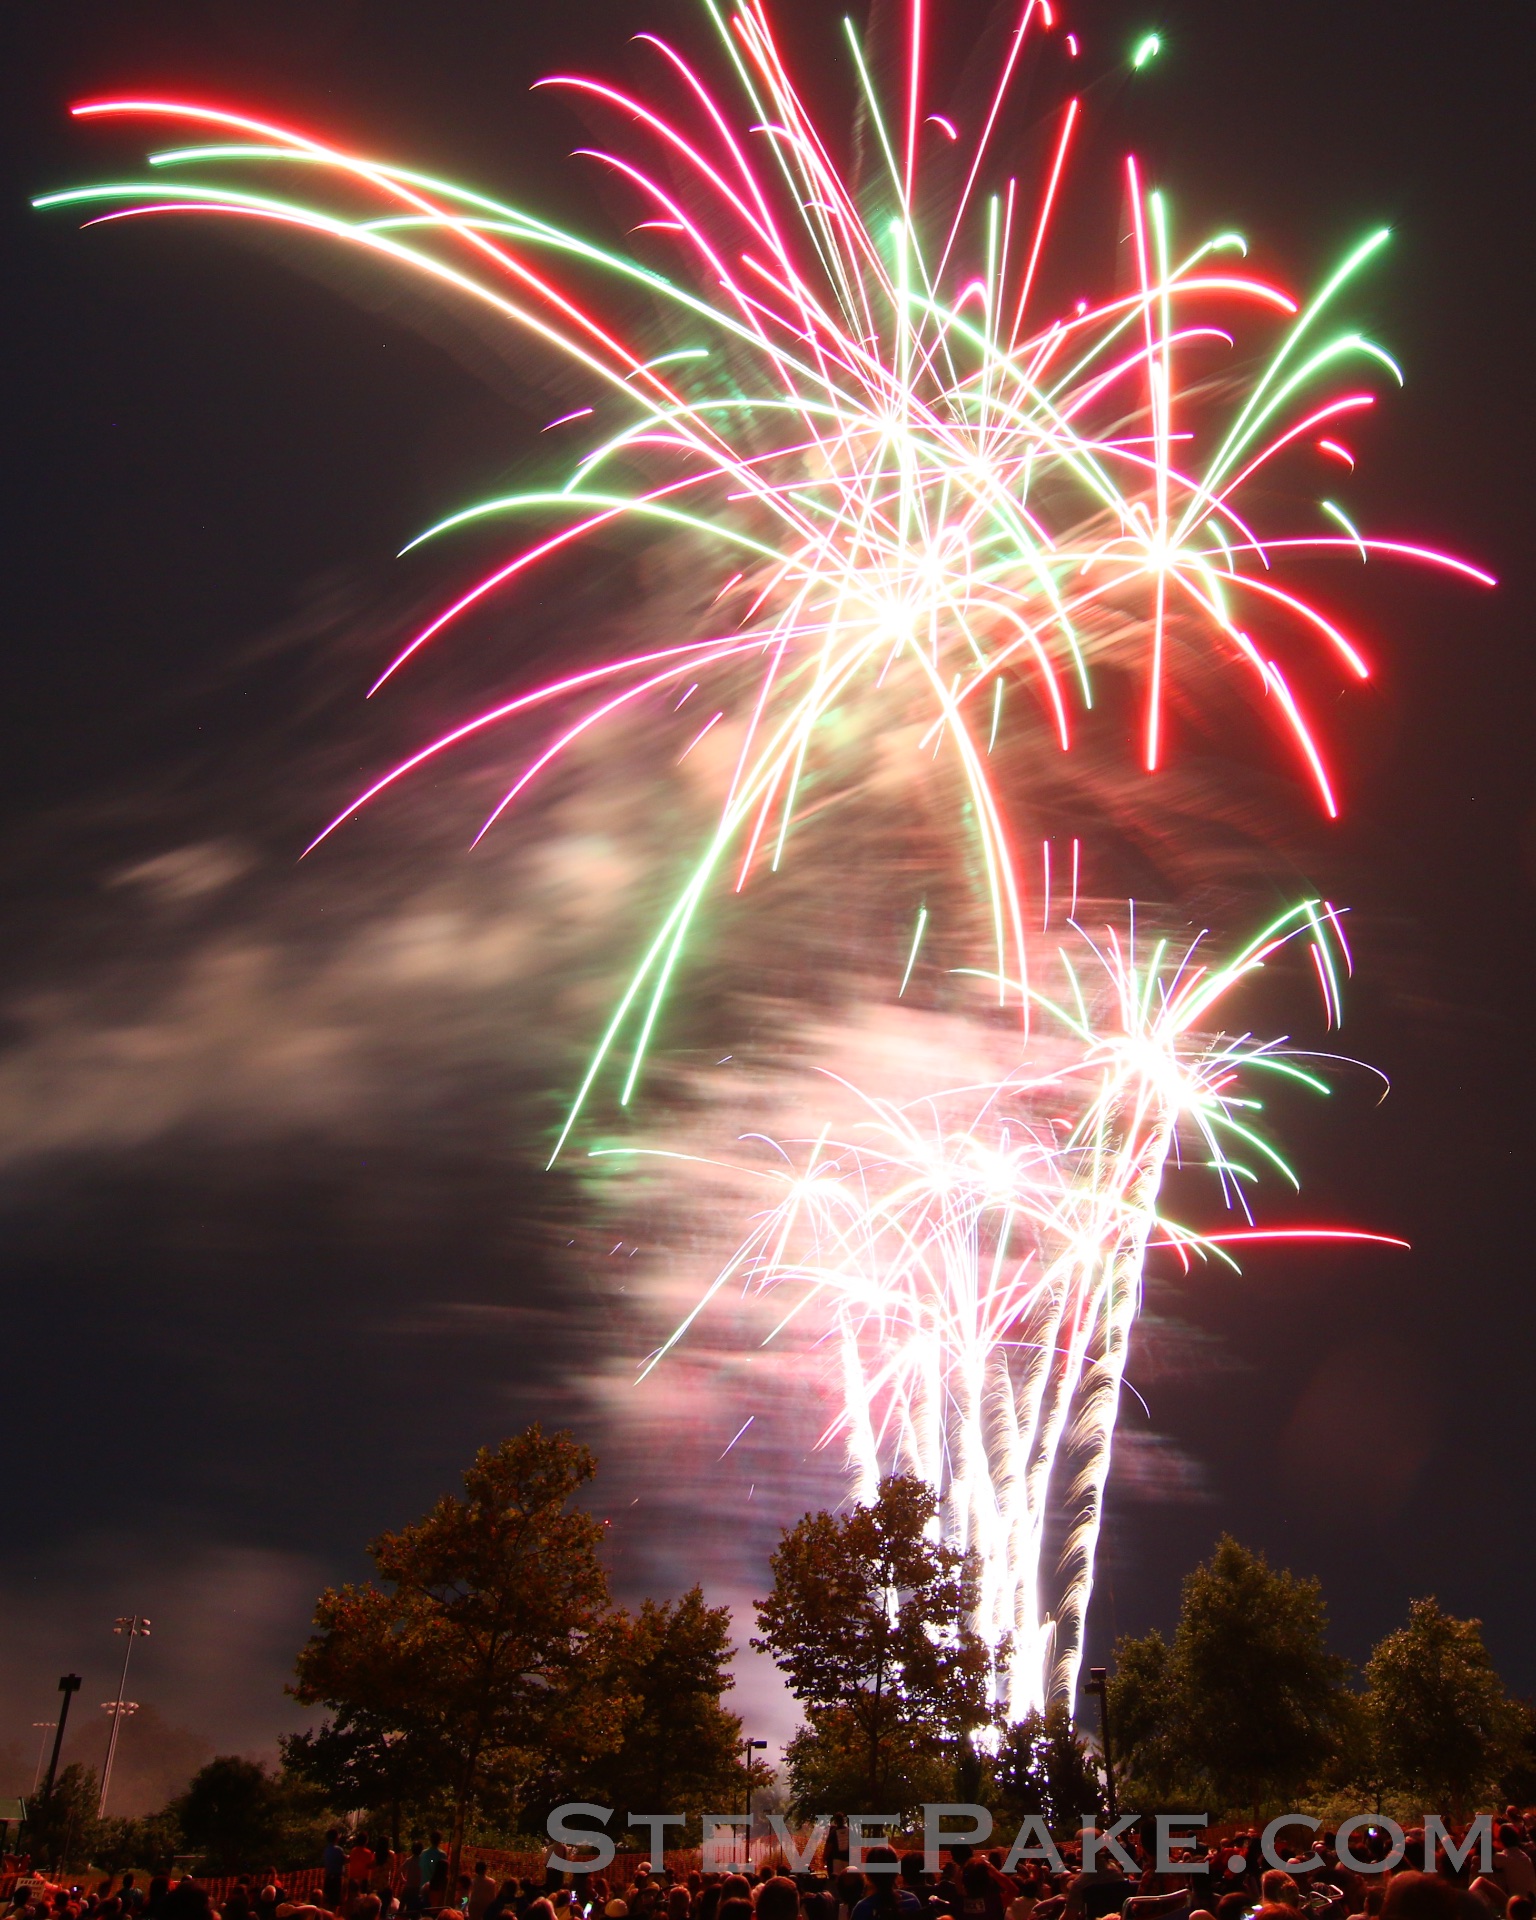


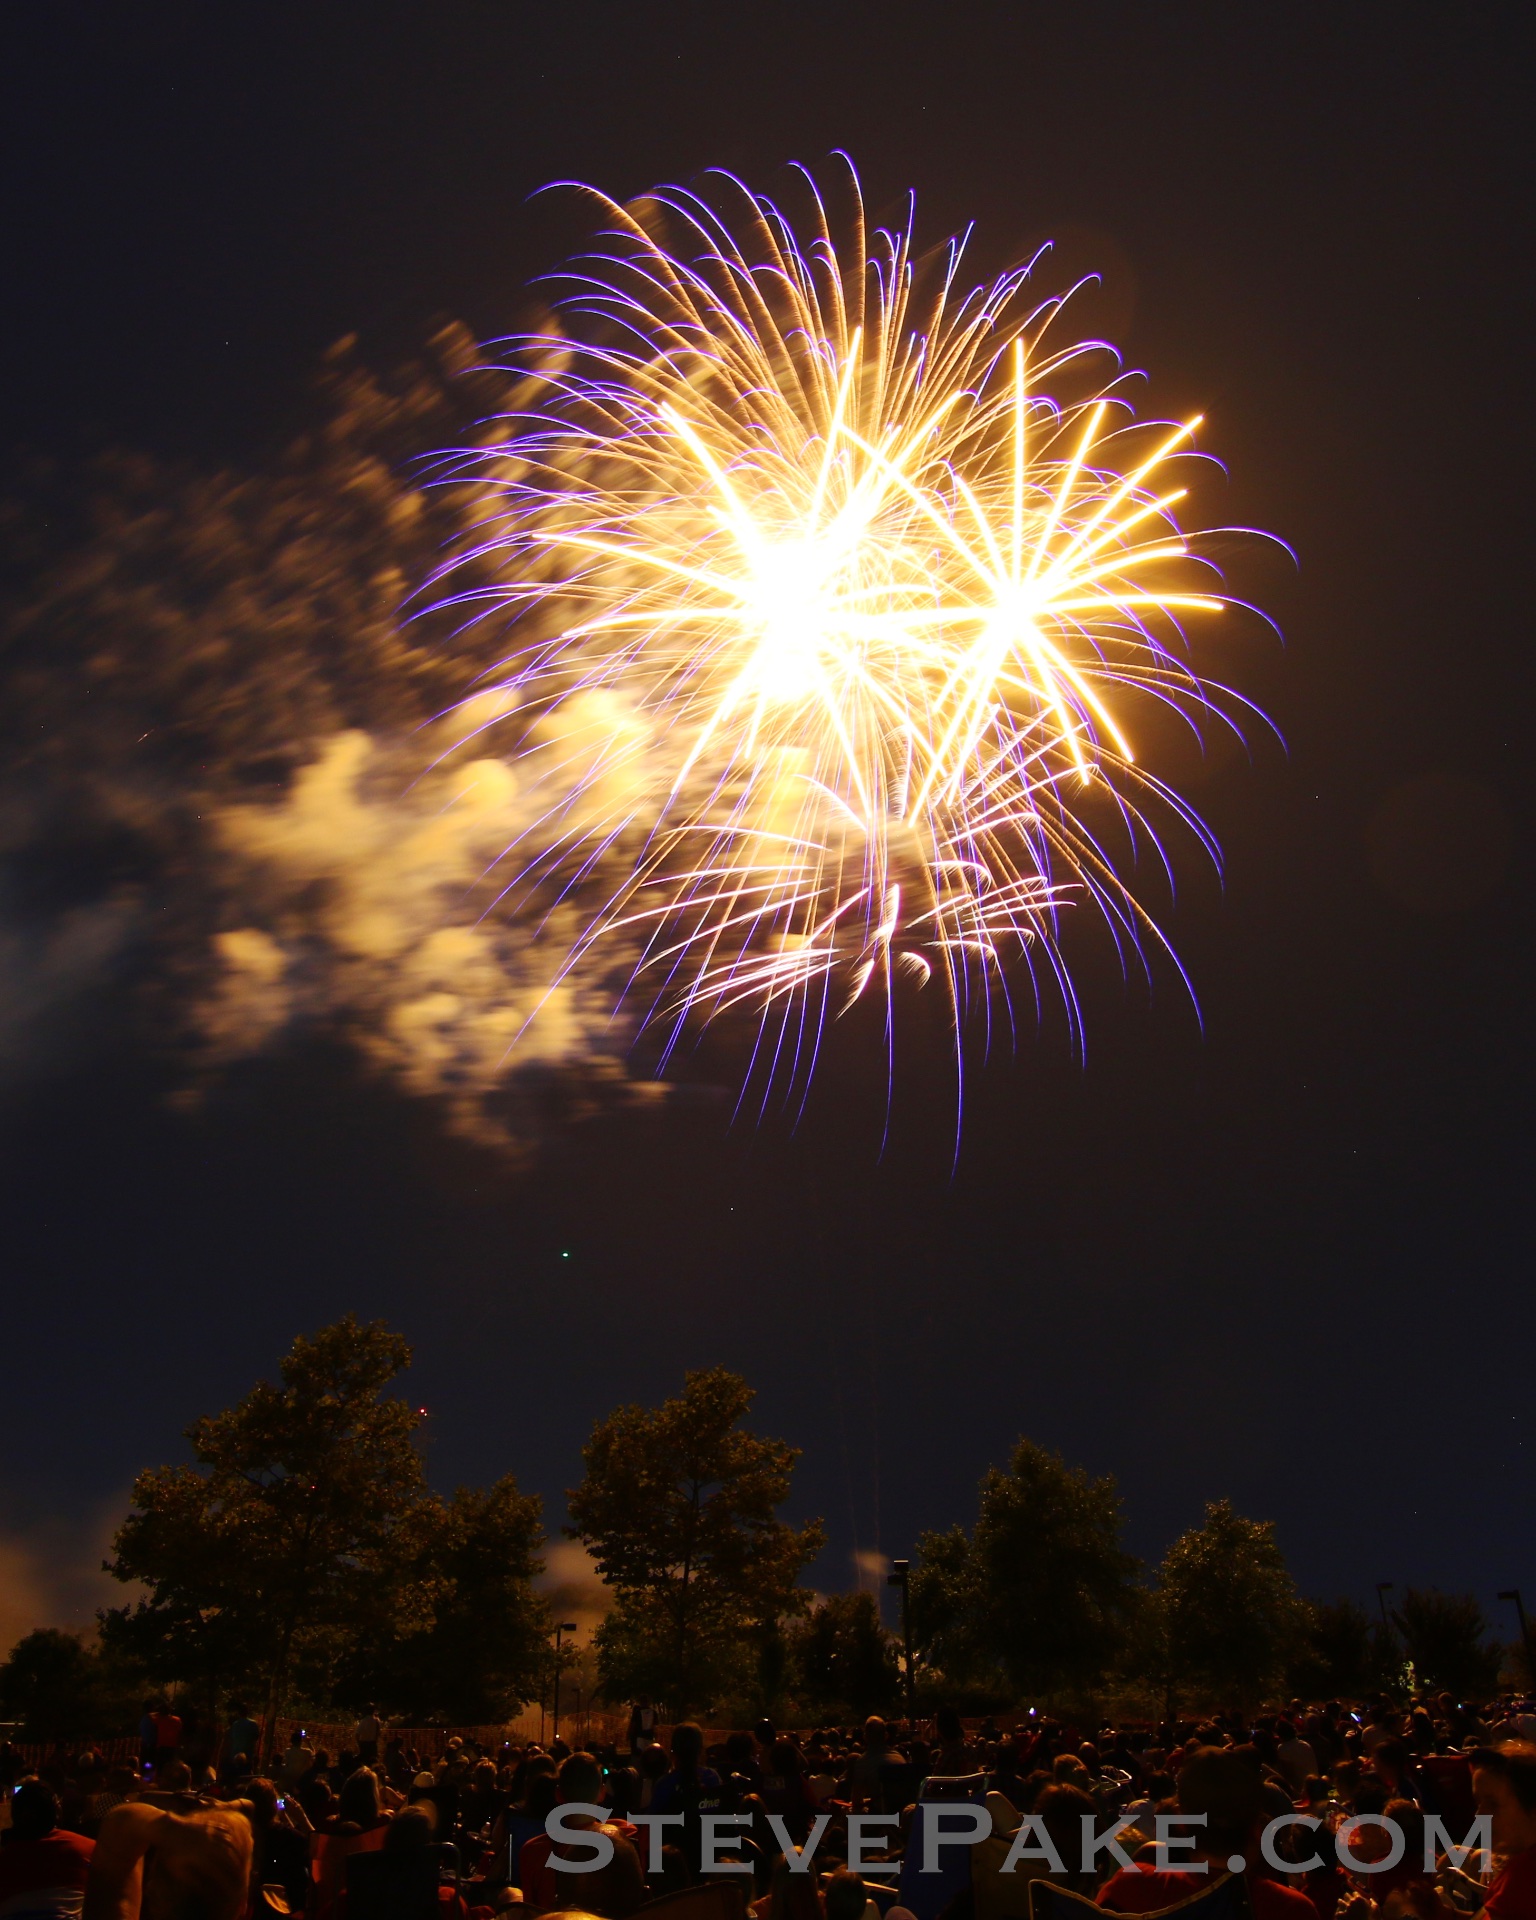

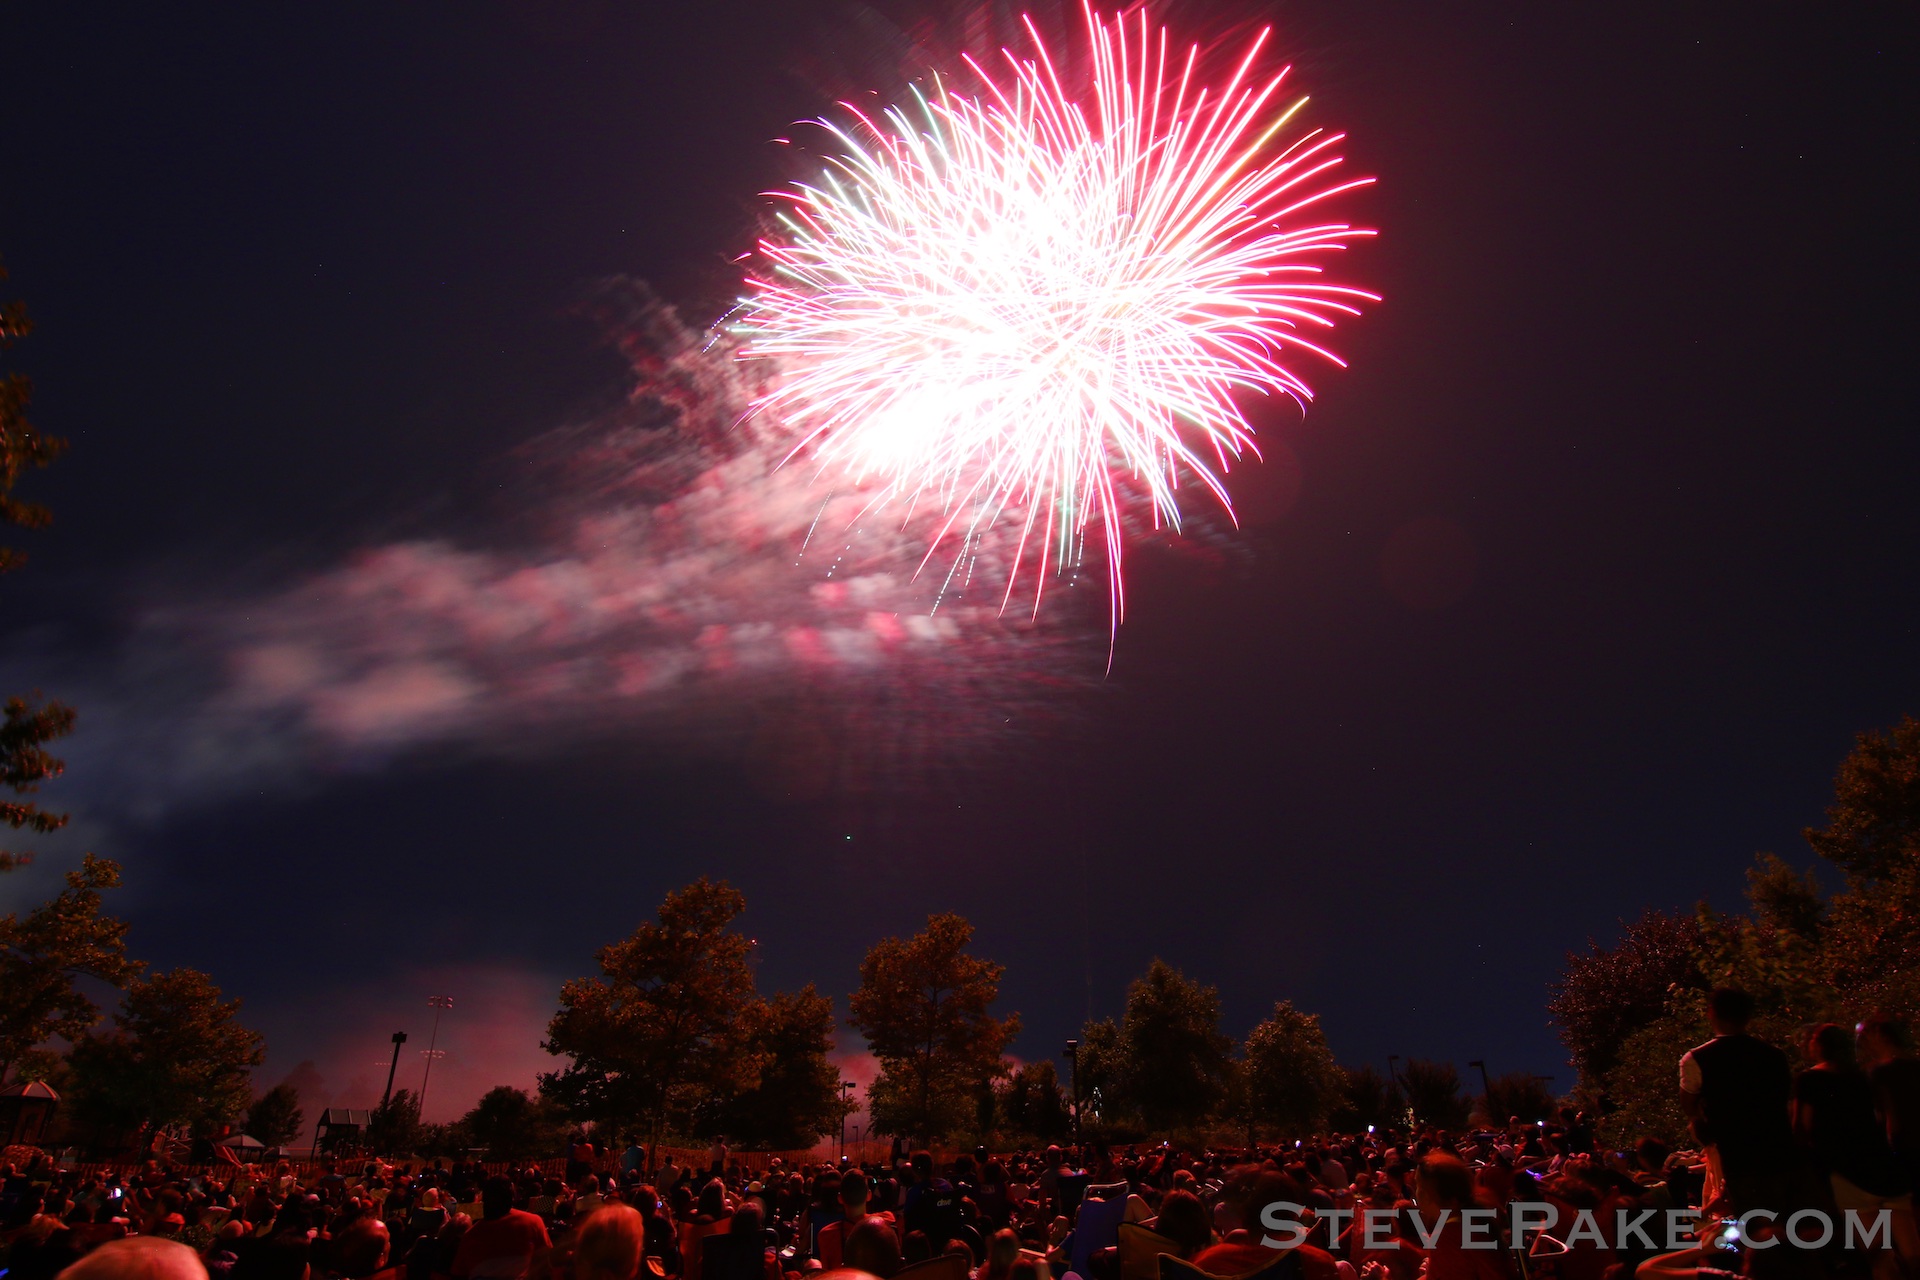


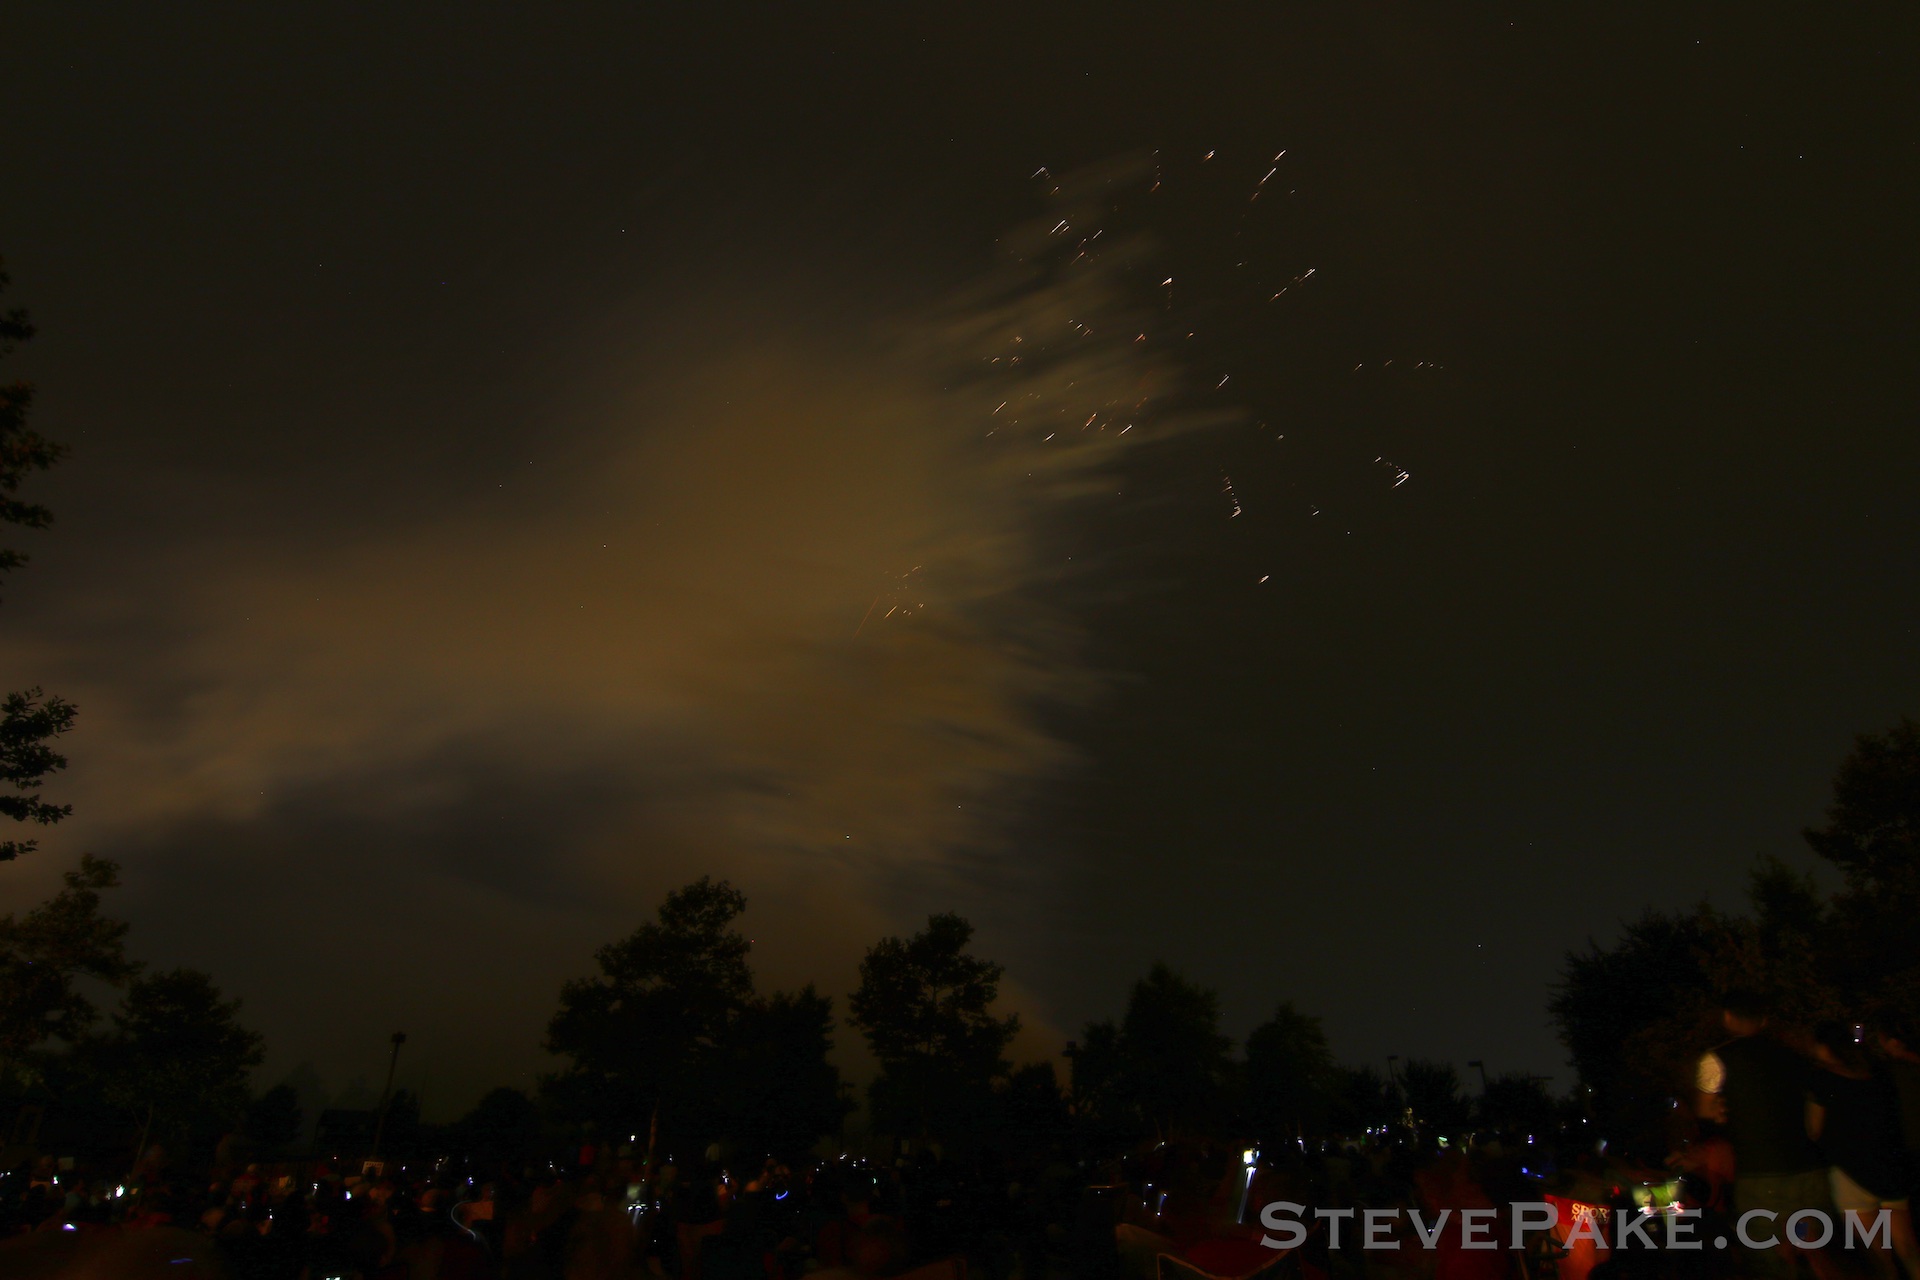

The Pake Family Summer Kickoff Color Party of 2018
It only took a few months due to all of the rain, but we finally managed to have our annual summer kickoff color party on July 4th, 2018!
It only took a few months due to non-stop rain, but we finally managed to have our Summer Kickoff Color Party on July 4th, when we normally try to have it the weekend before Memorial Day. It was a great time as always, but it hasn't gone unnoticed that a lot of the rebellious teens and pre-teens seem to be growing out of this or are already no longer interested, so I think we're going to recalibrate a bit for next year and get a dunk tank too! :)
Click or tap below for the full album.
Looking forward to doing this again next year! :)

DC Cherry Blossoms 2018
Well, it was a little past peak, but the annual DC Cherry Blossom Festival was actually today, and the weather was drop dead gorgeous also, so we dragged our butts out of bed at 6:30am and were on the road by 7:00am sharp to get down into town to take it all in!
Well, it was a little past peak, but the annual DC Cherry Blossom Festival was actually today, and the weather was drop dead gorgeous also, so we dragged our butts out of bed at 6:30am and were on the road by 7:00am sharp to get down into town to take it all in! Like usual, our timing was perfect. It only took us 40 minutes to get down to the Tidal Basin from Rockville, MD, we quickly and easily found a spot to park along Ohio St SW, and then took everything in in around 2 hours before the crowds made it impossible. First photo taken at 7:43am, last photo taken at 9:31am, including plenty of family photo and doggy breaks. As we were rolling out is right when all of the tour buses and various groups had unloaded. What had been quiet and peaceful bridges and pathways with plenty of space before, became mobbed with people and standing room only, which we hate. We snickered as we were rolling out at the massive crowds we managed to dodge, and then lumbered our way back up to Georgetown Cupcakes, where there wasn't a line yet either, and got a dozen to go! :) After a grocery stop closer to home, we were home by 11:00am.
Pake Family at the DC Cherry Blossoms 2018
Blossoms were a little thin in some areas, but not all.
Around the Tidal Basin
The women in the background: Awww, a puuuuuuupy! Puffles got tons of compliments, and lots of people said they wanted a puppy after seeing him. No, you don't, terrible mistake!! :))))))
Blossoms blowing in the wind.
Katie and Puffles next to the "heart" tree.
Can't go to the DC Cherry Blossoms without picking up some Georgetown Cupcakes on the way out, and especially their cherry blossom special cupcake! :)
Cherry Blossoms setup: Canon 7D Mark II with 18-135 white box special "kit" lens, and an old 580EX flash bought used from a buddy a long time ago.
Pro tip, folks. This pro photog cries every time he goes down to see the famous DC Cherry Blossoms, and sees so many people with very expensive pro grade photography gear trying to take pictures of their wives or girlfriends, but without a flash! Dude, people, guys, you NEED fill flash for stuff like this, or else your girlfriends are going to beat you! :) Especially with mixed lighting through trees with part of a person's face in shadows and another part in direct sunlight, fill flash is needed to help even the illumination, and it's especially needed when taking backlit photos like below. In one shot my flash just hadn't recycled completely yet, as it was probably popping off full power shots. It's not often that I drag around my big lump full-sized Canon 580EX flash, but this is one of those occasions. See the difference?
Proper fill flash lighting!!!! See how nice this looks? And I knew in advance that the little pop-up flash built into the 7D Mark II wouldn't be powerful enough here, which is why I brought the big 580EX beast.
Flash didn't recycle, or if you don't bother with a flash at all. Alternatively, push exposure a few stops up to get the people right, but then the background will be blown out white and nasty looking!
If you can't figure out the whole flash thing (there's not much to it, I just knew when I needed one and turned it on), you just need to find places where you can shoot that have nice natural lighting and that aren't backlit, and where illumination is even across a person's face. There's nothing more painful than seeing some really pretty girls all dressed up to the nines, who were having photos taken of them by someone who had no clue what they were doing!
My setup was exactly as shown. My workhorse Canon 7D Mark II body (could have been a cheap Rebel for this and it wouldn't have mattered), and my Canon 18-135mm IS STM white box special "kit lens", and the essential 580EX flash for anything with people in it. I had my trusty Tokina 12-28mm ultra-wide lens in my bag also, but never actually used it.
The weather in the DC area is best described as schizophrenic in March and April. Last year we froze our butts off and actually got better photos at home, but this year it was absolutely perfect, so we really enjoyed this!
Enjoy!
Steve


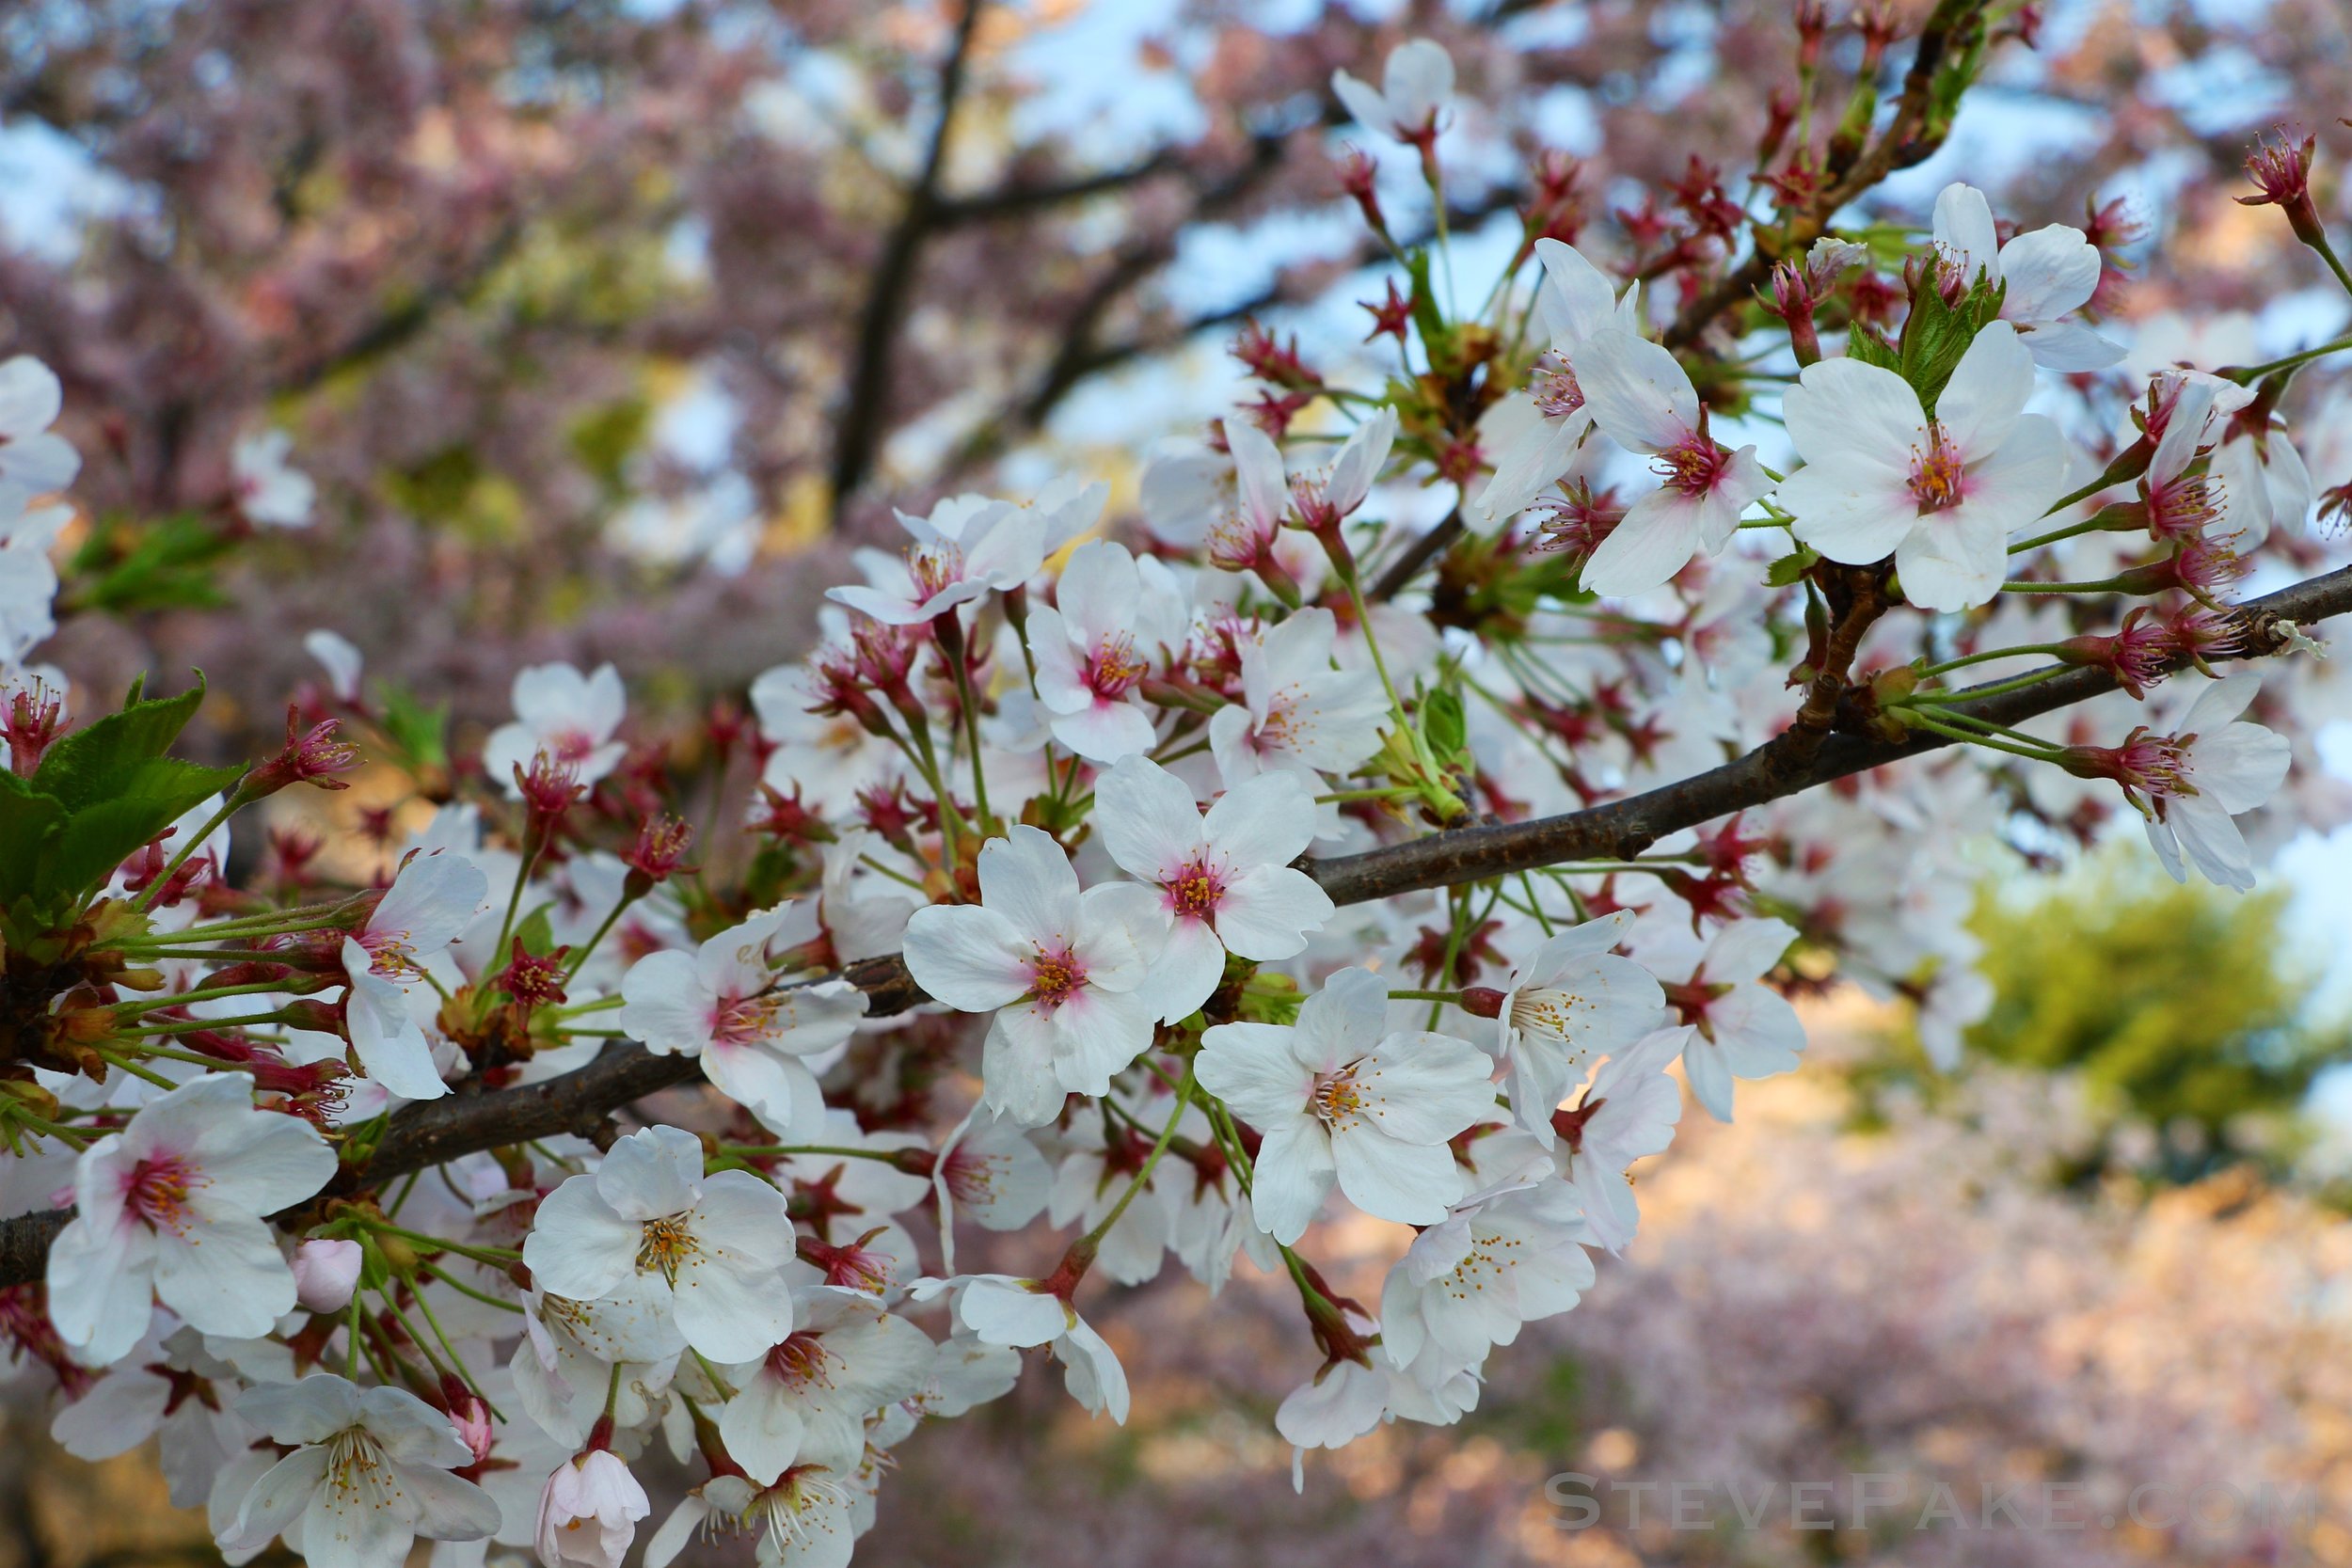


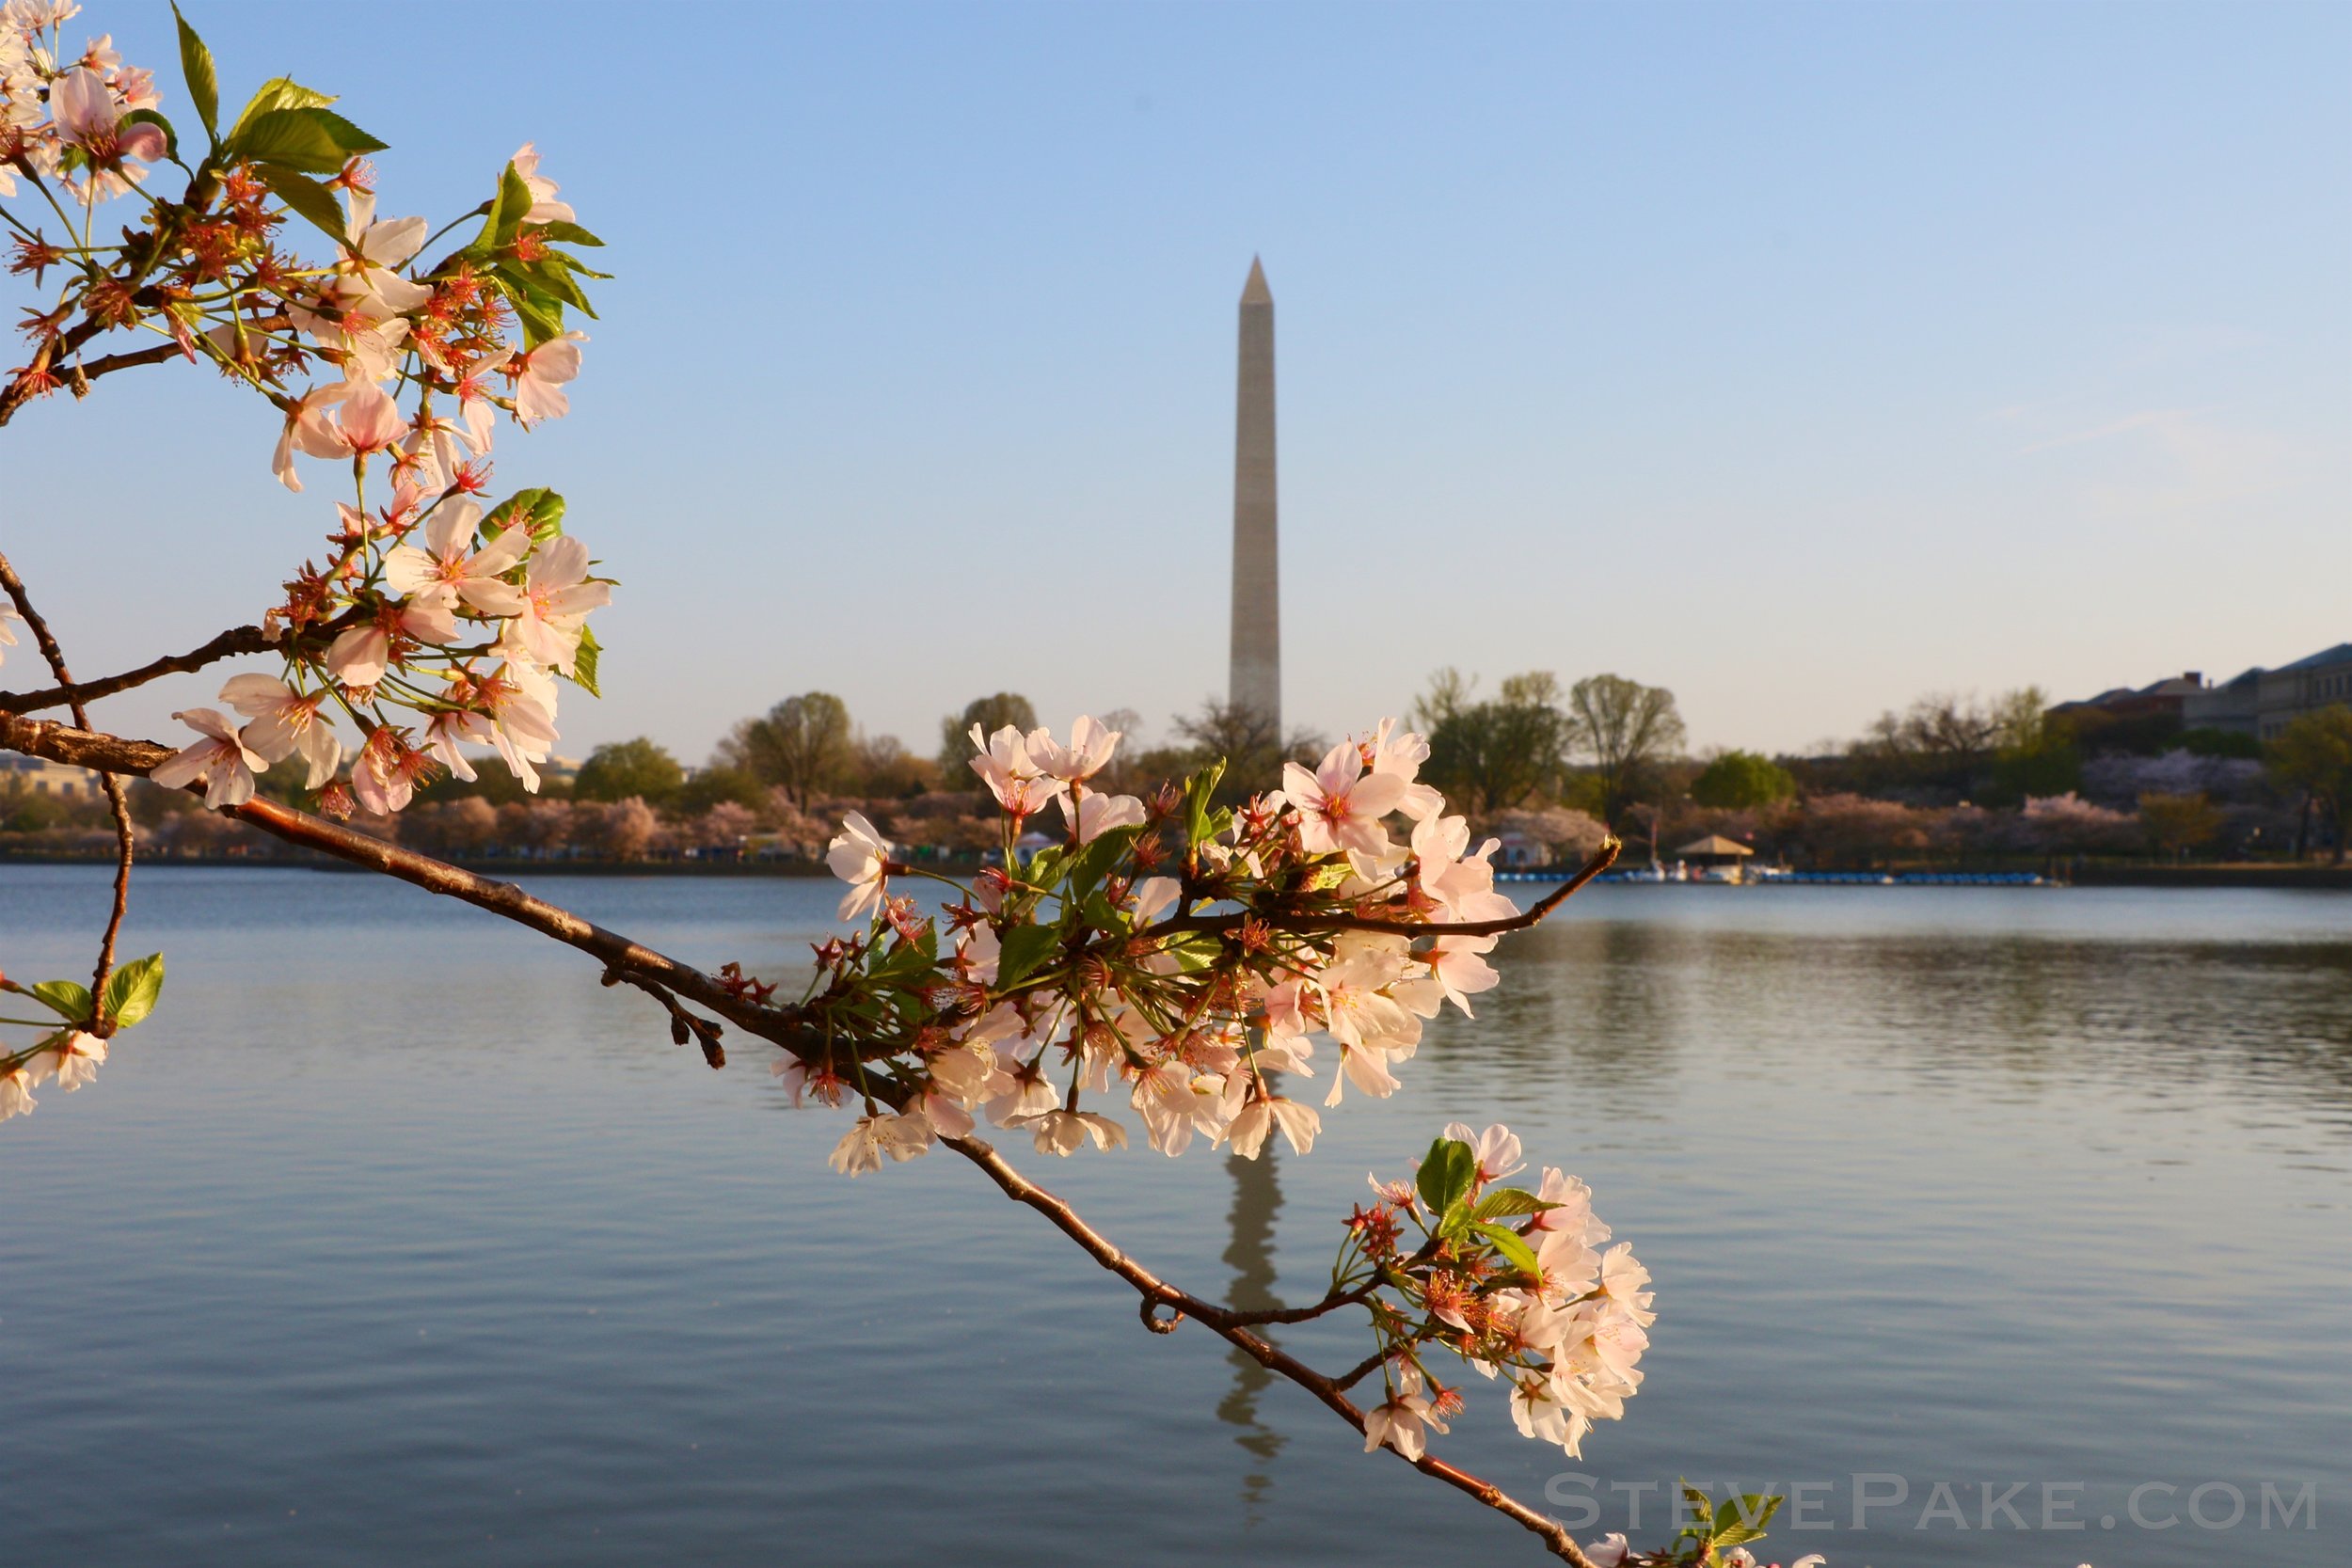
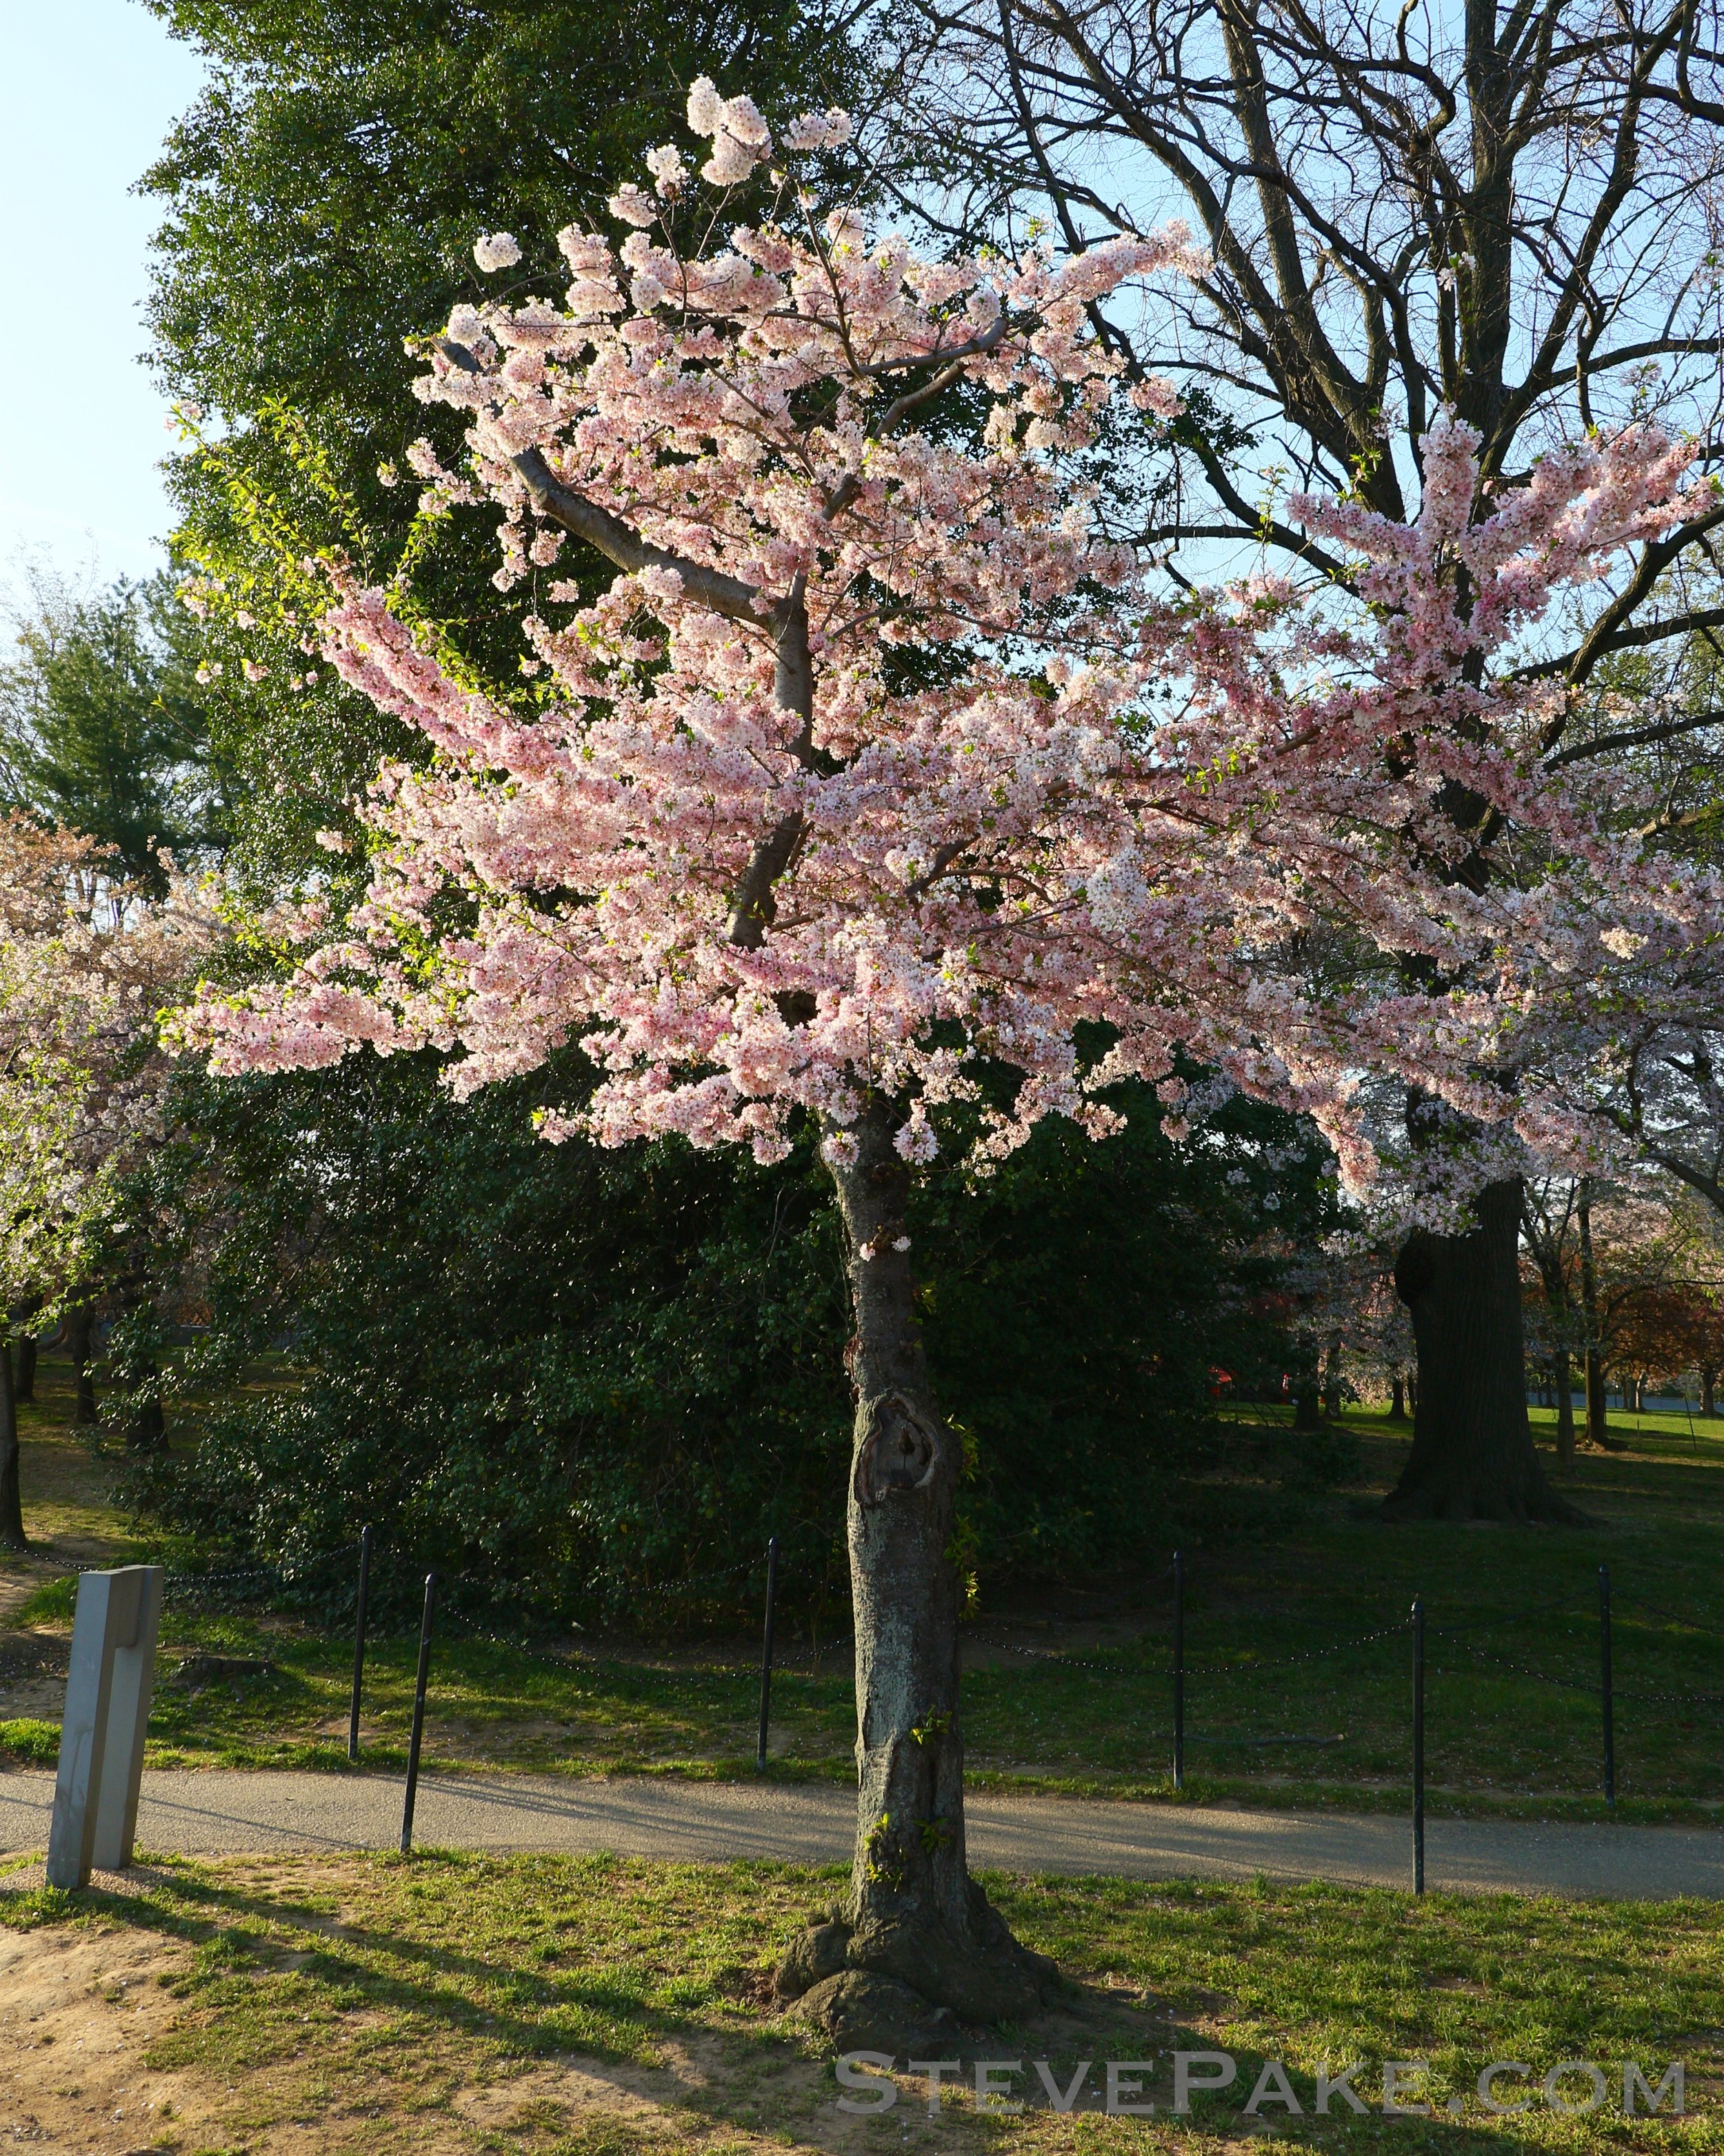


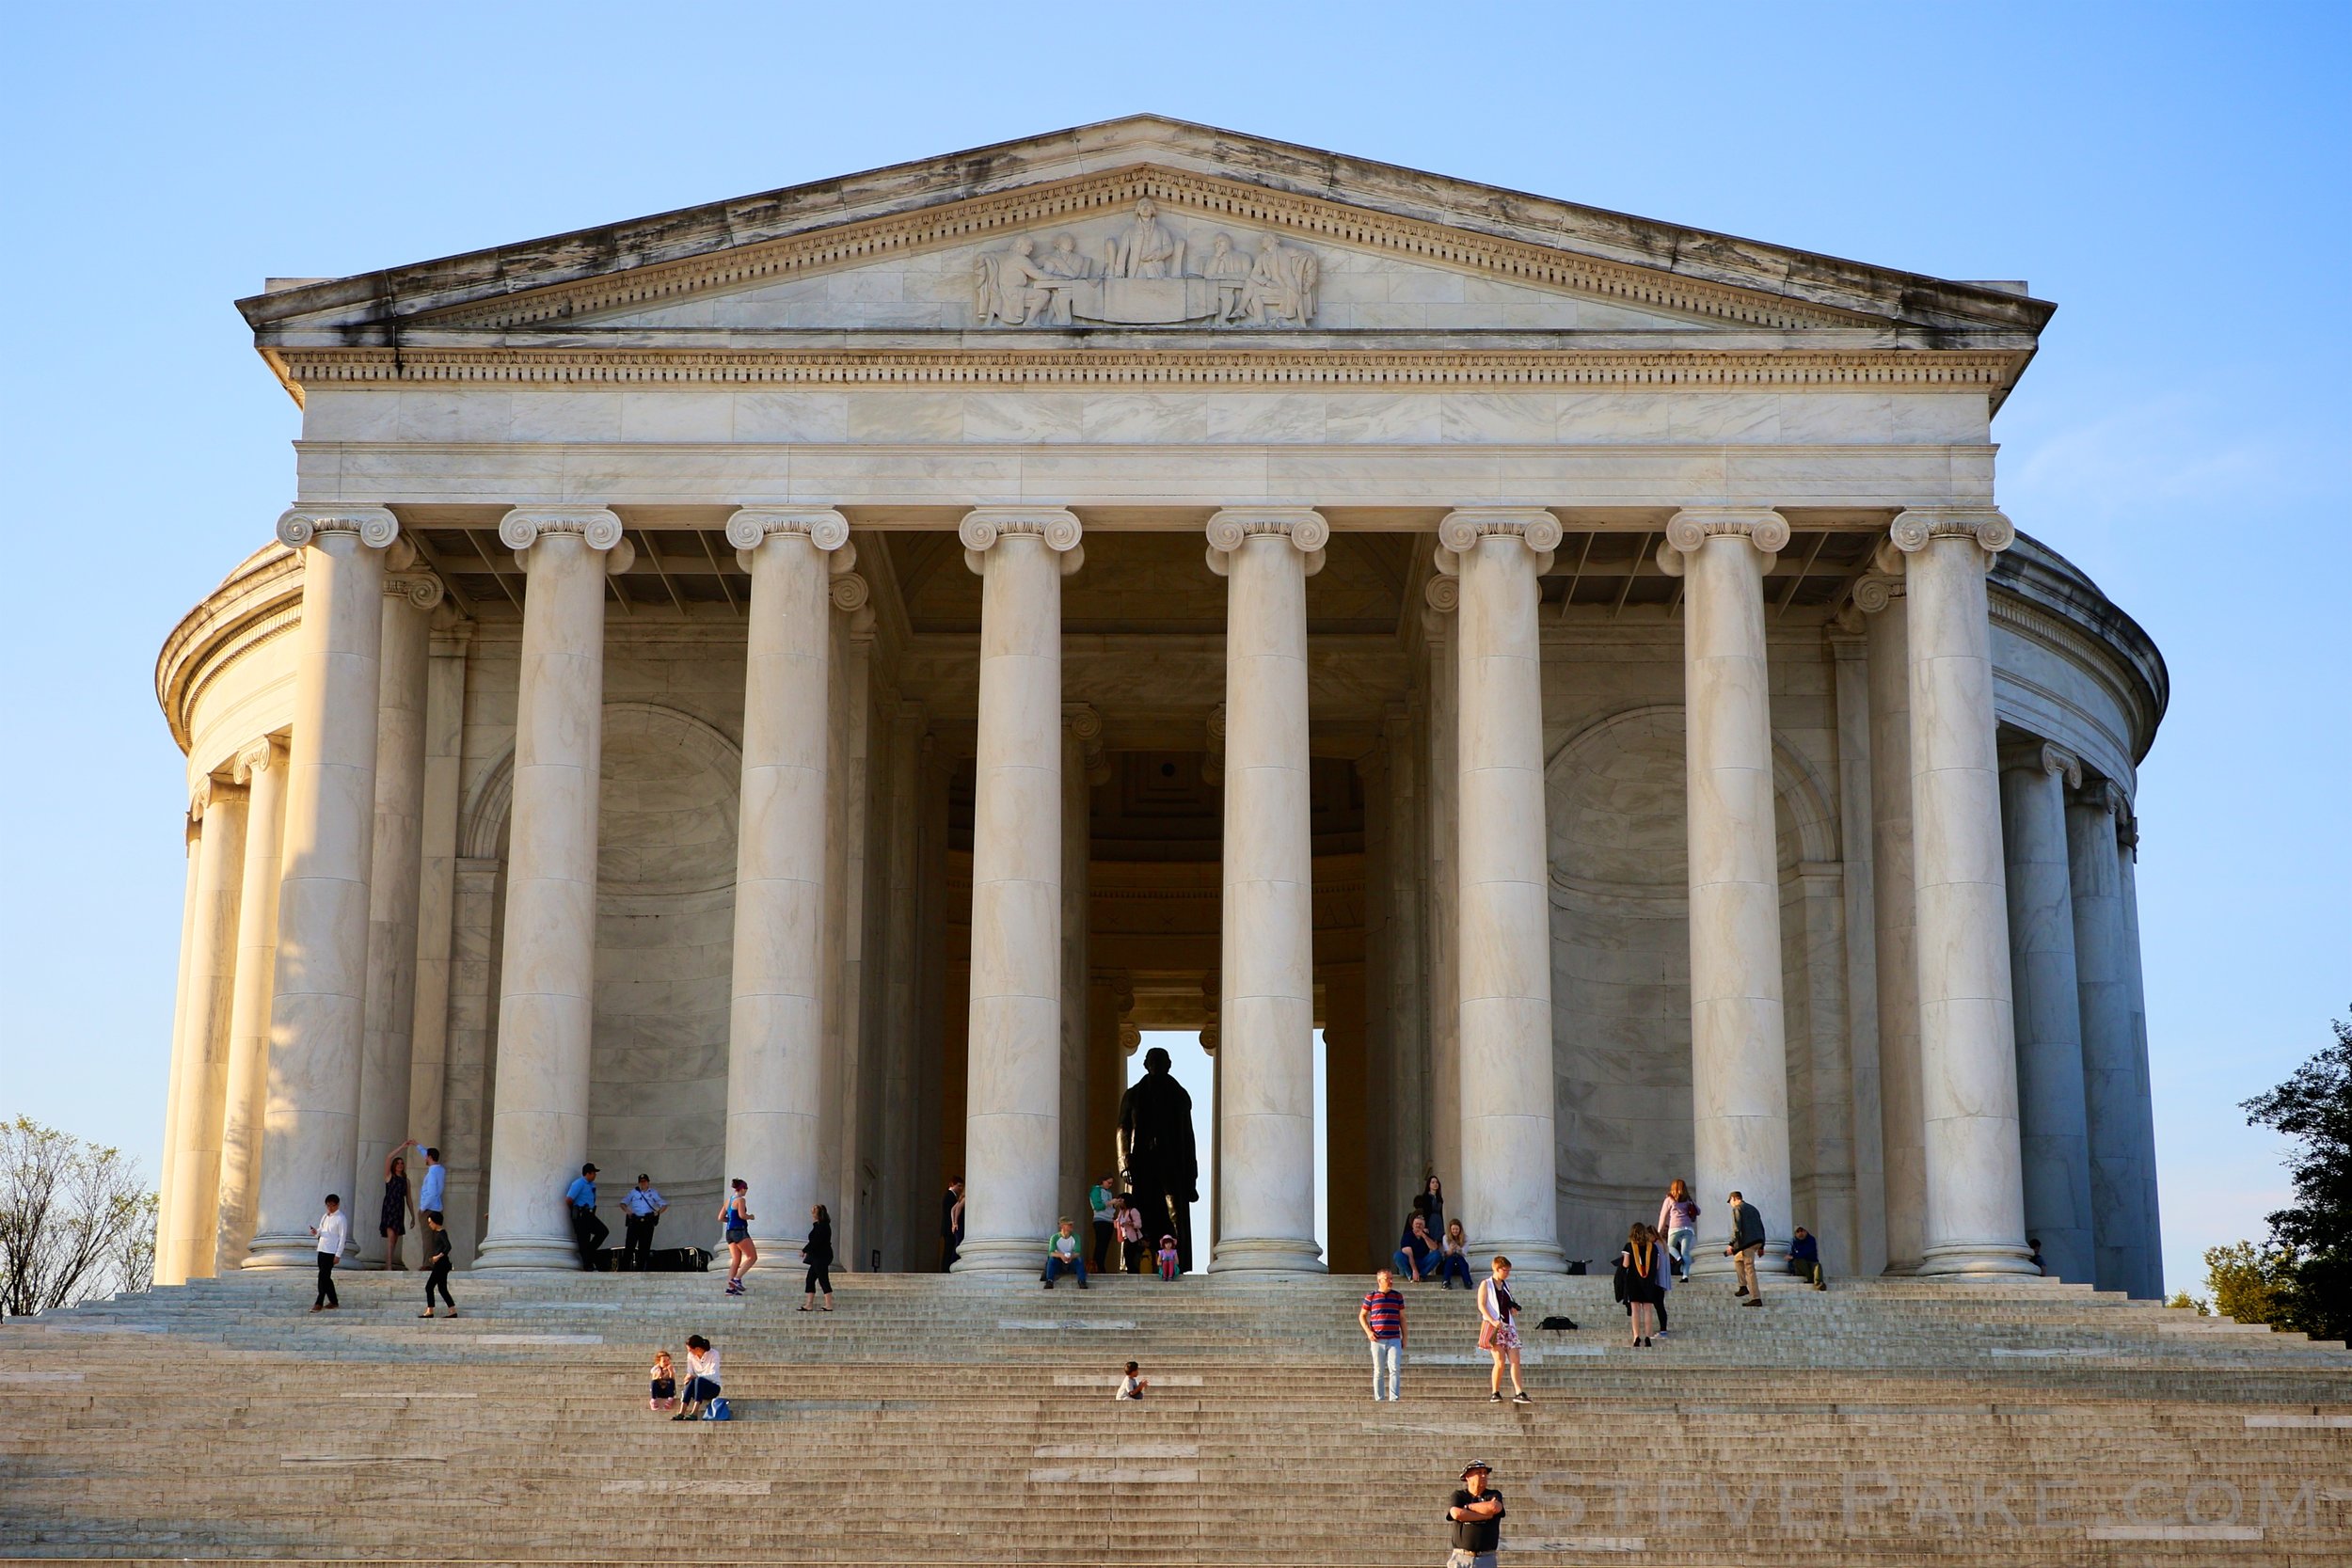


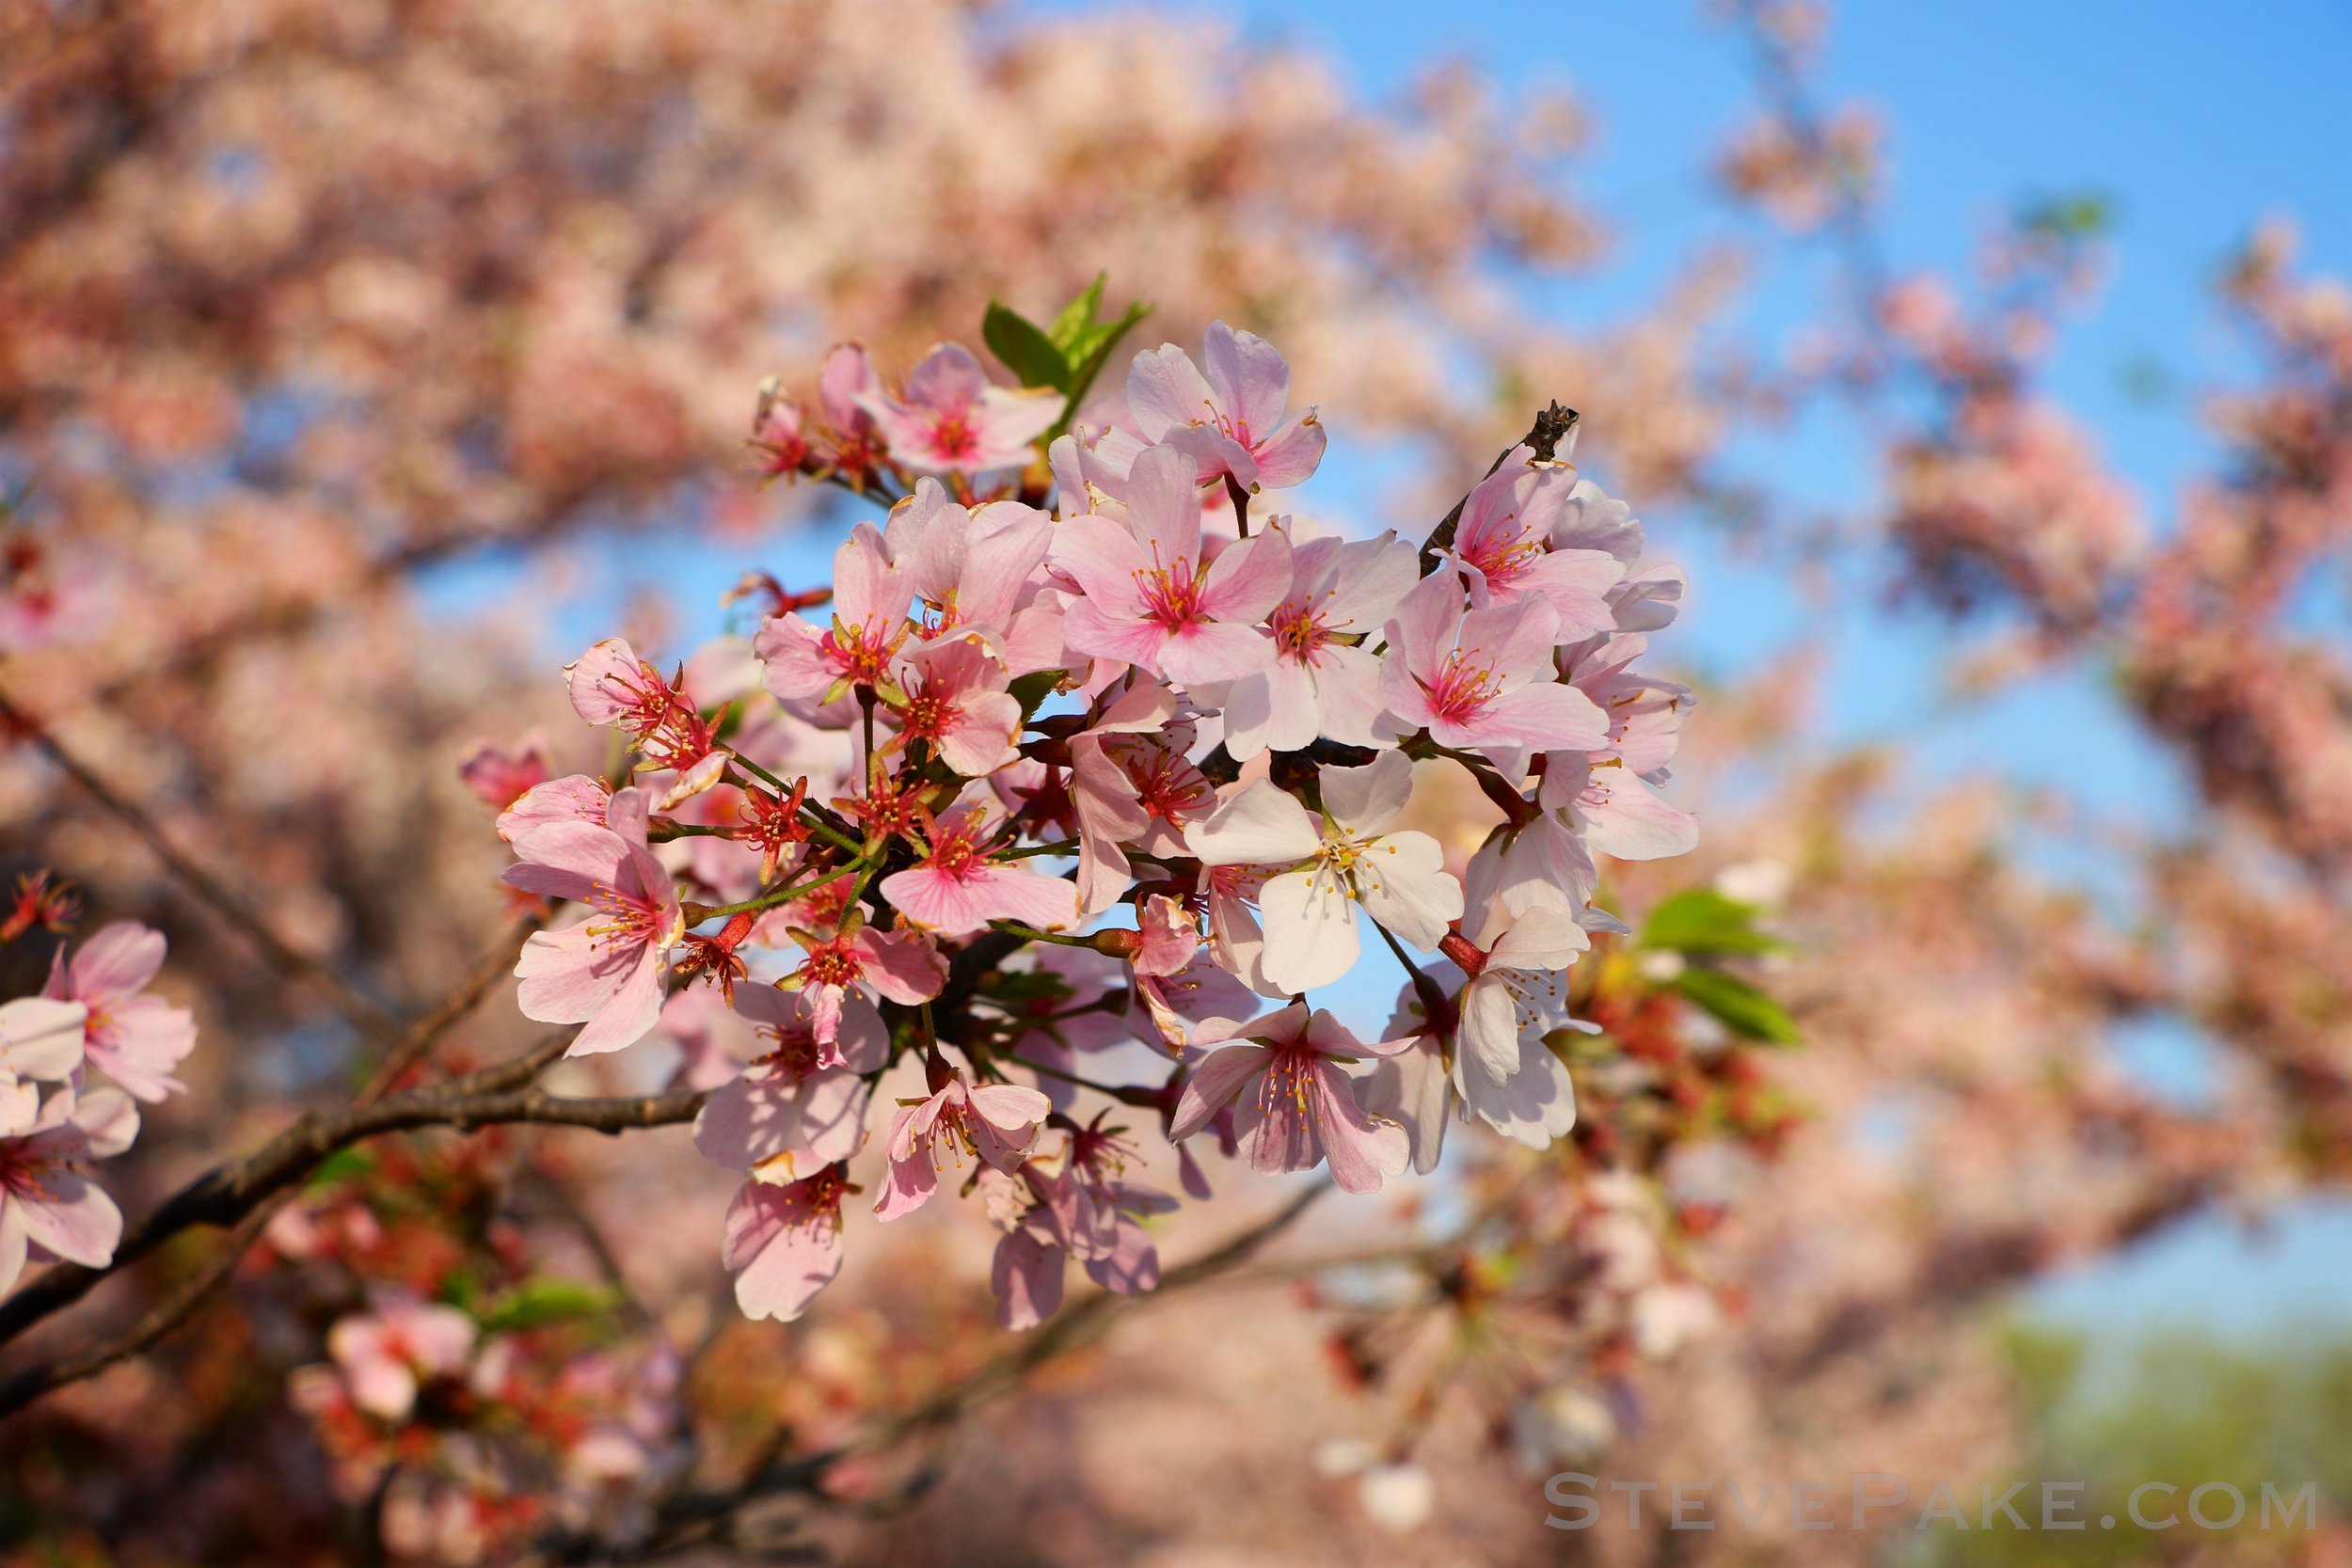


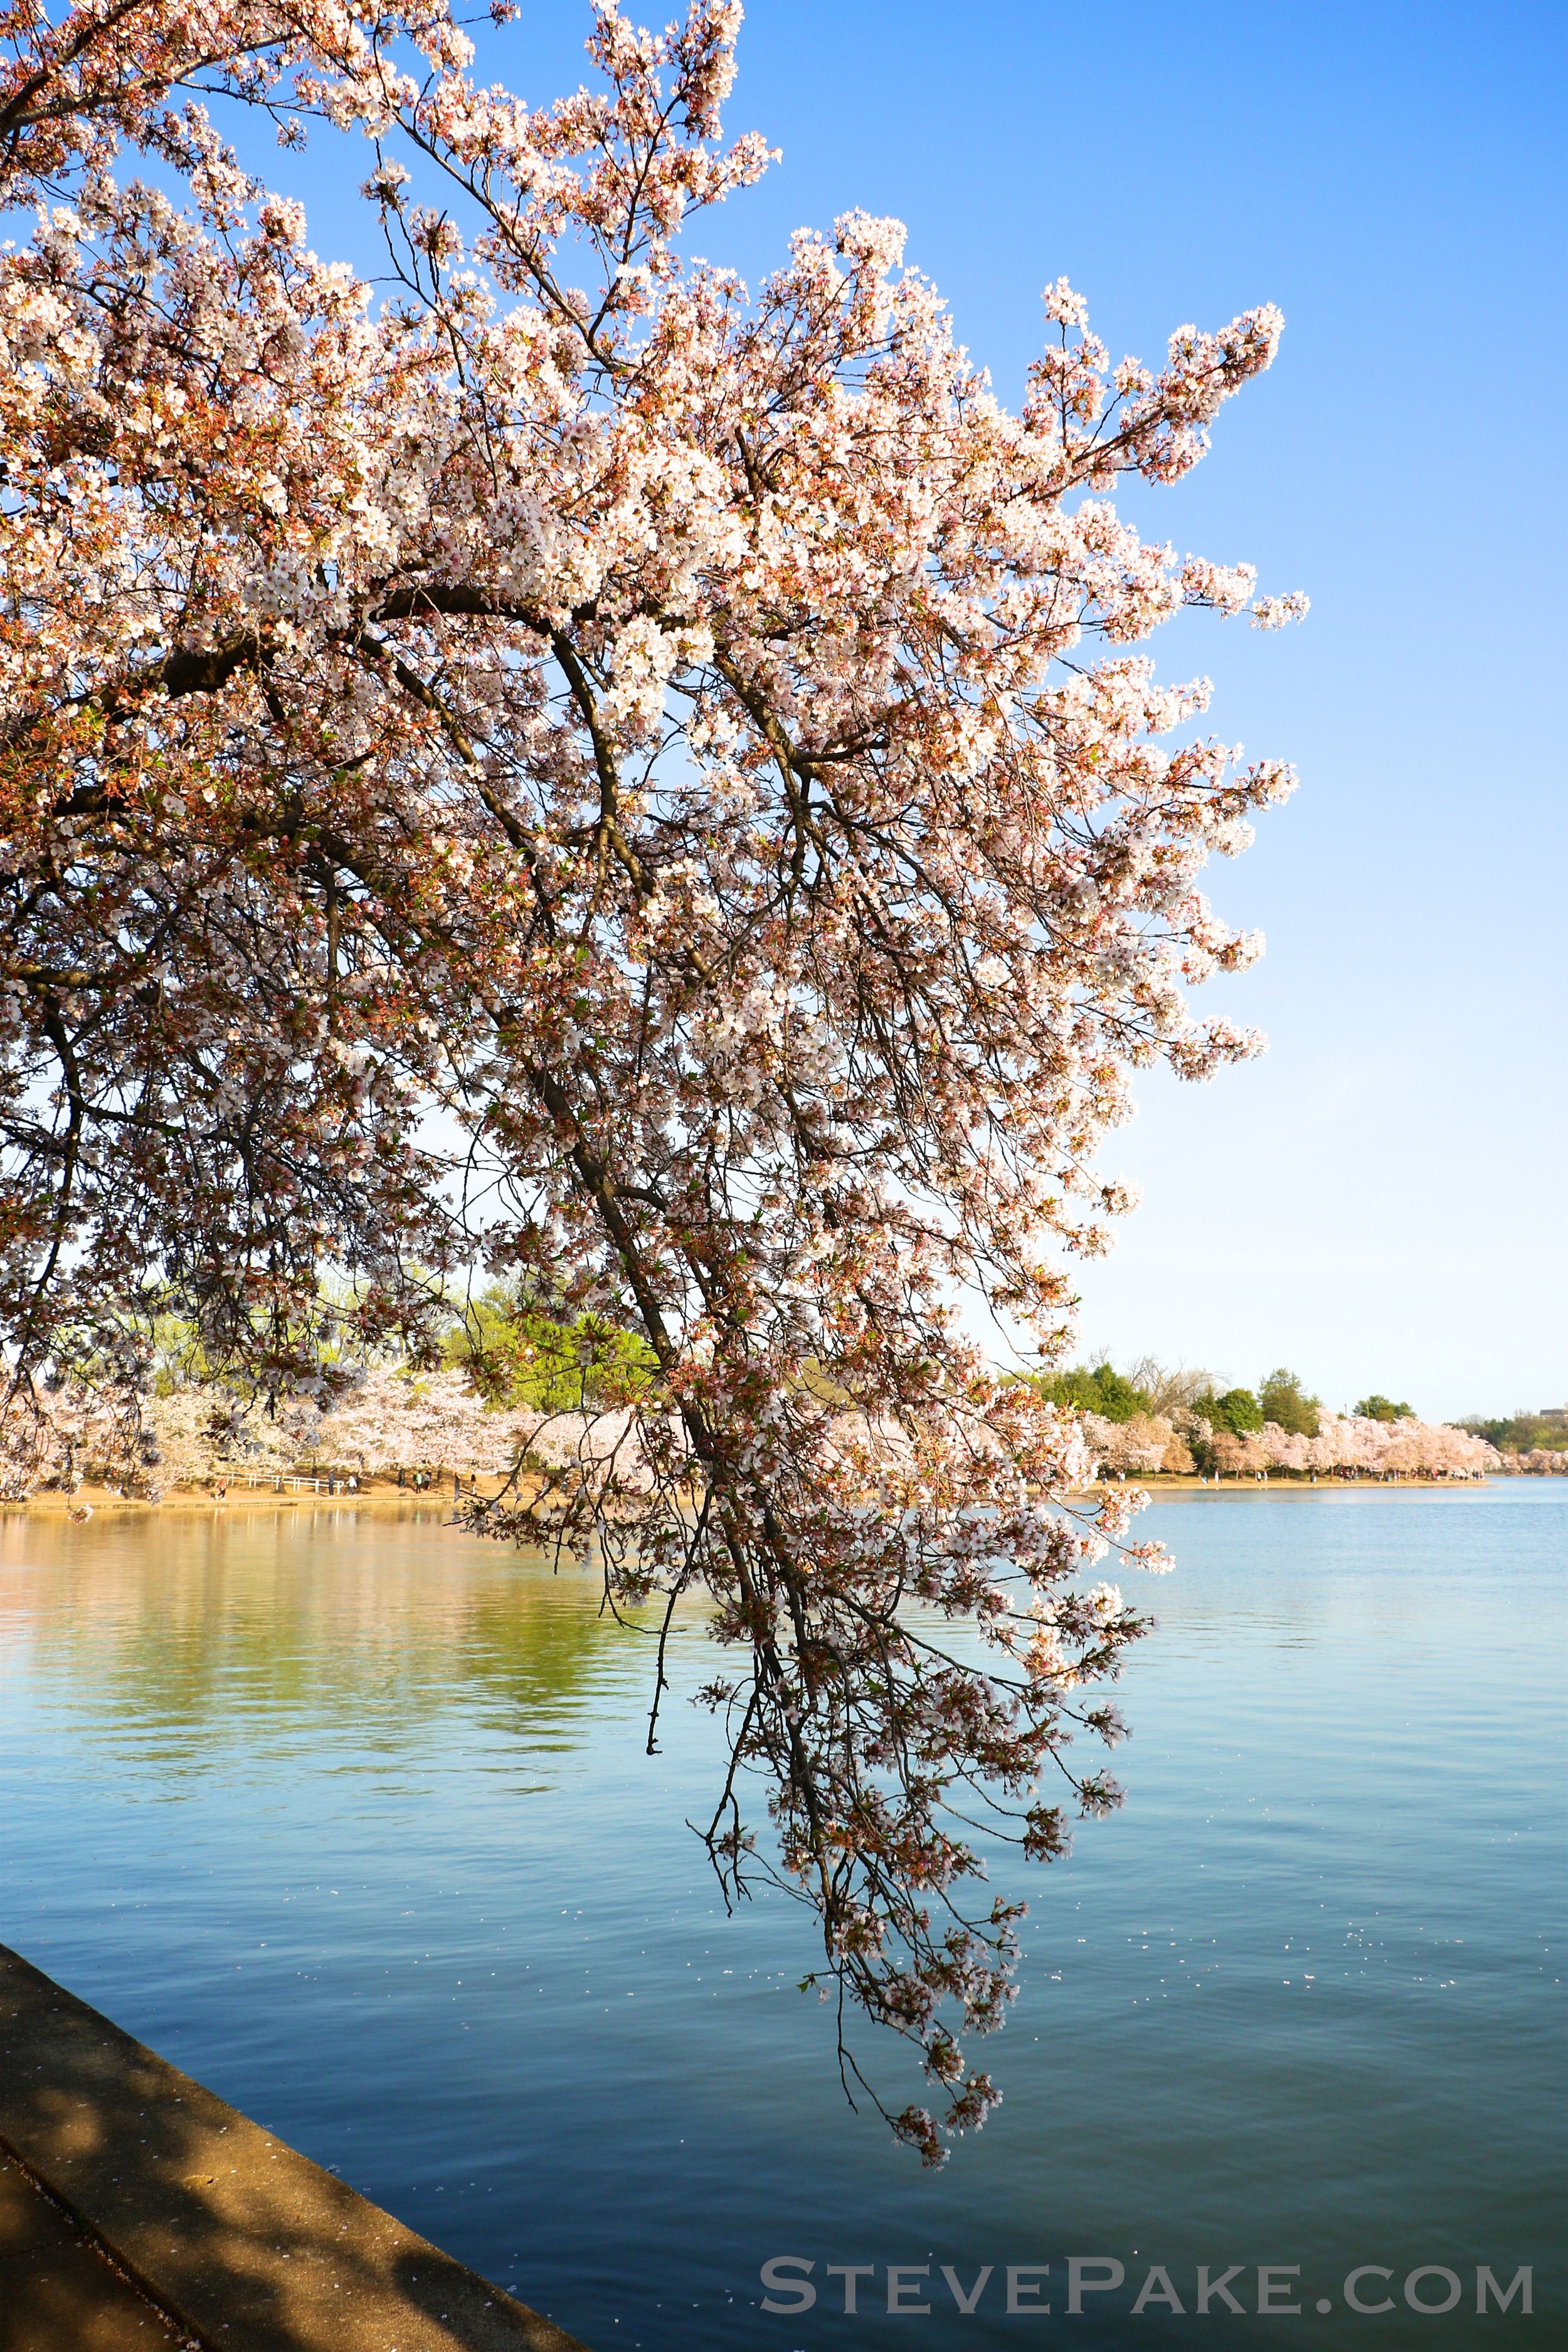


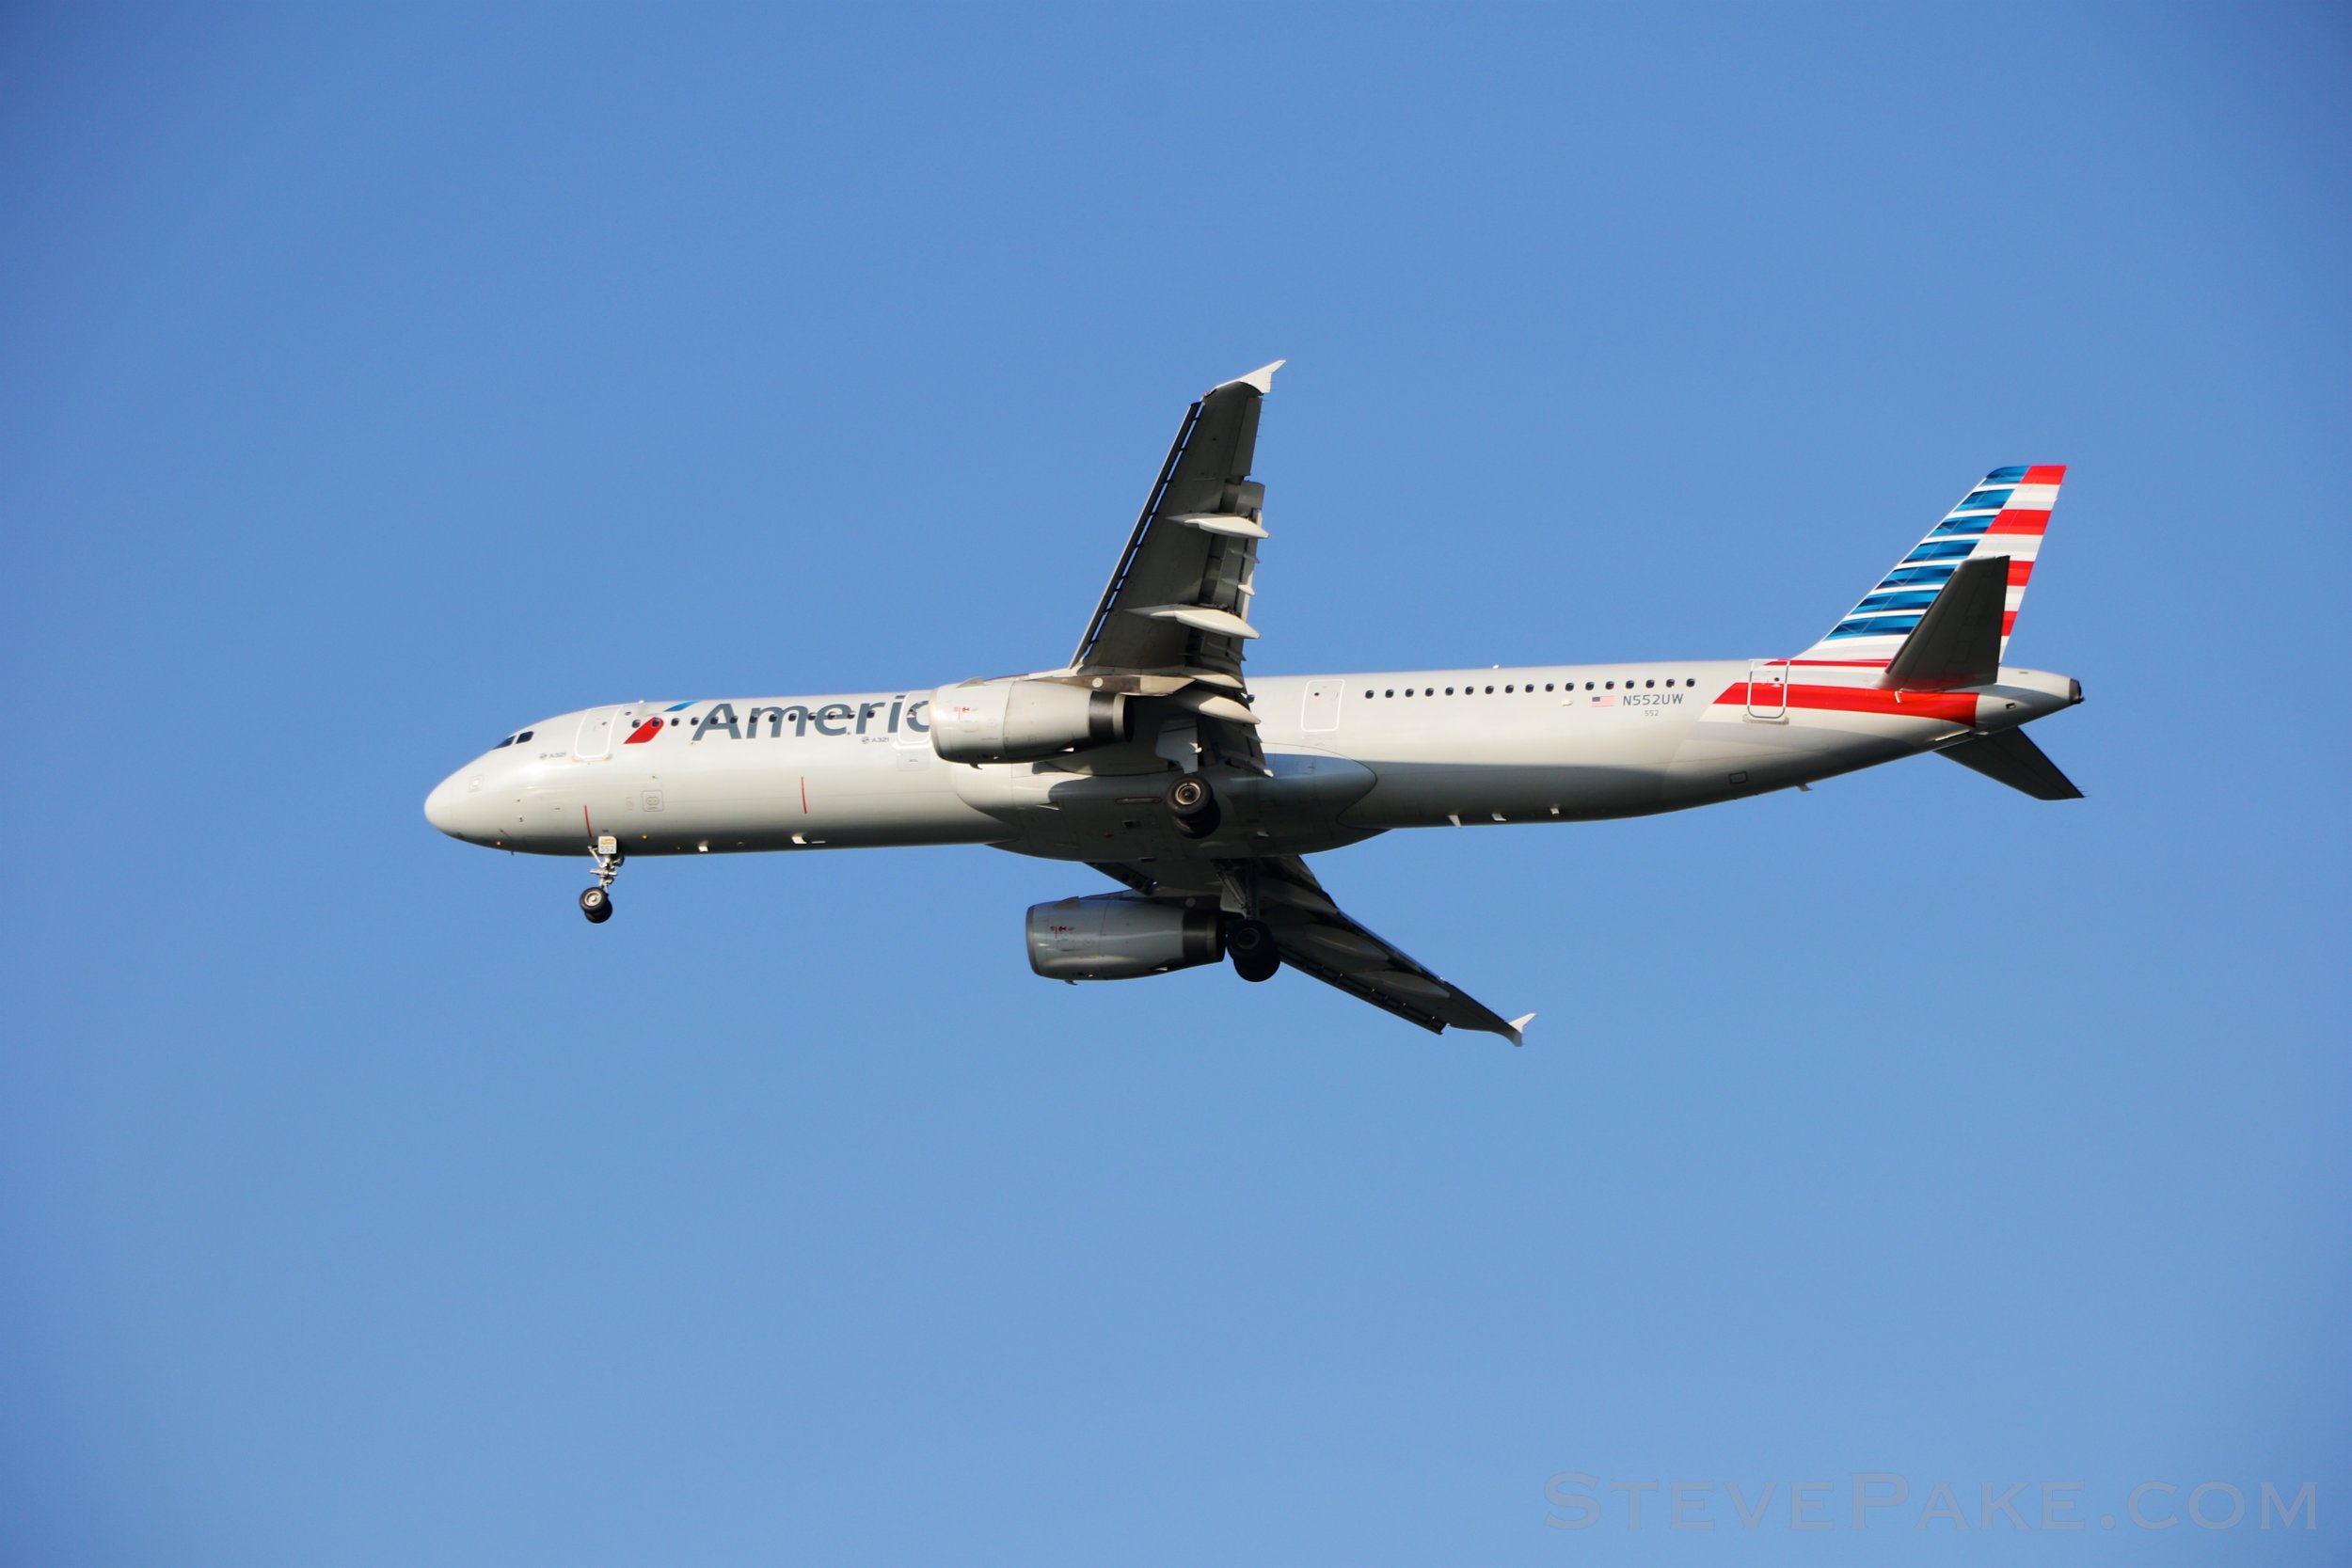


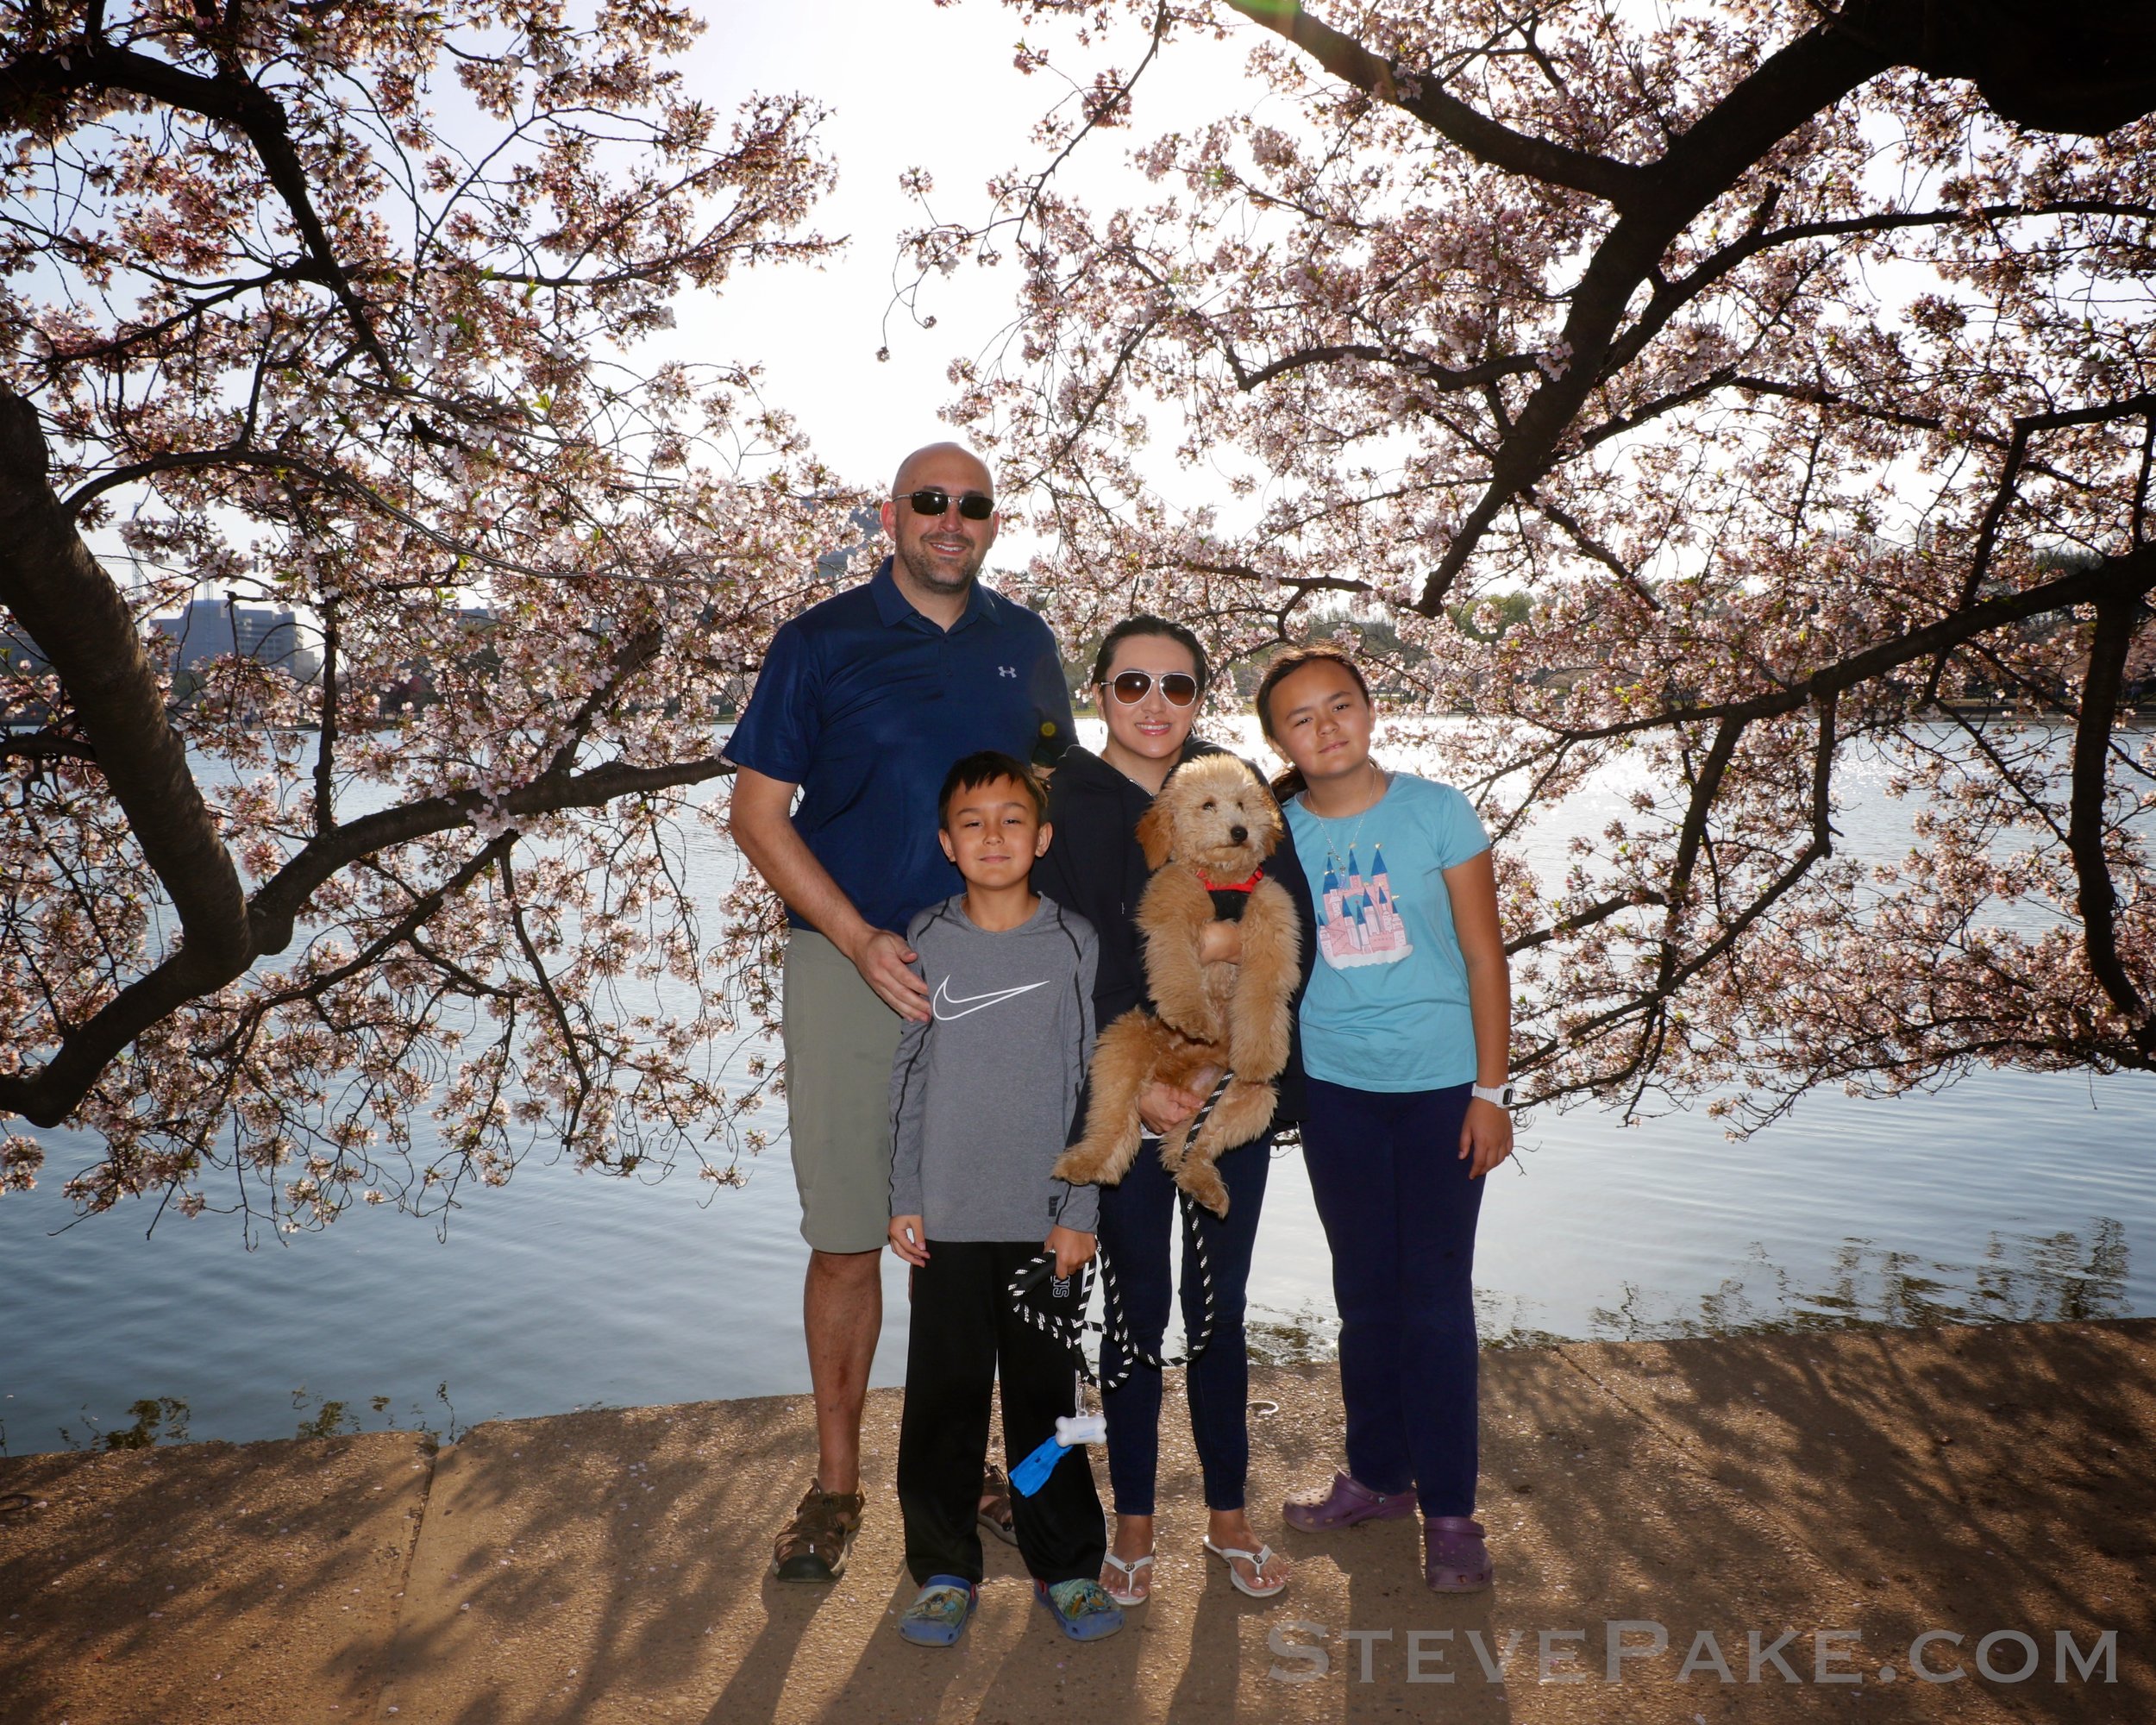


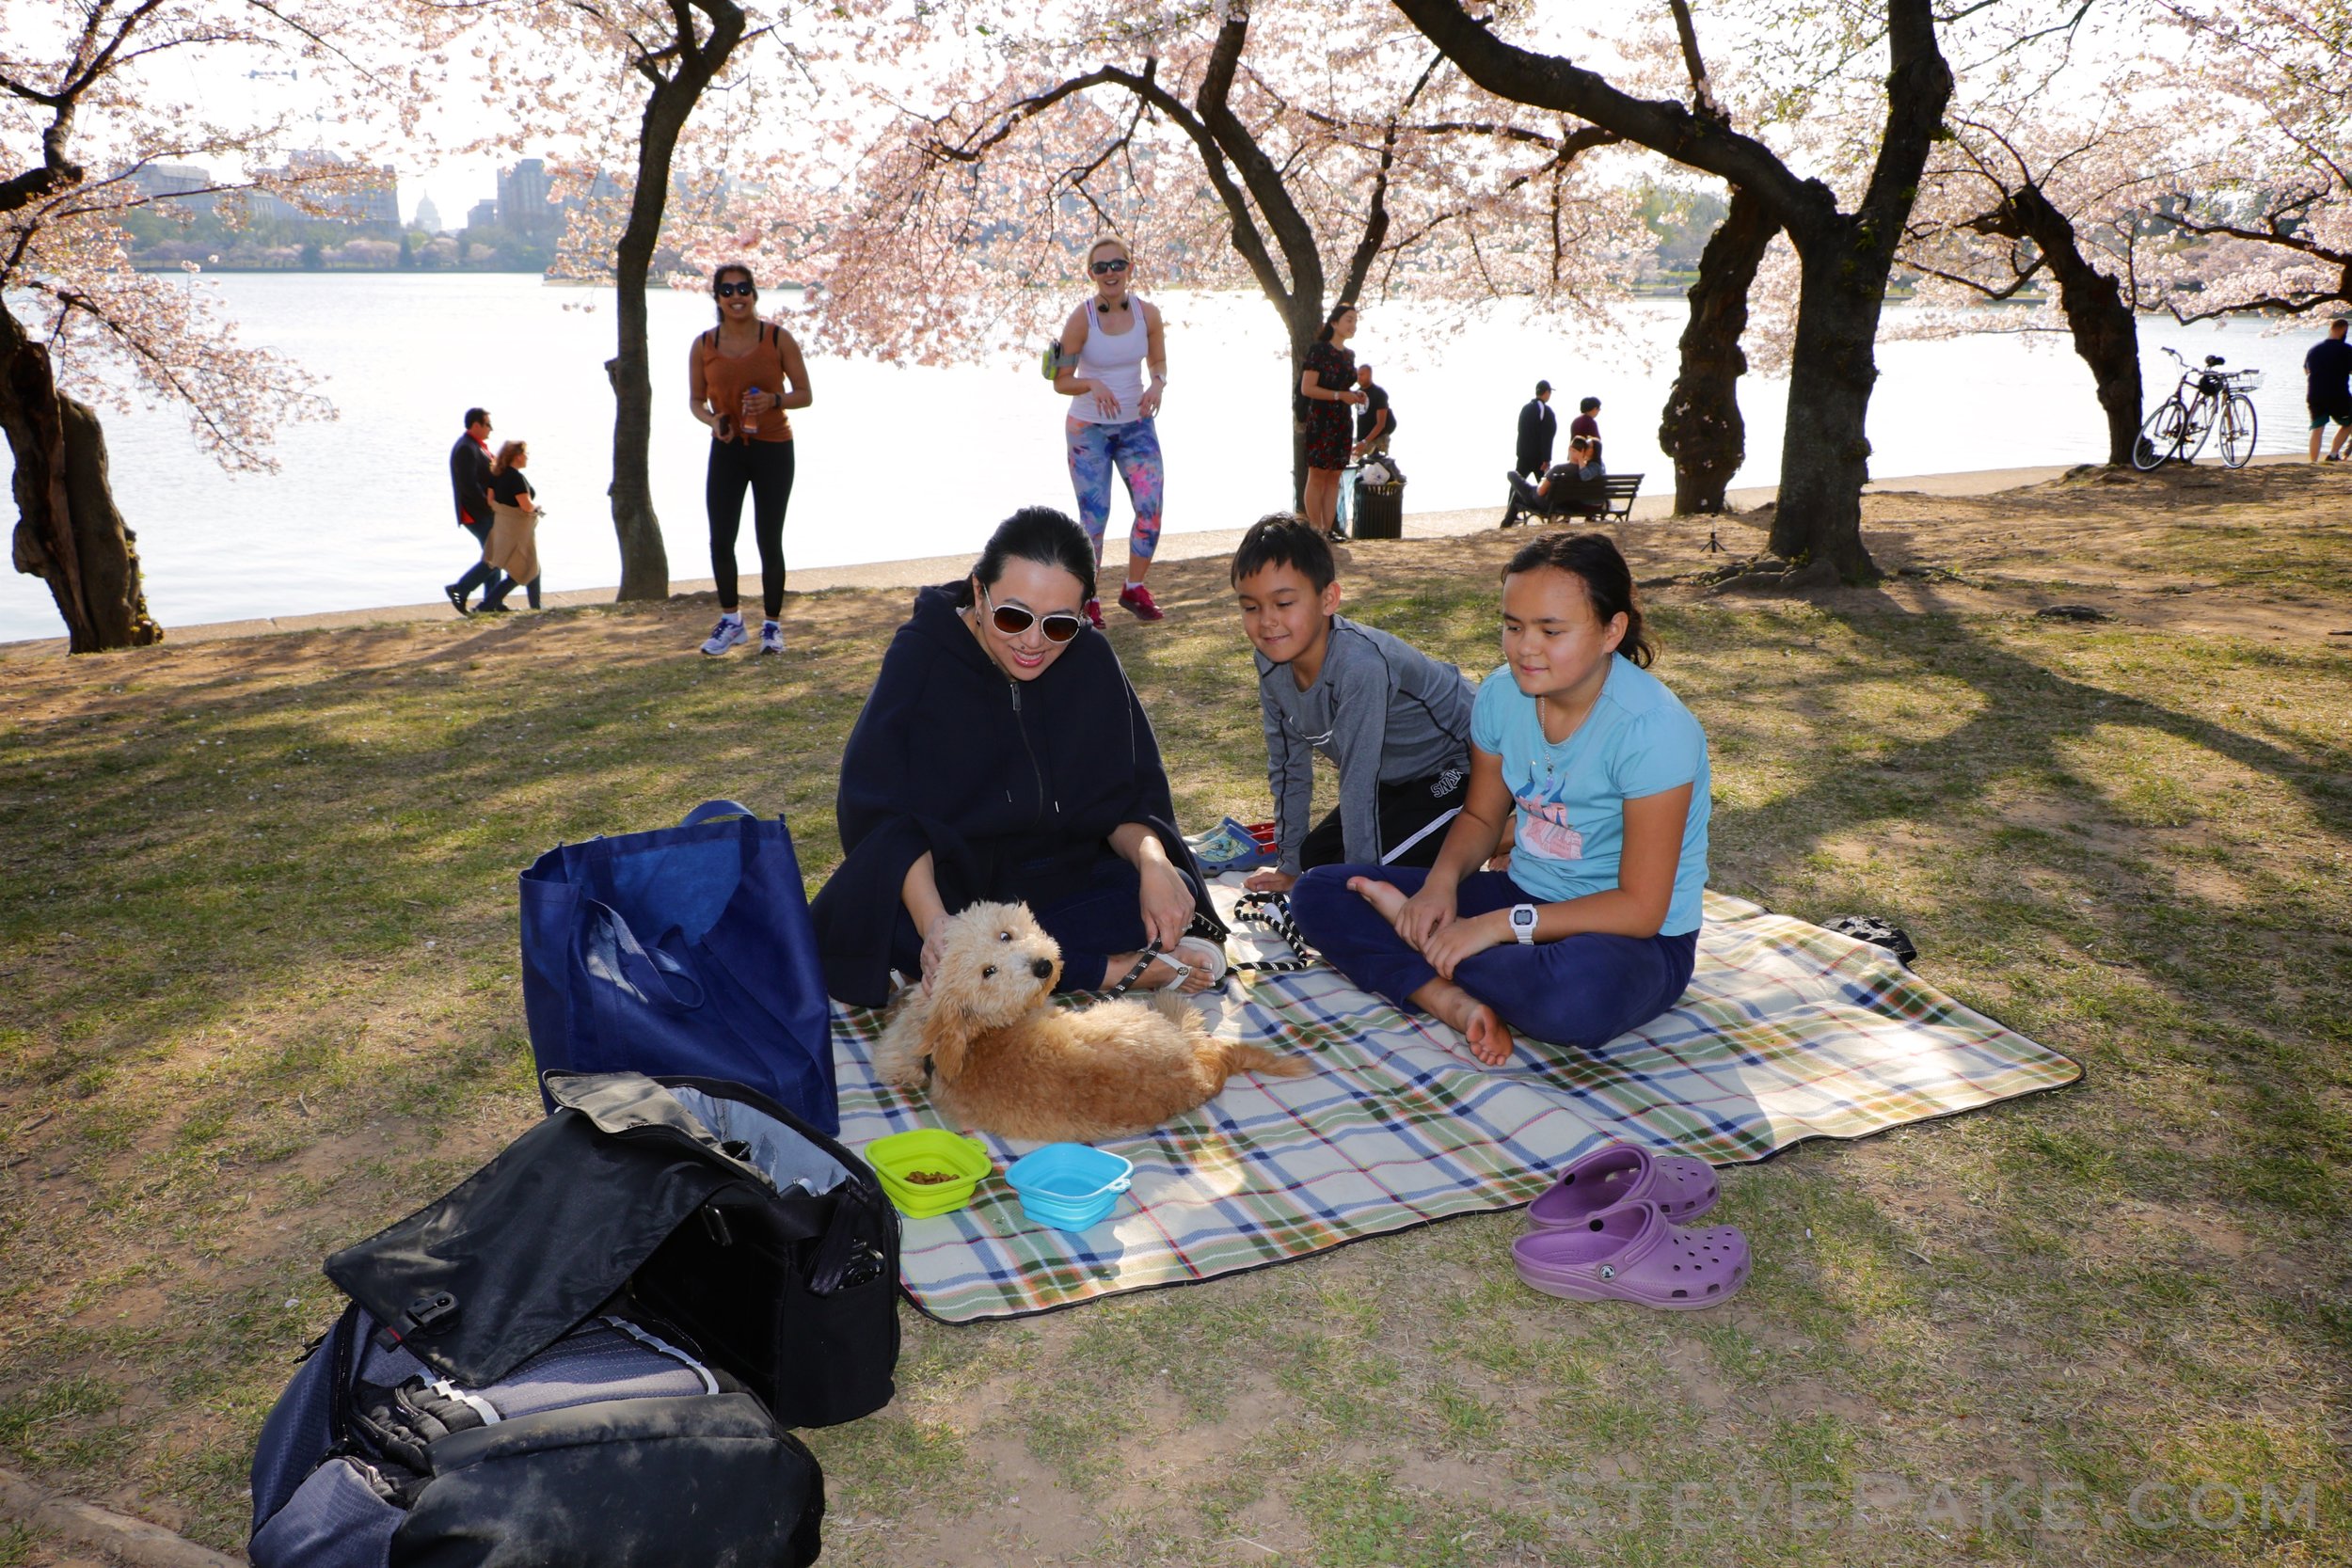

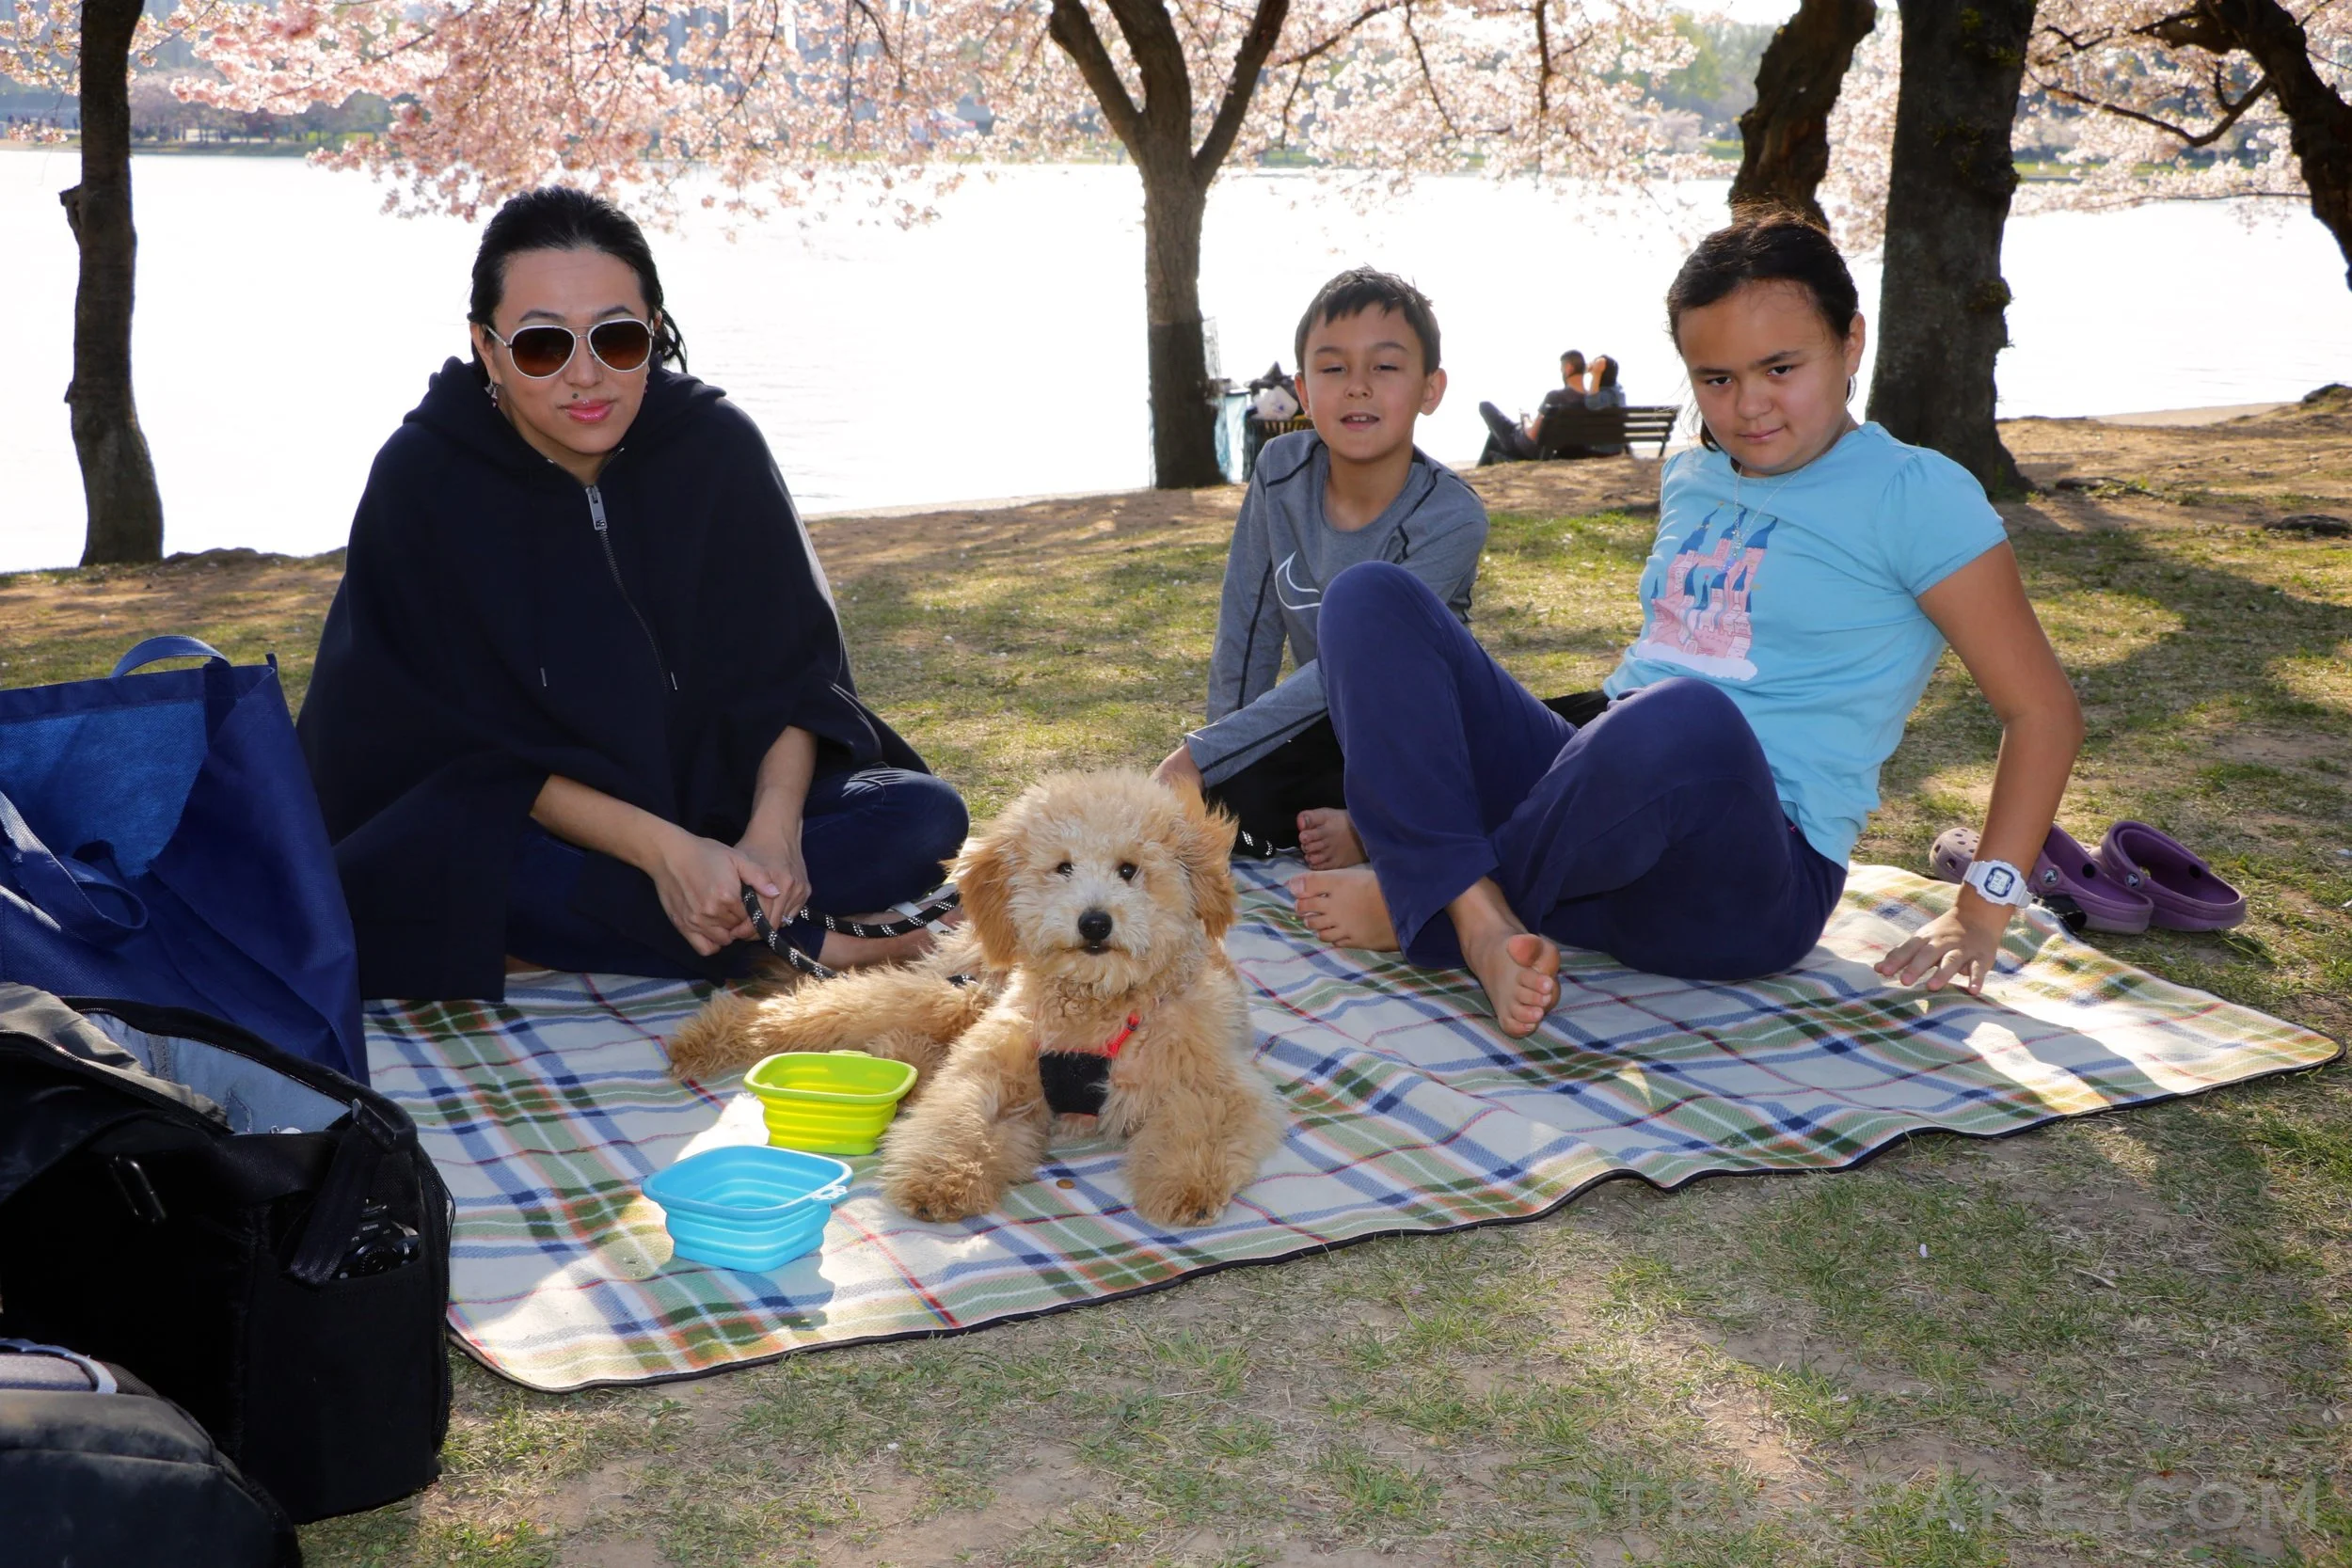


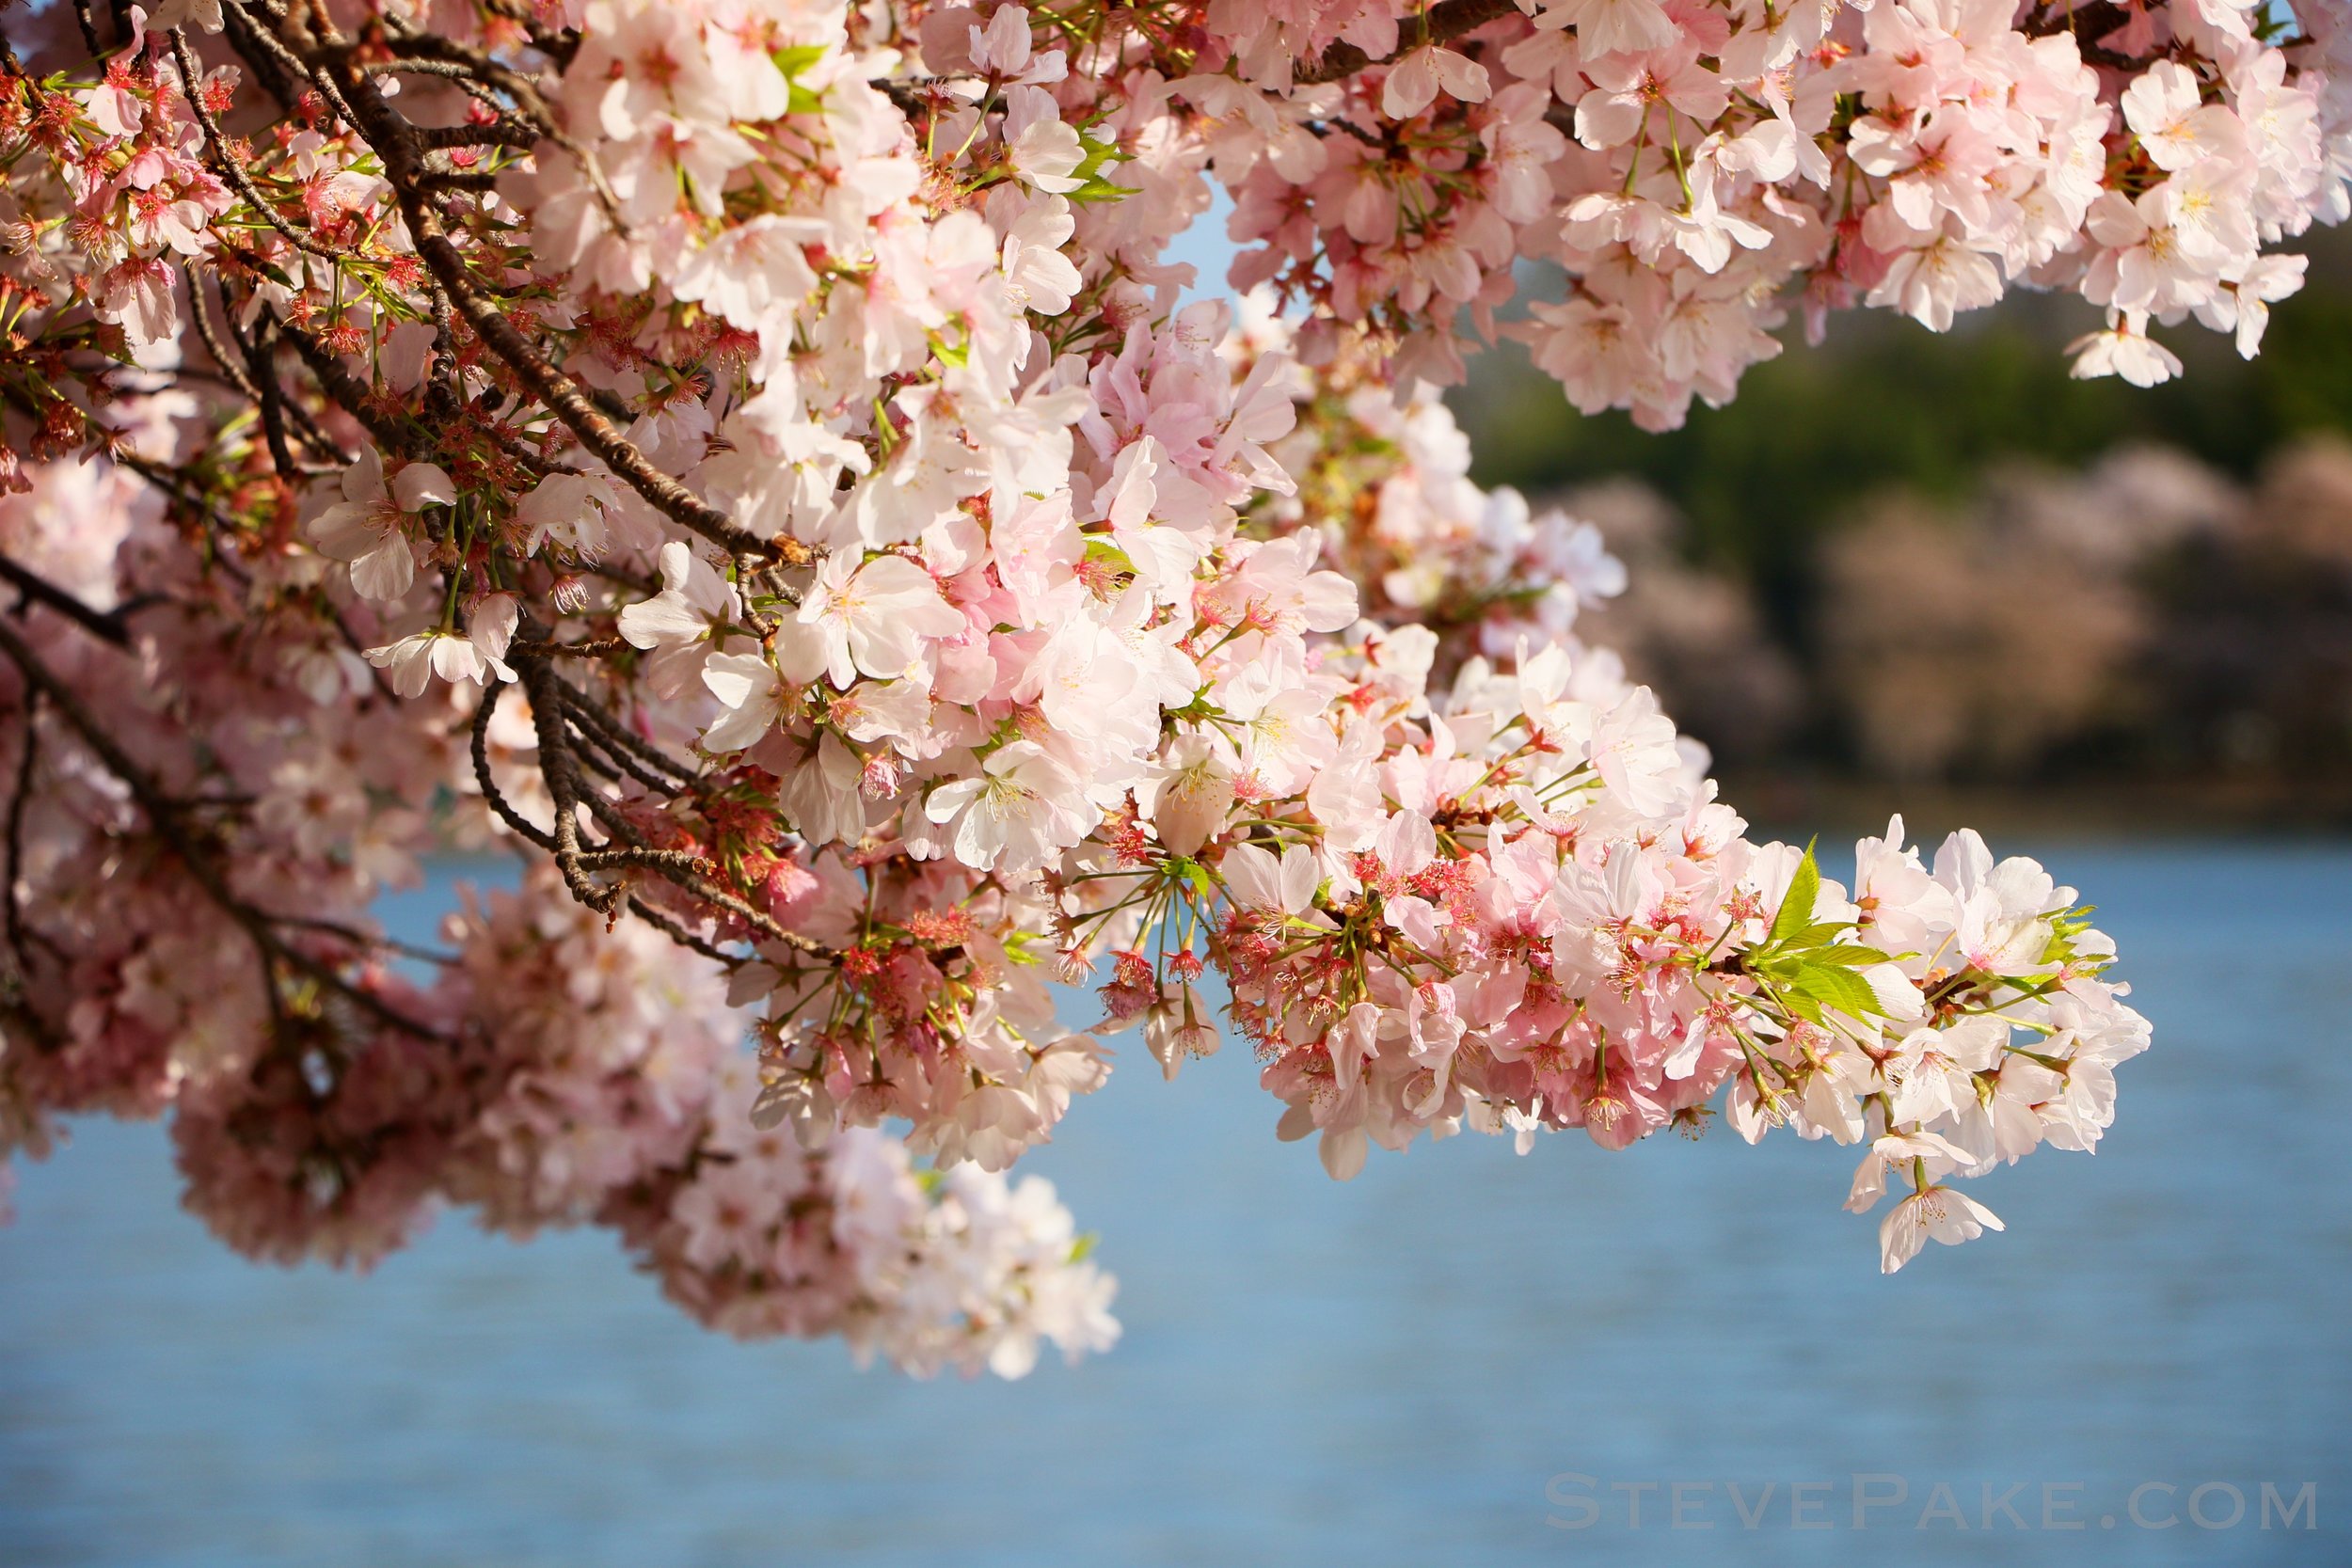


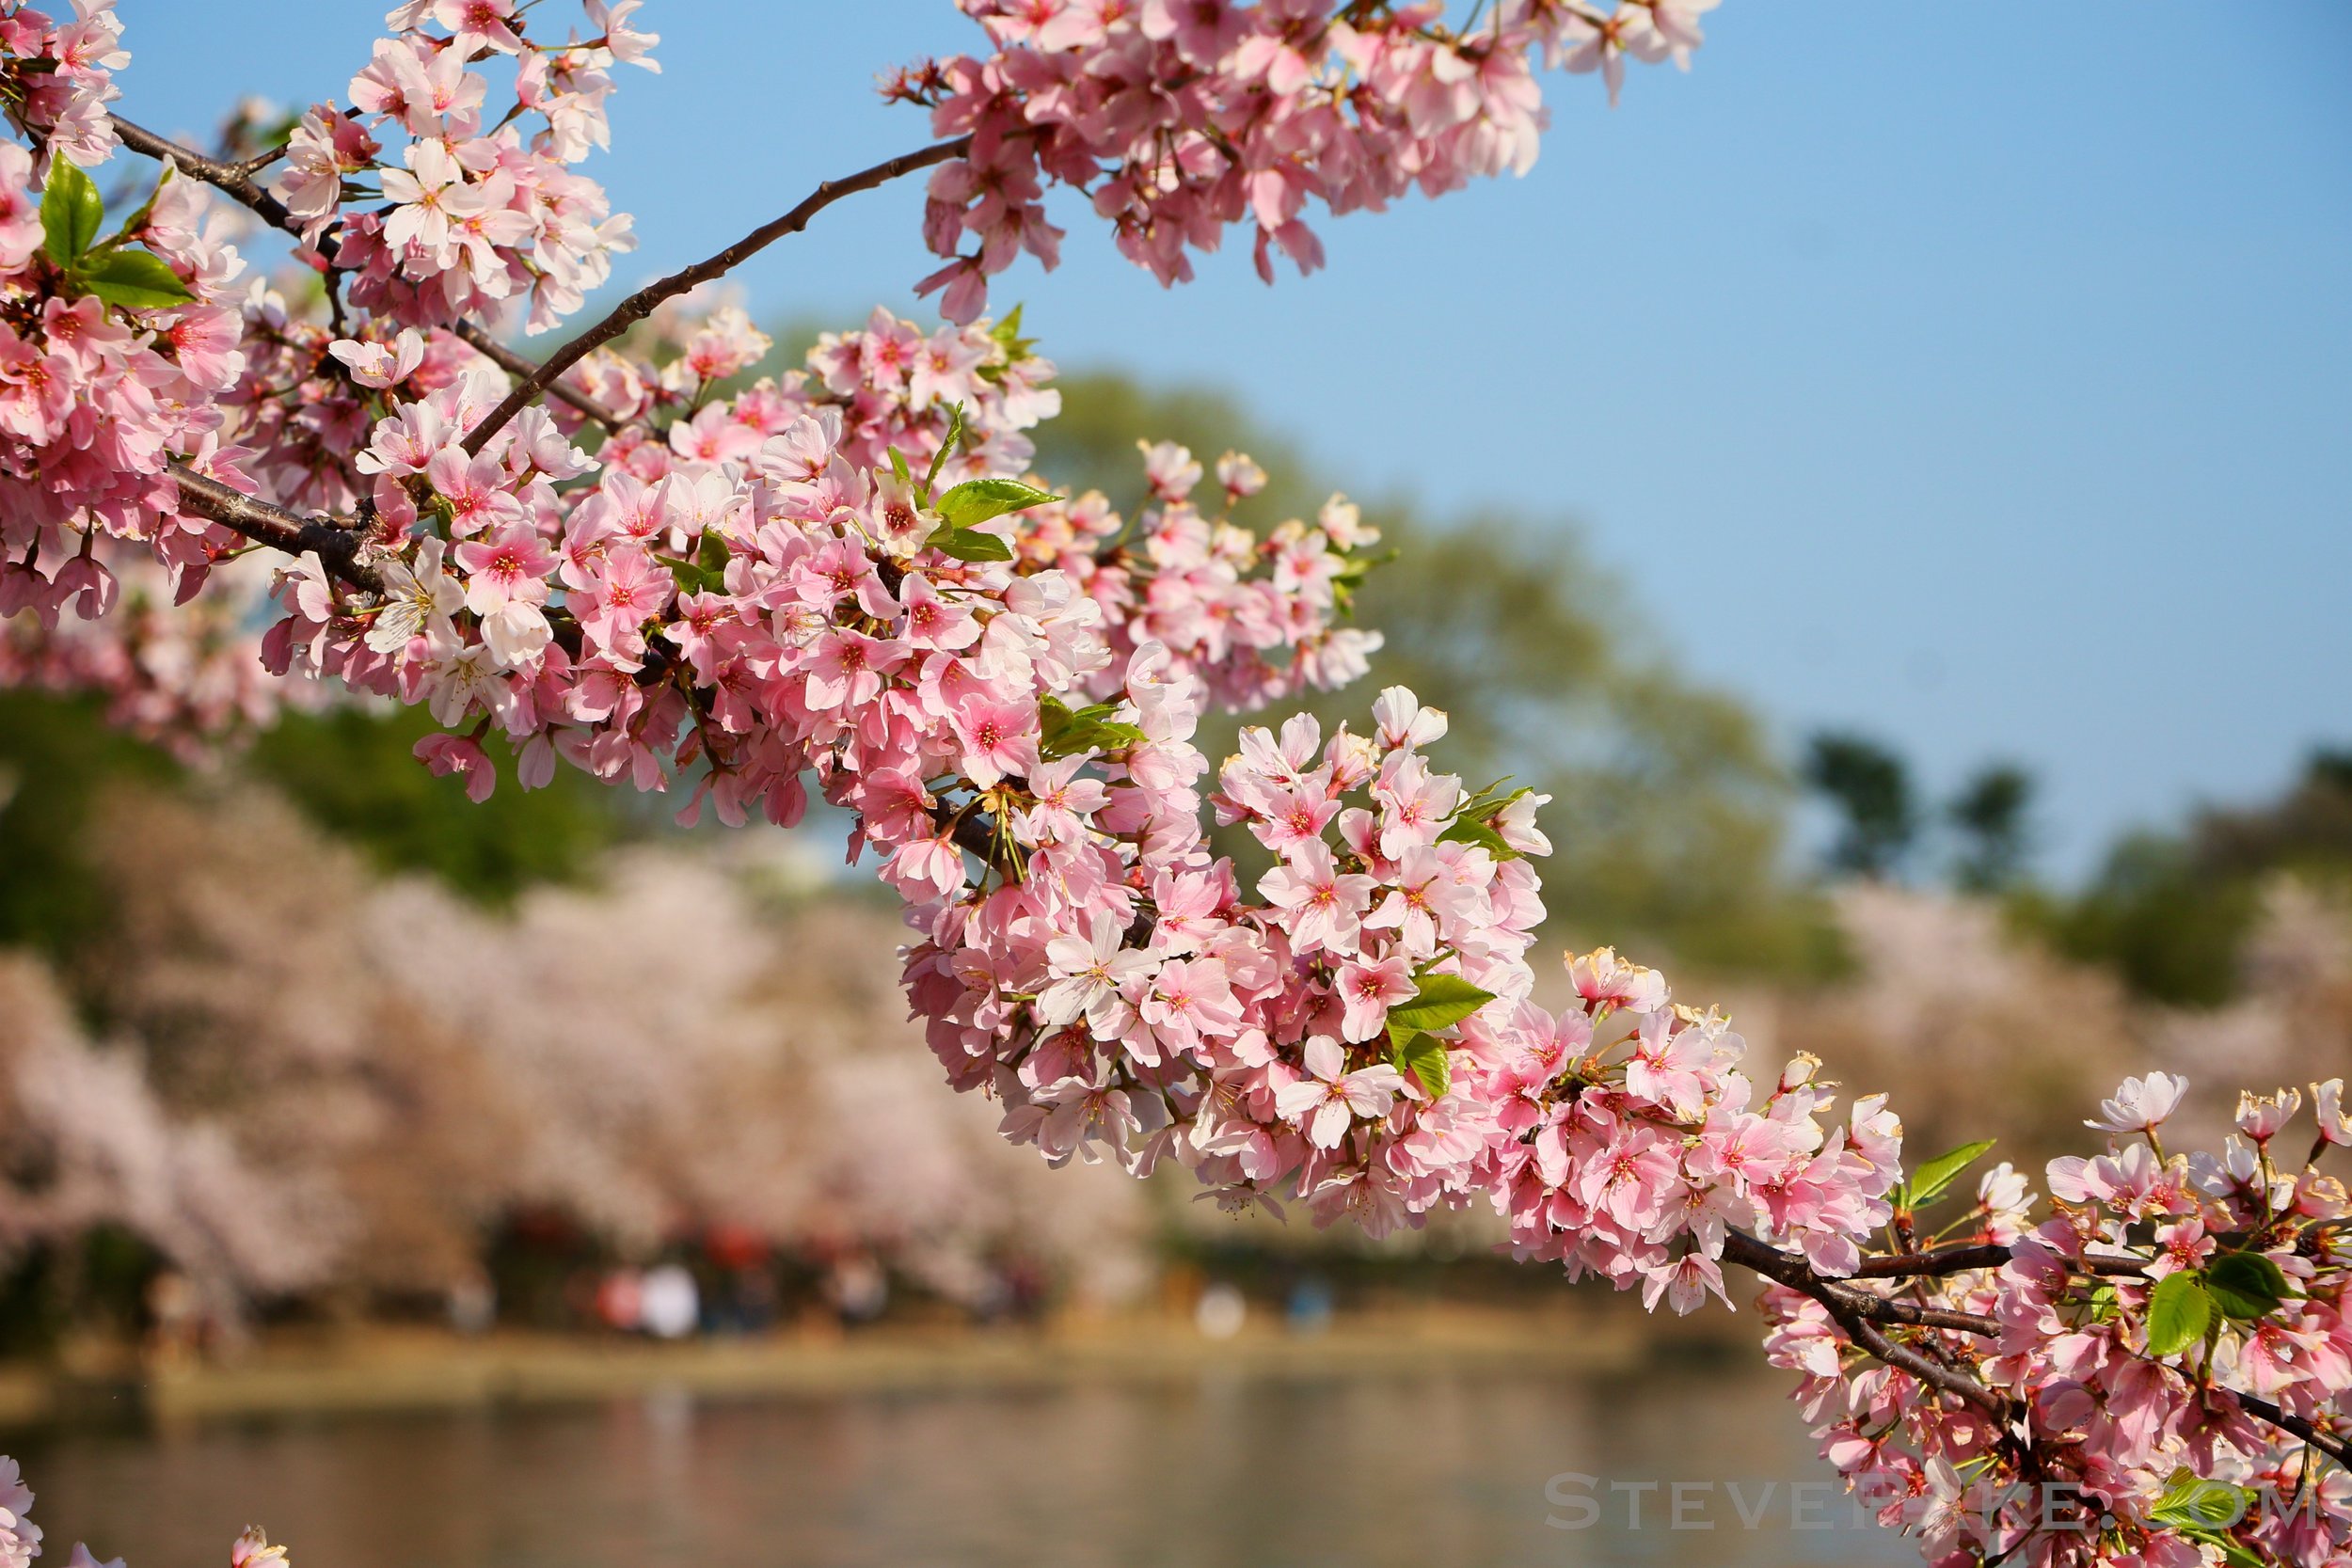


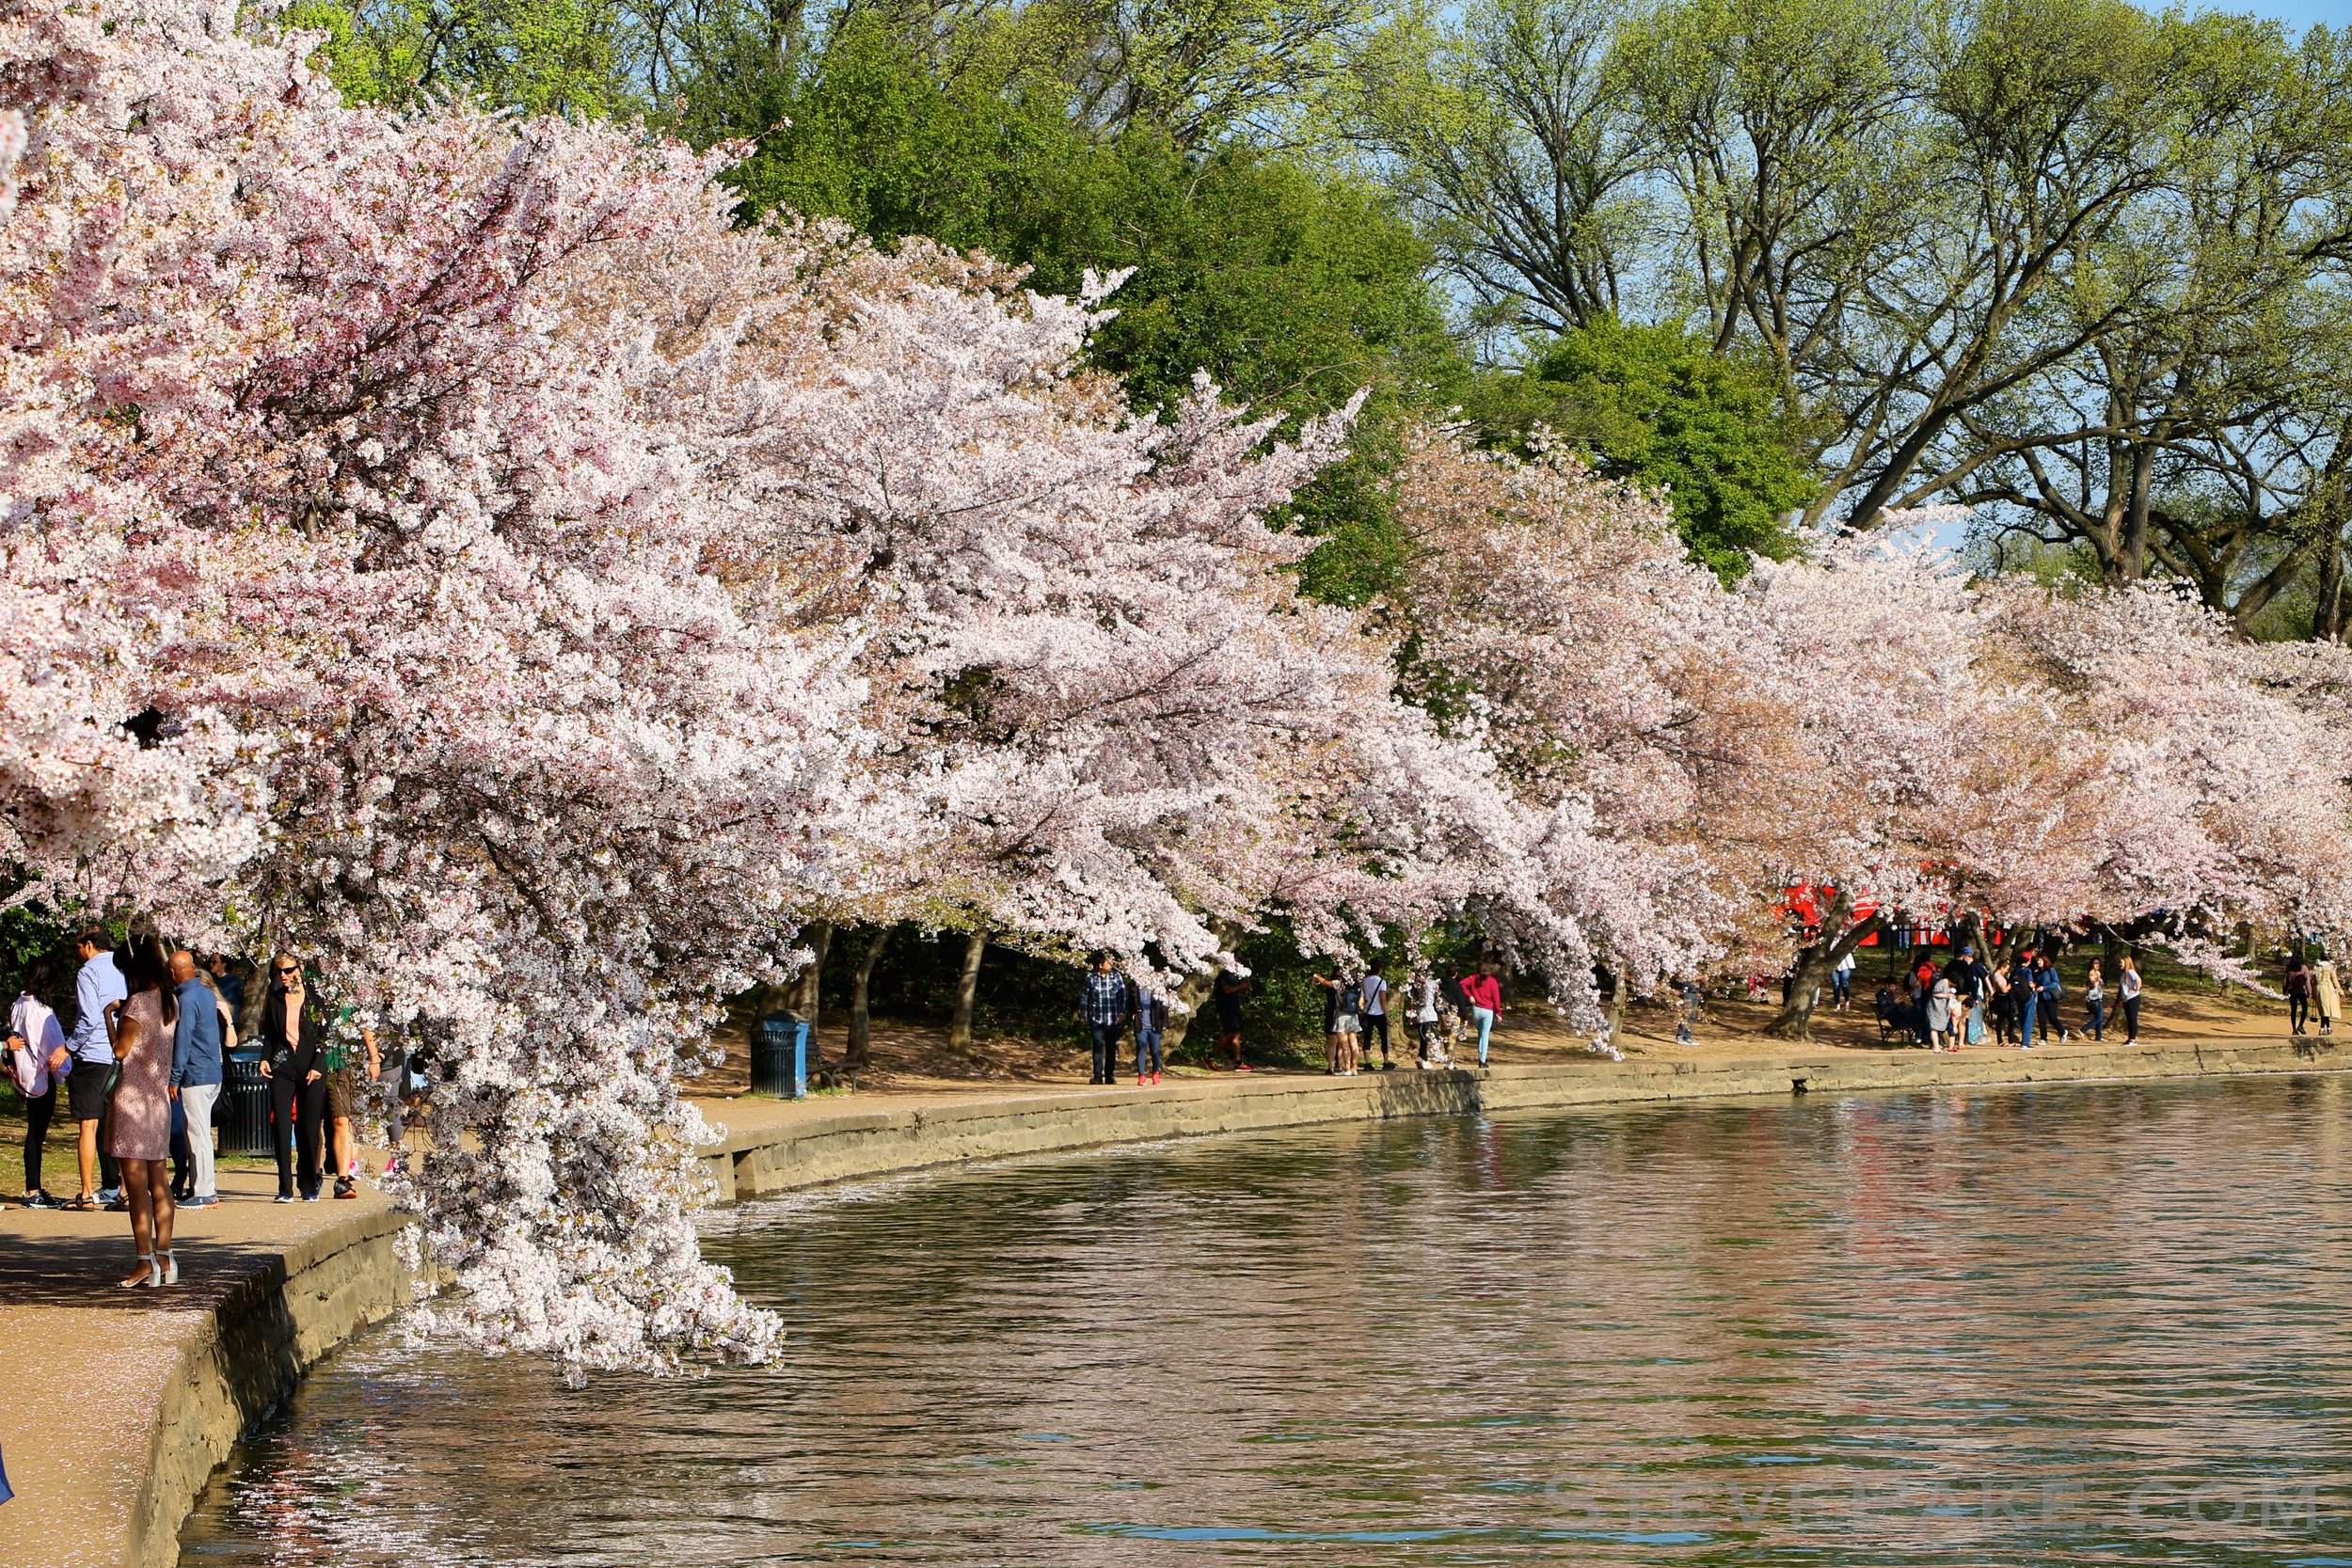


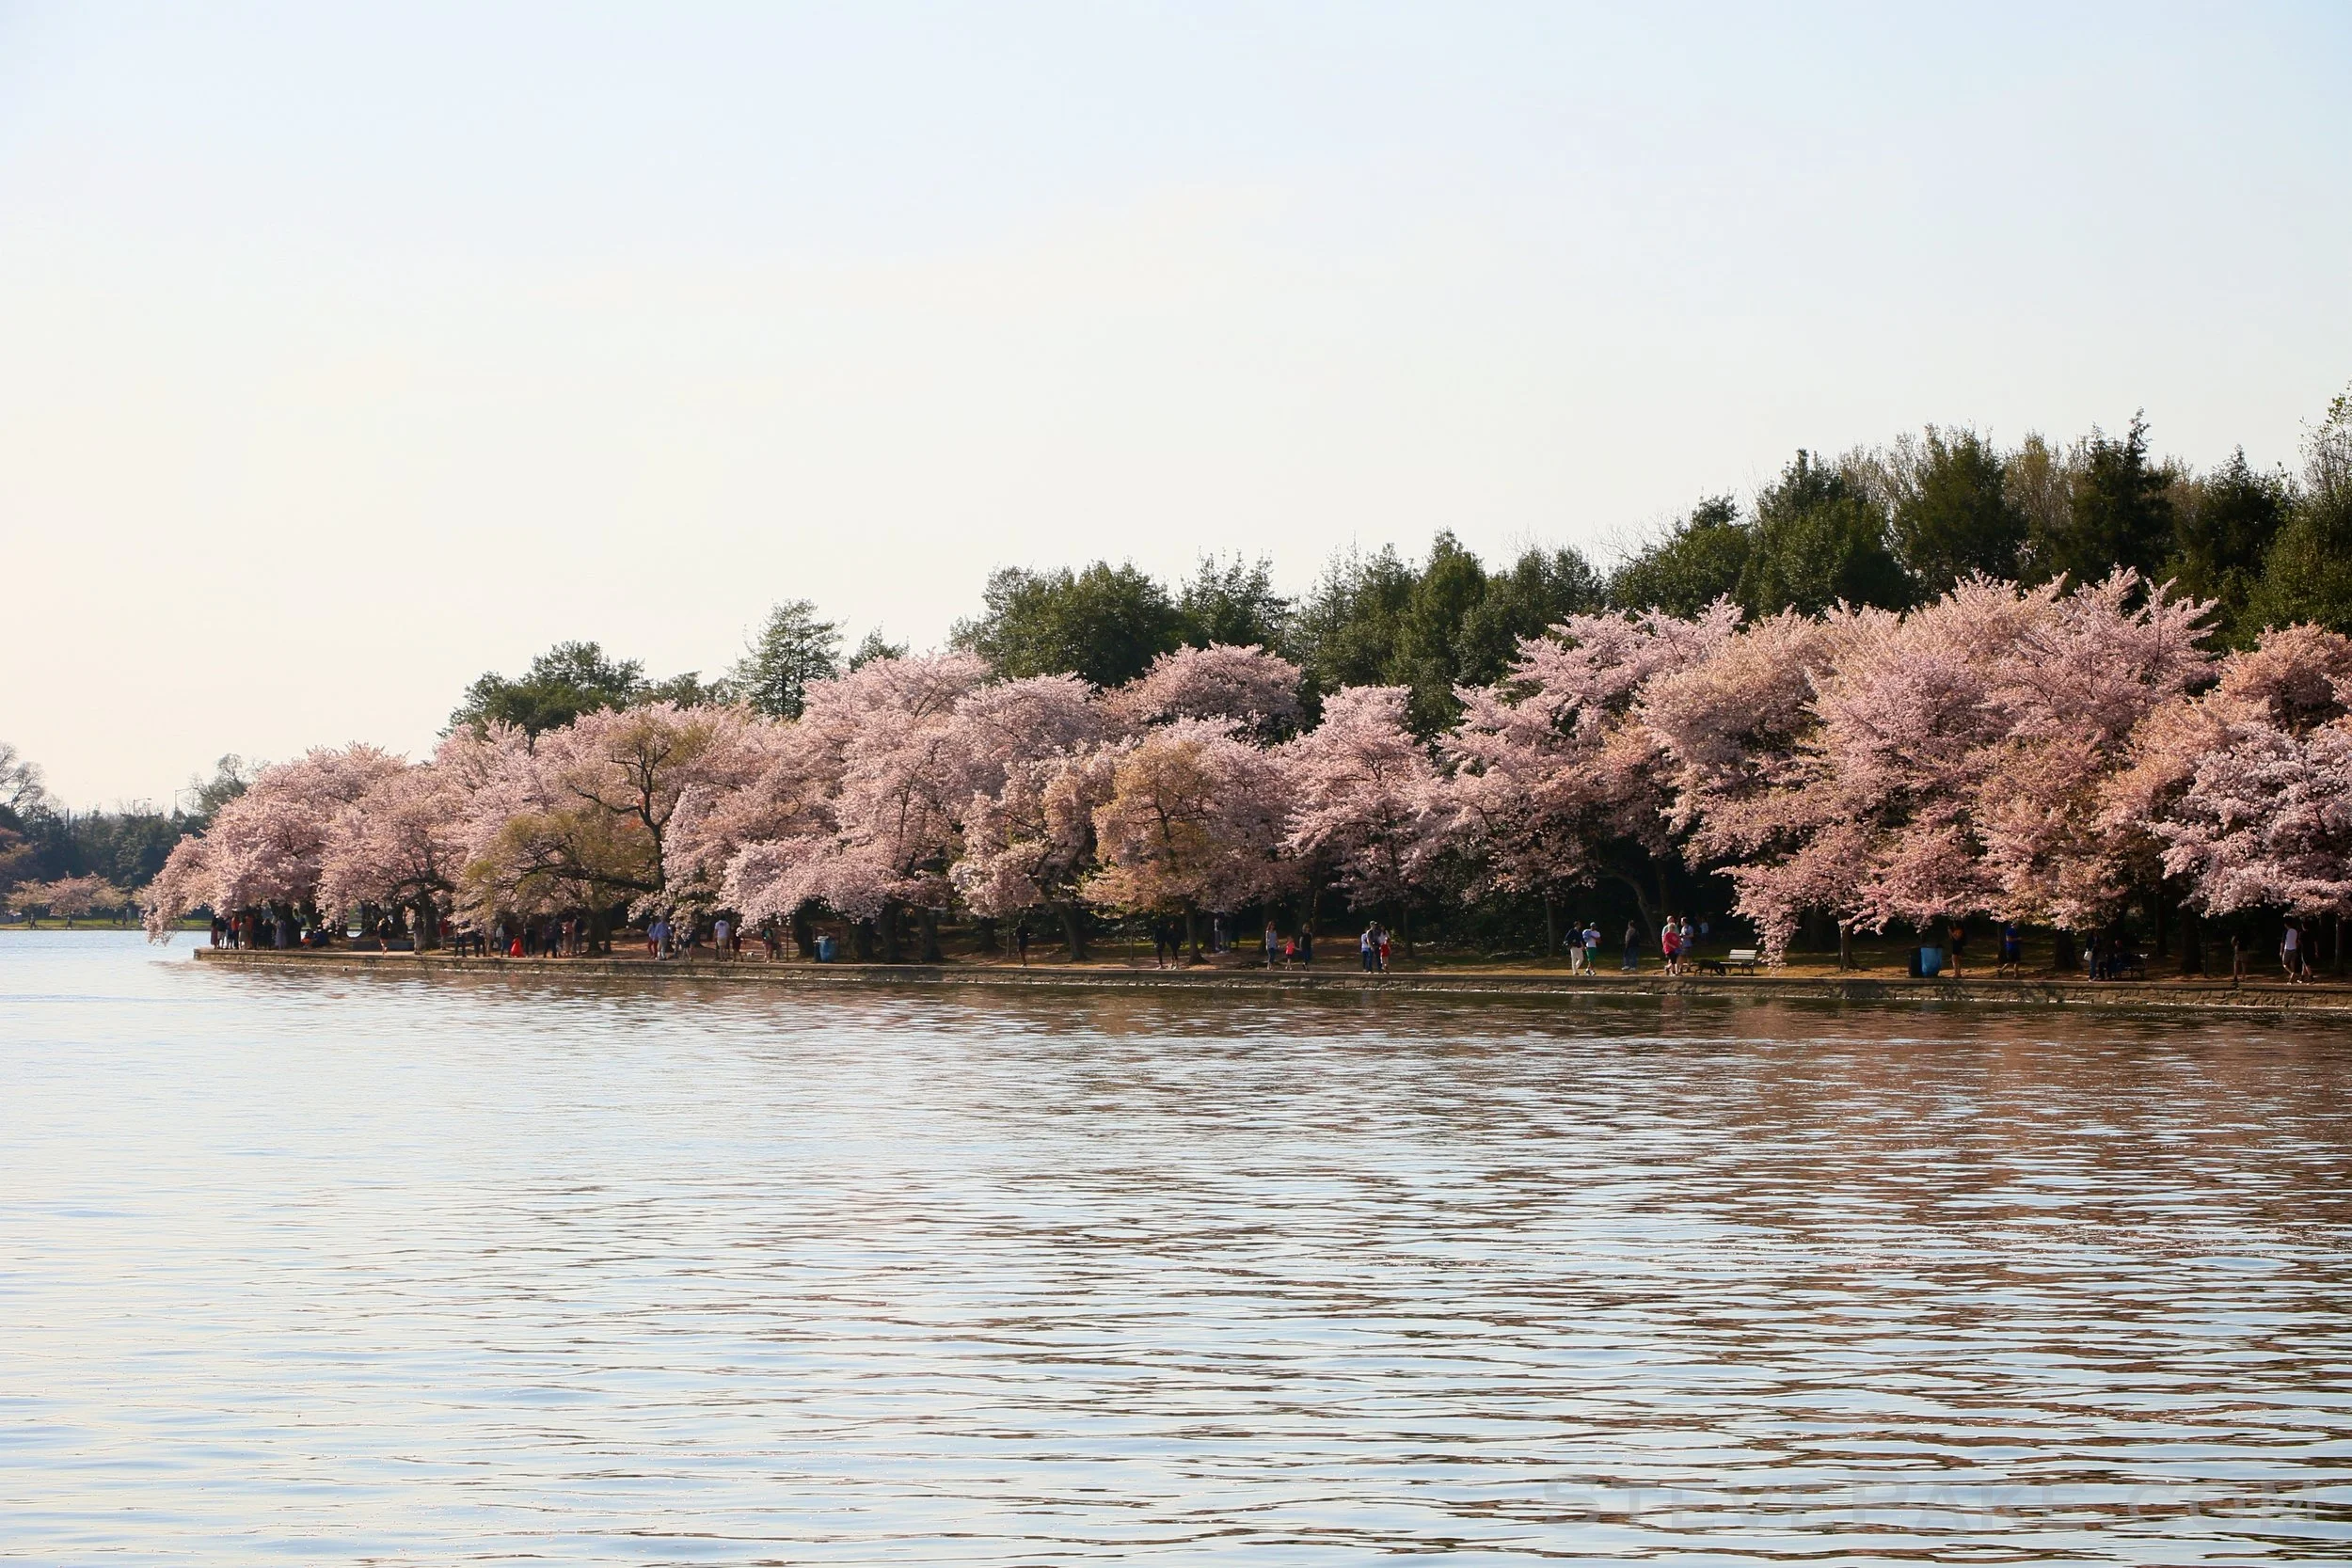


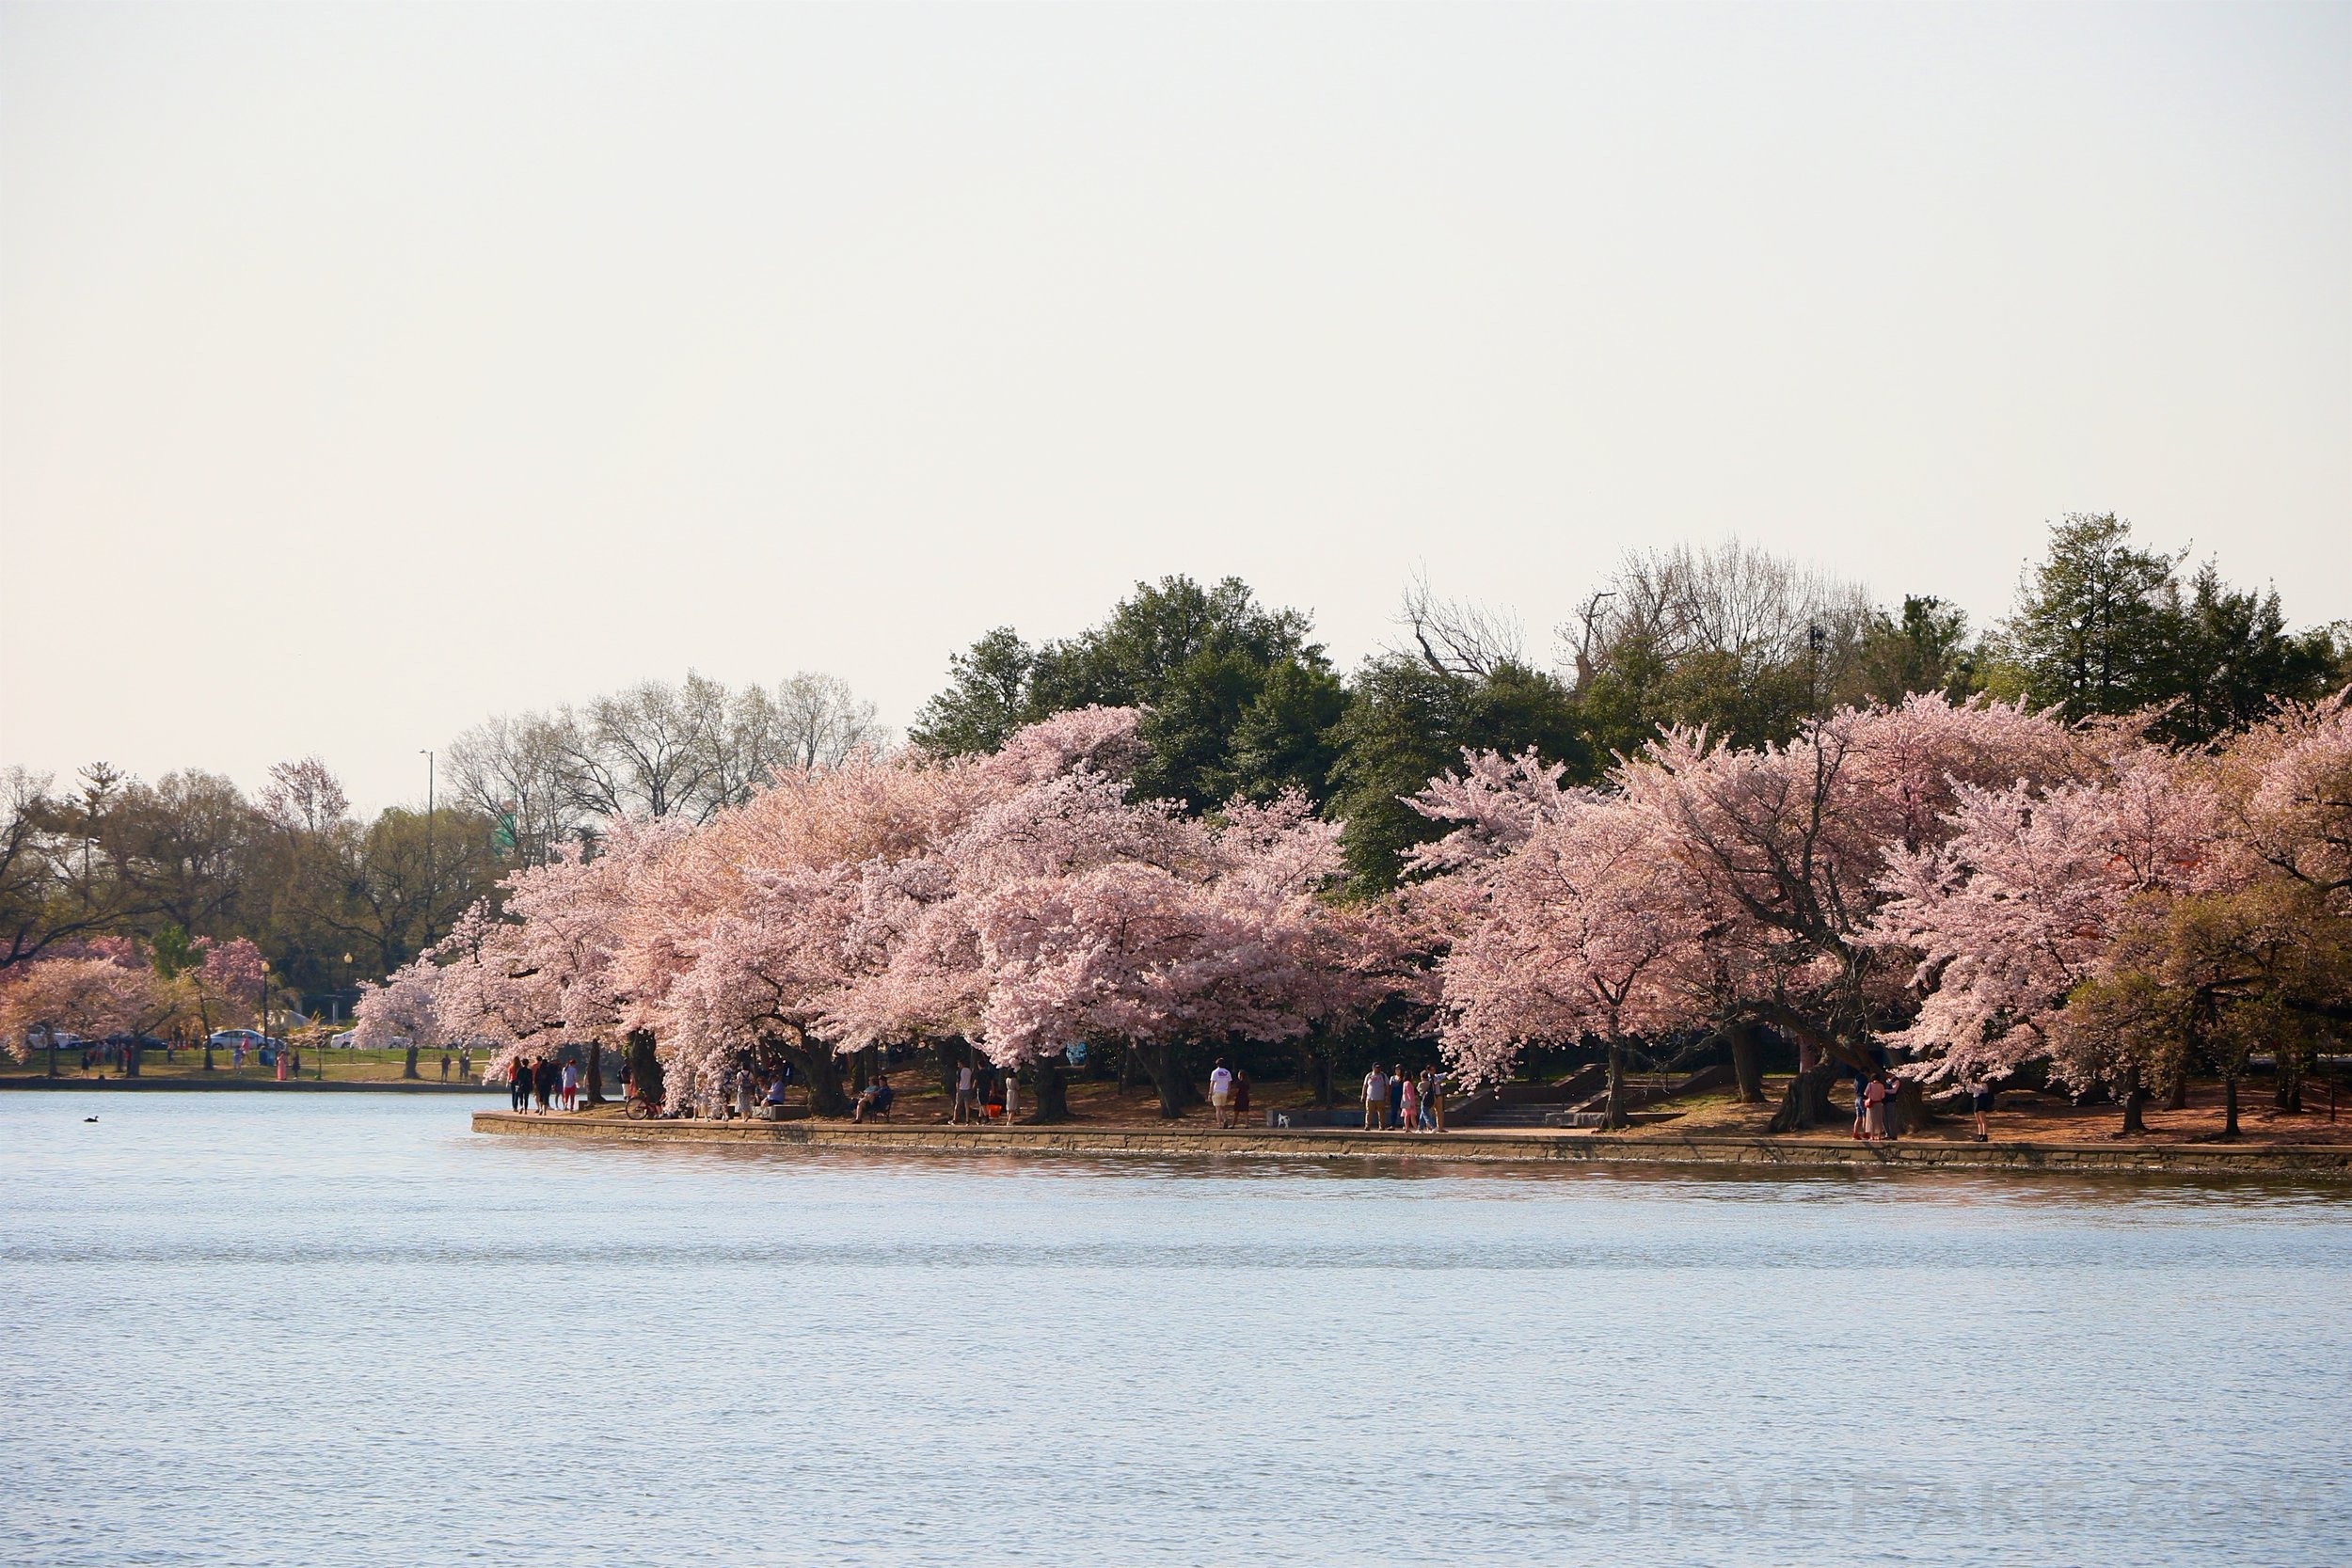


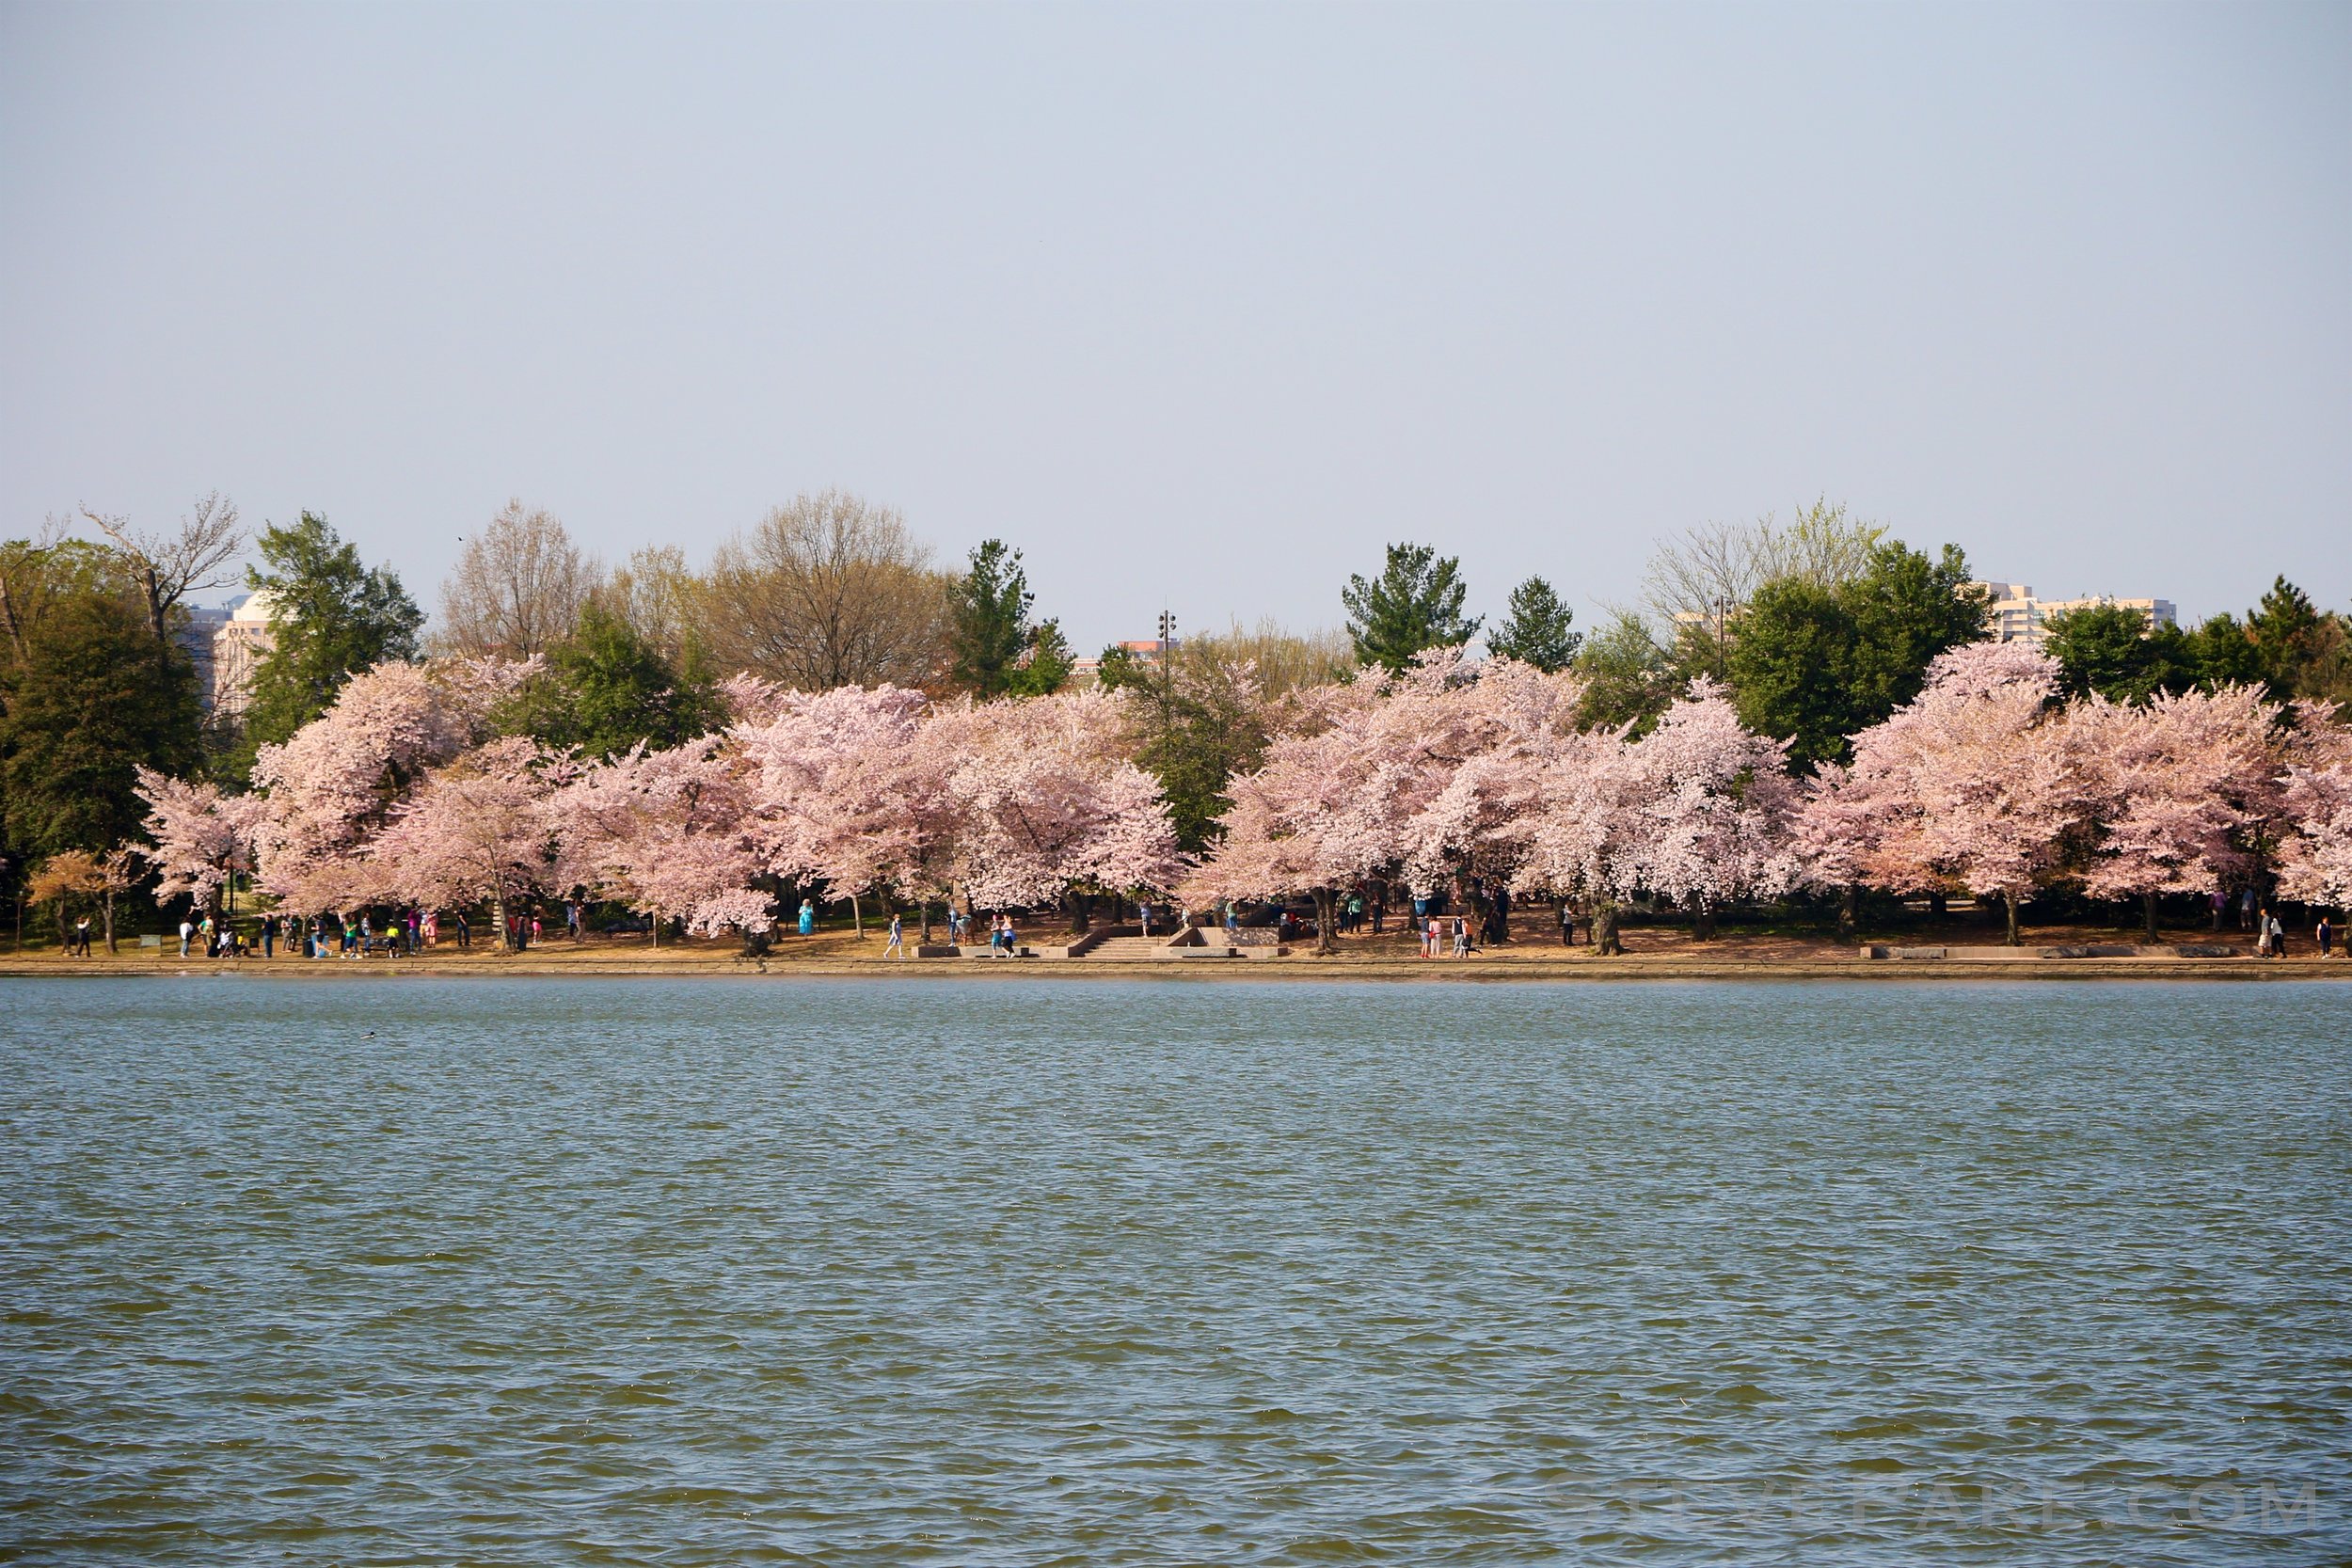


Andrews Air Show 2017
Here in the Washington, D.C. area, we only get an air show every other year at Andrews Air Force Base (Joint Base Andrews) due to DoD budget cuts, which makes the biennial Andrews Air Show a must-see event. This year I went with just my son, and it was an amazing day!
Here in the Washington, D.C. area, we only get an air show every other year at Andrews Air Force Base (Joint Base Andrews) due to DoD budget cuts, which makes the biennial Andrews Air Show a must-see event. This year I went with just my son, and it was an amazing day!

Air Show Snobs
I missed getting the primo VIP Flight Line Club seats online by a hair, so I made sure to get to the show as early as possible and arrived at FedEx Field just after 8am when the busses started. There was no wait through security and we got right on a bus. As soon as we stepped out on the tarmac, I made a bee line for the VIP area, and luckily was still able to purchase the Flight Line Club seats for my son and I. What does that give you? An amazing view right at show center, plenty of seats and space to move around, picnic tables with umbrellas and shade to rest under along with some tents to really stay out of the sun or cool down if you need to, along with free food and drinks, and a bit mobile bathroom facility that's actually air-conditioned and clean! Actual admission to the show is FREE including transportation to and from Fed Ex field where you have to park, and it's fully open to the public. The box seats and flight line club stuff are all optional.

William is pure B-O-Y. His favorite aircraft is the A-10 Warthog, and it's the first one he wanted to see! BRRRRRRTTT!!!!!
After scoring our club seat package on-site, we walked around and checked out all of the static display aircraft before the crowds picked up and it got too hot. By the time we were through all of that, it was 10:30am and time for the aerial demonstrations to start, so we went and checked in at our VIP Flight Line Club and enjoyed the rest of the day under a nice shaded umbrella.
William checking out the F-16C. We actually talked to the crew chief for a few minutes since there was hardly anybody there yet, and no huge line with other people waiting. Definitely pays to get to the show EARLY if you want to check out the static displays.
I finally got to check out the F-15E Strike Eagle. I'd actually never seen one of these in person either. It was hidden in the back at the 2015 show, and by the time I saw it we were already at the other end of the tarmac and on our way out.
The F-15 was my favorite aircraft growing up. Anybody else remember playing the Activision F-15 Strike Eagle II game for 286/386 era PCs? :) I had no idea how much bigger the F-15 was than the F-16! Wow!! That is one big aircraft!
I have to say, it was amazing seeing a B-17 Flying Fortress and a B-29 Superfortress fly. I'd only ever seen these aircraft in museums before, but getting to see both of them fly, especially the B-29, was a pleasure! I can only imagine the time, dedication, and money that it takes to keep these old warbirds in the air, and the same goes for many of the other aircraft from this era. The heritage flight of the P-51 Mustang and the F-22 Raptor was beautiful, as was the F4U Corsair and P-51 Class of 1945 flights.
B-17 Flying Fortress
B-29 Superfortress
P-51 Mustang and F-22 Raptor Heritage Flight
Shockwave
Class of 1945, P-51 Mustang and F4U Corsair
Shockwave racing a stunt plane! LOL
Having been to the previous shows in 2012 and 2015, I've seen the F-22 Raptor a few times, and this was my second time seeing the Air Force Thunderbirds flying F-16C Vipers (Fighting Falcons). They're amazing. That's all I can say. The Raptor is a fifth-generation air superiority fighter that still doesn't have a viable adversary, and it's been flying for nearly 20 years. And the amount of skill required to fly six F-16's in such tight formations and incredible maneuvers is mind-boggling. Best to see it in person to not just see, but hear and FEEL these things whizzing through the air.
F-22 Raptor
USAF Thunderbirds flying F-16's.
Photography Gear
Canon 7D Mark II with some extra batteries and an empty card.
Canon 100-400mm L II IS lens
Tokina 12-28mm ultra-wide
Fuji X100F
Last year I brought my Canon 7D Mark II and Canon 100-400mm L II lens, and then my old Canon Rebel T2i with an ultra-wide for the wider shots. I ended up taking a zillion photos with the 7D2/400 combo, and only a handful on the ultra-wide in comparison, so this year I decided to just go single body and switch lenses as needed. If you get to the show early like I did, you can just stick with the ultra-wide when you get there for all of the static display aircraft, and we were able to get through most of them before the aerial demonstrations started where you'll want the long lens, which minimized lens switching. After demonstrations, pilots taxi their aircraft past the show line, and my Fuji X100F in a side pockets proved to be the perfect solution for capturing these, without having to pull the 400 off of my 7D2 body. This setup worked very well, and didn't kill my back!
The magic shutter speeds for the prop aircraft are....
Use about 1/60s for a Huey or other helicopters.
WWII military aircraft (P-51, F4U Corsair, etc) use about 1/250s
Performance stunt planes use higher RPM props and you can get away with 1/500s.
The trick with that is holding a long lens steady enough while tracking fast moving aircraft to freeze their motion and your own body and hand shake blur looking so far away, but using a shutter speed that's still slow enough to get some prop blur, so that it doesn't look like the engine has stalled out and the plane is going to drop out of the sky. The goal is to freeze the motion of everything in your frame, except the prop! Lol. My 3500 photos were easy to sort through, because most of them had one of the above types of blurring, and weren't usable photos. No complaints about the weather, but the lighting was a bit challenging, which binned plenty more photos.
For the jets, I parked it at about 1/2000s most of the time, or 1/4000s or faster for crossing maneuvers. For the head on crossings with closing speed up near 1000 mph, I set it to the max, 1/8000s, and still had a little blur!!! Lol!!! 😆
Other Camera Settings
I used the Canon 100-400mm L II lens in Stability Mode 1, and set the focus limiter to the far range, so that when you inevitably lose lock, the lens won't spend as much time hunting and will get back on target faster. I used Ai-Servo (continuous) autofocus mode, and mostly I used center group select AF. The 7D Mark II is capable of frame rates of up to 10 frames per second, but I tend not to use that mode too often, as it just results in an unbelievable number of photos to sort through. I have my normal continuous shooting frame rate set to 5 or 6 fps I think, but did crank it all the way up to the "machine gun" 10 fps mode for the Thunderbirds, and especially the high speed crossing shots.
The Fuji X100F
I used my Fuji X100F to take photos of various aircraft after they had landed and were taxiing by on the tarmac, but I still wanted to use a slow shutter speed to get some some prop blur, but it was bright out and engines were now at idle! A shutter speed of about 1/60s and the camera's minimum aperture of f/16 was too bright and resulting in overexposure, but no problem! The Fuji X100F has a built-in 3-stop neutral density filter, which I actually have programmed into one of the function buttons, and that let me get ground photos and still have some prop blur with a proper exposure. Viola! I missed hitting that function button in time for one photo that I really liked, which resulted in overexposure, but the Fuji sensor has so much dynamic range that it was still an acceptable shot and made it into the keeper pile.
In line for the busses to take us back to FedEx Field. No parking allowed at Andrews AFB, so the show and busses are all FREE.
Skipped watching the last Thunderbirds maneuver to bee line for the busses, because I realized the wind direction had changed and...
...we wouldn't get to see them taxi so close right by the VIP Flight Line Club area. Well guess where they did taxi through? The opposite end of the tarmac near the bus lines! Probably saved us an hour of wait time getting on a bus with that maneuver right there. :)
All in all a great day! Fortunately it never got too hot, and we had plenty of shade and cold water to keep us hydrated. William enjoyed the show so much more this year in 2017 than he did in 2015, probably from army and war related iPad games!! Haha!
Prize Shot: The transonic F-22 Raptor pass. It's just stunning! This was right over our heads at a focal length of only 135mm, so my cheap 18-135mm kit lens could have gotten this shot! It helps to have top notch equipment, but you don't "need" to have exotic super telephoto lenses to get great photos!!!
My son and I had a great day out, and it was another great air show. Looking forward to 2019!
There are TWO Albums
Be sure to check out BOTH!
StevePake.com

Do You Own Your Photography, Or Does Your Photography Own You?
Do you own your photography, or does your photography own you? A classic age old question, that's often a bit of a balancing act that requires a bit of experimentation!
Are We Taking Too Many Photos? A friend posted this article on their social media, which I thought was pretty interesting.
Our Kyoto meltdowns. Are we all just photo-clicking monkeys? What’s travel about?
Here's my tangential thoughts.
If you can take photos without having to think about taking photos, and what settings or what lens you need and all that crap and just do it, you're going to get great photos and not miss a single thing or moment. And as a benefit to other people who want to get nice photos of a location too, you won't be in their way in the "good spot" for a second longer than necessary, which will keep everybody moving.
Don't Bring Too Much Junk!
The key to nice travel and vacation photos, and photos in general, is is not taking too much junk. The more camera gear junk you bring, the more you have to think about what lens or what camera body you might need for a particular photo, and the more distracted you become from actually enjoying your vacation. On one of our earlier trips to Taiwan to visit my wife's family many years ago, I brought an entire backpack worth of photo gear, and spent most of that trip thinking about what lens I should be using. I did get some amazing photos from that trip, but it surely was a distraction having that much stuff, and I ended up using only a few different lenses.
Since then, I've wised up. When we're traveling these days, everything has to fit in my small ThinkTank Retrospective 5 bag. Anything more than that and it's either going to be too much gear and a distraction, or too heavy to want to lug around. Photo blogger, Ken Rockwell, has a great article on his website titled, "How To Carry Less", which is a great read too.
Shoot What Works For You
It's also important to have a camera or camera system that works "for you", and that you understand. If you're not going to put the time and effort in to learn how to use a DSLR camera system to the point that it's second nature, you're either not going to get very good photos with it, or you're going to be distracted and not enjoying your vacation, or both! Maybe stick with a phone, or a basic point and shoot camera that's not as complicated.
My current DSLR workhorses, the more modern Canon 7D Mark II high-performance APS-C body on the left, and my older Canon 5D Mark II full-frame body that I use for portraiture and more artistic type photos on the right.
This is part of the reason why I switched from the Nikon to Canon DSLR system back in 2010. One second I'm shooting a nice landscape scene, the next second my kids are doing something cute and I switch to a portraiture or action photo type mode, and the next I have challenging backlighting to deal with and need good fill flash performance, all of which require drastically different settings. Nikon had never given people a way to quickly and easily save and then recall all settings on the camera for different types of shooting, whereas Canon had that figured out long ago with their total recall memory banks. I custom program C1 for Landscapes, C2 for action or portraiture, and C3 for fill flash or reverse-handed selfies exactly to my liking, and then I never have to think about it again. It's easy as pie. I never have to think about what I'm doing while on vacation and just shoot, or at most make one or two incremental adjustments from the baseline I have those custom modes set for, and that's it. When I switch back and forth, the camera is always back to my known and defined baseline, without worrying about missing a setting and screwing up photos, as I always did with Nikon!
Today, Nikon has finally figured that out, but their insistence on micromanaging features between cameras means not all of them have it when they should. The latest Canon 7D Mark II camera body, which has been my primary workhorse over the past few years has three of those total recall memory banks along with a pop-up flash, whereas Nikon's latest equivalent D500 has neither? Why?? The answer is Nikon micromanagement of features yet again, and deciding for photographers which features and modes should be available to them, rather than allowing photographers to decide what they'll use for themselves. There's other things that drove me crazy about Nikon too. My brain just speaks Canon better, and the system does what I want it to do better and easier for me than Nikon, and that's why I shoot what I shoot. The system lets me achieve my goal of getting stunningly good photos, yet also being able to enjoy my vacation and travel at the same time and not miss moments.
You Don't Need To Lug Pro Camera Gear Everywhere To Get Great Photos
Once you obtain some professional level camera gear, there's a tendency to want to take it around everywhere, but you don't have to. Once upon a time on a particular camera gear forum, a member was posting their photos of a particular European city with all of the fancy lenses that they owned. I couldn't resist my temptation to troll them by posting my own photos of the same city, but with my basic 18-55m "kit lens", which was all I had at the time. Not that the other members photos weren't awesome, but many of mine were just as good if not better, which shows that the most important aspect of photography is what's six inches behind the camera.
Via "The Secrets To Getting Great Photos", my shot of the Eiffel Tower in Paris with my first DSLR, a Nikon D80, and its 18-55mm kit lens. I was at exactly the right place at exactly the right time, lucked out with some amazing atmospheric effects as the sun set, and that made this photo more than having one lens or another did.
These days my photography has taken a decidedly more casual turn. I don't need 1000+ photos every time we go to the beach, not just because that was always excessive before, but because I didn't have time to sort through all of them then, and especially don't have time to sort through a huge photo catalog like that right now. If I can't pick out a few photos that I like right off of my "good camera" and dump them straight over to my phone and onto social media over peer-to-peer WiFi or Bluetooth, the photos just aren't going to get posted or even sorted. Our lives have become way too busy, too complicated, and just plain too crazy, which has required me to streamline my photography workflow even more, and cut down on my photography. I'll never stop taking photos, but I'm definitely more selective with what I shoot these days.
I enjoyed some front yard camping with my son this weekend. All of these, with the exception of the moon shot at the upper right of the first collage were taken with that Fuji X100F. For the moon shot, I broke out the "big gun" Canon 7D Mark II and 100-400L II lens at 400mm. The moon would have been just a tiny spec with my Fuji X100F, which has a 23mm lens in it. You need a camera that's capable of capturing what you want to capture. For normal life photos and vacation shots, the Fuji (or even your phone!) is perfectly capable, but they're not going to reach to the moon.
I really like my new Fuji X100F a lot! I had to pack away all of my DSLR gear while we moved, and I still haven't really taken them out and am still using just the Fuji X100F for the most part, with the exception of that moon shot. No, it doesn't do everything that I need it to, but for a more casual "just be present and enjoy life" camera, it's perfect. It's a single lens, so your mind is never occupied about which focal length or what lens to use, and your mind is just glued to that perspective without wonder or thought, much like a phone. There's value in simplicity, yet this is an amazingly sophisticated camera with a lot of advanced features if you drill down. You don't have to use them, though.
For my more casual photography as of late, this Fuji X100F has been all I've needed. It's much smaller and lighter than a single DSLR body without a lens, and you still need to pack lenses for the DSLR cameras!
We're going to the Outer Banks for a week at the end of August, and I think I'm still just going to bring the Fuji X100F. The secondary question you have to ask is, is part of the purpose of your vacation actually getting over the top awesome photos that will knock people's socks off? If yes, bring the good stuff! If you just want to be present and enjoy the moment, you don't need to. We're so worn out, beat up, and burned out, that we just want to relax, be present, and enjoy. I want to get great photos of my kids on their boogie boards though, so maybe I'll end up bringing my big camera and the 400mm lens afterall.
Now the Joint Base Andrews Air Show in DC in September, yeah, I'll be going full tilt craziness with my Canon 7D Mark II and my hot rod Canon 100-400mm L II lens for that for sure, along with an ultra-wide lens. Which gear you bring is often a balancing act. Ask yourself what you're trying to accomplish, and don't bring too much or too little camera for what you're trying to achieve. we can't wait for the air show. Nothing is more spectacular than a 400mm photo up the afterburners of an F-22 Raptor demonstration, an ultra-wide shot standing underneath a B-1B Lancer supersonic bomber, or of the Air Force Thunderbirds streaking across the sky. There's a time and a place for the big guns, and an air show, or a once in a lifetime trip someplace all definitely qualify, but even then you don't need a whole backpack worth of photo gear.
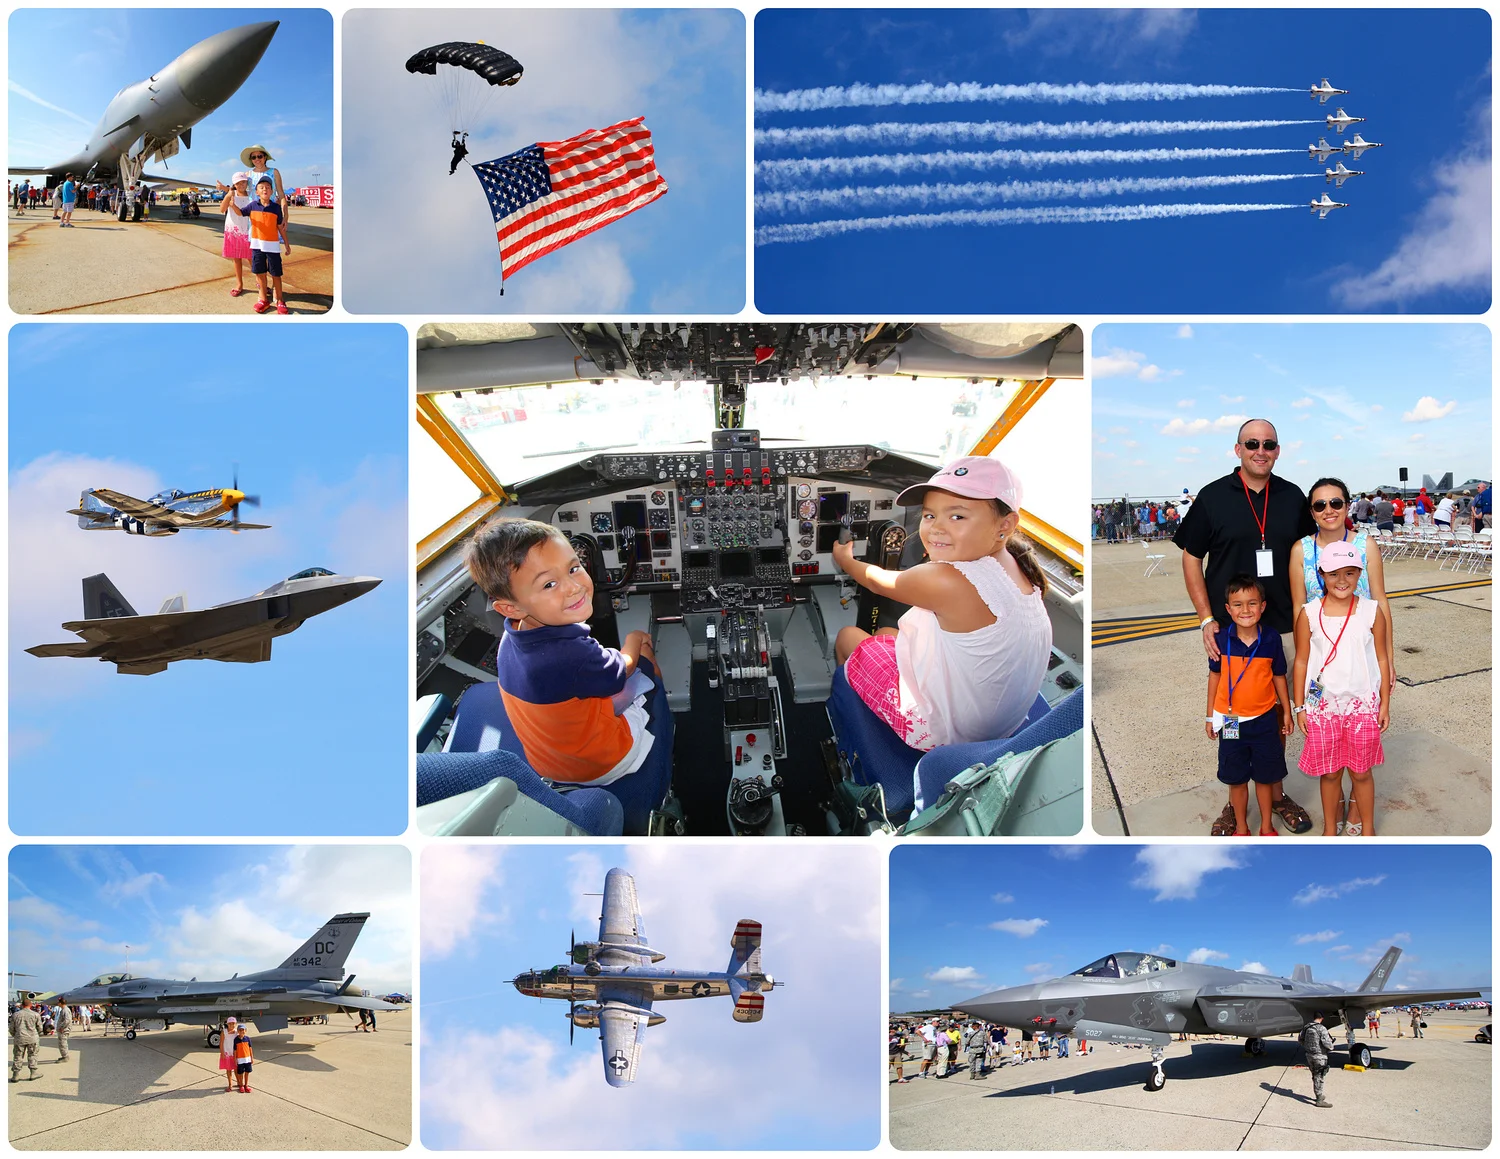
Joint Base Andrews Air Show 2015, click the photo for the blog.
Just for grins and while we're on the topic, here's a photo of my Canon 7D Mark II with a fully extended Canon 100-400mm II lens, right next to my Fuji X100F. It's a beast, and it's still pretty big with just an 18-135mm all-purpose zoom lens, and still a lot bigger with just a 24mm f/2.8 pancake lens.
Conclusion
Do whatever you want. These are just my ramblings, but I know what works for me. Your mileage may vary.
We're loving our huge new house, and I can't wait to start decorating the walls with amazing photos that I've taken all over the world, and of people that have been along for the ride with us and that have meant the world to us. I couldn't imagine going to a beautiful place and not taking some really nice photos of it, or going out to dinner with friends that have meant a lot to us and not snapping a few photos of both the cuisine and the company, but that's just me. It's just a question of what gear I bring, and finding camera gear that you understand and that works well for you. It might take a little experimentation.
There's not much I can't do with my Barcelona setup of a Canon 7D Mark II, an 18-135mm all-purpose zoom, a 12-28mm ultra-wide lens, and then a 24mm f/2.8 pancake lens for close quarters and dinner photos. It works extremely well for me, I don't have to think too much about my photography so that I can enjoy the moment too, and I can get in and out of "the spot" in an instant so that other people can get their photos also. For more casual photos, the Fuji is all I need and beats the heck out of a phone, while not being much bigger than one. I can squeeze that 7D Mark II and 18-135mm and 12-28mm combo in my ThinkTank Retrospective 5 bag, and then the Fuji X100F rather than the Canon 24mm f/2.8 pancake lens into the side pocket and have an even better setup with extra capabilities, while still being amazingly portable and lightweight.
There's not really any right or wrong answers in photography. Just do whatever works best for you, but please try not to be a douche like some of the people in that Kyoto blog! LOL!
StevePake.com

Is That A Leica? Trial by Fire with the Fuji X100F at Rehoboth Beach, DE
I've wanted a Fuji X100 since the line first came out in 2010, but had just blown my wad on a new at the time full-frame Canon 5D Mark II camera, and was acquiring lenses for the Canon system after switching from Nikon. The first X100 was intriguing, but seemed a bit rough around the edges. Fuji made some nice improvements to the camera with the X100S successor a few years later, and I still wanted one. Then they made yet more improvements with the third generation X100T, which had finally become a very well-rounded camera, but still didn't get one. Now they've just released the fourth generation X100F with yet more improvements, and I finally bit the bullet and got one.
We love going to Rehoboth Beach so much that sometimes we end up going twice a year, so whenever that's the case and I already have a zillion photos, I always like to try new things. This year, I only brought one camera with its one lens, the new Fuji X100F.
Warning. This blog is a bit tech heavy. It'd take too long to fully explain some things unless you're already a photog and know, so if you have no idea what the hell I'm talking about here, don't worry about it and just enjoy the photos. :)
I've wanted a Fuji X100 since the line first came out in 2010, but had just blown my wad on a new at the time full-frame Canon 5D Mark II camera, and was acquiring lenses for the Canon system after switching from Nikon. The first X100 was intriguing, but seemed a bit rough around the edges. Fuji made some nice improvements to the camera with the X100S successor a few years later, and I still wanted one. Then they made yet more improvements with the third generation X100T, which had finally become a very well-rounded camera, but still didn't get one. Now they've just released the fourth generation X100F with yet more improvements, and I finally bit the bullet and got one.
I'd actually been patiently waiting for the new full-frame Canon 5D Mark IV to come down in price to replace my aging 5D Mark II. That camera still takes phenomenal photos, but it's starting to show a bit of "digital rot" without built in WiFi, and also only takes big clunky CF cards rather than SD, which means I'm continually tied to not just taking my laptop everywhere if I want to get photos off of the camera, but to also rememberingto bring my external CF card reader on top of that, which I sometimes forget! There's absolutely nothing wrong with a camera like the 5D Mark II as far as the photos that you can make with it even today, but I'm hooked on the modern tech in my Canon 7D Mark II. The optional W-E1 WiFi adapter is fast and the app works great, which means I'm no longer tied to my laptop, and the far more modern autofocus and a zillion other things about the camera are just "better", even though it's "only" a crop frame APS-C camera. But is that really a bad thing these days?
As much as I love the look that you can get out of full frame cameras, APS-C just seems to work better for me as a format. DSLR sensors have really matured, and you no longer "need" to buy a full-frame camera if you want great looking photos even in low light or at high ISO. Modern APS-C crop frame sensors are like turbocharged 6-cylinder engines. No, they're not quite as sexy as a V-8, but for all intents and purposes, they're just as good, while costing a lot less and saving weight. I still remember my APS-C Nikon D80 and D200 cameras from the late-2000's. They looked good up to about ISO 400, or if you really wanted to push it, you could maybe get decent looking photos up to about ISO 800, but beyond that good luck. The full-frame Canon 5D Mark II that I switched to from the same era looked great all the way up to ISO 3200, but these days cameras like my APS-C Canon 7D Mark II can still give you perfectly usable photos all the way out to ISO 16,000 or more. It's not just mature sensor technology, but the matured image processing engines (the ASICs) that they put into camera as well, that are putting together the photos from the raw data off of the sensor.
I have some secondary issues with the full-frame format, also. Ergonomically, Canon omits the pop-up flash on their full-frame cameras to keep the profile lower. I'm big on fill-flash, and the fact that the Canon's don't even have a quick and dirty pop-up flash for daylight fill means means having to dork around with clumsy external flashes all the time, which is a pain. A few Nikon full-frame cameras do have pop-up flashes, but there's too many things that drive me insane about the Nikon system to want to go back, so that's not an option. Another issue I have is that I also like taking a lot of food photos. Get a full frame camera at or near close focus on a plate of food, and trying to keep any of it in focus at all due to the thin depth of field that you get on larger format cameras is an exercise in futility. It just doesn't work, unless you buy a pricey tilt-shift lens that I'm not going to buy, so that's that.
The bottom line is that I don't really "need" a Canon 5D Mark IV enough to warrant buying one, and it wouldn't work well enough for me to pay north of $3000 for one either, so I've kinda gotten cold feet on getting one, and am glad I figured this out before I dropped three large on one! There's the Canon 6D, which is Canon's somewhat feature stripped entry-level full-frame camera. It's an "old" camera now, but has a slightly newer sensor from the 5D Mark III vs my 5D Mark II, and it also has GPS and WiFi built-in. It could work pretty well for me, except for the existing challenges I have with the format, and always needing to carry around an external flash and big heavy lenses again. I'm on the fence about getting a 6D Mark II, but it's tough to make a judgement call on something that isn't even out yet, meanwhile I still hadn't gotten myself a birthday, anniversary, or Christmas gift from last year, because I was saving my money for a camera that I wasn't even sure that I wanted anymore!
Well, enough of that.
Here's my new Fuji X100F, and everything that I love about it so far.
Yes, somebody really did ask me if this camera was a Leica at the beach. It does look just like an old rangefinder film camera!
Basically Unlimited Flash Sync Speed
Back in the day when I shot Nikon, I had a little D40 among other DSLRs, and a unique feature of that camera was that it had a faster 1/500s flash sync speed vs. 1/250s or 1/200s for many of Nikon's other cameras including their professional ones. A 1/500s flash sync speed vs 1/200s made a huge difference for when you were trying to get some fill lighting on people's faces during the middle of the day, when the sun is directly overhead and creating deep shadows on people's faces. If your eyes are already glazing over and you have no idea what the hell I'm talking about, photo blogger Ken Rockwell as a nice article about flash sync speed and what it means at his website, and why faster flash sync speeds are so useful.
Because of its leaf shutter design, the Fuji X100 basically has an unlimited flash sync speed of anywhere from 1/1000s to 1/4000s depending on aperture setting. That's awesome, and lets the camera's tiny little built-in flash work more effectively than massive external flash units on other cameras that are limited to much slower typical 1/200s flash sync speeds.
1/680s, f/2.8, ND Filter On, perfect fill flash against harsh backlighting. With a much slower 1/250s exposure, there's already so much exposure contribution from the natural environment and you're already at such a small aperture as a result, that it's just about impossible for even a big flash to work, and then you're in Photoshop making heavy lighting adjustments afterwards. But even small flashes work great when they can sync with the exposure to much faster shutter speeds than 1/250s!
Skin Tones
See below. Need I say more? I've never had a camera that renders nice and vivid colors, yet still has such natural looking skin tones all at the same time. Now I do. The first two photos below are in Velvia mode +4 saturation, and it still delivers decent looking skin tones. The bottom two are Standard color +4 saturation, and skin tones are looking even better there. My wife is already in love with this camera because it makes her skin look natural, rather than more orangish. DSLR color palletes just aren't optimized for skin tones, but the Fuji is, and it really shows.
Dynamic Range
Almost every DSLR camera I've ever owned including the new ones, all love to blow out highlights, which results in really ugly and nasty looking backgrounds if you're not careful. Sure, you can engage the special hack modes if you can figure out how to use them, or shoot in RAW and do HDR stuff, but who has time for that? Not me. Between daddy, husband, engineer, and young adult cancer advocate and non-profit director, I already have way too many hats to wear as it is. As they say, "don'ts gots no time for that!" It really just needs to work, otherwise it's no good to me.
In the extreme example below which is heavily backlit, you can still see yellow accents from the setting sun at the bottom, and then blue accents from the sky elsewhere and especially at the upper left. I've never had a camera that looks more "film like" than this Fuji, which I guess makes a lot of sense considering that Fuji still does make a ton of film! There's a huge film "shoulder" here that you can use, and this is actually causing my brain to retrain itself back to how I shot when I shot film. Depending on the film you were shooting and the look you were going for, you could easily go +1 or +2 EV exposure compensation and have a really nice looking photo, and you can do the same with this Fuji.
The Perfect Social And Foodie Camera
Another issue with DSLRs is that they just don't work well in many social situations. They're big and clunky things as it is, and most of the lenses for them make them even bigger and clunkier, which is awkward in close quarters.
We're foodies and love to go to nice places to eat, and I take pictures of it all for the memories and to share with friends. You can't park a DSLR and any typical lens on a table for dinner without it being in the way somehow, which is why I have the Canon EF-S 24mm f/2.8 pancake lens for my Canon system. That setup actually works pretty well and it can usually sit on a table without it being in the way, but then I run into another issue in that I can't actually dial down the power of the pop-up flash enough for it to work well on a plate of food. You end up looking like a complete idiot with a massive flash going off, which can disturb other guests, so that's not cool.
When it comes to getting balanced fill lighting on dinner guests and friends, good luck with that too. Canon's flash system just isn't very smart. I'm sure if you fiddle around with settings for long enough you can get what you want, but by that time the moment has passed, and you've missed it. Plus if you're out at a Michelin Star rated place with friends, do you really want to spend a ton of time wrestling with your camera to get optimal photos, or would you prefer to use one that just "gets it" and does what you want automatically? This Fuji is brilliant here.
Mechanical + Electronic Shutter AND a Built-In ND Filter
A common issue at the beach is that you're going to have a lot of distracting elements in the background. Ideally you'd want to run as large of an aperture as possible for less depth of field to keep distracting elements out of focus, but at the same time it's very bright at the beach, which forces you to use smaller apertures which will give you more depth of field, and not less! Even setting the maximum shutter speed of your camera, typically 1/4000s, you might only be able to use a maximum aperture of f/4 or f/5.6, which isn't large enough to yank backgrounds and distracting elements out of focus.
The mechanical leaf shutter in the Fuji X100F does max out at 1/4000s, but then it has a secondary electronic shutter that goes all the way up to 1/32,000s if you need it. Or if that isn't enough and you still want to run flash at a large aperture in bright conditions, the lens has a trick switchable 3-stop ND filter that you can turn either on or off. I actually programmed the ND filter to the front function button, and loved the flexibility of being able to instantly switch it in or out, depending on what I was doing.
If you have no idea what in the hell I just said, like I said, don't worry about it and just enjoy the photos! :)
1/16,000s at f/2, Electronic Shutter, ND Filter OFF

1/2200s, f/2, Mechanical Shutter, ND Filter ON. The people in the background aren't in focus enough for your eyes to be drawn to them, making for a much better photo!
I like to do motion blurred and panned photos also, but it can be tricky to get the shutter speed slow enough for that in daytime conditions, even at the minimum aperture of the lens and base ISO. Here, the switchable 3-stop ND filter is a great help too.
1/8s at f/16 and Base ISO of 200, 3-stop ND Filter ON. Without the ND filter, that would have put the shutter speed up at 1/60s, which would have been too fast for a nice motion-blurred shot in this situation. (I hadn't figured out how to drop the ISO down to 100 (L) yet, but that would have helped too, by letting me get the shutter speed even slower at 1/4s.)
So What Don't I Like?
No camera is perfect, and this one isn't either. For starters, you can knock the battery door open by mistake way too easily. As some reviews have said, the EVF auto brightness is defective, and gets way too dark in indoor conditions. The camera apparently won't let you add the custom EVF brightness setting menu to the quick menu either, or I haven't figured out how, so there's no quick way to adjust it when you need to. The color palette of the camera is clearly optimize for great people photos, but landscapes can look a bit pastel like as a result. They're not bad, just different, just like different films gave different looks back in the day. Fuji's menus are pretty messy because the camera is loaded with way too many features, and it's not always intuitive that certain features or functions of the camera won't work when certain other modes are engaged. I nearly went crazy trying to figure out how to get the camera into center-weighted metering mode, only to realize later that only matrix metering was allowed if you had face detection turned on. What?? And then the AF Assist beam ended up being way too bright, washing out my subject in dark conditions, and actually jammed the autofocus system. I got better indoor low light autofocus results without the AF assist light. Uhh... that's not how that's supposed to work! LOL!
I have to dedicate an entire paragraph just to the disgraceful WiFi, because it sucks that bad. It's disgracefully slow at transferring photos, and the phone app is junk. It can take 30 to 60 seconds just to transfer one image, and even dropping the camera down to only transfer downsized 3MP images over the air doesn't seem to speed things up very much. And there's no ability to sort photos by rating or date on the app. So if you rate a bunch of photos quickly on your camera, there's no ability to select just the rated images through the app, and just transfer those images. And good luck going from a single photo view on the phone app and then back to a grid view. Half of the time the app crashes when you do that, and you're out of business, which means you have to select the photos that you want to transfer from the tiny thumbnail views, which you might not be able to see clearly enough. In comparison, the little Canon W-E1 WiFi card for my Canon 7D Mark II is professional grade. Transfer speeds are 10x faster, and you'll have a few dozen full-sized images on your camera in just a few minutes. The app gives you the ability to sort photos by specific date ranges and ratings also, and allows you to pre-select all 5-star rated images from a certain date for transfer, and then transfers them with just one more tap. Viola. Fuji, take note. This is how it should work. I won't say the X100F's WiFi isn't usable, but it's just barely usable. I'll probably just get the Lightning to SD card dongle for my iPhone 6s Plus, rather than having to futz around with the really pathetic WiFi functionality on the X100F.
APRIL 2019 UPDATE: As of a new version of the Fuji phone app, WiFi transfer speeds seem to have improved a bunch, but I haven’t used it enough to know for sure. Will update this blog when I find out, but things seem to be better on the WiFi now.
FEBRUARY 2020 UPDATE: No complaints with WiFi transfer speeds since the above update. My complaint now is the limited functionality in the app, and not being able to pre-select and only transfer 1-start or better rated photos, for example. Canon’s functionality is much better, but at least you’re not waiting hours for photos to transfer anymore.
So Fuji didn't get everything right, but who ever does? There's tons of features, yes, but the feature quality isn't always there, and occasionally is completely absent. A feature isn't much good if it doesn't actually work. It has been and still is a bit of a quirky camera, but I really like what you can do with it, it can do things that other cameras can't at worst or would really struggle to at their best, and am incredibly pleased with it as a whole, and the photos that I can make with it.
Click the banner below for the full album from Rehoboth Beach. Enjoy! :)
NEW FUJI X100V, and “F” FOllow-Up Review
February 2020: Fuji has just announced the fifth-generation X100V.
Based on Ken Rockwell’s preliminary review, there doesn’t seem to be anything all that compelling about the new camera, then again this is still basically the same camera since the original X100 came out in 2010. It’s been the norm to just see minor tweaks from one X100 generation to the next, and that you’ll typically need to go 2-3 generations with this camera line to see meaningful changes and improvements. The same could be said of DSLR cameras these days also, as digital sensor technology has reached a state of maturity for quite some time now. So I plan to keep plugging away with my X100F, which I still love and find incredibly useful. If I happen to drop it in the ocean, I’d definitely buy a “V”, or a discounted “F”. :)
Hot tip. Buy these with their respective Fuji XC-100F or XC-100V fitted leather cases. It truly makes them go anywhere cameras that you can just toss in your bag or backpack, and not worry about it getting scraped up. Being able to USB charge them for the last few generations now means for the most part you don’t even need to bring an extra battery or a separate charger. Most people already have portable recharger “bricks” for their phones, so you can just recharge your camera with one of those on the fly as well.
A couple of years later, I still commonly use this camera and enjoy it. It’s definitely quirky and at times a bit frustrating, but is an absolutely brilliant camera and a very useful tool to have. You definitely need to know what you’re doing to use one of these effectively, hence it being called “the pro’s fun camera”. If you’re that type and want one of these to get some seriously good photos with for the times that you don’t want to lug around your big heavy pro gear (or where it isn’t appropriate), don’t hesitate to buy one of these. They’re great cameras!
StevePake.com
PS: Oh funny! Literally today as I'm wrapping this blog up, Canon has finally announced the long-awaited update to their 6D, the 6D Mark II, and it looks like a pretty nice camera too with an introductory price of $1999. I just can't justify a 5D Mark IV for my needs and usage, so this is probably what I'll get next year sometime to replace my old 5D Mark II.
(2020 Update: LOL, I never did buy the 6D Mark II, but rather the new full frame mirrorless Canon EOS RP instead, which I’ve been incredibly pleased with as well.)

Memorial Day Weekend in New York City
We finally did something that we hadn't been able to do for the past six years - we went on a trip to New York City, for fun!
We finally did something that we hadn't been able to do for the past six years - we went on a trip to New York City, for fun!
NYC had been off limits for me for a few years, due to posttraumatic stress issues after cancer, having been treated in at Memorial Sloan-Kettering Cancer Center in NYC. My treatment and care were all top notch, but it definitely left a mark on me, and this just isn't a place that I could go for a few years. That's all solidly in the past now, and my wife and kids had all wanted to go for awhile. We finally made it, and had a fantastic time.
We drove up super early on Saturday morning, leaving Maryland at 6am, and started off at the famous Soup Nazi, then swung through Central Park and the MET, and met my testicular cancer survivor "twin brother", Jason for dinner. On Sunday, we saw the Statue of Liberty, the Brooklyn Bridge, and Ground Zero in the morning, and then the ladies went shopping while the boys went to check out the USS Intrepid Aircraft Carrier Museum. That was a lot of New York crammed into two days, so we were pretty pooped after that, but still managed to walk down to Times Square Sunday night, before leaving Monday morning.
Full album link below, or for a few quickies, keep scrolling.
My travel kit as of late has been my Canon 7D Mark II, Tokina 12-28mm f/4 ultra-wide lens, a Canon 18-135mm IS STM lens all-purpose zoom, and then my trusty Canon 24mm f/2.8 pancake lens. You won't miss a shot with this combo, although it does lack the sexiness and "pop" that you can get with a full-frame camera. Try taking food photos with a full-frame camera though. The depth of field becomes so thin that it's just ridiculous, and the full-frame cameras tend to not have a pop-up flash either. I'm big on fill flash, and hate having to mess around with clunky external flashes, so just stick with the APS-C format cameras for travel.
Soup Man!
The MET

Of course we swung by Laduree's for macaroons!

Dinner with my testicular cancer survivor virtual twin, Jason.
It was great to see the Statue of Liberty again. I hadn't been here since I was around my kids age, but who knew that tickets to go up into the crown sell out 4 months in advance now?? Times change thanks to the Internet!
I'd never seen Ground Zero before. Powerful is all I can say. We didn't go into the 9/11 Memorial Museum. Will save that for another trip when our kids are a bit older, and regretfully come to understand what terrorism is.
Brooklyn Bridge Selfie
The USS Intrepid
We of course did a bit of foodie stuff. Totto Ramen, OMG!!! This was actually Totto Ramen "Next Door" because there was a huge wait at Totto Ramen, but could get right in here. It was amazing! You can't beat food in NYC
Times Square of course!
StevePake.com
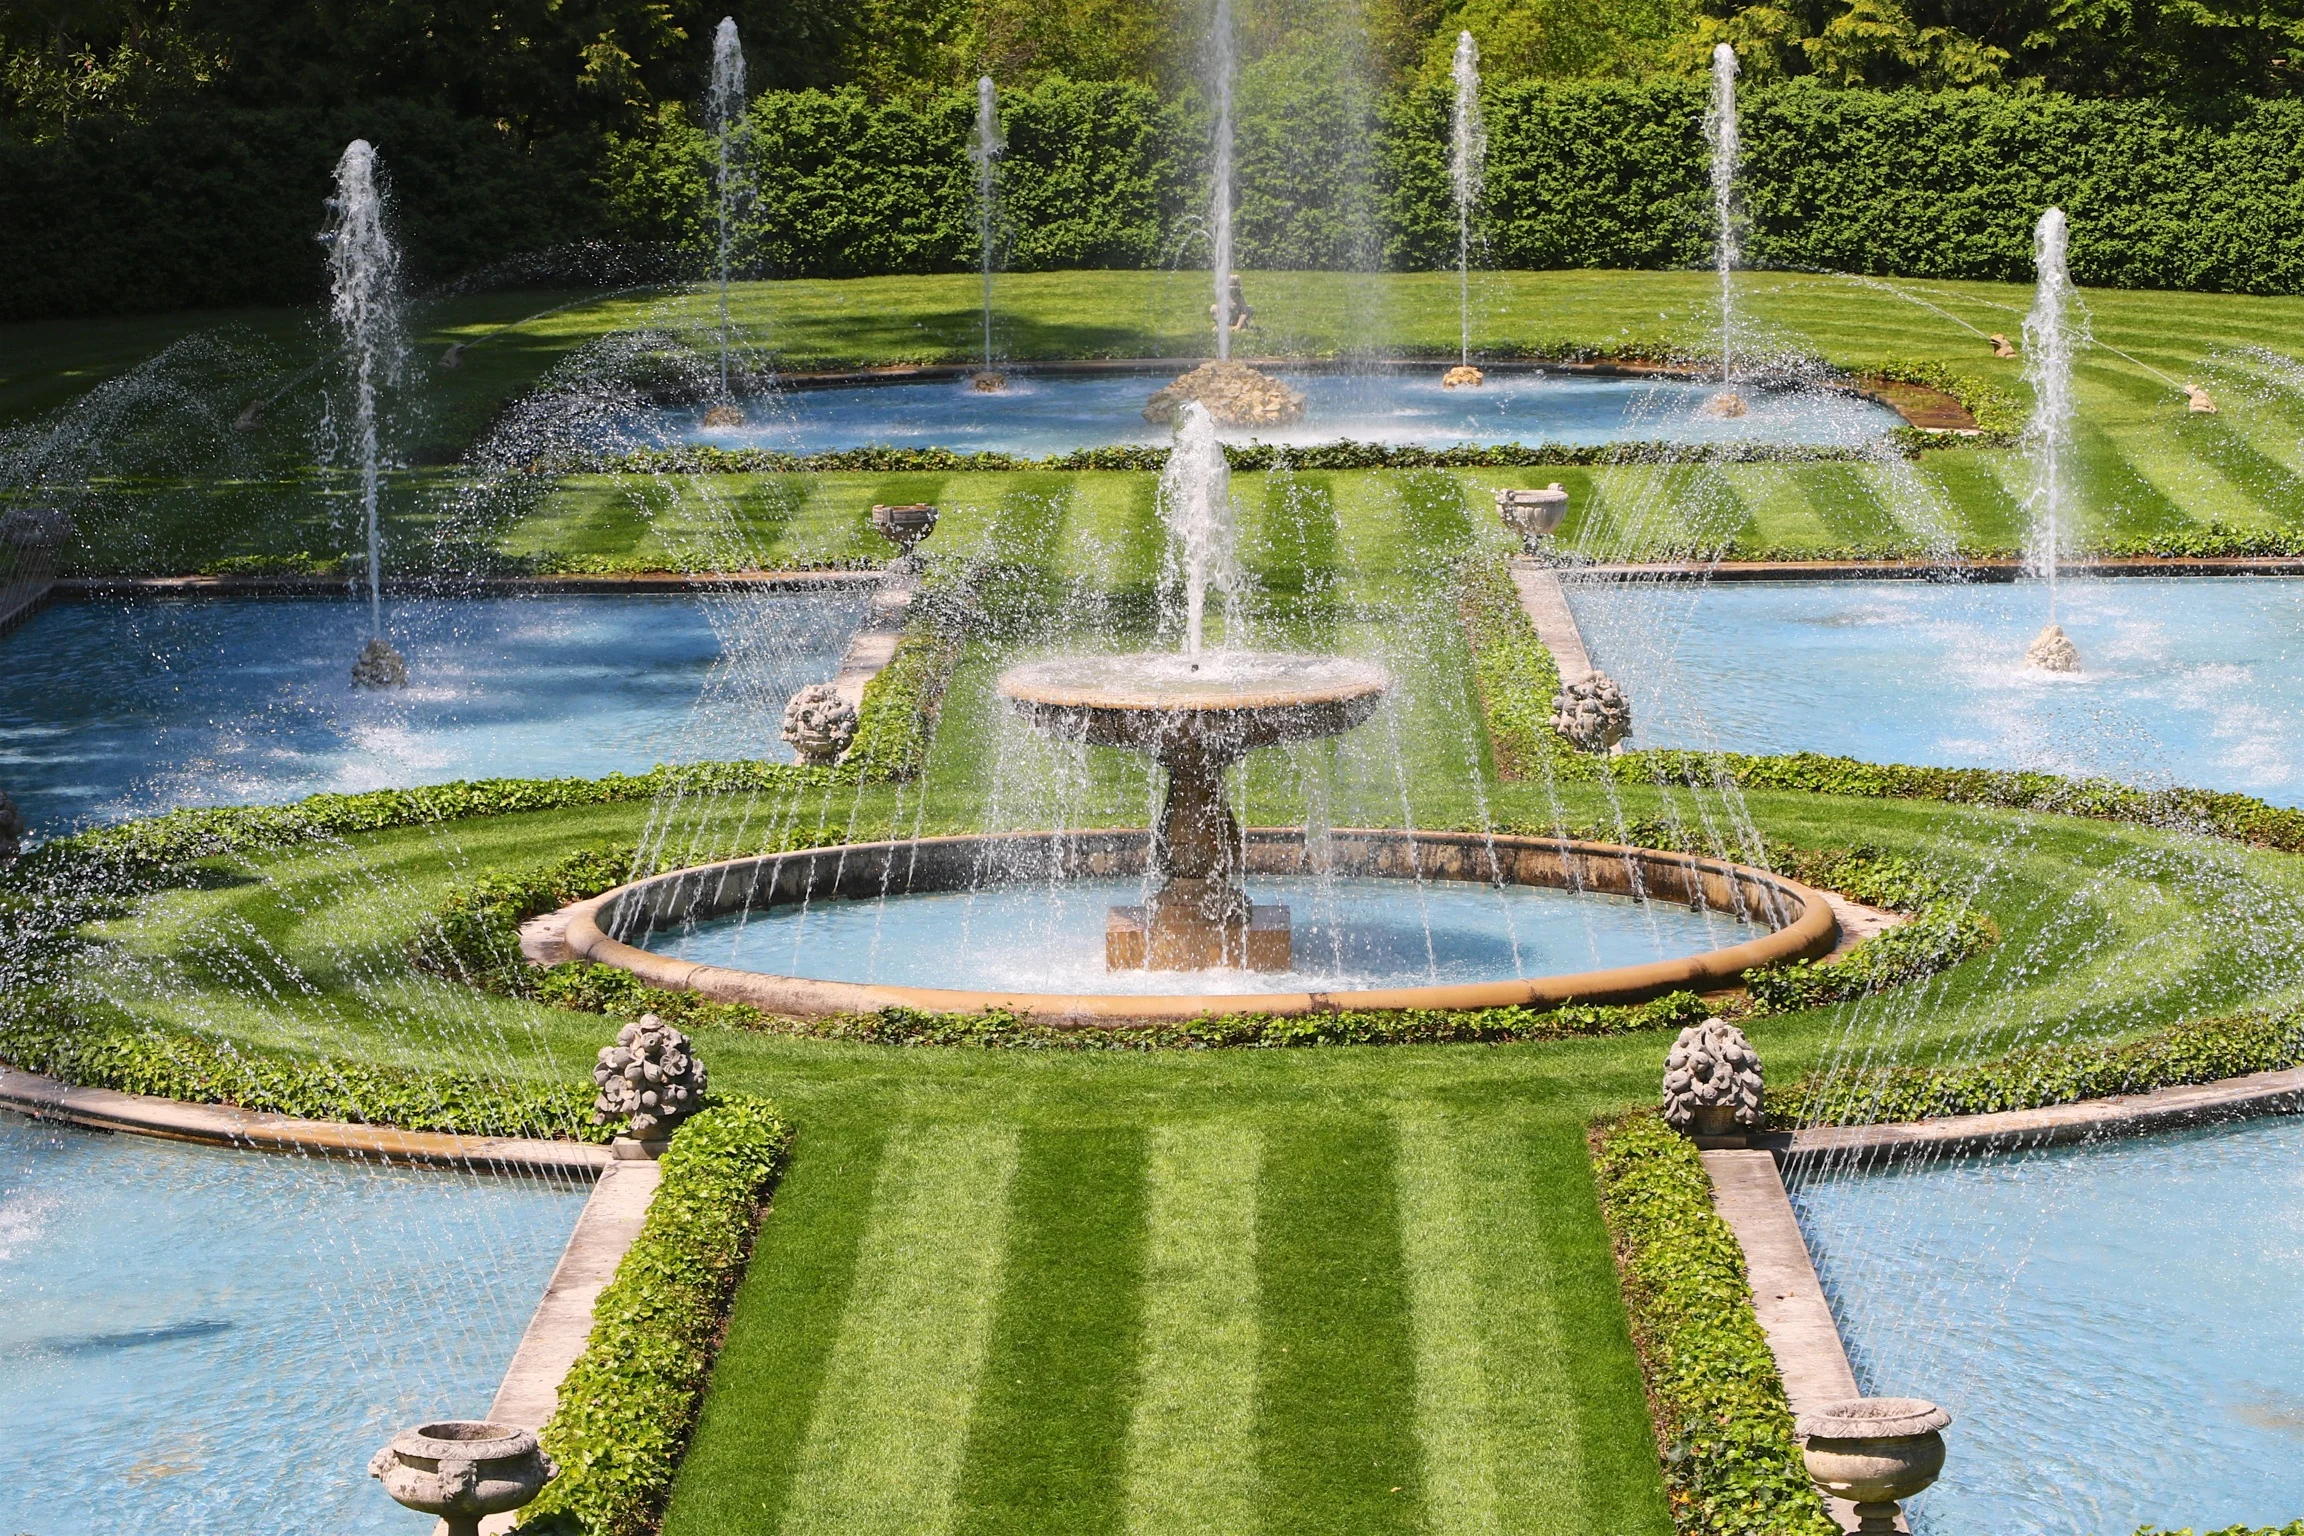
Mother's Day at Longwood Gardens
It's become a bit of a tradition to meet my folks at Longwood Gardens in Kennett Square, PA for a Mother's Day get together. There's a bunch of good places to have a nice brunch around there, and the gardens are beautiful, and great for family photos.
It's become a bit of a tradition to meet my folks at Longwood Gardens in Kennett Square, PA for a Mother's Day get together. There's a bunch of good places to have a nice brunch around there, and the gardens are beautiful, and great for family photos.
I've been "phoning it in" lately with my photography, and just used my Canon 7D Mark II, 18-135mm STM "kit" lens, and then my Tokina 12-28mm ultra-wide lens for photos. Having some powerful fill flash is critical for good outdoor portraits when you're also dealing with deep shadows, but alas, I only had the pop-up flash on my 7D2 to use, and not a real external flash gun like my 580EX that I left at home. (I did mention phoning in my photography lately, right?) I'm finally going to pick up a camera that I've wanted for years that has some unique capabilities that give it the ability to power through facial shadows in daylight much better than an ordinary camera, due to its special leaf shutter design that allows it to sync with the flash at extremely high shutter speeds. Oops, I kinda gave it away there, a little, but I hope to get it soon.
Here are the photos. Enjoy, and Happy Mother's Day!


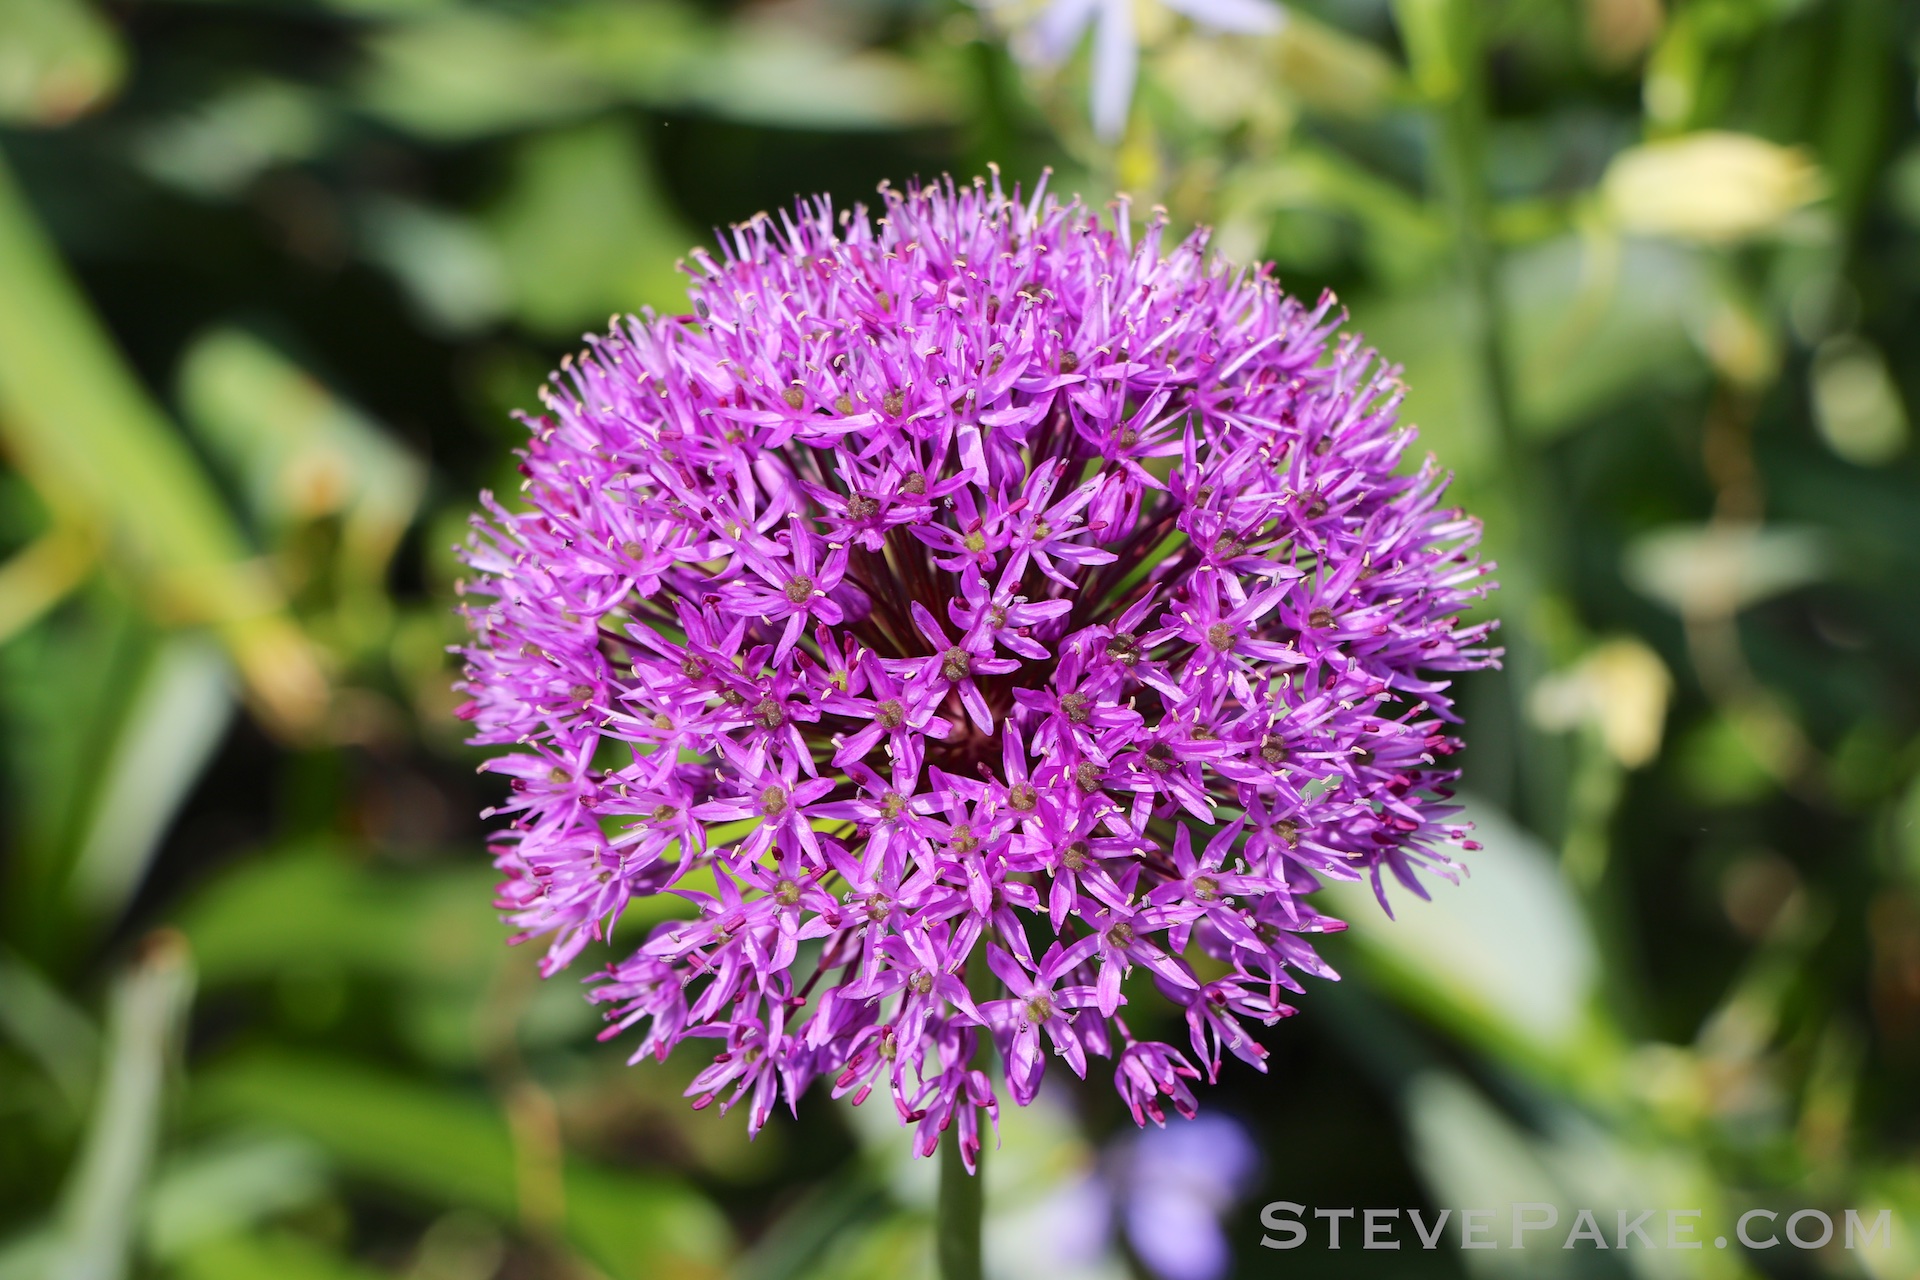


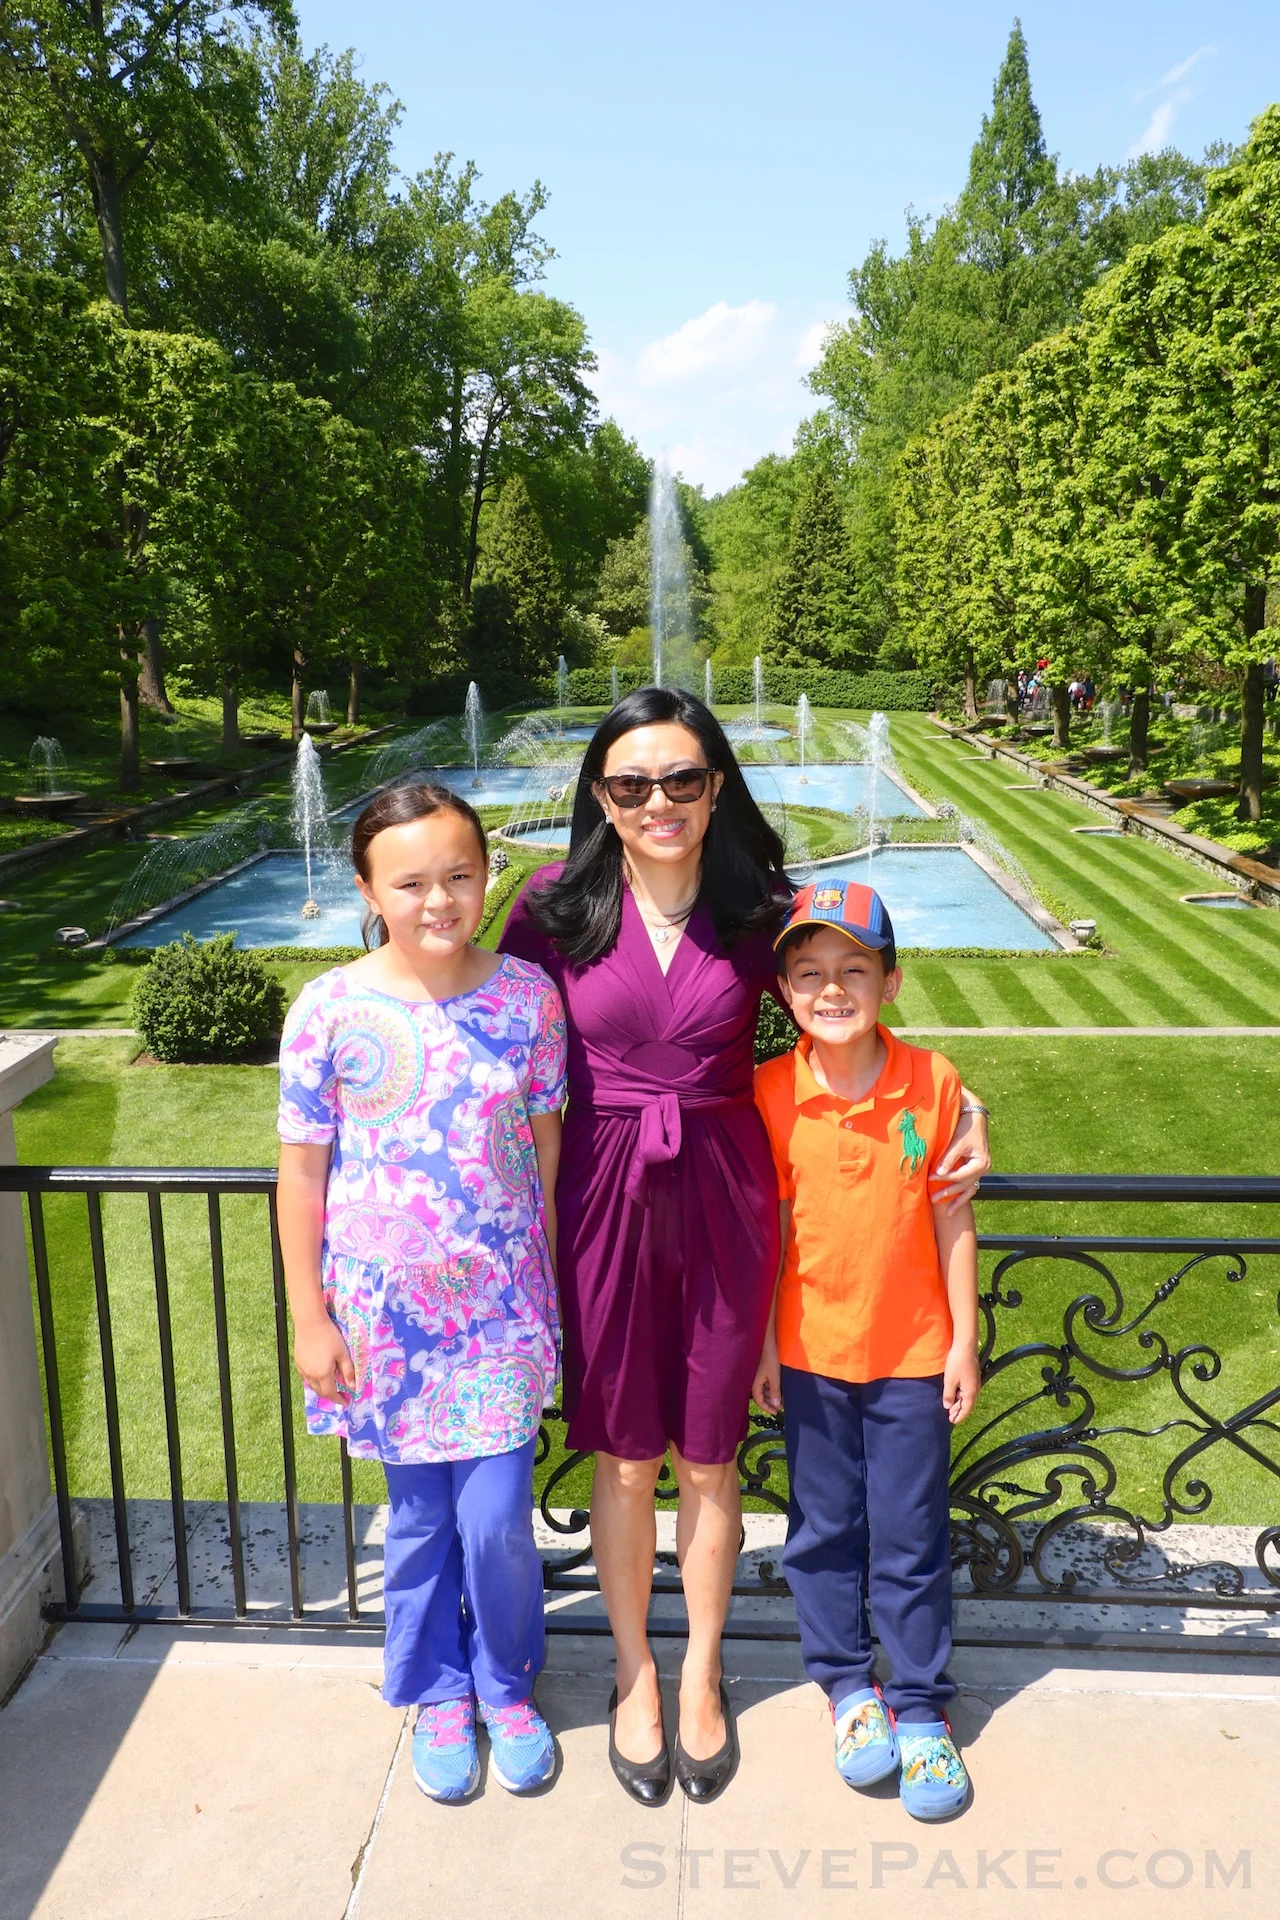


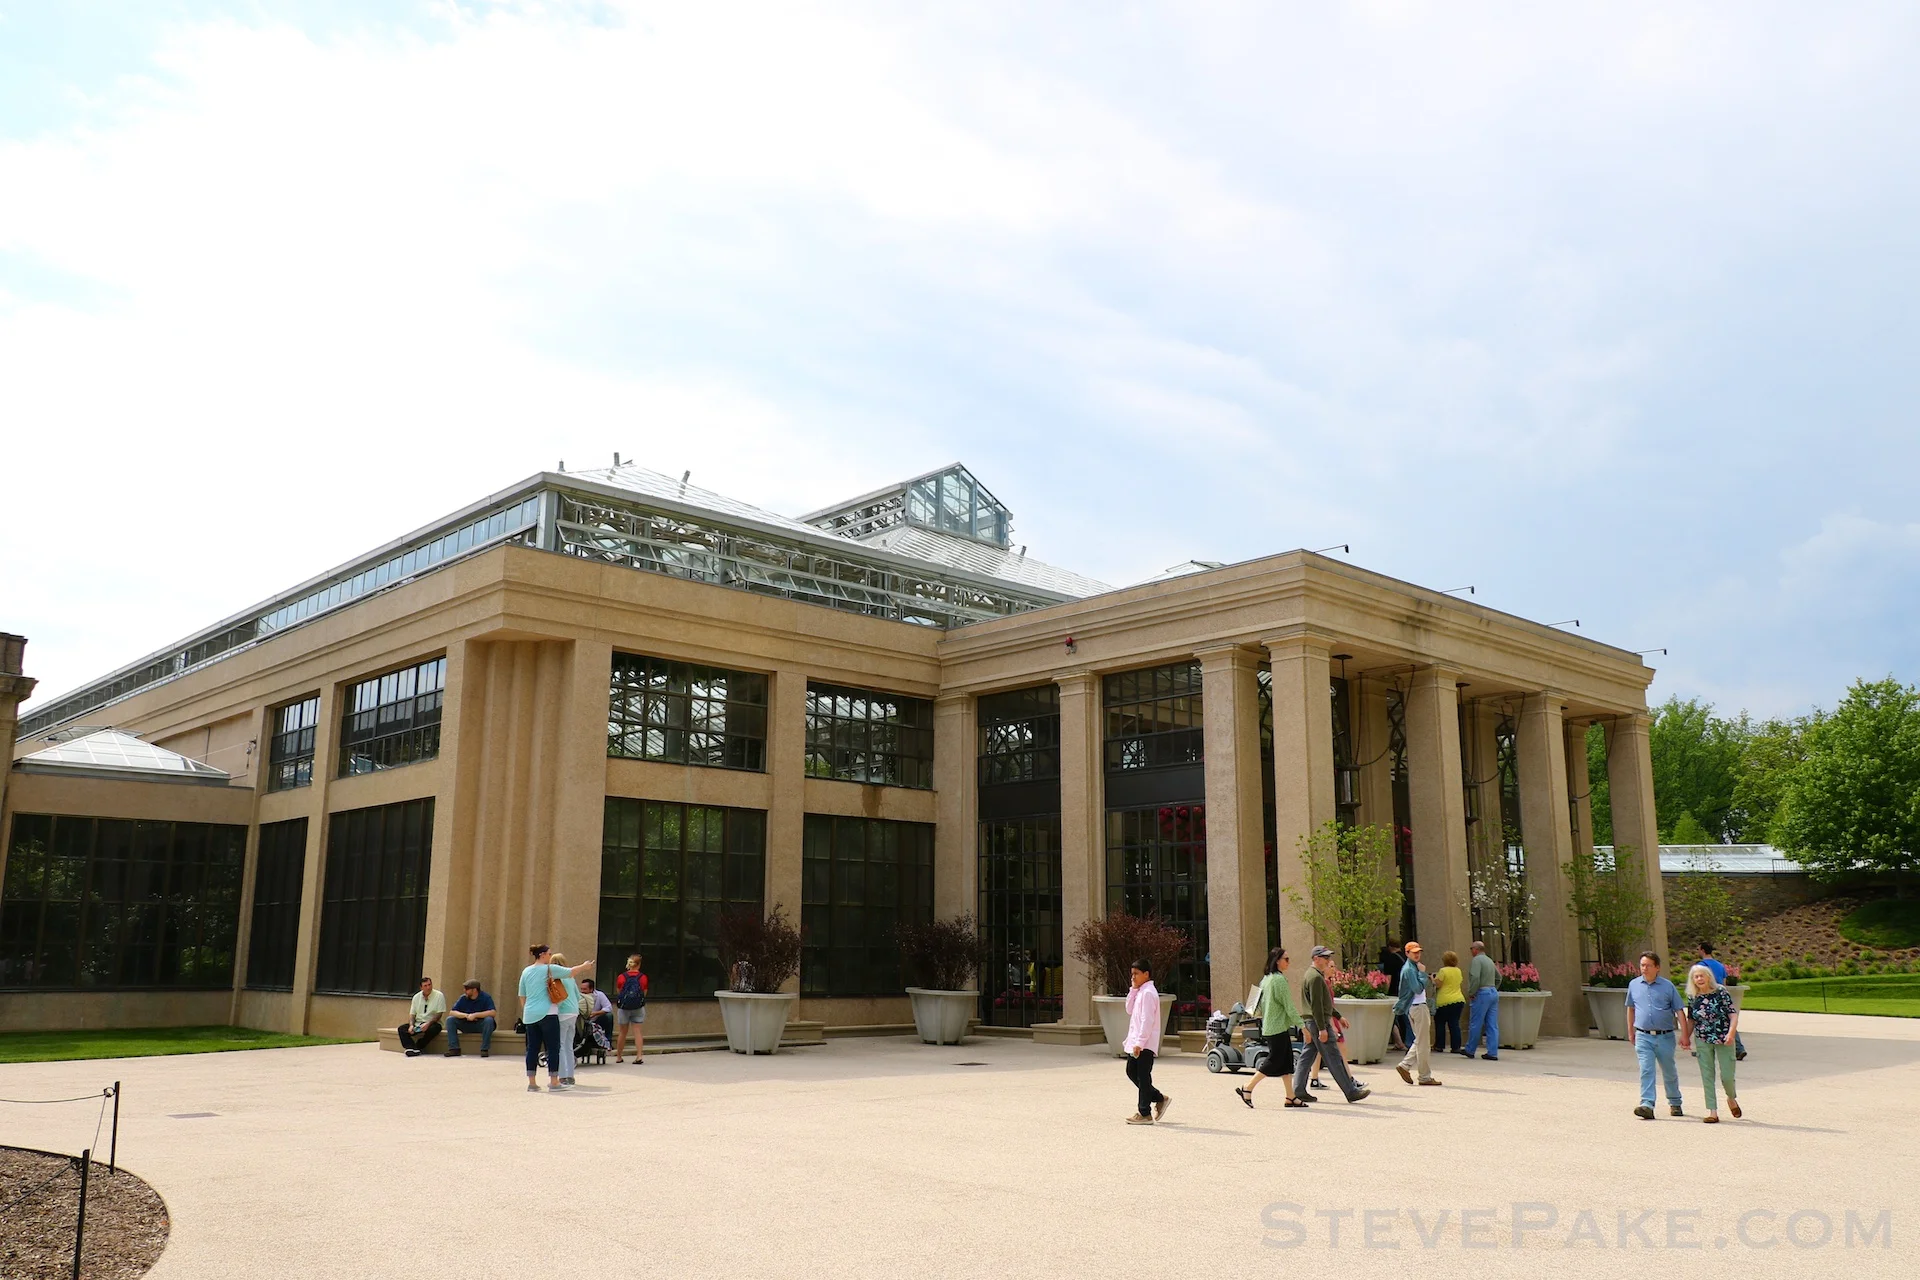


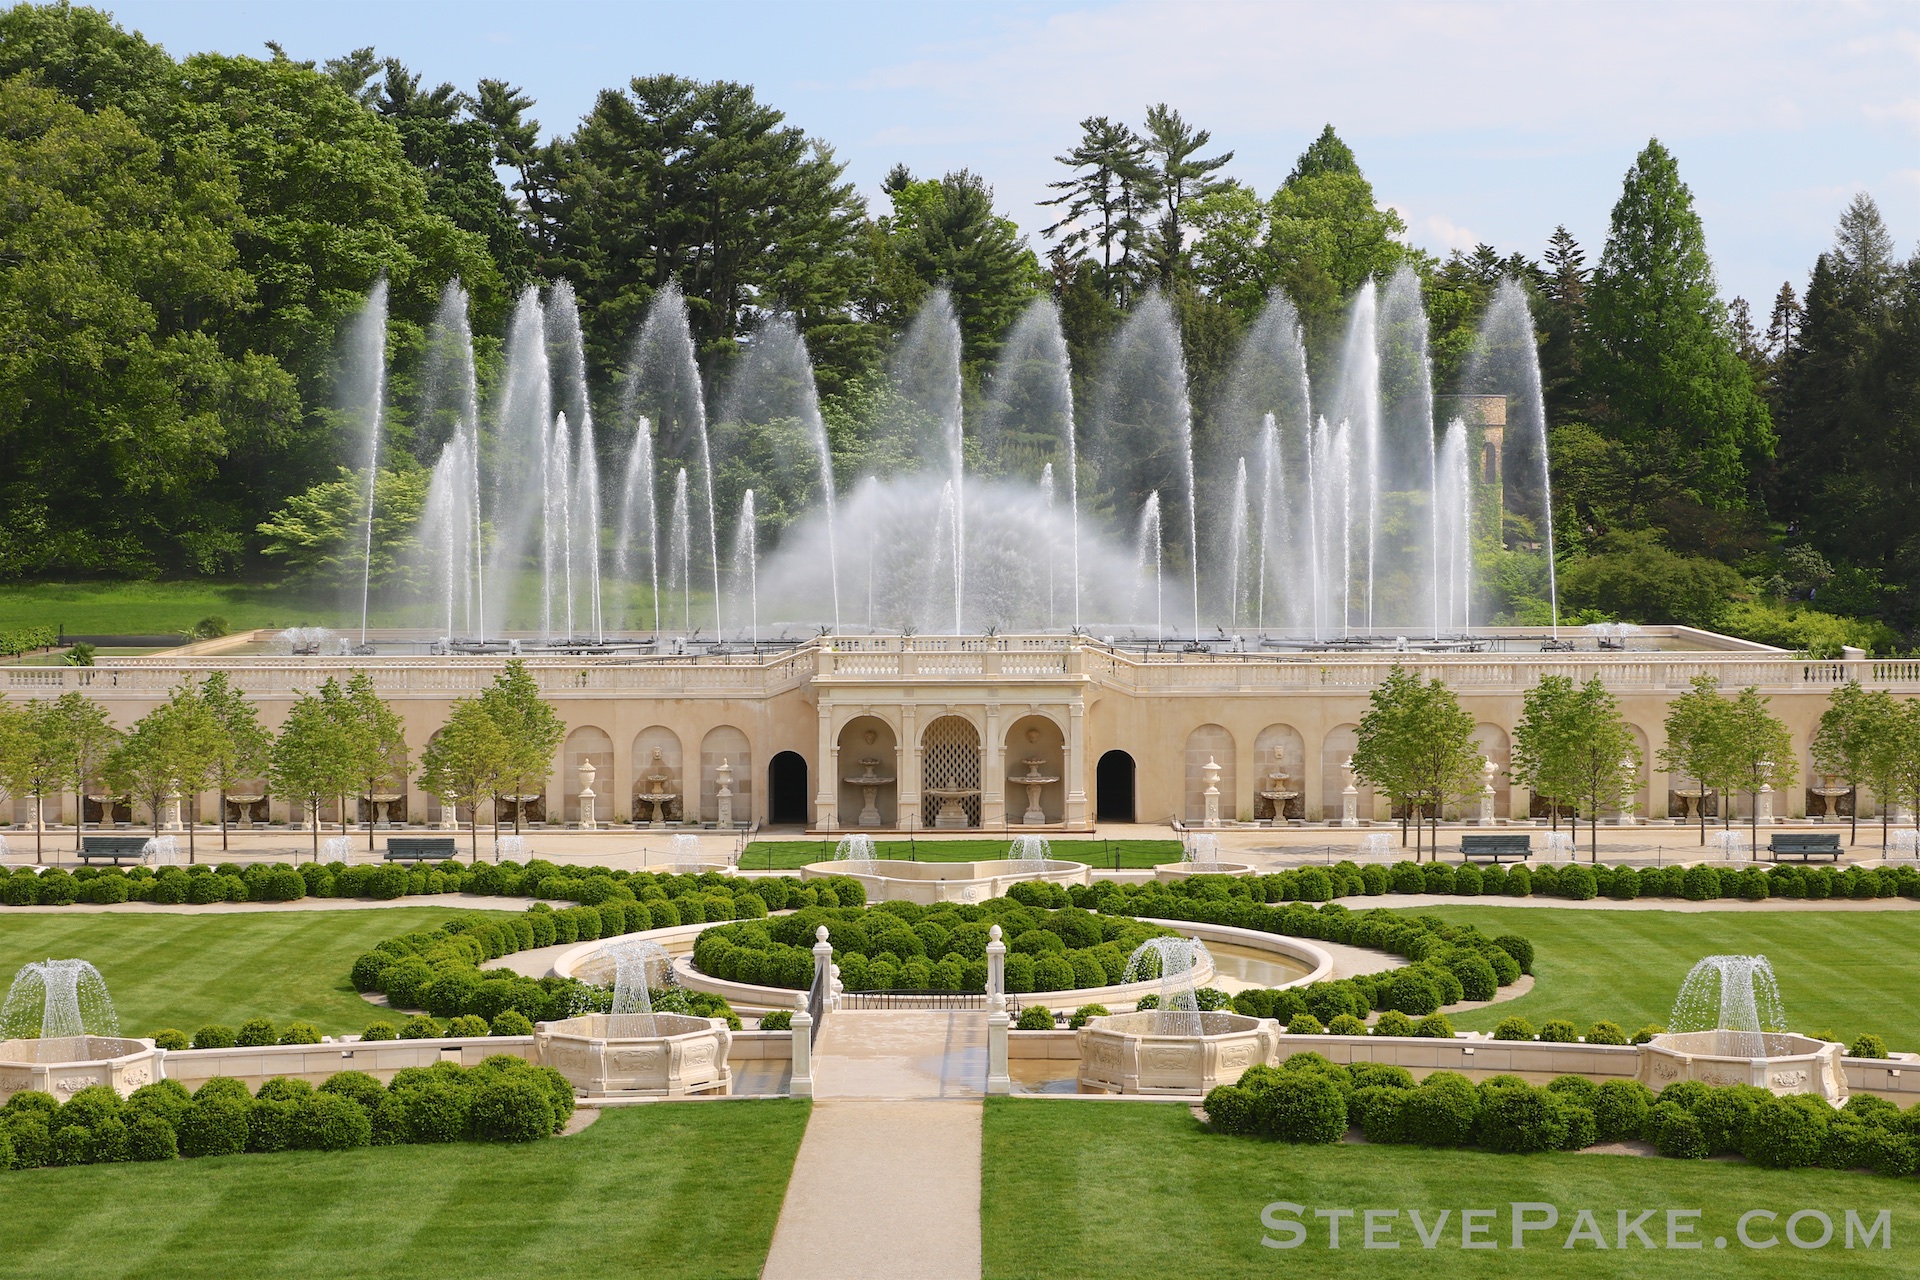
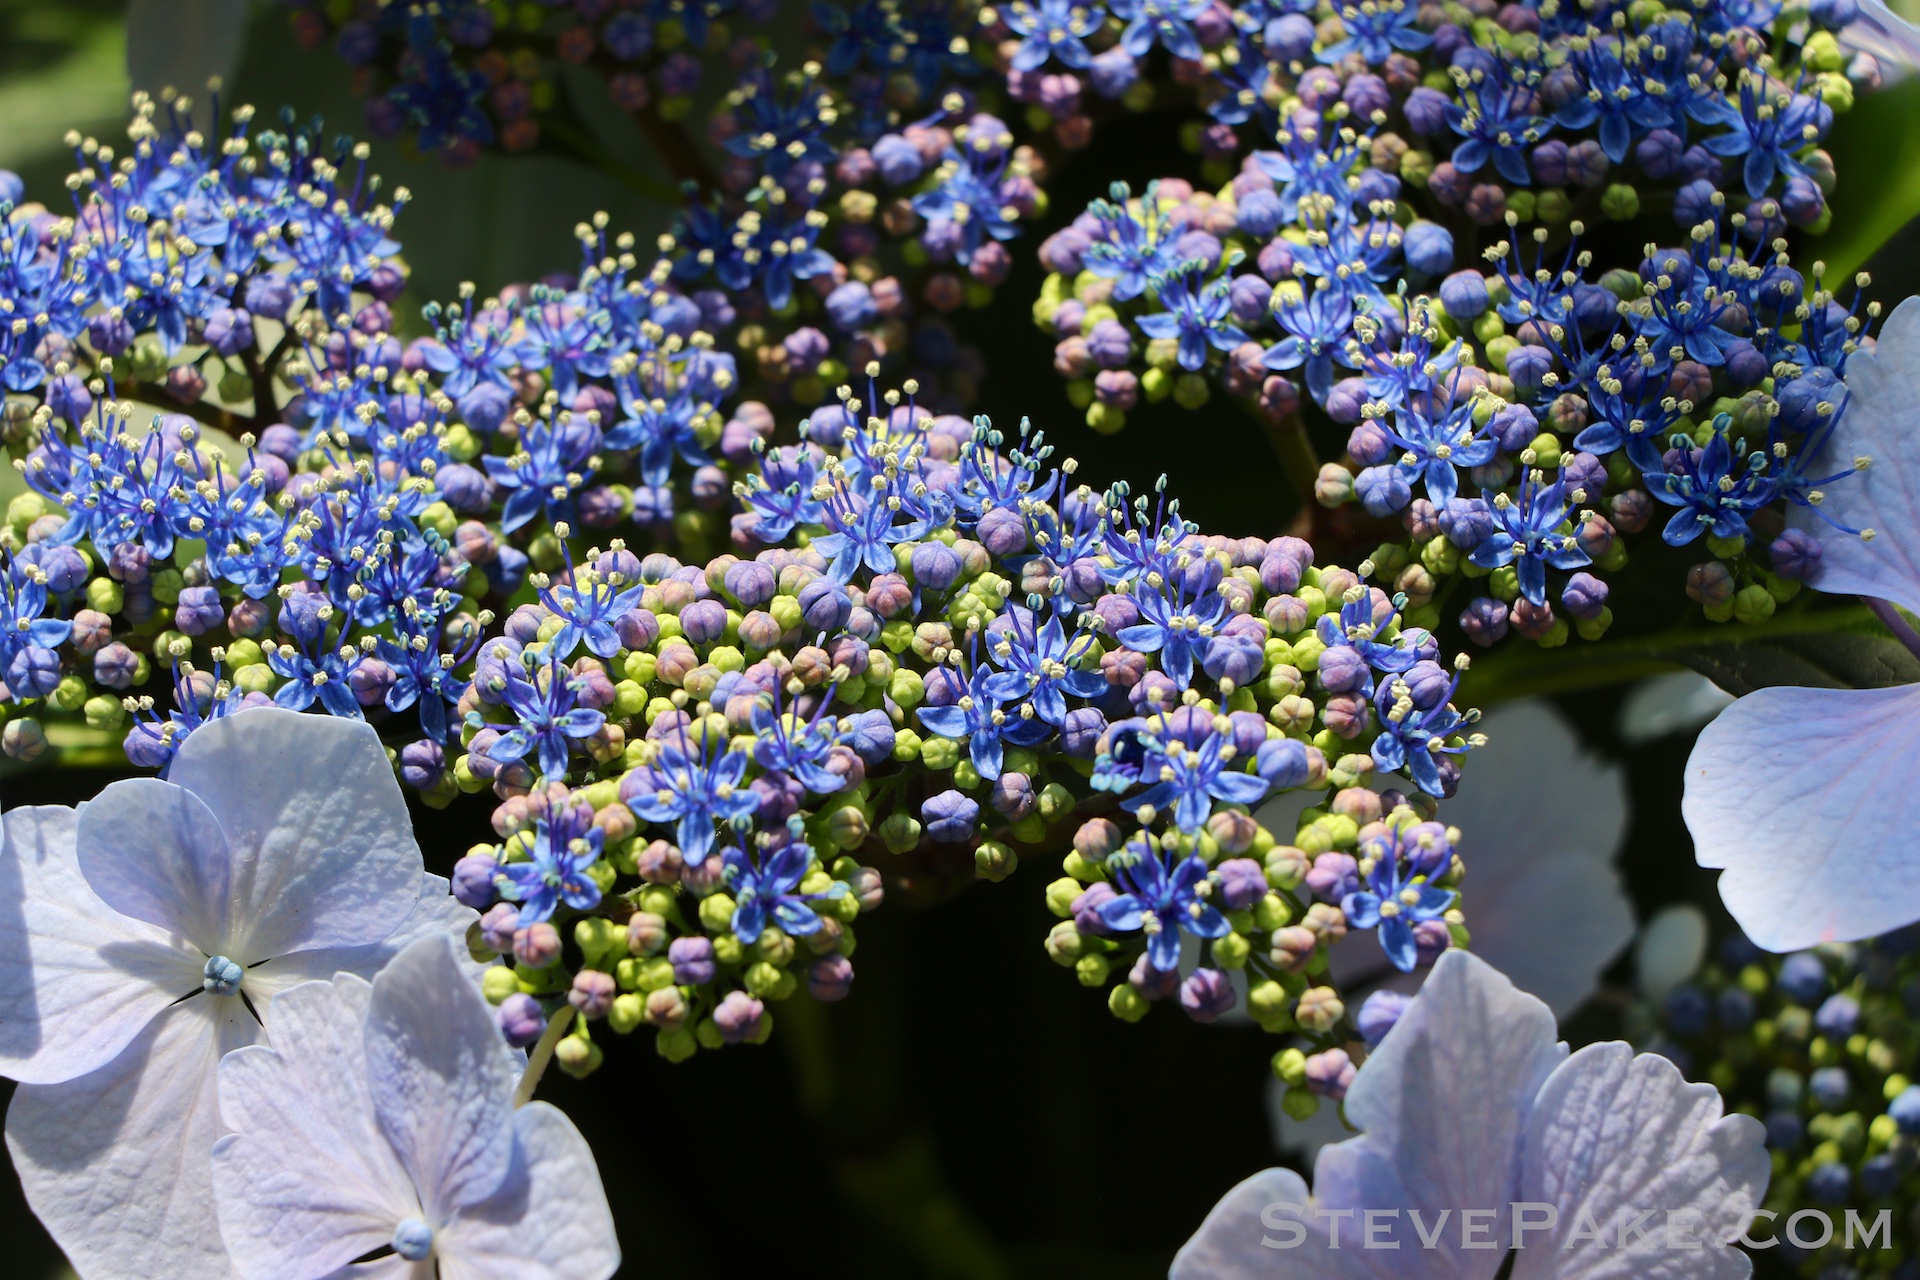

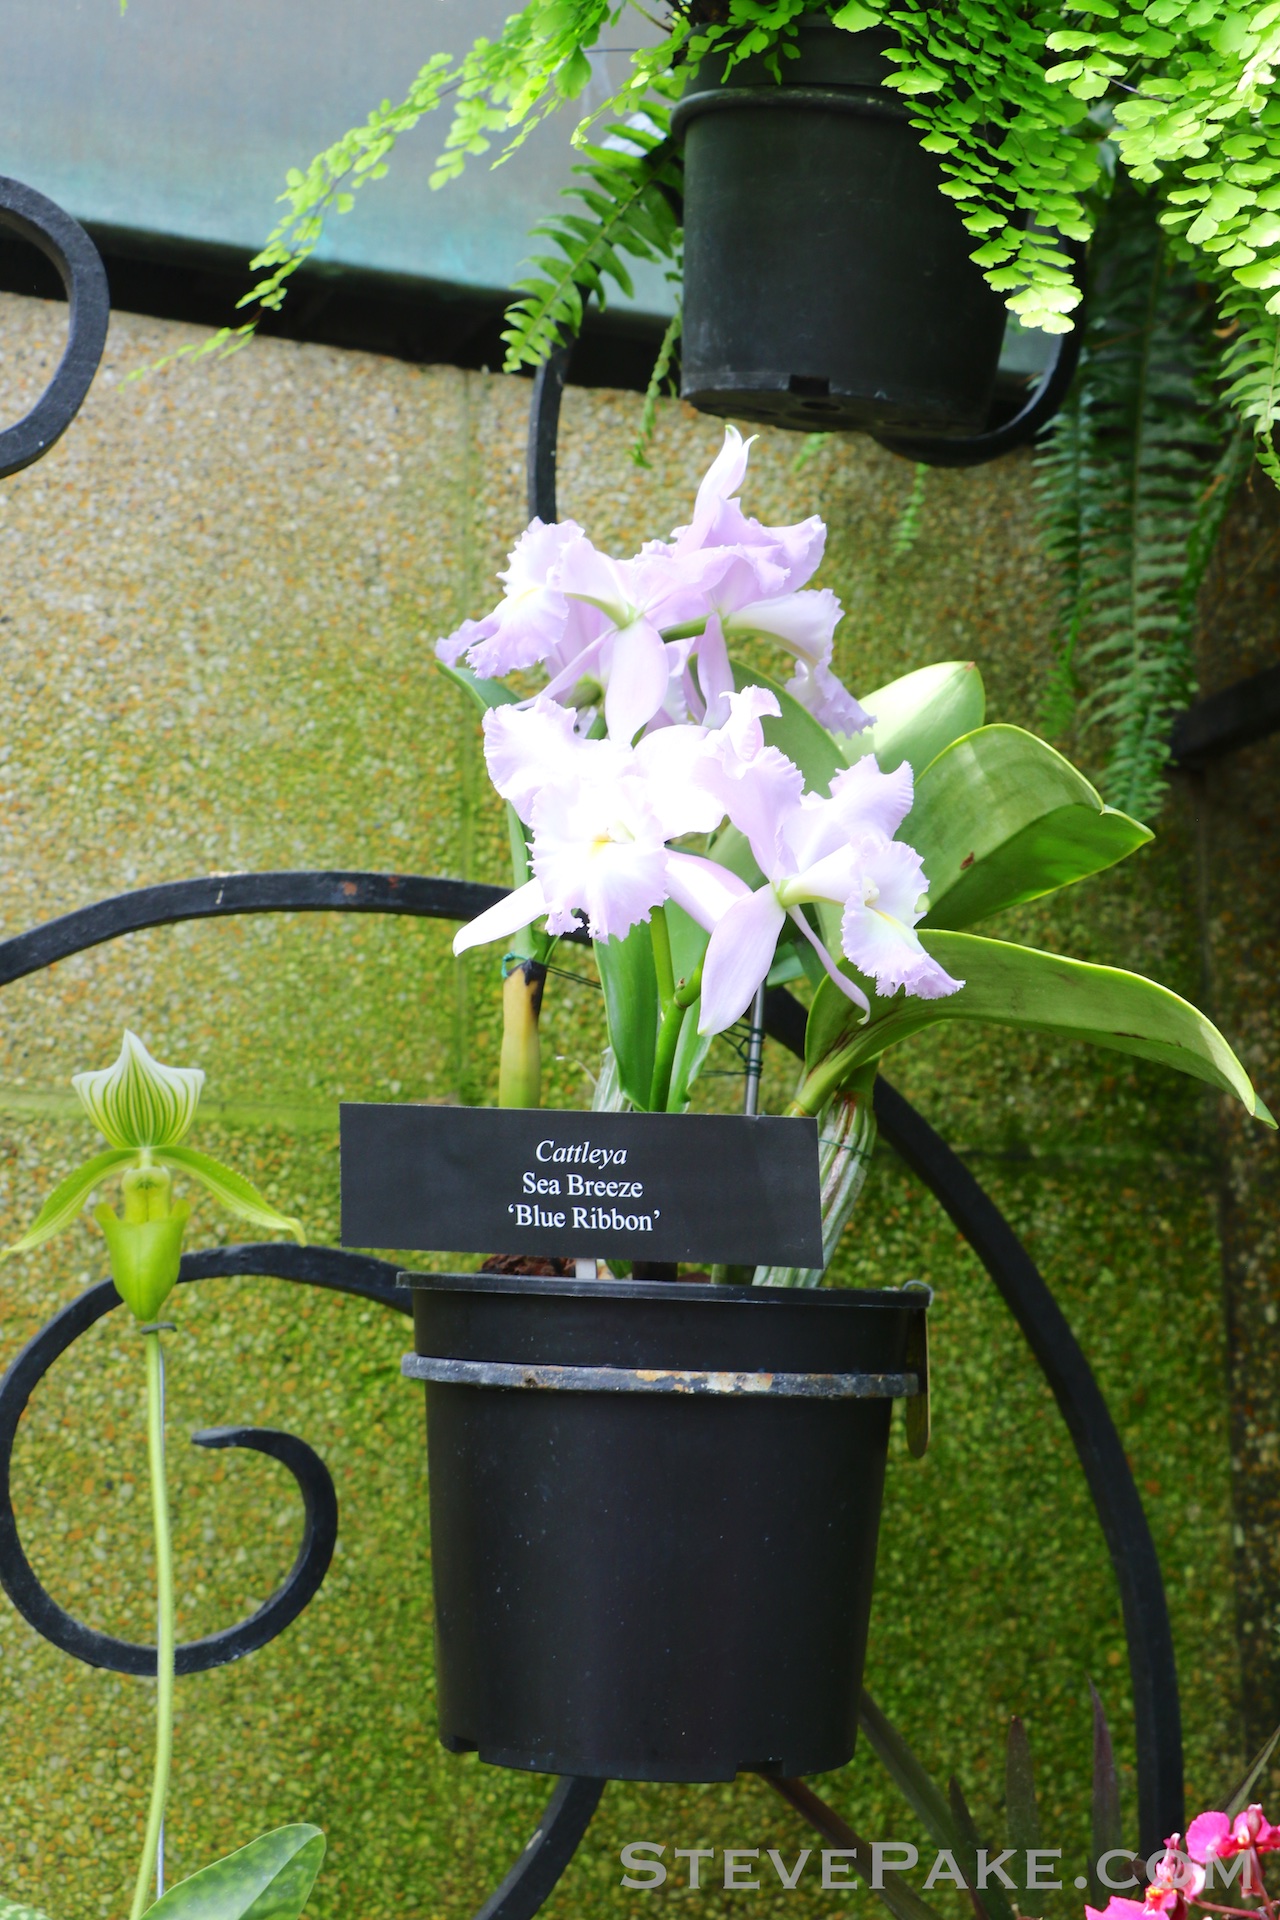


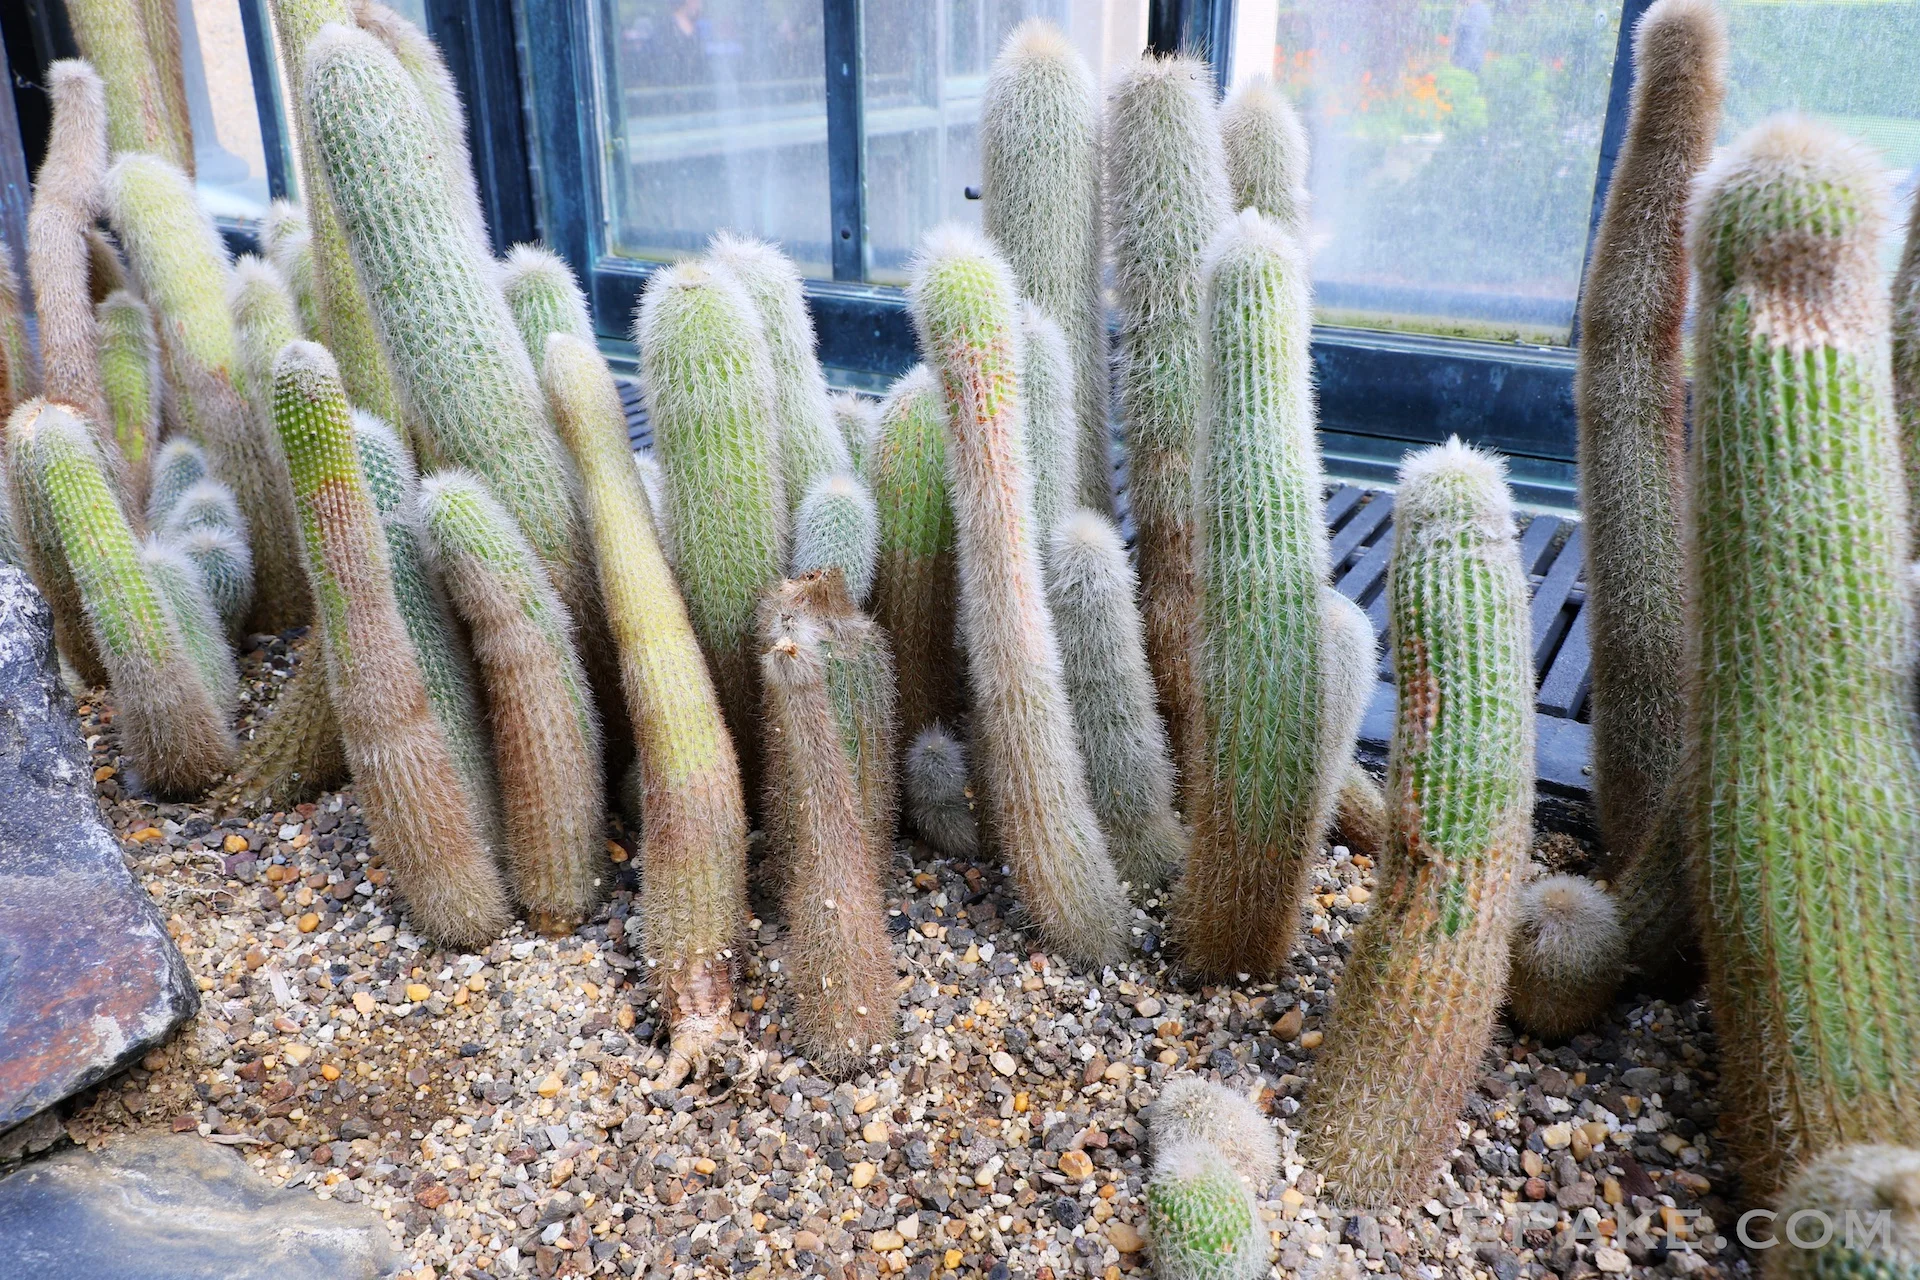


Barcelona 2017
Spring Break 2017 has come and gone, and we had a fantastic time in Barcelona! If it were up to me, I'd have parachuted into a cute little island in the Caribbean somewhere and just disconnected for a week. We've been through a lot in the past year. A week on a little island somewhere with my feet in the water and my ass in the sand sounded ideal, but I'm glad I was out-voted. We'd been longing to come back to the Continent for ages, and the Euro trading at about parity with the Dollar now made it a great time. Spain was amazing, and Barcelona is an incredible city. We can't wait to go back to Europe again!

EDIT March 2018 - Added FOOD PHOTOS! HA!
Spring Break 2017 has come and gone, and we had a fantastic time in Barcelona! If it were up to me, I'd have parachuted into a cute little island in the Caribbean somewhere and just disconnected for a week. We've been through a lot in the past year, and have been stressed out, burned out, have had our hearts broken, and have been pretty tired. A week on an isolated island with my feet in the water and my ass in the sand sounded ideal, but I'm glad I was out-voted. We'd been longing to come back to the Continent for ages, and the Euro trading at about parity with the Dollar now made it a great time. Spain was amazing, and Barcelona is an incredible city. We can't wait to go back to Europe again!
We scored a great AirBnB right in the downtown shopping district, which maybe wasn't such a good idea, but we had plenty of space for all of us for less than what hotel rooms would have cost. I had to split all of the photos out into two different albums. In Part 1, places visited included the Gothic Quarter, Castell de Montjuïc, Park Güell, the central park area, the beach, and Casa Milà. In Part 2, you'll find photos of the spectacular Montserrat, Basilica de la Sagrada Familia, and then the ticket only area of Park Güell.
On top of Castell de Montjuïc
A cable car going up to Montserrat
Basilica de la Sagrada Familia
One of many amazing views of the city, from Park Güell.
Everybody was very friendly, it was no problem getting around, prices were very reasonable at current exchange rates, and we all had a fantastic time. This was just the change of scenery that we needed. A group of two women did try to pick pocket one of the ladies purses and my camera bag at one point. They weren't successful and we quickly shooed them off, but other than that small bit of trouble, Barcelona was amazing!
My camera gear for the trip included a Canon 7D Mark II, Canon EF-S 18-135mm STM all-purpose zoom, a Tokina 12-28mm ultra-wide zoom (review coming), and then lastly the Canon 24mm f/2.8 STM pancake lens, although I used that lens mostly for food photos that I didn't include in these albums. With the Canon W-E1 WiFI adapter in the camera, I never needed to touch my laptop. I just pre-selected the nicer photos of the day via the RATE function on the camera, and then connected my phone to the camera with an app over WiFi, and sucked the photos straight down to my phone and posted some of them on social media more or less in real-time.
My Canon 5D Mark II full-frame camera definitely would have taken sexier looking images, but without the WiFi support it's suffering from a bit of digital rot these days, and I'd have been back to the old clunky workflow on my laptop, downloading photos to there, importing in Apple Aperture, selecting and rating, and then having to export back out somewhere. It's so much easier when you can just do it all straight on the camera and/or your phone! Also, I'm big on fill-flash, and the Canon full-frame bodies don't have built-in flashes, so I'd have had to dork around with a small external flash, which can be clunky. I do still want to get back to using full-frame cameras for travel, though, but I'm waiting for either a 6D Mark II to come out to consider, or for the 5D Mark IV to come down a bit in price, and then we'll talk.
Enough gear talk. Enjoy the photos! :)

Katie's 10th Birthday Photo Shoot
My daughter turned 10!!! She's such a sweetie, and a panda mommy too! The weather was super nice out, so we went outside and did a little photoshoot of her.
My daughter turned 10!!! She's such a sweetie, and a panda mommy too! The weather was super nice out, so we went outside and did a little photoshoot of her. The lighting was tricky to work with through the trees and shadows created from the branches. I used my Canon 5D Mark II full-frame camera for these, and then the 35mm f/1.4L, 135mm f/2L, and the 17-40L for a few too, along with a 580EX flash for fill. These were very tricky photos trying to balance all of the light together, but I'm pretty pleased with how they turned out. :)
HAPPY 10TH BIRTHDAY TO KATIE! WE LOVE YOU!!!! <3

DC Cherry Blossoms 2017
I'm sooo behind on posting photo albums on here. There's lots of fun stuff I've wanted to share from last year, but just no time. We did get down into D.C. today to enjoy the famous Cherry Blossoms of the Tidal Basin.
I'm sooo behind on posting photo albums on here. There's lots of fun stuff I've wanted to share from last year, but just no time. We did get down into D.C. today to enjoy the famous Cherry Blossoms of the Tidal Basin. They took a huge hit from freezing weather after they had already started to bloom, but it was still very pretty! Thick overcast and no clear blue skies actually took away from the cherry blossoms more than the cold weather hit did, but again, still very pretty. The crowds were so thin early when we got there that we actually got done with our walk around the Tidal Basin early, so a stop for a bit at a Paul's bakery, and then onto brunch at one of our fav's, Acadiana.
Photo gear: Canon 7D Mark II, Canon 18-135mm STM all-purpose zoom, Tokina 12-28mm f/4 ultra-wide, and the Canon 24mm f/2.8 STM pancake lens for food photos. I've just recently picked up the 18-135 and 12-28mm lenses, so trying them out a bit and pretty pleased. Enjoy the photos!
UPDATE: A few somewhat sunny photos have been added to the end of the album from closer to home.


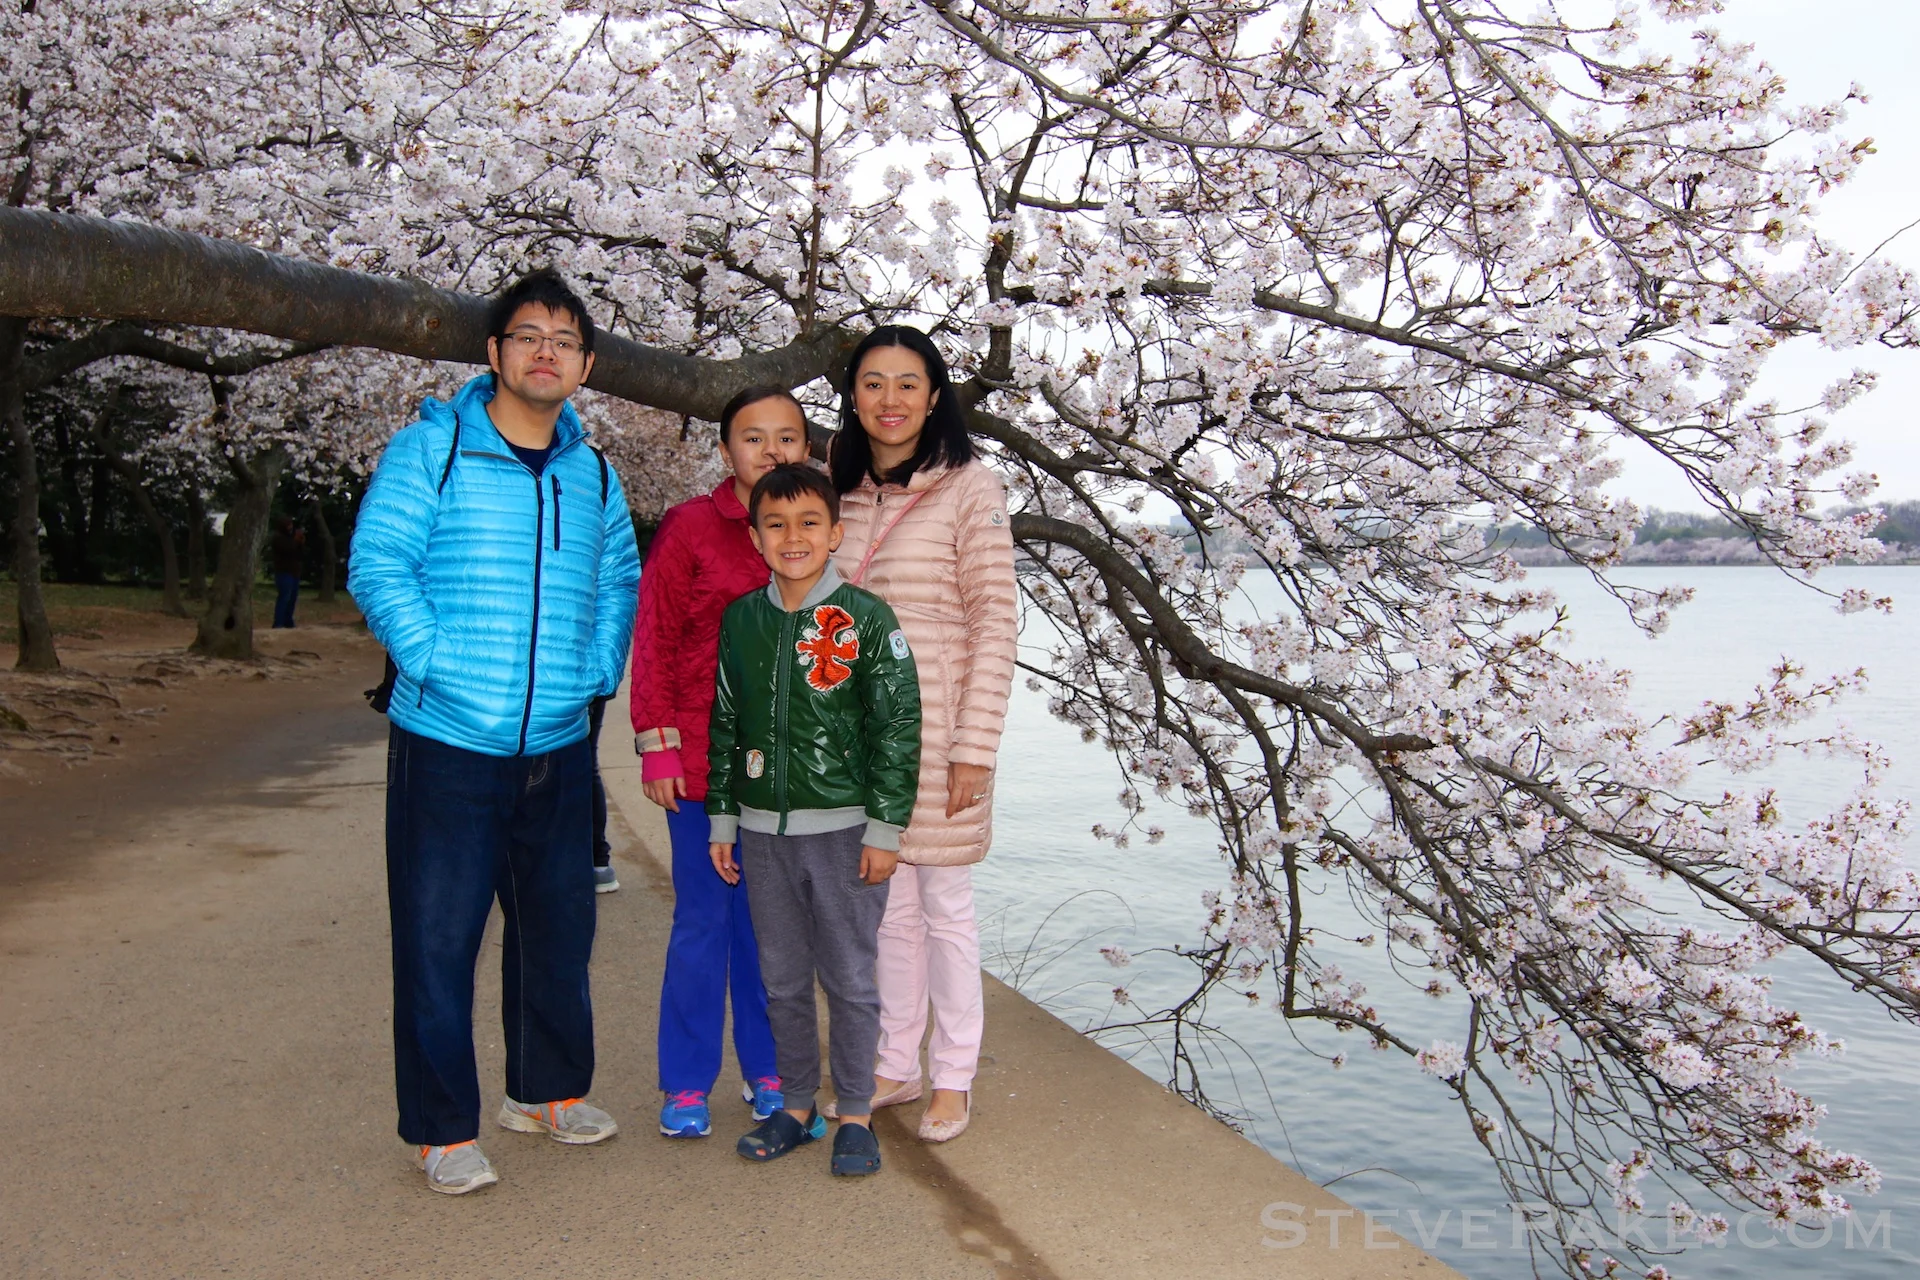


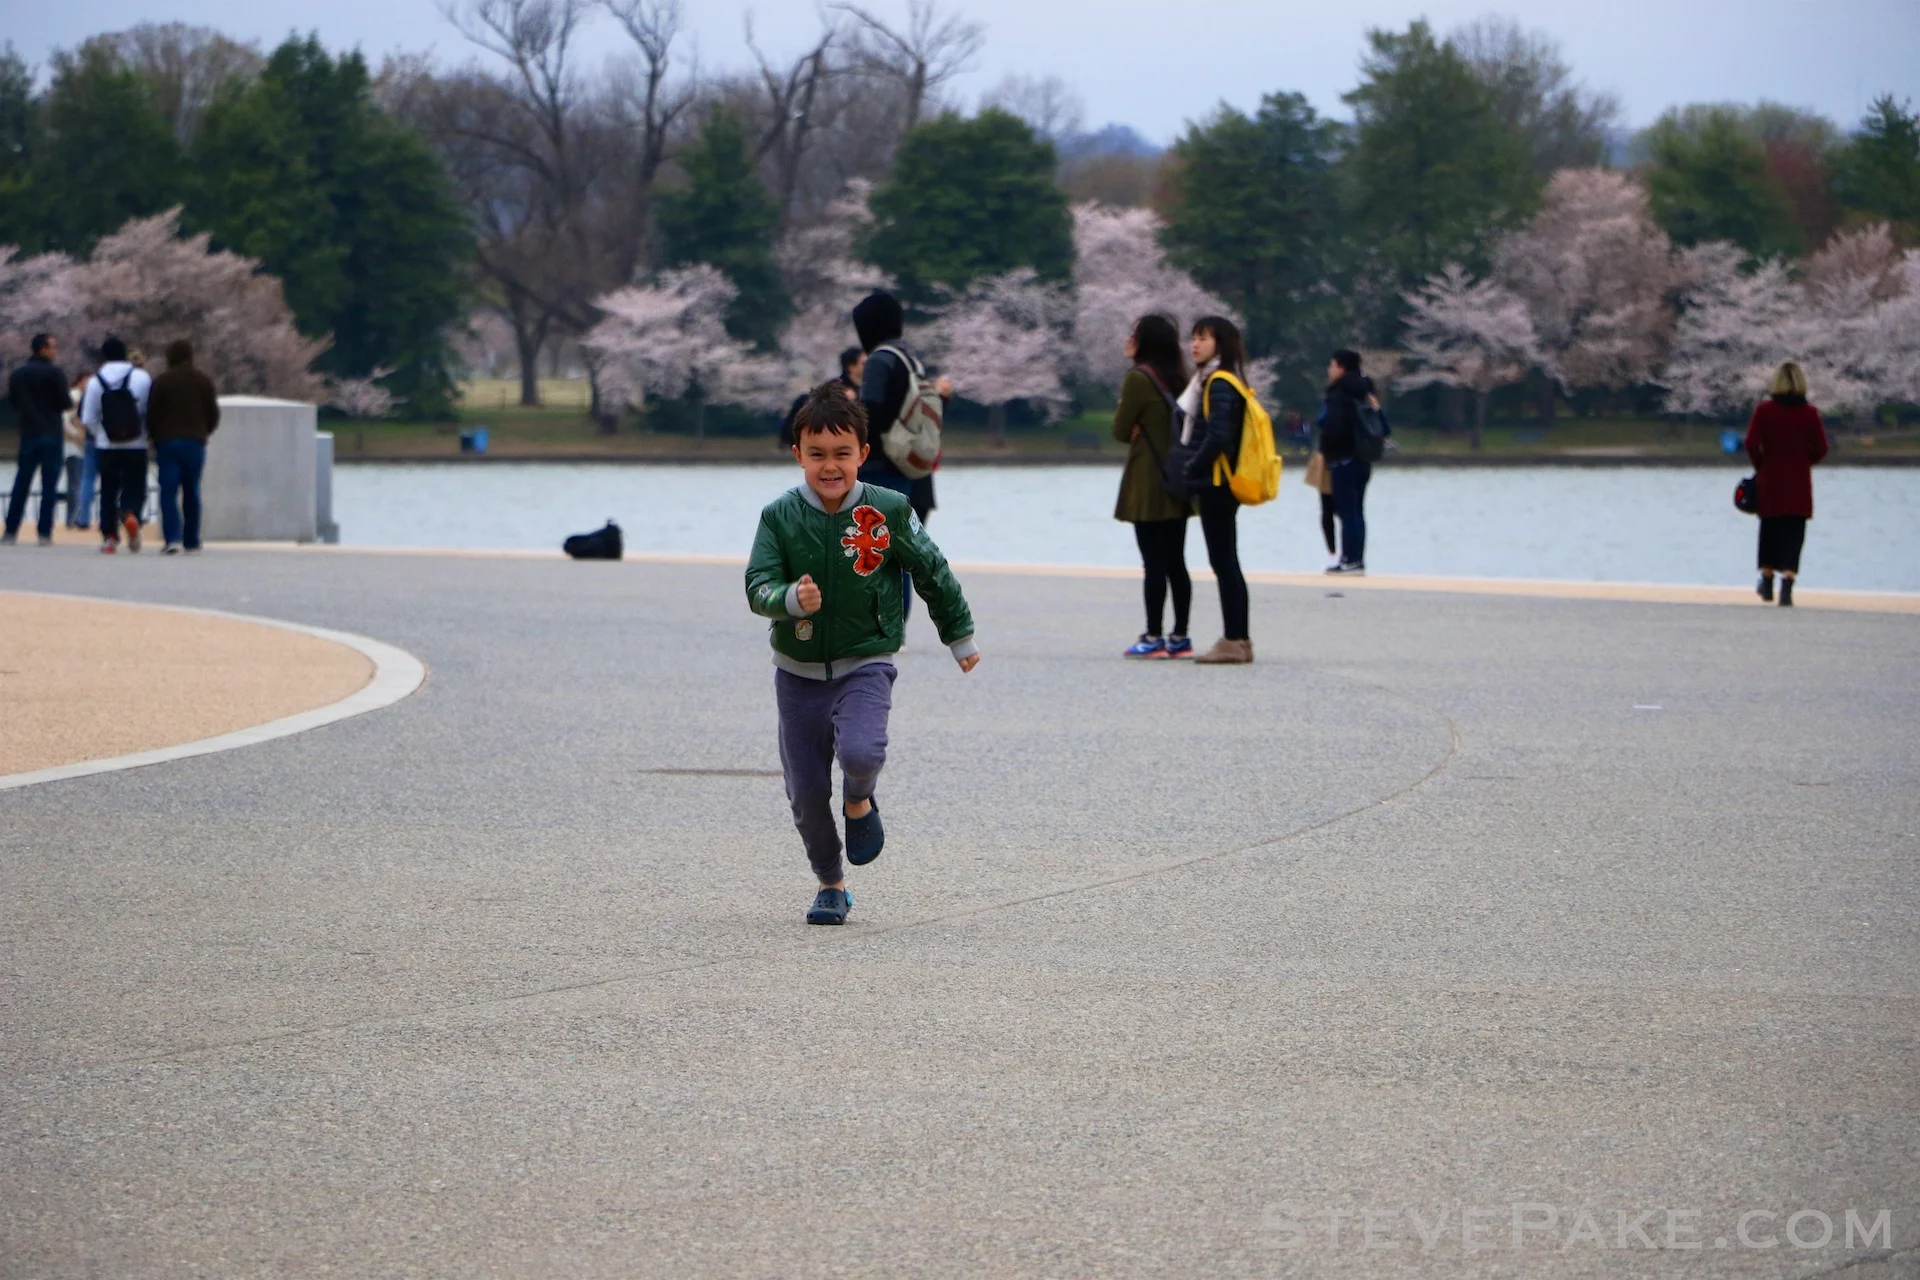
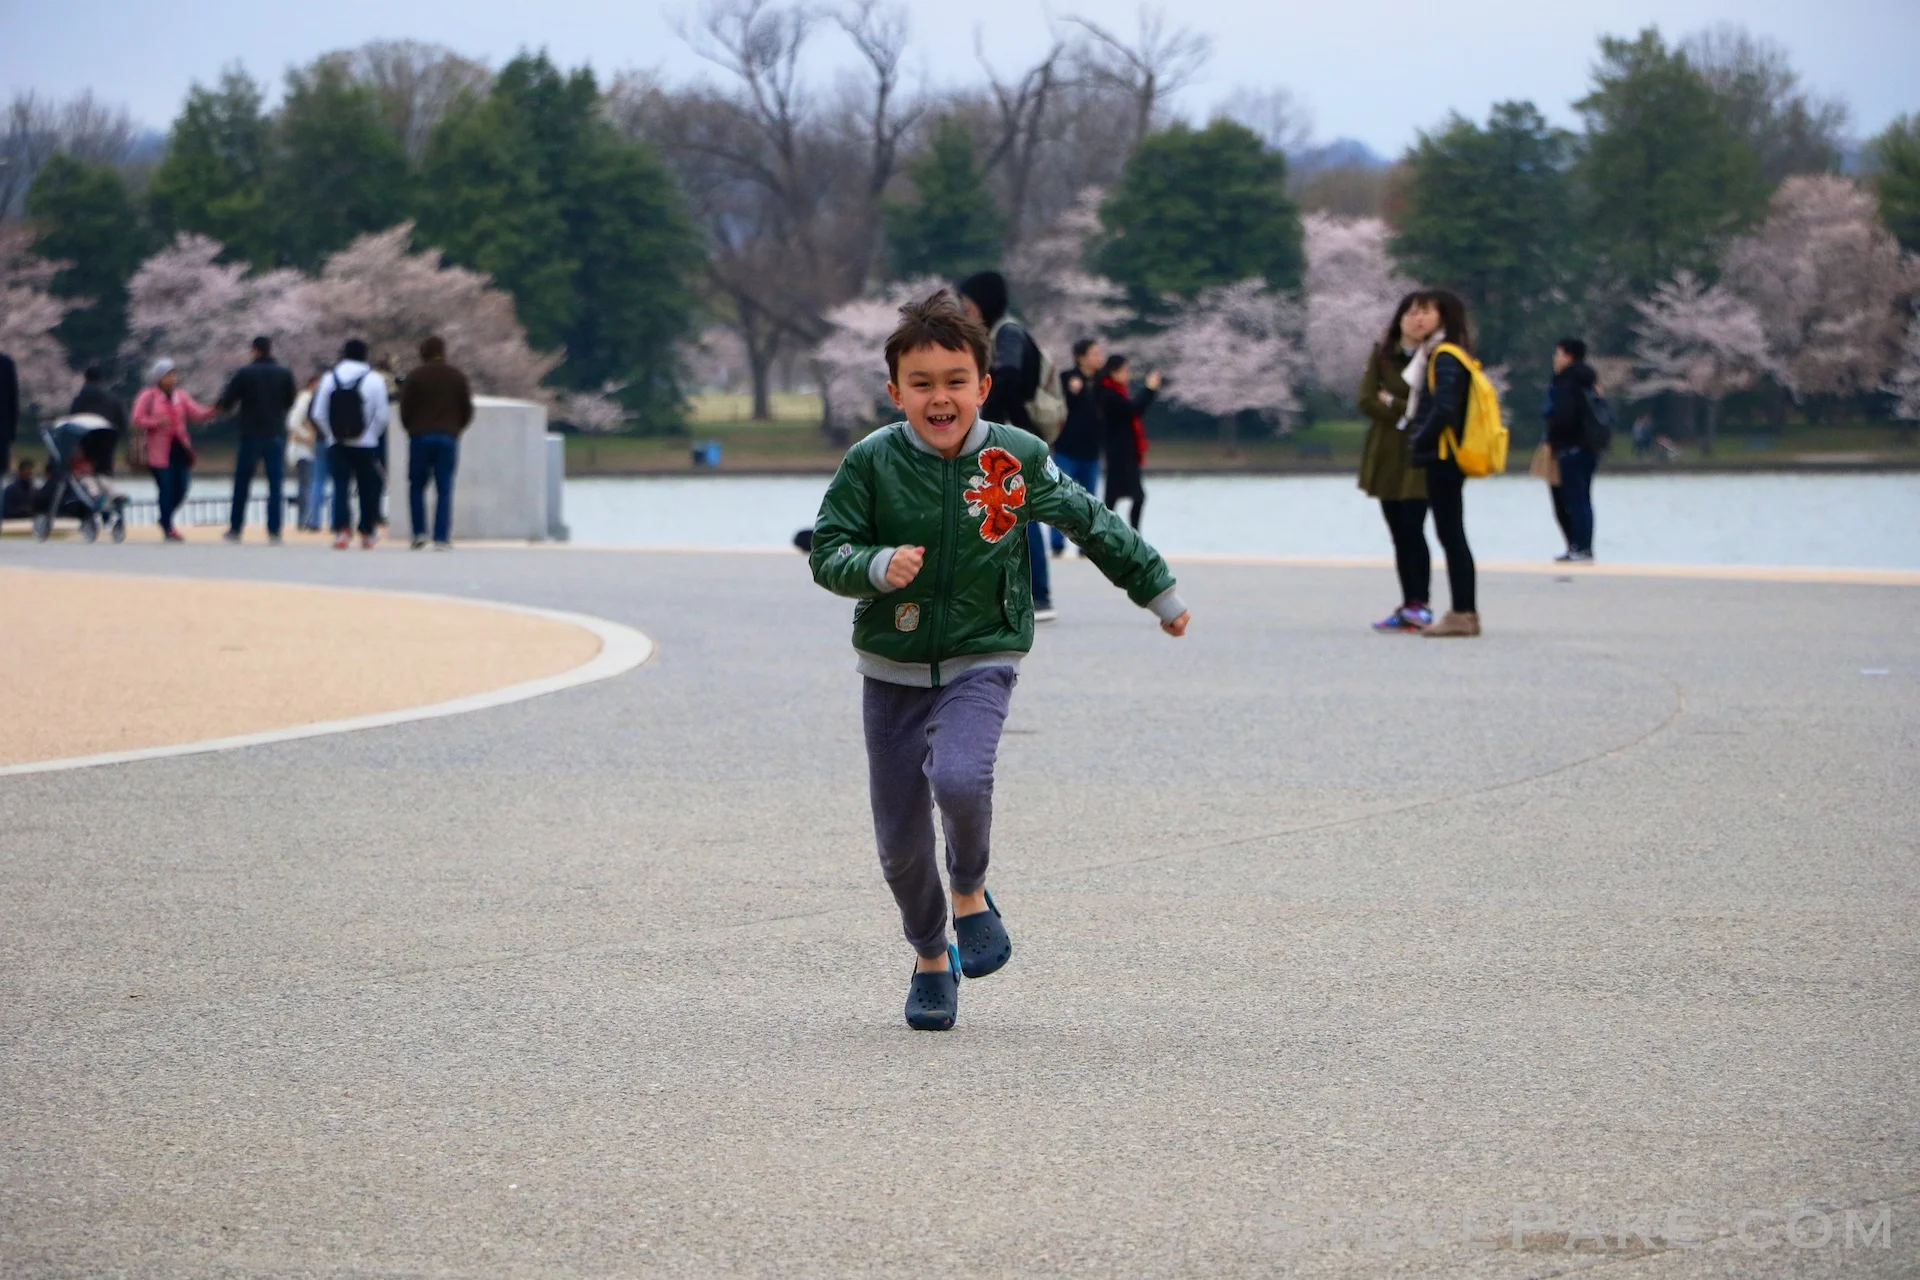
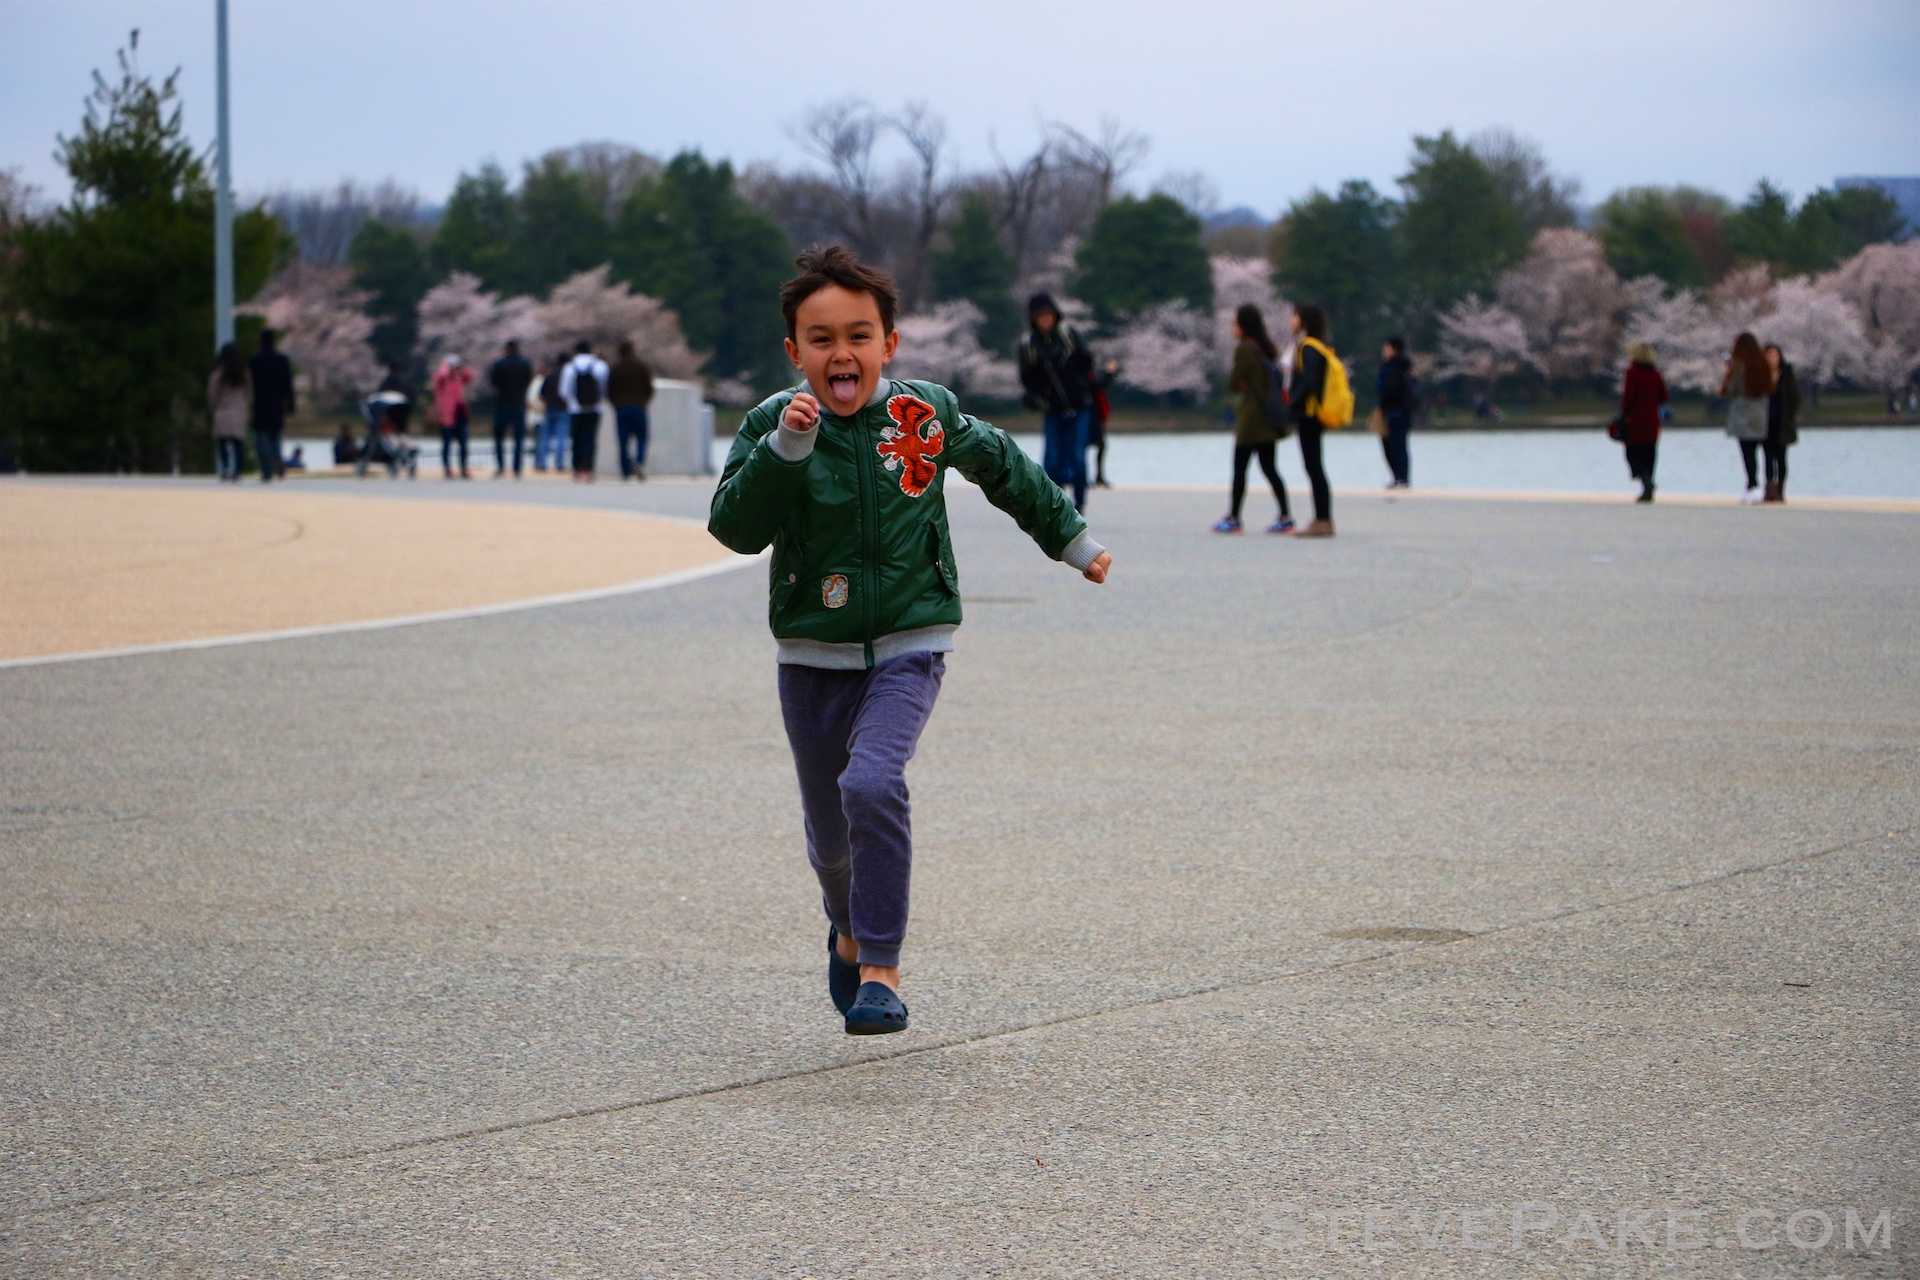


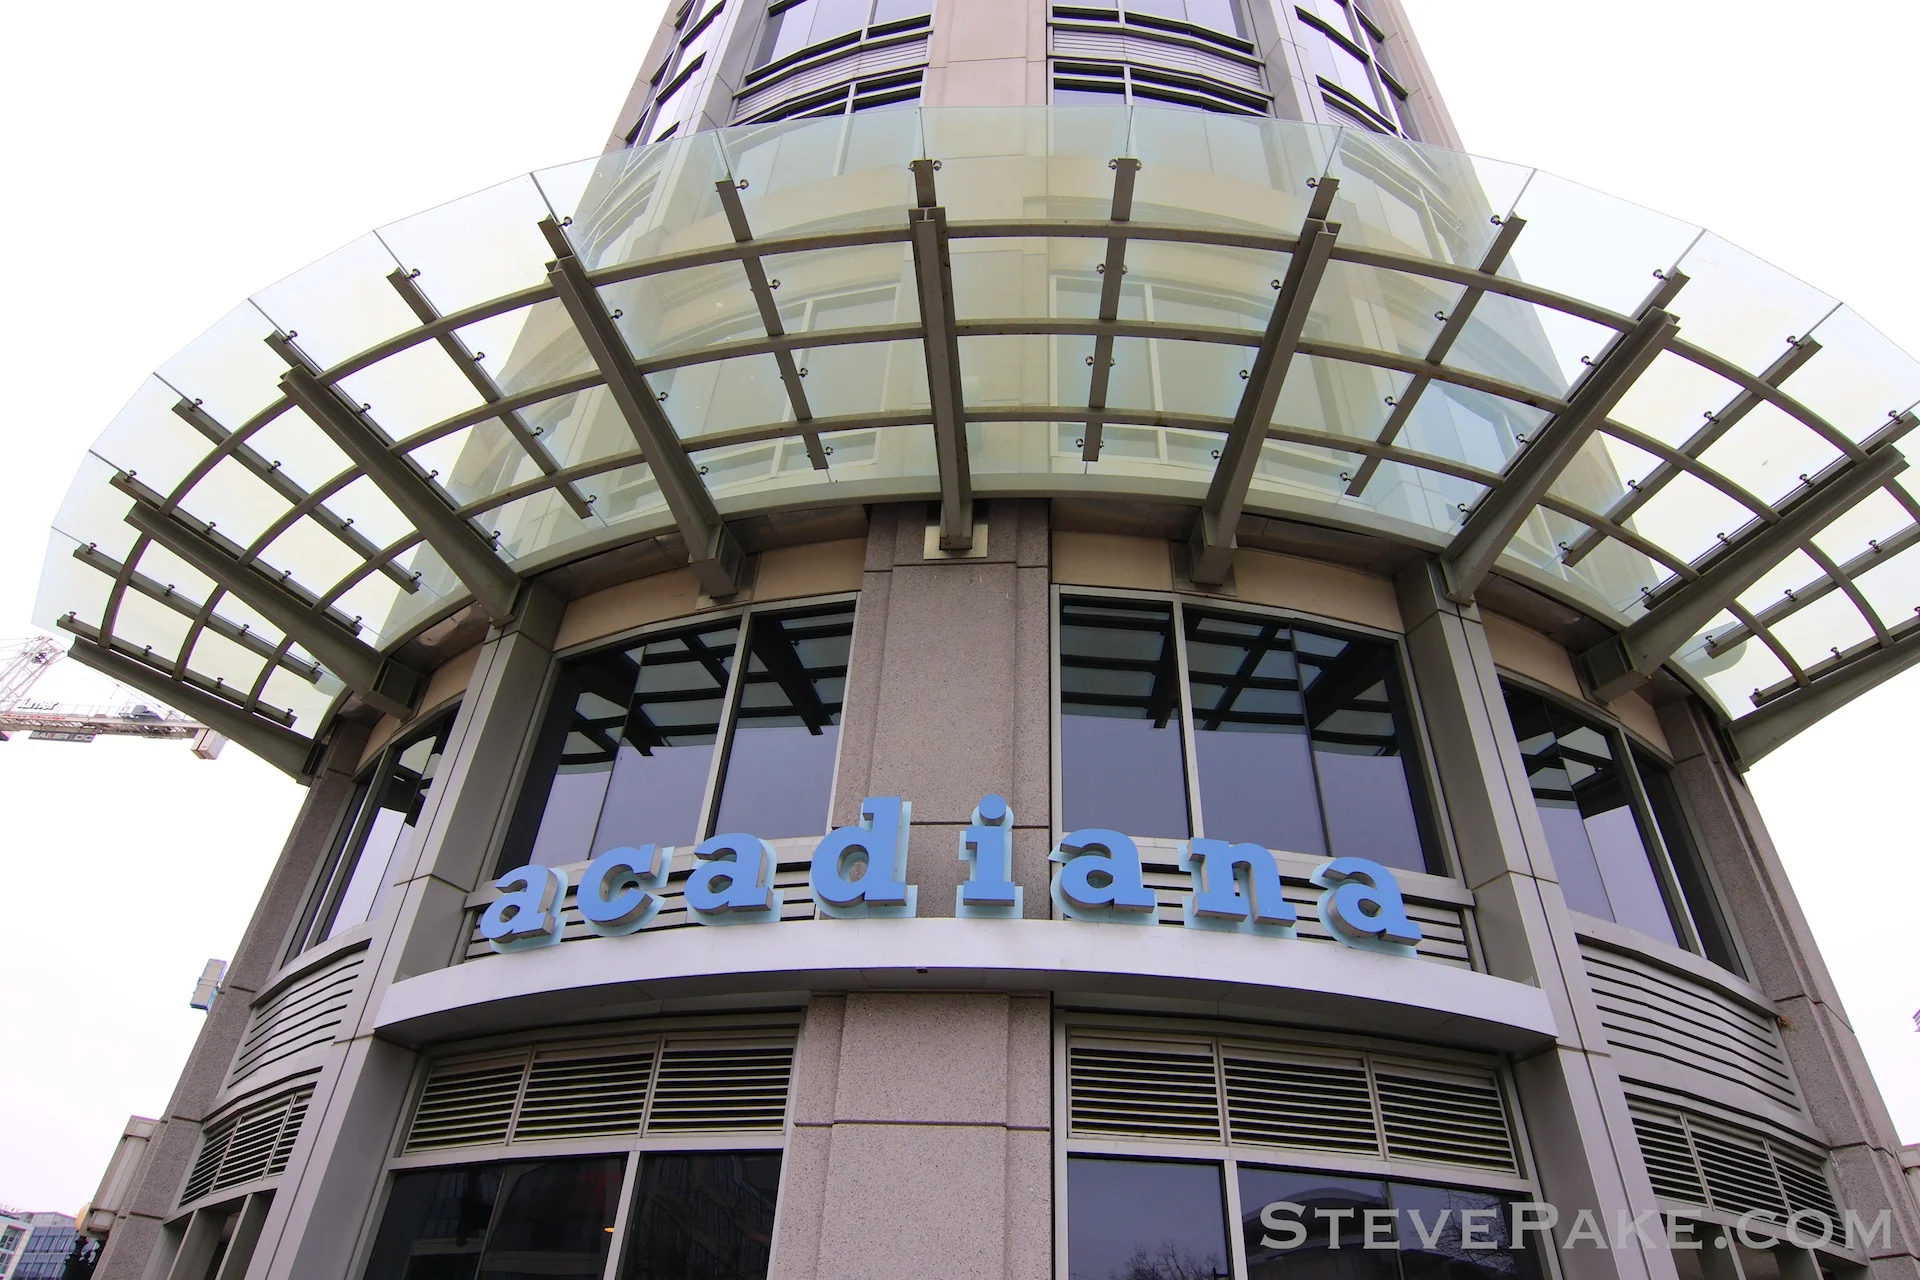


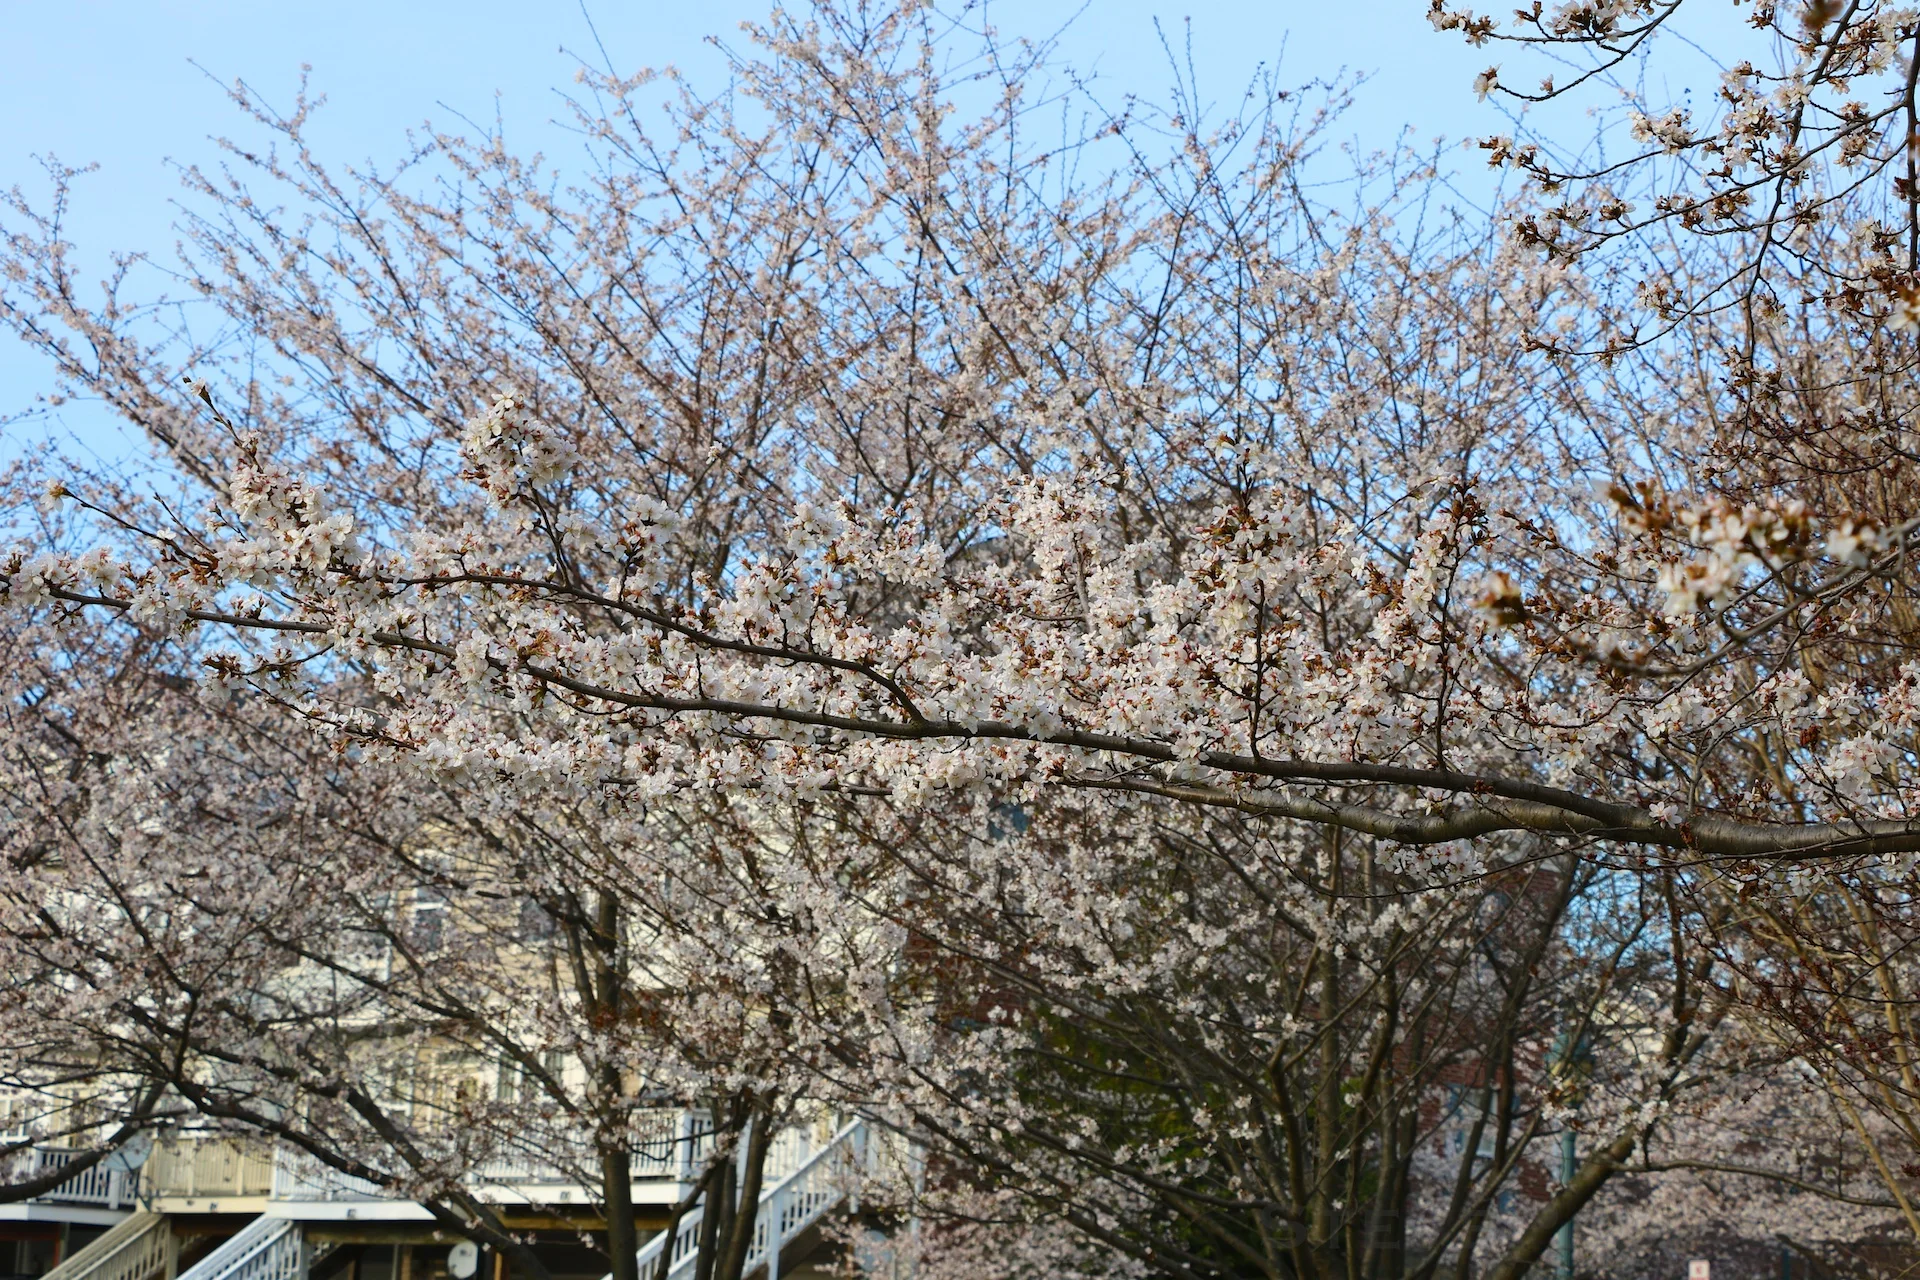


Over The Moon!
I got this really cool moon photo on March 9th with my Canon 7D Mark II and Canon 100-400mm L II lens.
I got this really cool moon photo on March 9th with my Canon 7D Mark II and Canon 100-400mm L II lens. I had been watching planes criss cross the sky one day, and realized if I had my camera out maybe 30 minutes earlier, that I might be able to get a plane going directly across my field of view to the moon. I didn't get one of those, but really loved this one, "Over the Moon!", right as the sun was setting giving some nice glow and color to the moon and sky.
A 400mm lens works out to 640mm equivalent on a Canon APS-C body (focal length x 1.6), and a Canon 7D Mark II body is 20 MP. The cropped final image here is 4.7MP, so still quite a bit of cropping even at 400mm. I'm planning to eventually pickup a Canon 1.4x Extender III, which would put this combination at nearly 900mm equivalent for some even better moon, plane spotting and airshow photos. :)

Inaugural 2017 Winter Portraits
The first real snow of the year, I always love to get photos of our kids, Katie and William, running through the snow as it comes down. Katie didn't want to play, so leave it to William to get all of the glory. Photos taken with my Canon 5D Mark II and 135mm f/2L prime lens, shot at full aperture. Enjoy! :)
The first real snow of the year, I always love to get photos of our kids, Katie and William, running through the snow as it comes down. Katie didn't want to play, so leave it to William to get all of the glory. Photos taken with my Canon 5D Mark II and 135mm f/2L prime lens, shot at full aperture. The trick for photos like these is to use a larger format camera and and a large aperture prime lens, which gives you the ability to leave only a thin area in focus, with everything else falling out of focus. Only the face of the subject, and the thin layer of snowflakes in that same plane will be in focus, with everything else blurred to oblivion. Ability to do this with larger format cameras is why I still stick with them, and continue to use big old clunky DSLR cameras today. I love my iPhone 6s Plus, and the iPhone 7 is a bit better, but they're still not close to being able to do things like this.
Best viewed on a desktop computer at full screen.
Enjoy! :)
To get snowflake photos, you have to manually focus at mid-field, and then use a fast shutter speed like 1/2000s.
StevePake.com