Our First Pinewood Derby Car - "Coupe De Will"
William joined the Cub Scouts last year and has been having a lot of fun in it and making lots of new friends. We just had an incredibly successful Pinewood Derby car event, so I figured I’d share our rookie entry, “Coupe de Will”. I never did Scouts as a kid and this is William’s first year, but “Coupe de Will”, named after the famous Cadillac Coupe de Ville, managed to win 3 of its 5 heats and placed 2nd in the other two, so it was a pretty hot car!


YOU’RE AN ENGINEER, YOU SHOULD BE ABLE TO FIGURE THIS OUT
RIght! Lol! You don’t need to be an engineer, just an understanding of high school physics is good enough - somebody knowing you’re an engineer just adds pressure is all. So what to do? Well, let’s just say that I’m typically neck deep in electronics that don’t actually work in my day job, and that when I come home I just like things to work for a change, so woodworking and tinkering projects like these aren’t really my thing. While the performance of Coupe de Will spoke for itself in that we got a lot of the engineering things right, numerous missteps while putting it together really spoke to my lack of experience as a hobbyist of this nature, which I felt would make for an interesting blog, so here we go. Classic Jeremy Clarkson: “How hard could it be?”
MINIMIZE AERODYNAMIC DRAG AND FRICTION
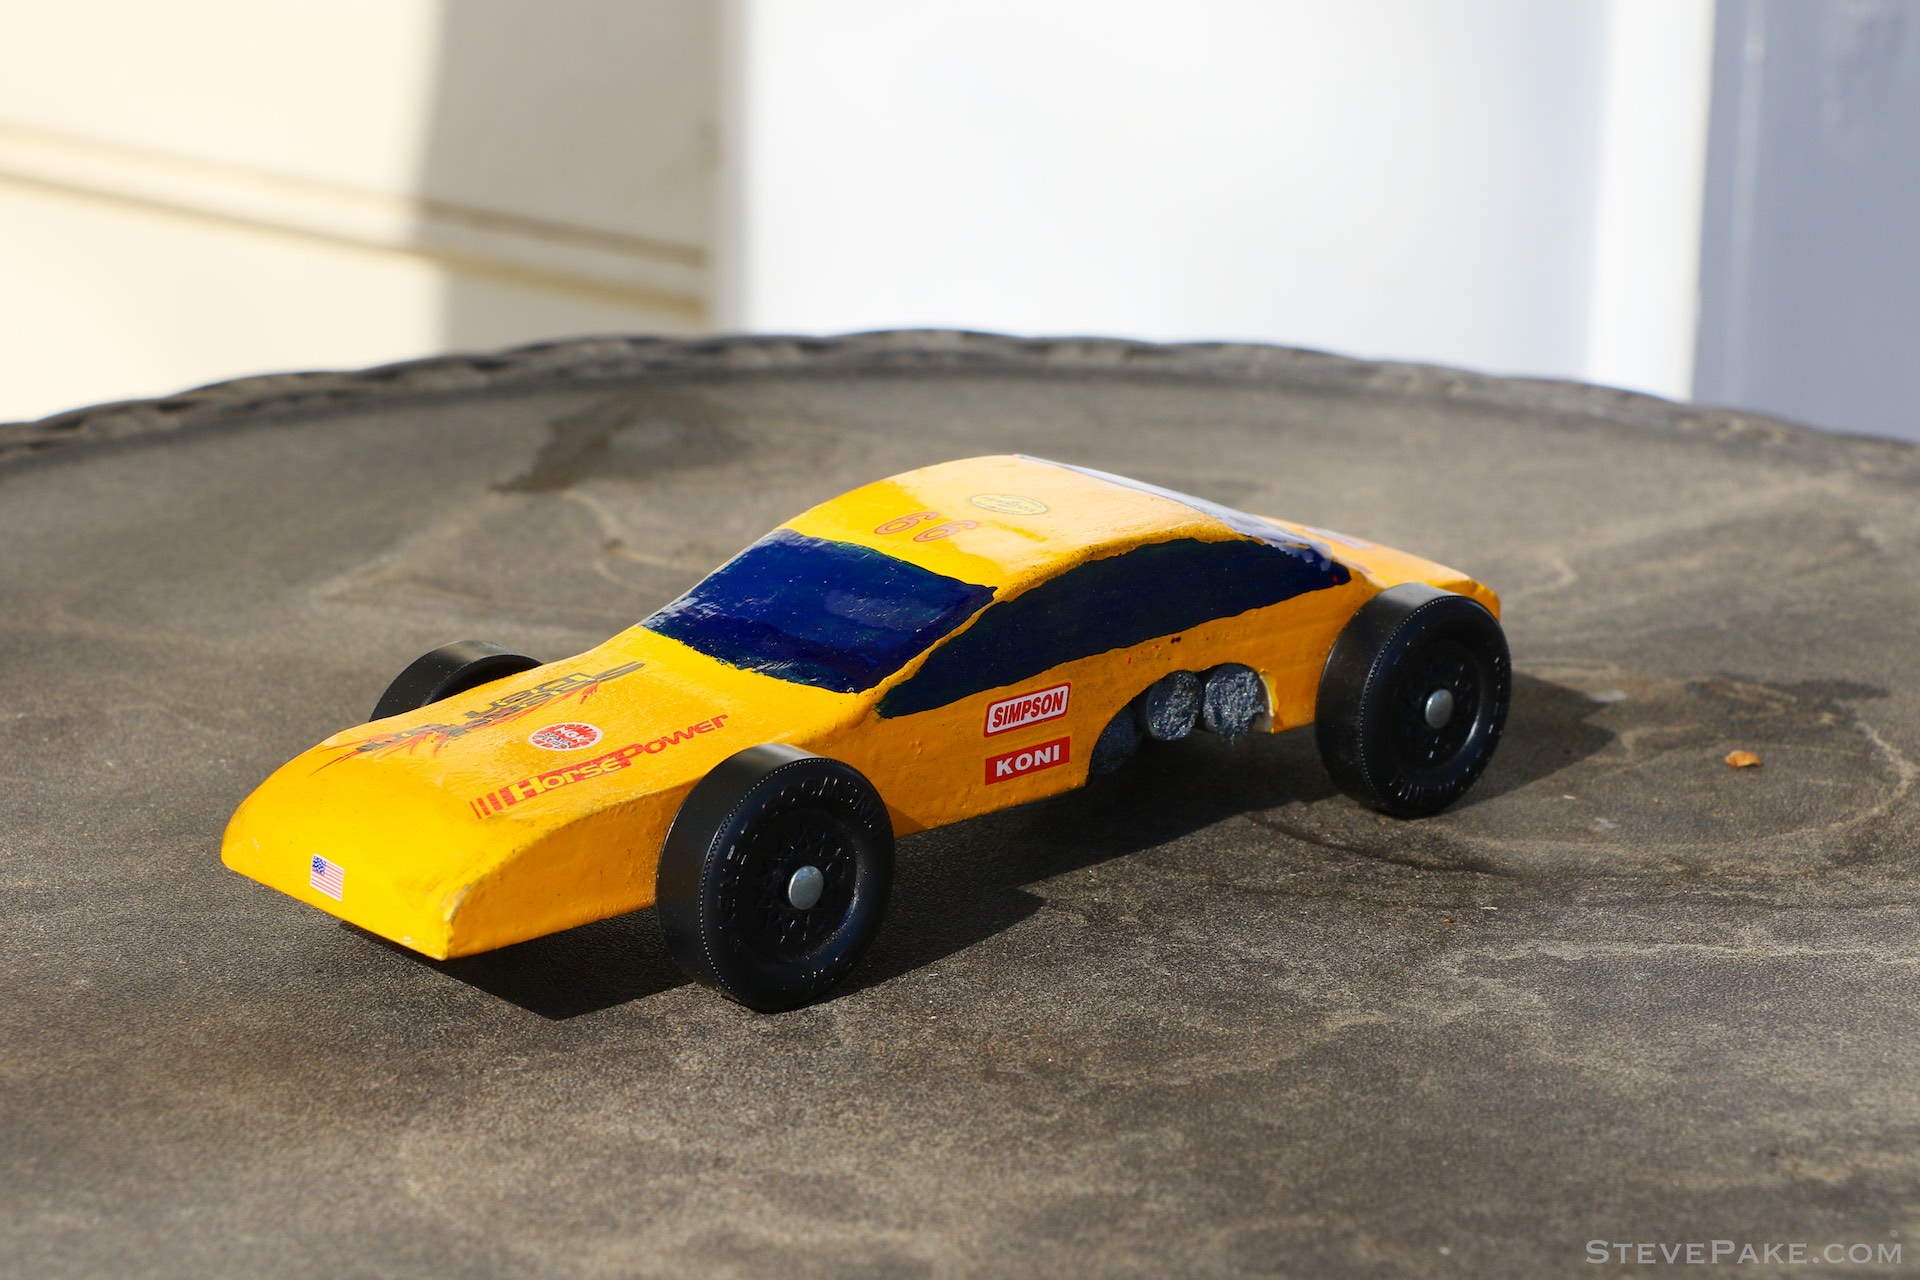
First things first, the only power these cars have is gravity pushing them down a ramped track, so you need to minimize all sources of friction including aerodynamic drag. A nice thin and flat streamlined shape is your friend, and while you can make a perfectly flat car like this, we wanted to build something that actually looked like a real car. William said he wanted to build a Lamborghini of course, so we got to work.
It quickly became apparent that just using coarse sand paper to shape the car was going to result in worn out arms long before we ever got anything looking like the car we wanted, so off we went to my office machine shop where we have a nice band sander and a band saw. Both are rarely used and thus not well maintained. The band sander had no material left on it and was basically useless, and the band saw was so dull from doing some metal work that it could barely trim through the pinewood block, but managed to get some cuts made and saved us a few hours of time. (I’d have just gone to Home Depot and gotten a jig saw or called up some friends to see what I could borrow!)
I ended up trimming way too long of a hood for a mid-engined Lambo (oops!) but had a really good coupe shape going so stuck with that. At home, I used a sharpie to mark about the shape we wanted, and then worked on it with some leftover pieces of sandpaper from an old painting job, and then fired up my Dremel’s sanding bit to do the rest of the shaping.
PAINTING AND DECORATING
Once we were satisfied with our shape, we got to work painting - “Lambo Yellow” of course. :) The lighter colored paint didn’t at all cover over the grain of the bare pinewood, so we ended up needing not two but three coats of paints done over two days, and then just a single coat for the dark blue windows, and a bit of red for the tail. While I was at it, I put on a bunch of the little vinyl decals, half of which fell off or were broken as we continued to handle the car through various things. Oops. Yeah, maybe save the decals for last, and the painting for next to last? Totally wrong order, but that’s just how we did things.
WHEELS AND AXLES
What’s next? Wheels and axles? Well, maybe not that either, but that’s what we did. There’s a bunch of companies out there that will take as much of your money as possible in building these cars, most of which I feel is a complete waste of money. One thing that I felt was worth it was this trick axle aligner tool I found at a local hobby shop for $15. It has a guide tool that’s perfectly shaped to get your axles inserted dead-on, which will help minimize friction going down the track. It made getting the nail axles inserted a piece of cake, and everything lined up and rolled perfectly.
While I was at it on the wheels, I opened up my tiny tube of graphic dry lubricant. Never seen it before, had no idea what it was, and quickly found out. It’s tiny graphite shavings that get literally everywhere, and basically act as mini ball bearings between the plastic wheels and the metal nail axle. Pretty decent idea, except that’s probably the absolute last thing you should do rather than in the middle of a bunch of other things!
WEIGHT PLACEMENT
A big consideration for a top performing pinewood derby car is your total weight, and also where you place it. You’re allowed a maximum weight of 5.00oz, and yes you’ll need weights to be competitive because the bigger (heavier) they are, the harder they’ll fall and the faster your car will go. So you’ll actually want to be right at the maximum allowed weight, but where do you put it?
Physics will tell you that the more weight you have higher up, towards the rear of the car as it’s pointing down the ramp, the more potential energy you’ll have to convert into kinetic energy going forward. So you actually want to have most of the weight towards the rear of the car to maximize potential energy, or as much as you can get without having the car pop a wheelie.
The axle placements for the standard Pinewood Derby kit are asymmetrical in that one has a shorter overhang and the other a bit longer. It wasn’t a coincidence that I used the one with the shorter overhang as the rear axle for the car. That way as you’re stacking your weights on the rear of the car, you’ll have less of it behind the rear axle trying to flip the car into a wheelie, and more of it between the two axles to help balance. Simple weight distribution physics in action.
After that I went back into the garage with my Dremel to start carving out our holes to stick our weights into, and quickly realized how ridiculous it was to have done the wheels and axles and dry lubricant already when wood dust from the Dremel with a sanding bit went everywhere, including into the wheels and axles! Sigh!
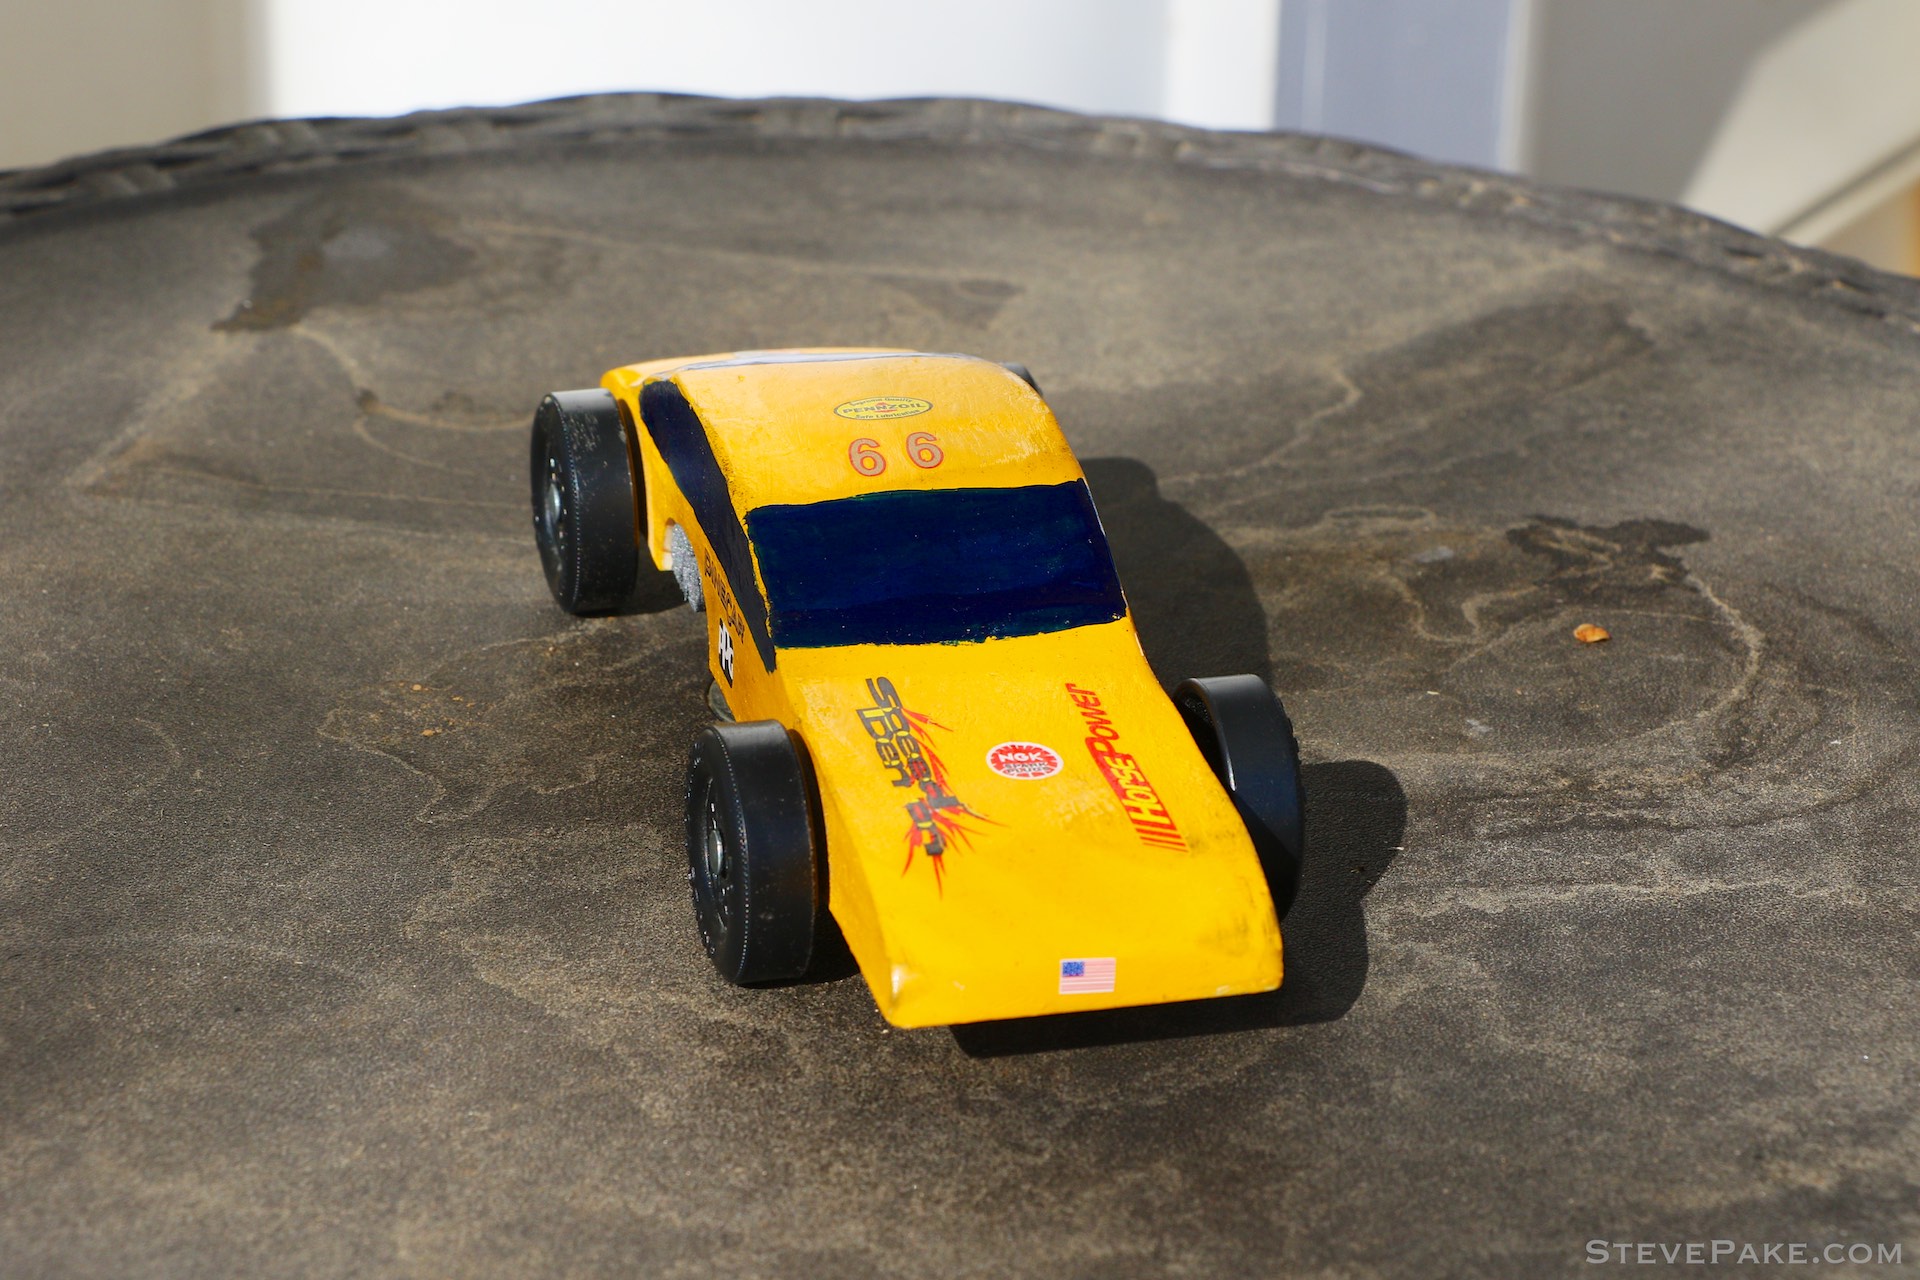
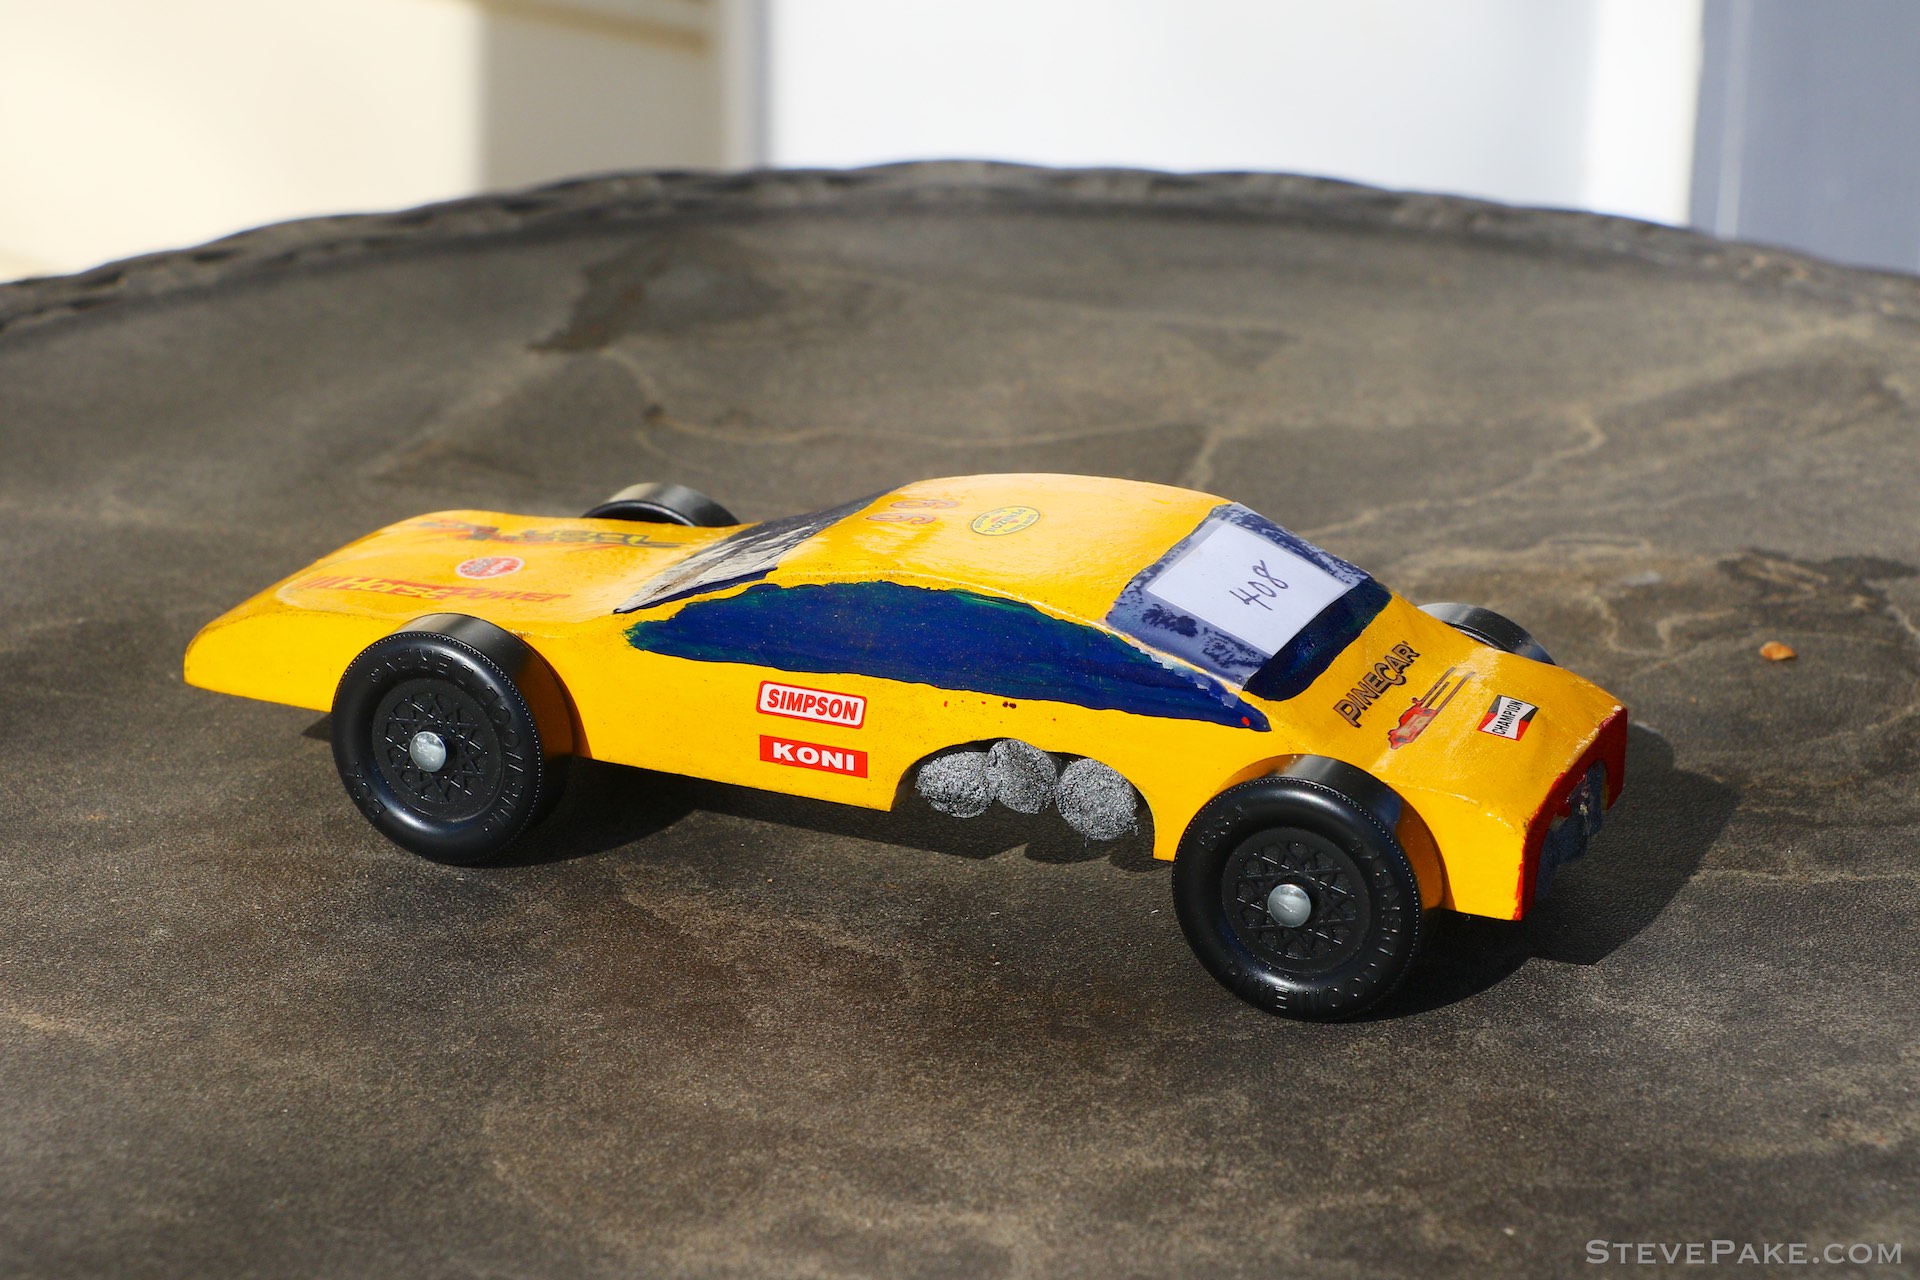
My initial plan was to use these flexible weights picked up at the Scouts of America store and drill holes for them through the back of the car. Problem was, I had shaved down too much of the trunk area and was going to risk cutting into the rear axle area, or they’d be sitting on top of the trunk and totally ruining the look of the car and it’s coupe shape. What to do, what to do. I took the Dremel and started hollowing out the rear of the car behind the axle for two “weight exhausts” which I thought would look pretty slick. I went for two at first, but realized I had enough space for a third, so hollowed out a bit more with the Dremel and made it a triple exhaust.
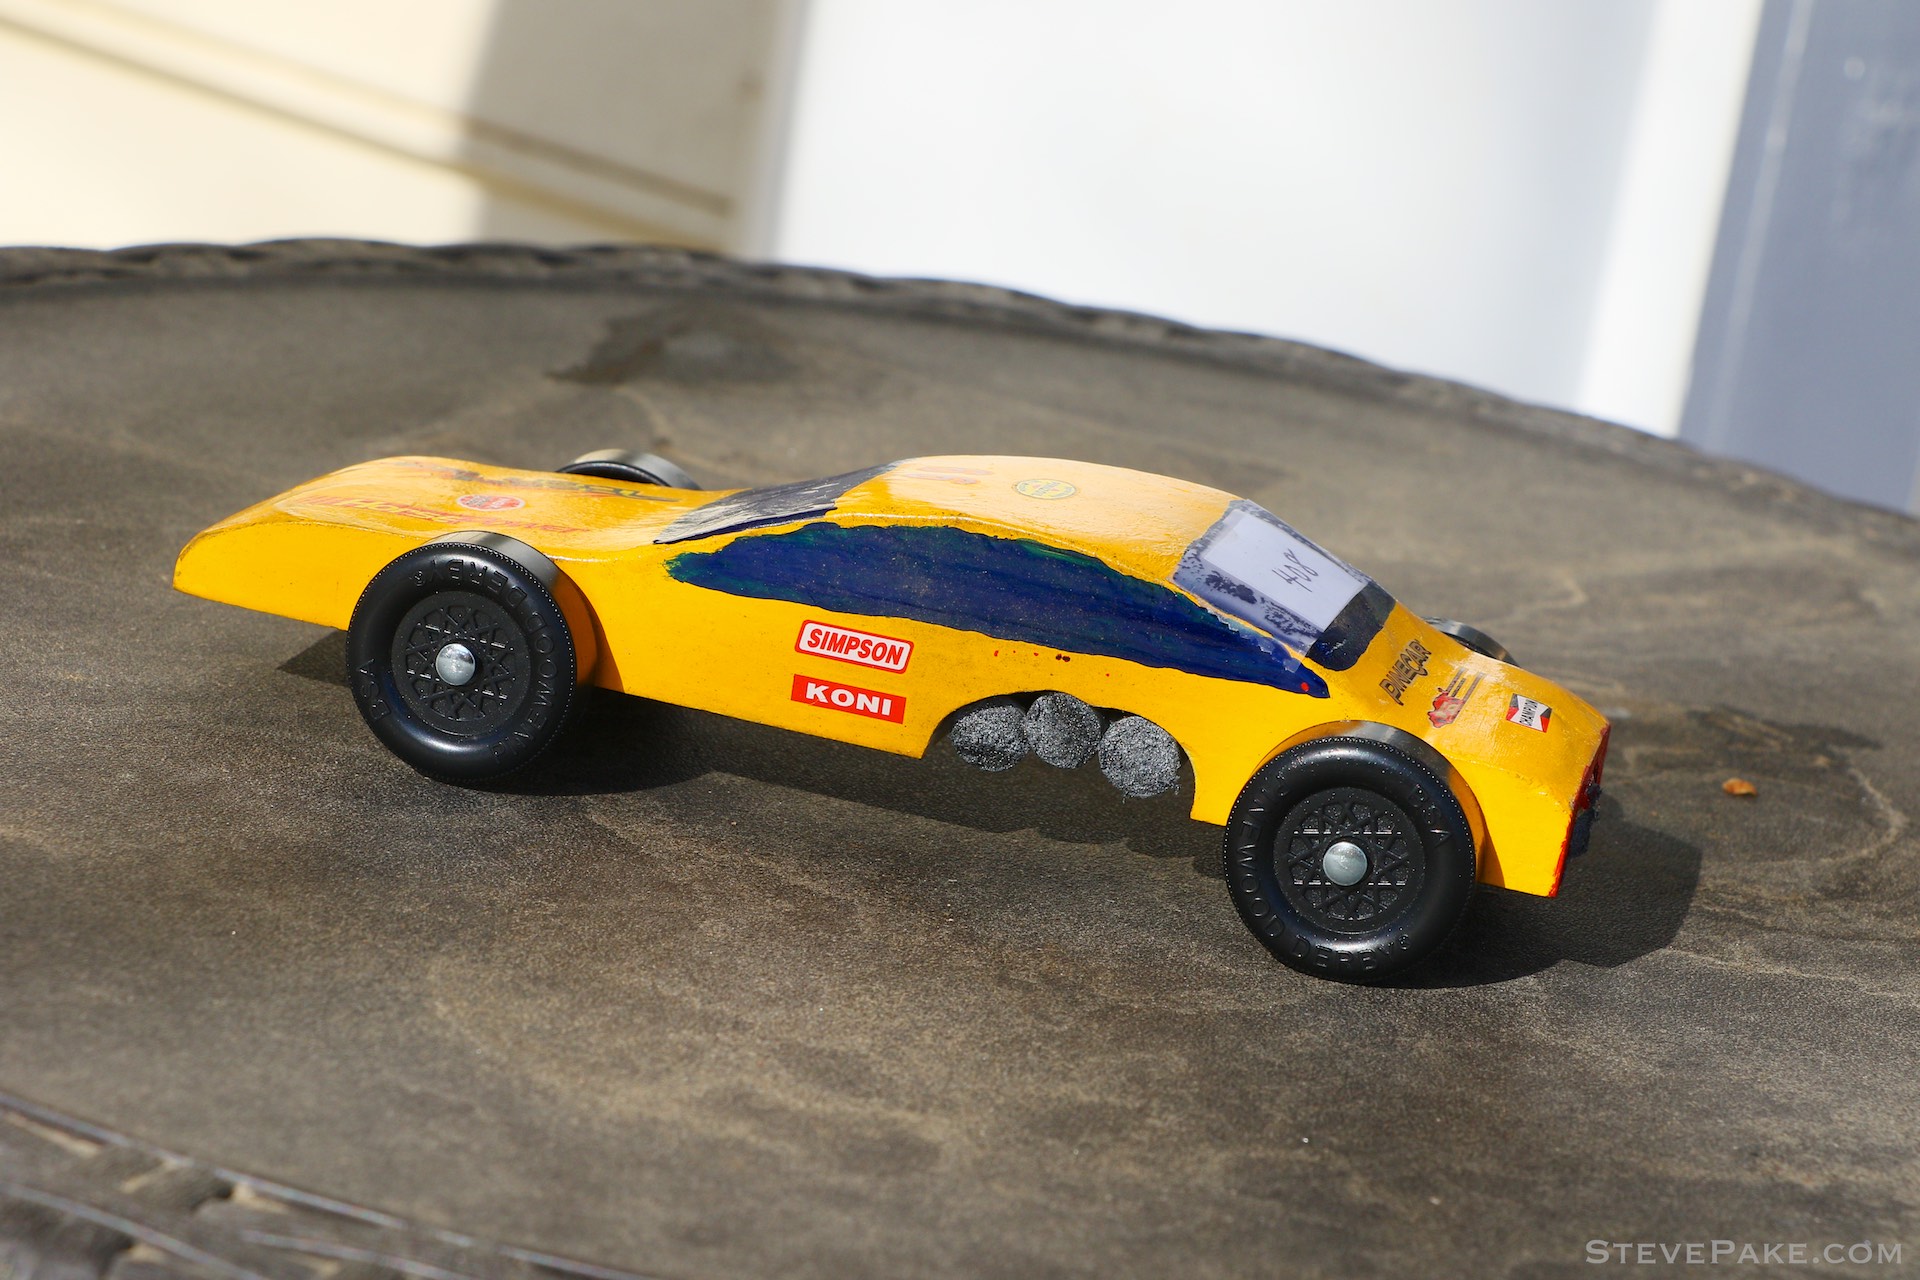
As for the rest of the weights, I hollowed out space for them in front of the rear axle and wheels and tried to make them look like side exit exhausts. Triple rear and triple side exit exhausts on both sides? Hey, what can I say, the “Coupe De Will” is a fast car! :) I cut the third side exit exhaust weight slightly shorter so that the car would end up at 5.00oz per regulation, but didn’t take into account all of the weight I was removing from the car by Dremeling out cavities to stick the weights in. Lol! Oops! Another rookie error. I didn’t want to risk grinding up the wheels with my Dremel or not leaving enough material near the rear axle area, so just put the last bit of weight closer to the front axle of the car. To test things out, I found some painter’s tape I had sitting around to tape all of the weights into place, and the car seemed well balanced going down the rear window of one of our cars. No wheelie popping issues.
GLUING IN WEIGHTS
Next up, gluing in weights. These were literally on the underside of the car with nothing to hold them there but the glue. These cars go flying down a huge track and crash and go flying around at the end, which makes whatever you use to glue the weights to the bottom of the car a critically important decision. So I just used whatever I had sitting around. :)
Hot glue guns are generally recommended. I think we might have one of those but have no idea where it is, and while I knew I had one at my office workshop, I didn’t feel like going back and rummaging around to find it so I just used the bottle of Gorilla glue I had sitting right in front of me. Like most special purpose glues in my house, I remember that I bought them for a reason but can’t remember what, and so there they sit. It’s always important to read the instructions though, because adhesive compounds have a zillion different variations, some need special prep, and there are huge variations in time to handling strength and time to being fully cured. I looked on the back of the bottle, and sure enough it wasn’t what I was hoping for, but it was what I had to work with. Need I mention I was also sick as a dog with the flu this whole week and terribly fatigued, so I was having to muscle through this big time and didn’t exactly have the energy to hit Home Depot.
For this glue to work, one surface had to be lightly dampened with water, and then the glue is applied to the other. Then you have to clamp them together for 1-2 hours. Crapola. 1-2 hour time to handling strength wasn’t what I was looking to hear, but it’d have to do. The glue fully cures after 24 hours, so considering this is “Gorilla Glue”, I assume you get a rock solid bonding strength compared to hot glue. I’m not sure I’d trust hot glue to hang weights off the bottom of a Pinewood Derby car like this, but the Gorilla glue ended up working great. The glue “foams” and expands 2-3x so you need to make sure you have some extra room for it to expand, and pressure applied to keep your objects in place while that’s happening. I glued in all of the weights, and then found small objects to sit on top of them for the night. When I came back in the morning, one bit of glue had foamed out underneath the bottom of the weights, so I just sanded that bit down with the Dremel so that it wouldn’t disturb aerodynamics.
CLEAN UP, DECALS, AND A FINAL GRAPHITE LUBE
I didn’t want all of the wood dust from hollowing out the space for the weights with the Dremel to end up mucking up the wheels and causing friction there, so I took the car back to my office workshop and used our high pressure air hose on it. If you don’t have a compressor and a high pressure air system, one of those cans of compressed air that you can get at Home Depot or most office supply stores will do. I’ve even seen those at Costco. After cleaning the car up, then it was back home for another round of dry graphite lubing, and finishing touches.
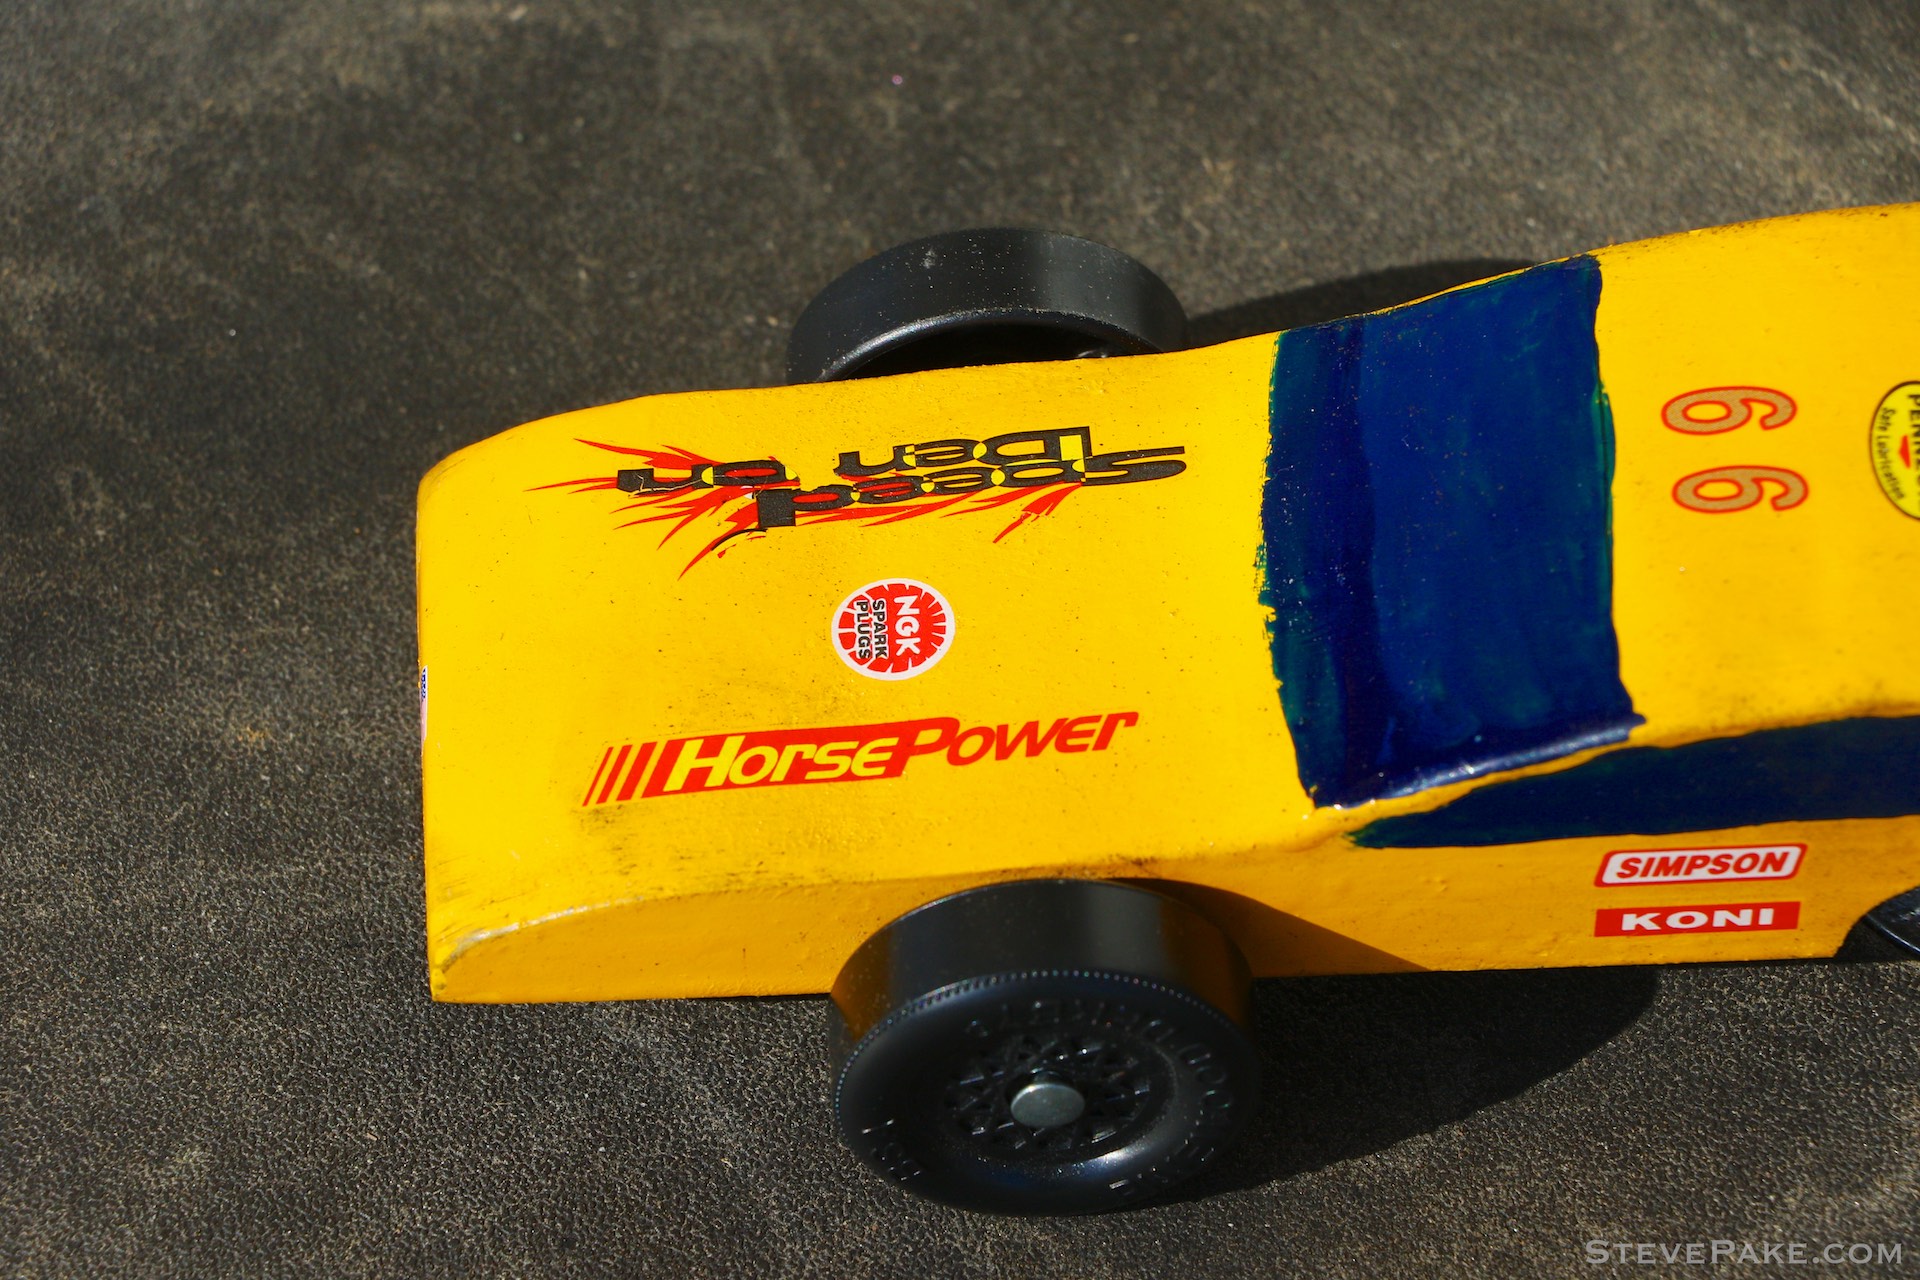
We initially had some flame decals on the hood and long pinstripes down the side, all of which were just not very robust and got broken from handling, so ended up pulling those off. William wanted to sticker it up NASCAR style, and the smaller and less complicated decals proved to be much more sturdy and applied easier as well. These aren’t “stickers” but rather vinyl decals that you have to cut out, and then press on, and that was that.
Our car was done, and my scale said it was dead on at 5.00oz.
HOW I REALLY SHOULD HAVE DONE IT
Cut and sand the pinewood block to the shape we wanted.
Drill holes and/or hollow out areas to place weights.
Painting.
Attach Wheels.
Attach Weights
Apply Decals.
Graphite Lube Wheels and Axles.
Got the engineering bits right, and everything related to the process completely wrong or backwards, but we got there! :)
CHECK-IN AND QUALIFYING
If you’re using the Pinewood Derby kit officially used by the Scouts organization, compliance with the rules is largely “baked in” to the template wood block, so you don’t need to worry about length, width, or wheel spacings so much. It’s mainly the weight you have to watch out for.
The bit of sanding of material under the “front” hood, and then just forward of the rear axle are areas where I did a bit of Dremel work to get the car right at 5.00oz.
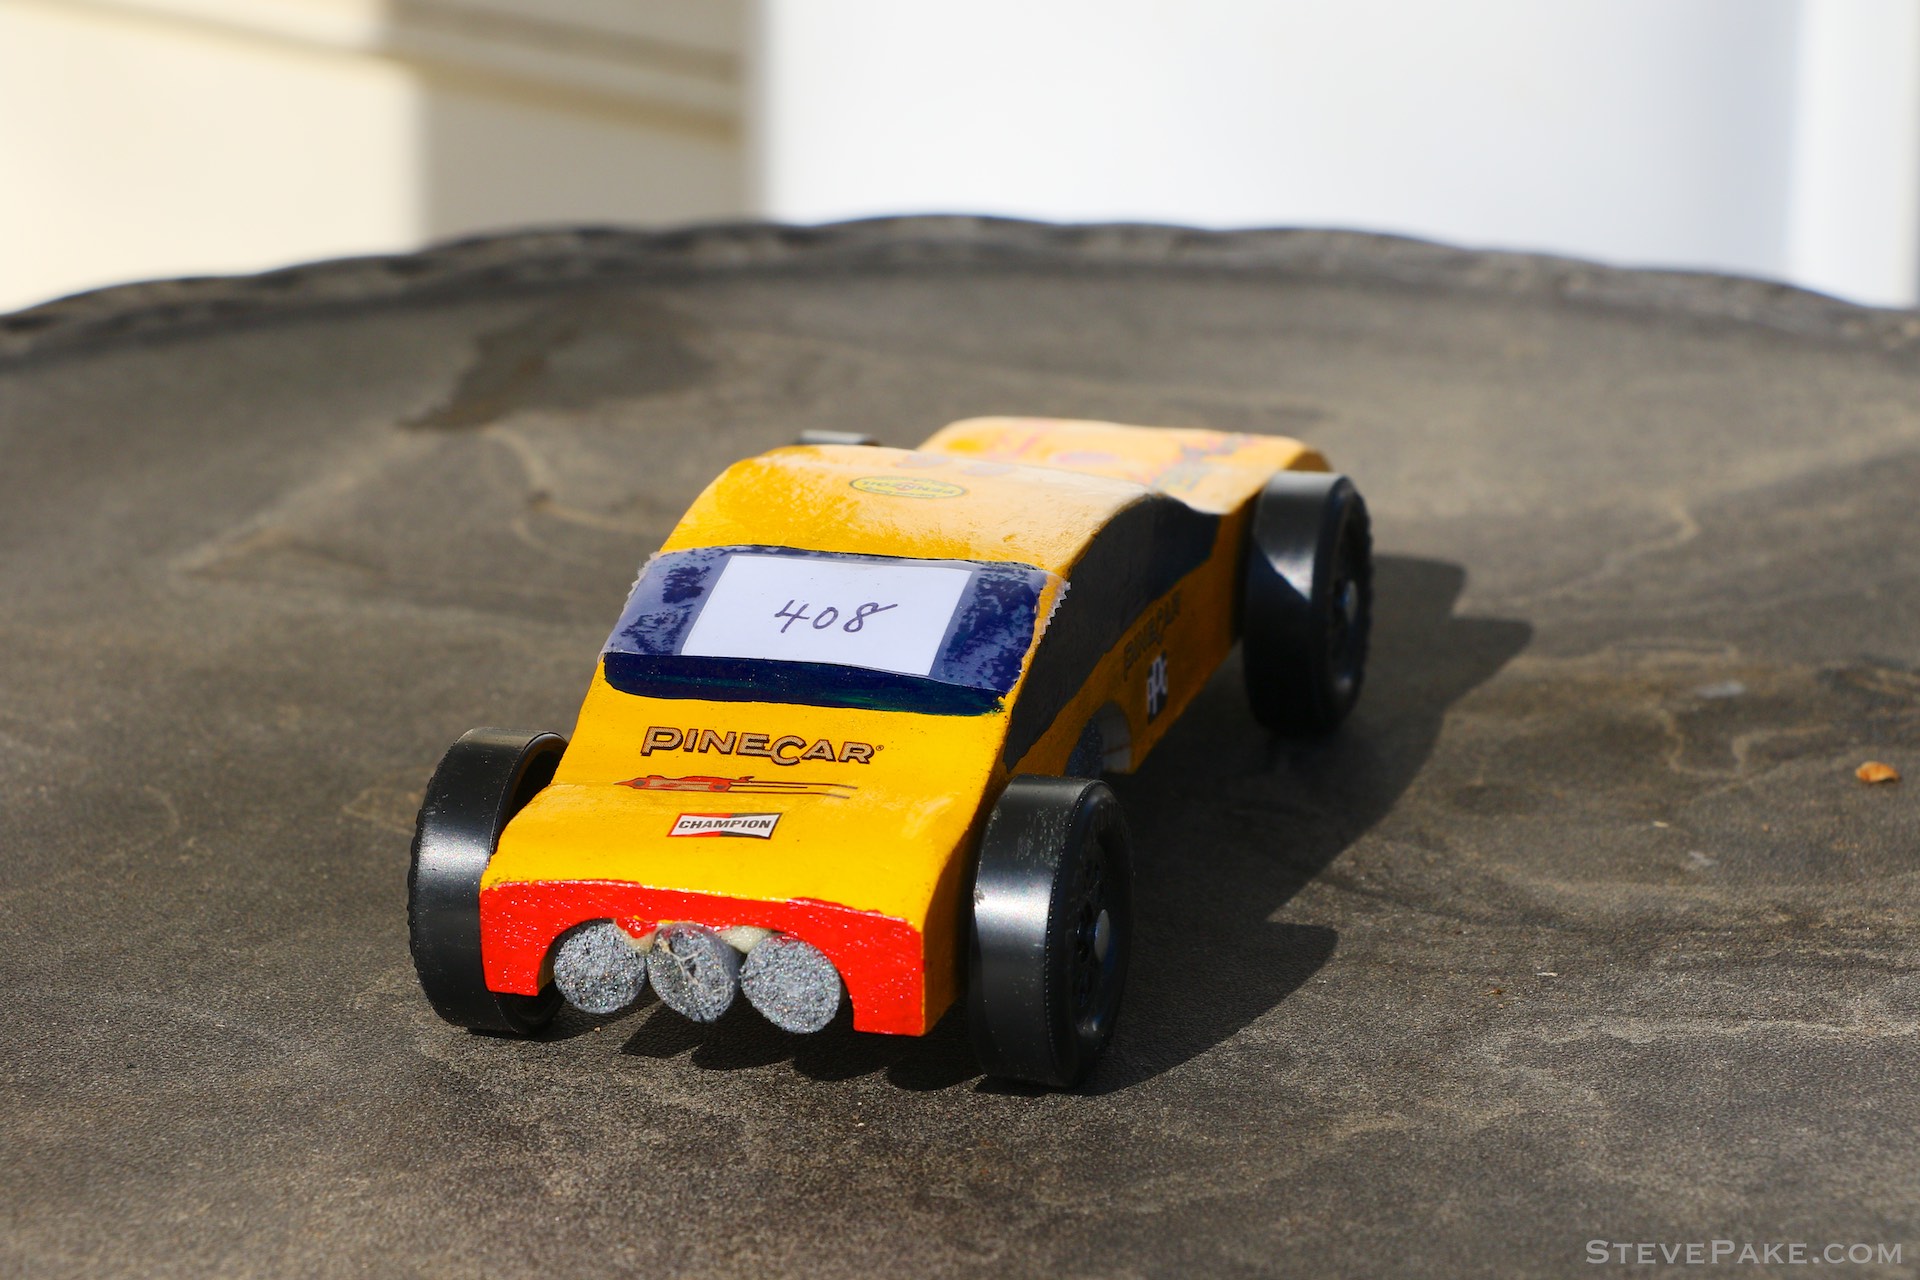
Of course when we showed up to check-in the car and get it through its regulation checks, it was over on weight by 0.04oz. My scale showed “5.00oz” exactly, but it actually only weighs in 0.05oz increments, and the “official” scale is the only one that counts. I knew the car might be overweight, but nothing that a Dremel can’t fix. To get the car back in line on weight, I simply hollowed out a bit more of the underside of the car near the nose, which dropped it down by 0.02oz. A little bit more behind the rear set of weights and in front of the rear axle brought it down to 5.00oz exactly and it was good to go.
I blew all of the wood dust off the car once again, and then re-lubed the wheels and axles with the dry graphic lube for a third time, did a final check that it was still 5.00oz, and the car was officially ready to race, and race it did!
COUPE DE WILL KICKED BUTT!
I was ecstatic to see that not only was “Coupe de Will” a fast car, but it was actually one of the fastest in the entire pack! It WON three of its five heats, and placed 2nd in the other two. On the track that Pack 1450 has, most cars could do between 2.800-3.000 seconds. The faster cars could run in the 2.7xx second range, but only the absolute fastest cars were cracking into the 2.6xx’s, and Coupe de Will was one of them, and hitting a “scale speed” of 190 mph while it was at it! Yeehaw!
There was one other car that I saw hit a 2.67s at least twice, and one of the “sibling” cars was an obvious ringer, “Unicorny”, which hit 2.65s and set a new track record! Lol! I don’t think that one counts officially, so while I’m not sure if “Coupe de Will” was the fastest overall, it was definitely one of the top few cars and we were blown away!
I just wanted to help William and I build a fast car that looked pretty cool that we could both be proud of. I was sick as a dog with the flu the whole week, didn’t have time to think much (hence all of the missteps) and was really just winging it never having done this before, so I about fell over at the event when I realized that our Coupe de Will was in contention for possibly being the fastest car in the pack! Pretty exciting!
Cliffhanger
Sorry to leave this one on a cliffhanger, but the official results will be announced at the Pack’s Blue & Gold Banquet in another week. I’ll update this blog then, but for now just wanted to share a fun story and some cool photos of the event, and also some lessons learned on what NOT to do while building a really fast pinewood derby car for the first time ever!
Official Race Results
A picture speaks a thousand words!
1st Place - Craftsmanship, Webelos 1 Den
1st Place - Speed, Webelos 1 Den
2nd Place - Overall, Pack 1450
WOW! Coupe de Will managed to take home both 1st place trophies in his Webelos 1 den for both Craftsmanship and Speed, and finished 2nd place overall in the entire pack! What an amazing result for a totally rookie effort! William is so proud! I knew we probably had a lock on the Speed contest within the den, but had no idea we’d win for Craftsmanship as well, which was a total shocker. Pack 1450’s Cubmaster described “Coupe de Will” as a very well-rounded entry for this reason.
But wait, there’s more! The 1st place speed winner in each pack qualifies for the district wide competition, so there will be a Part 3 to the race results here. I’ll have to check and see if we’re allowed to modify the car in any way before the district competition, because I’ll want to shave down that area just in front of the rear axle so that I can move that weight back a tad to hopefully pickup a few hundredths of a second more.
Stay Tuned…
I believe districts are in March (they were May!)
Potomac District Pinewood Derby Competition
The Potomac District Pinewood Derby competition was held on Saturday, May 11th. As expected, Coupe de Will did well and was at the upper-middle pack level, but was never going to compete with the purpose built totally streamlined cars. That’s where you get the extra few hundredths of a second from along with probably some other tricks, but William had the fastest pinewood derby car that actually looked like a real car. It was fun to watch and we definitely learned a lot. They raced all of the cars by den level, and Coupe de Will finished 7th out of 19 out of all of the Weblos 1 cars in the district. Pretty good!
I’ll let William decide what he wants to build next year, and whether it will be more about design and look, or more about speed, or a combination of the two like we did this year. Coupe de Will will now be retired! Enjoy the photo albums of both the Pack level and the District level competition below
Click Below For the Full Photo Albums
Our first totally rookie Cub Scouts Pinewood Derby car, “Coupe de Will” was an amazing success! It placed first in his den for both speed and design, and was the 2nd fastest car in his entire Pack! You can read about the entire build process at the blog.
So having performed amazingly at his Pack level competition, William’s “Coupe de Will” competed in the Potomac District on Saturday, May 11th. Don’t miss the blog.
Thanks to all of the volunteers for Cub Scouts Pack 1450 in Rockville for making this happen. We had a great time!
